Documents
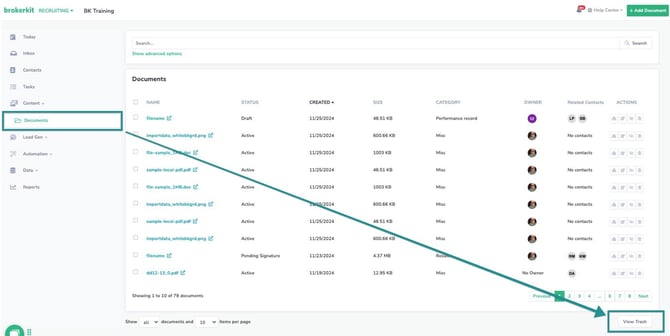
The Documents feature allows you to manage, share, and organize documents across your team. Access Documents under the Content menu in the top navigation.
Note:
- This article covers managing documents within the Brokerkit platform. If you're looking for a copy of your service contract with Brokerkit, please see our Billing FAQ
- If you’re trying to import an Excel or CSV file with a contact list, you can find the information here: “How To Import or Upload Contacts”.
Uploading Documents
Documents Page
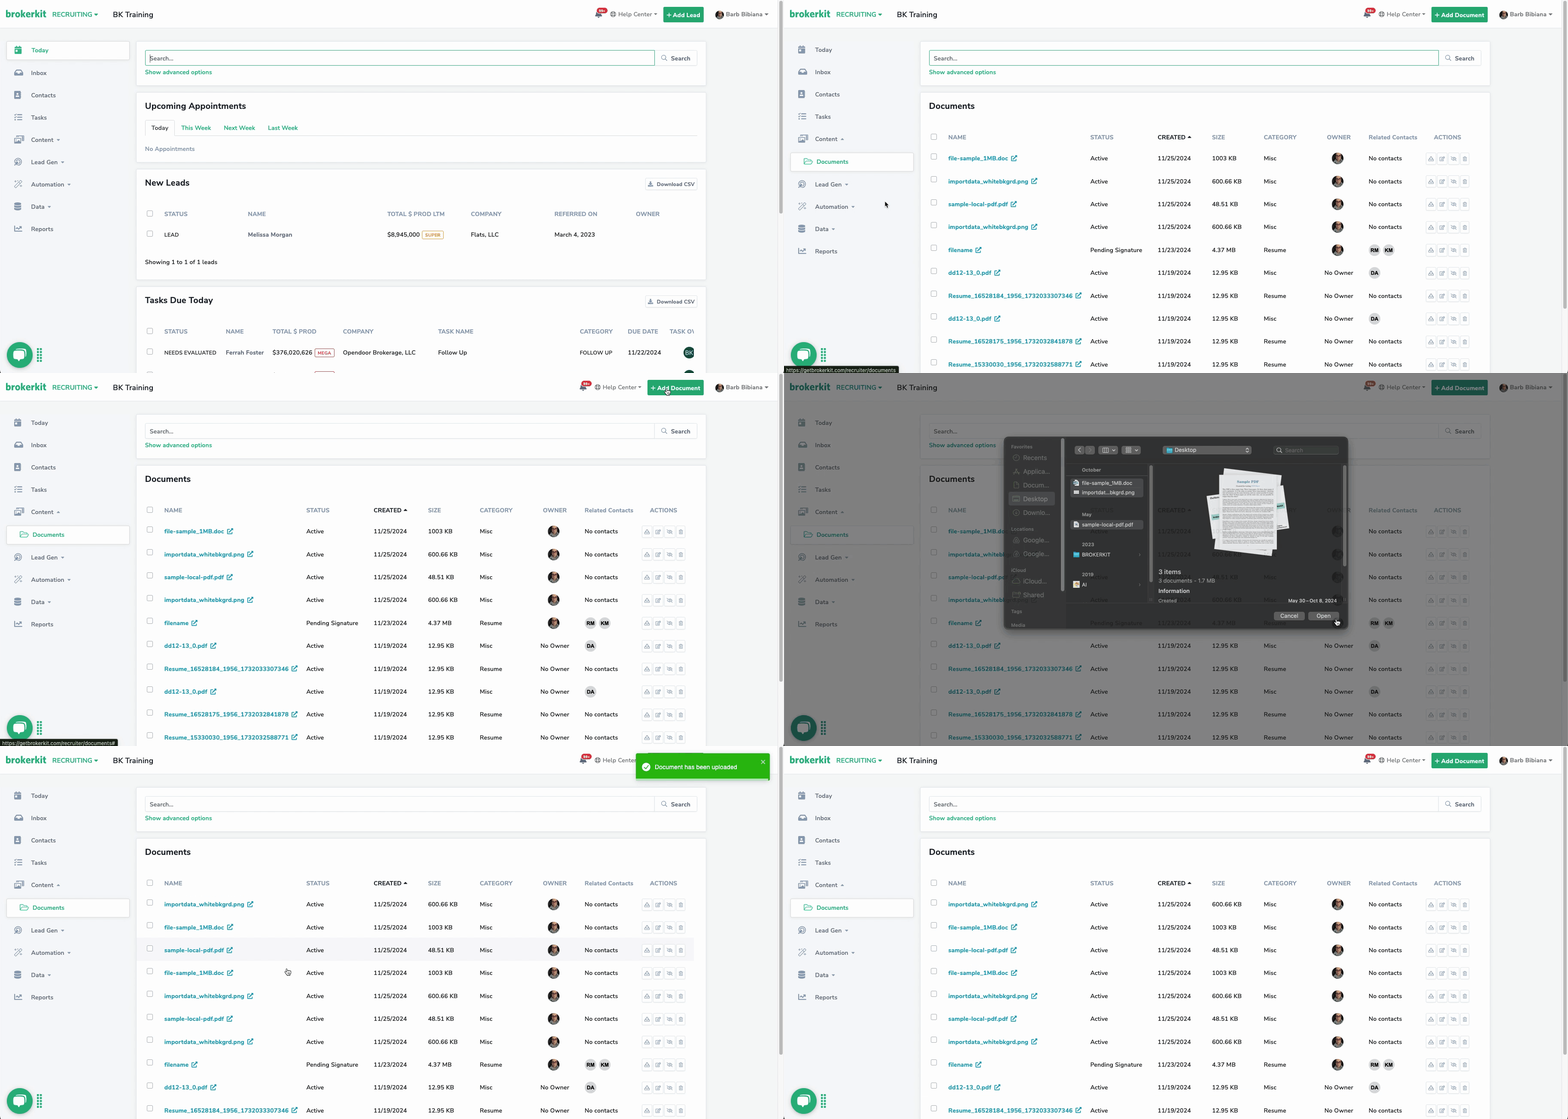
- Click on Content in the top left menu -> Documents
- Click "+Add Document" located in the top right of the screen
- Select one or more files (max 25MB each)
- Click upload
Contact Profile
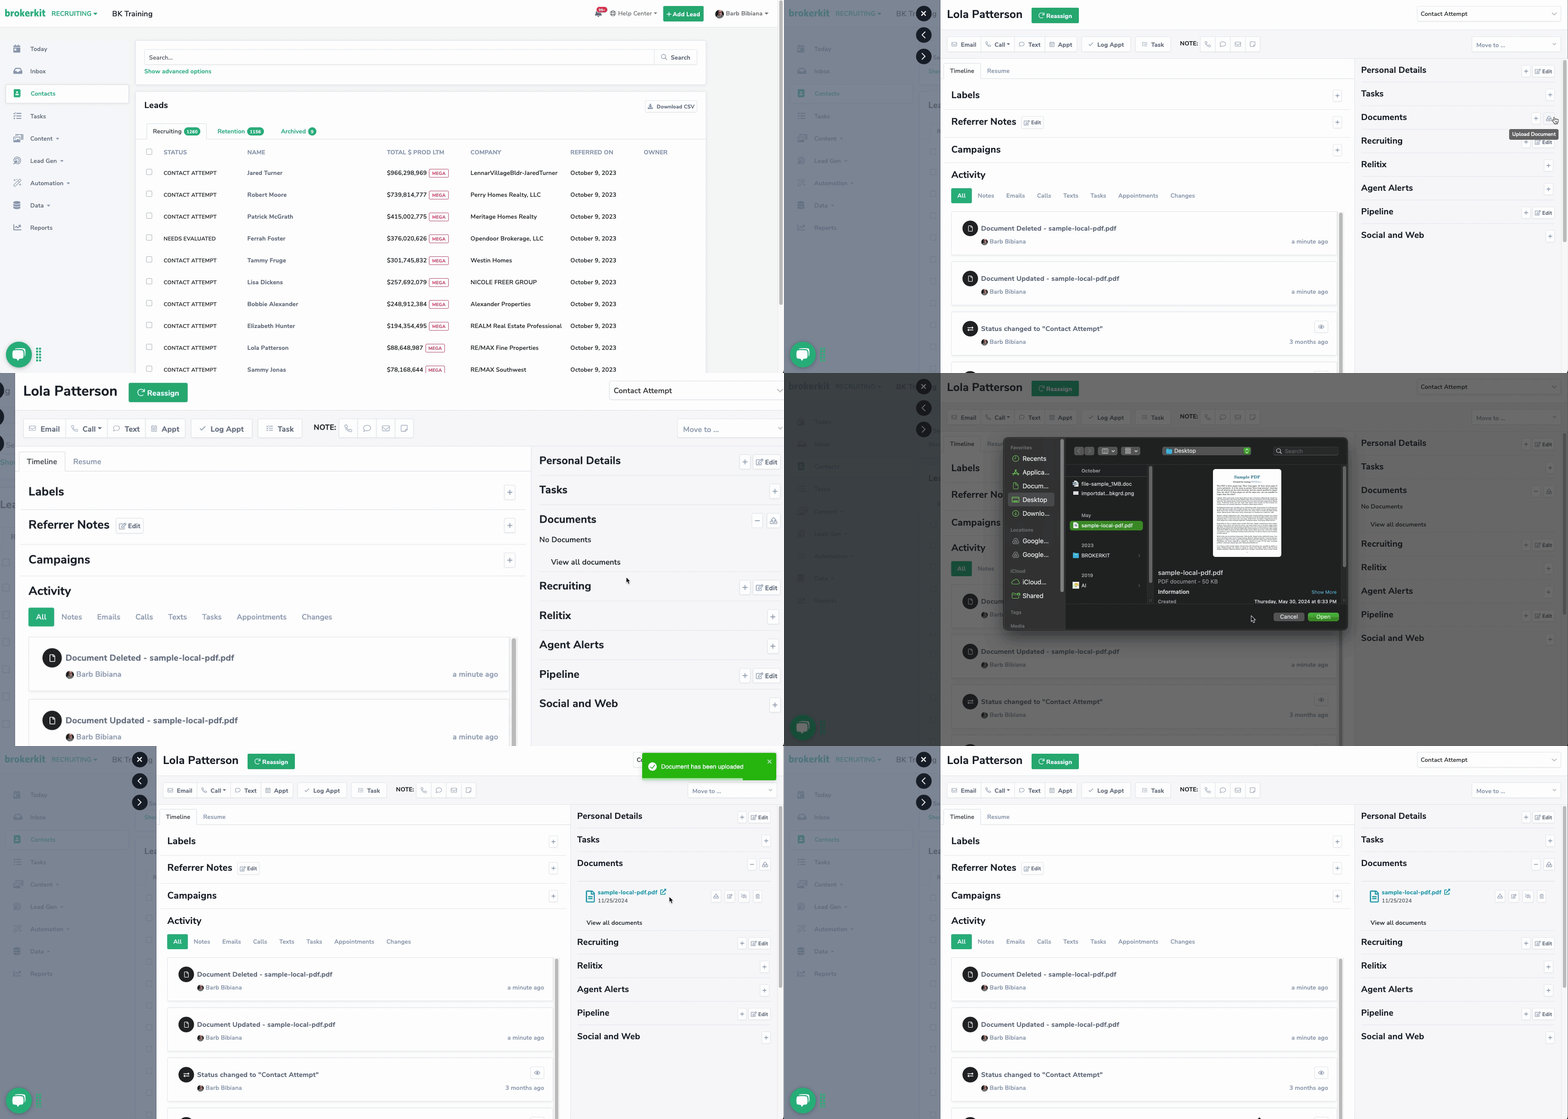
- Go to a contact profile
- Click the upload button on the documents panel.
- Select one or more files (max 25MB each)
- Click Upload
API
- Visit the article on how to add via our API here
Basic Management
- In the Documents page
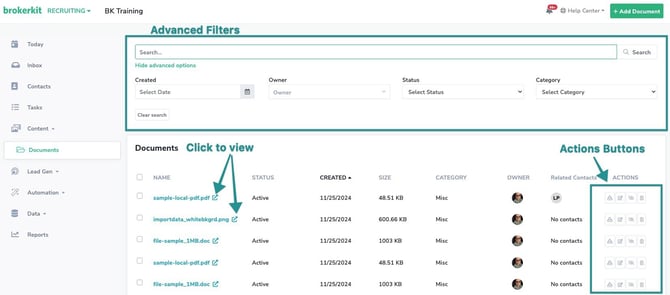
- Use the search bar and advanced filters to find documents
- Click a document name to view it
- Use action buttons to:
- Download
- Edit properties
- Share links
- Delete
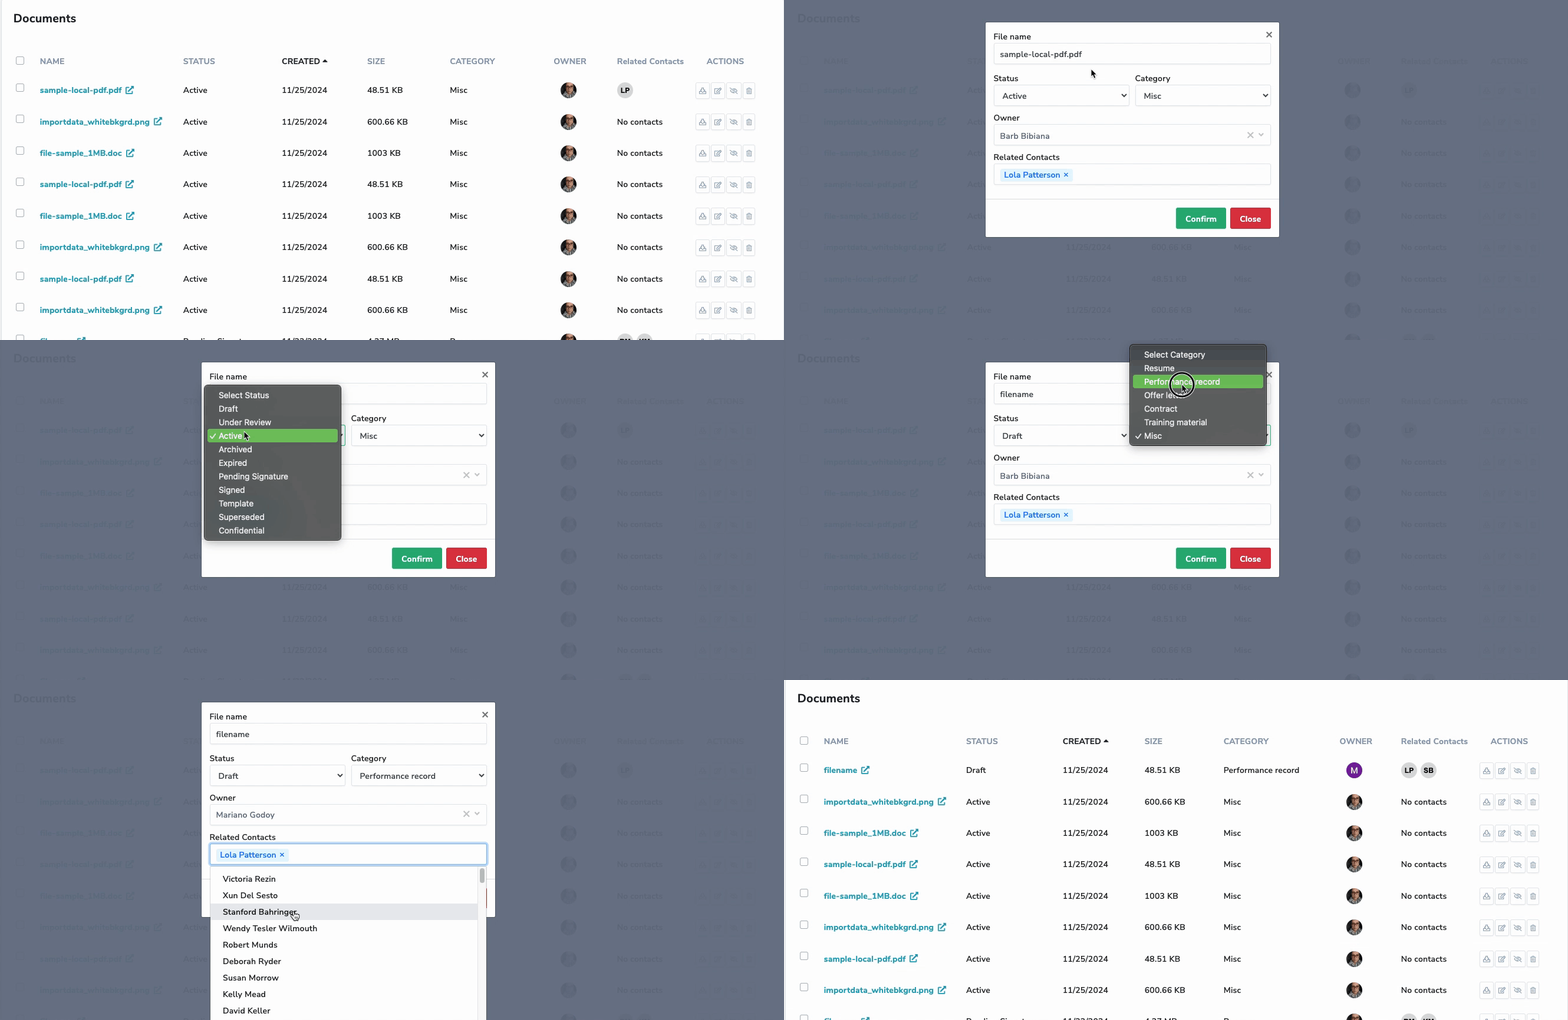
Edit Document Details
- Click the edit icon
- Update:
- File name
- Status
- Category
- Owner
- Related contacts
- Click Confirm to save changes
Sharing Documents
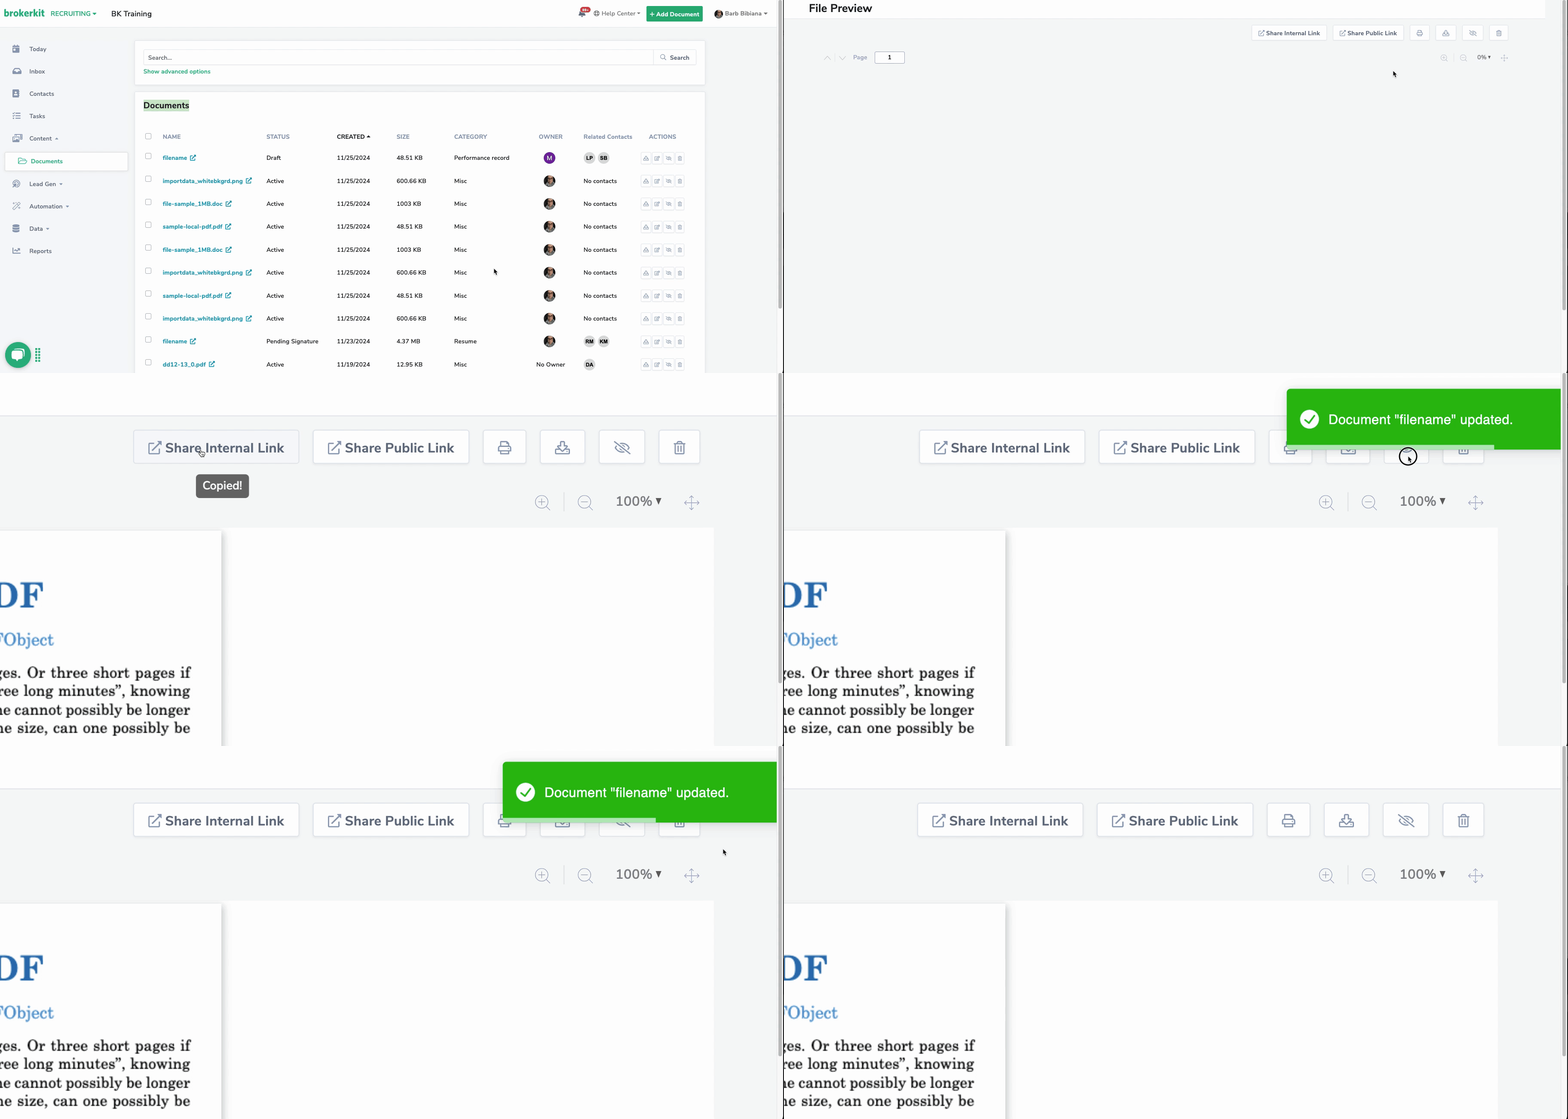
- Open a document
- Choose:
- Internal link (requires BrokerKit access)
- Public link (no login required)
- Click to copy link
- Optional: Toggle Staff Only/Shared setting
Using Documents in Communications
- Open an email, text, appointment, notes, tasks or campaign composer
- Click "+Insert Document"
- Select document(s)
- Click Insert
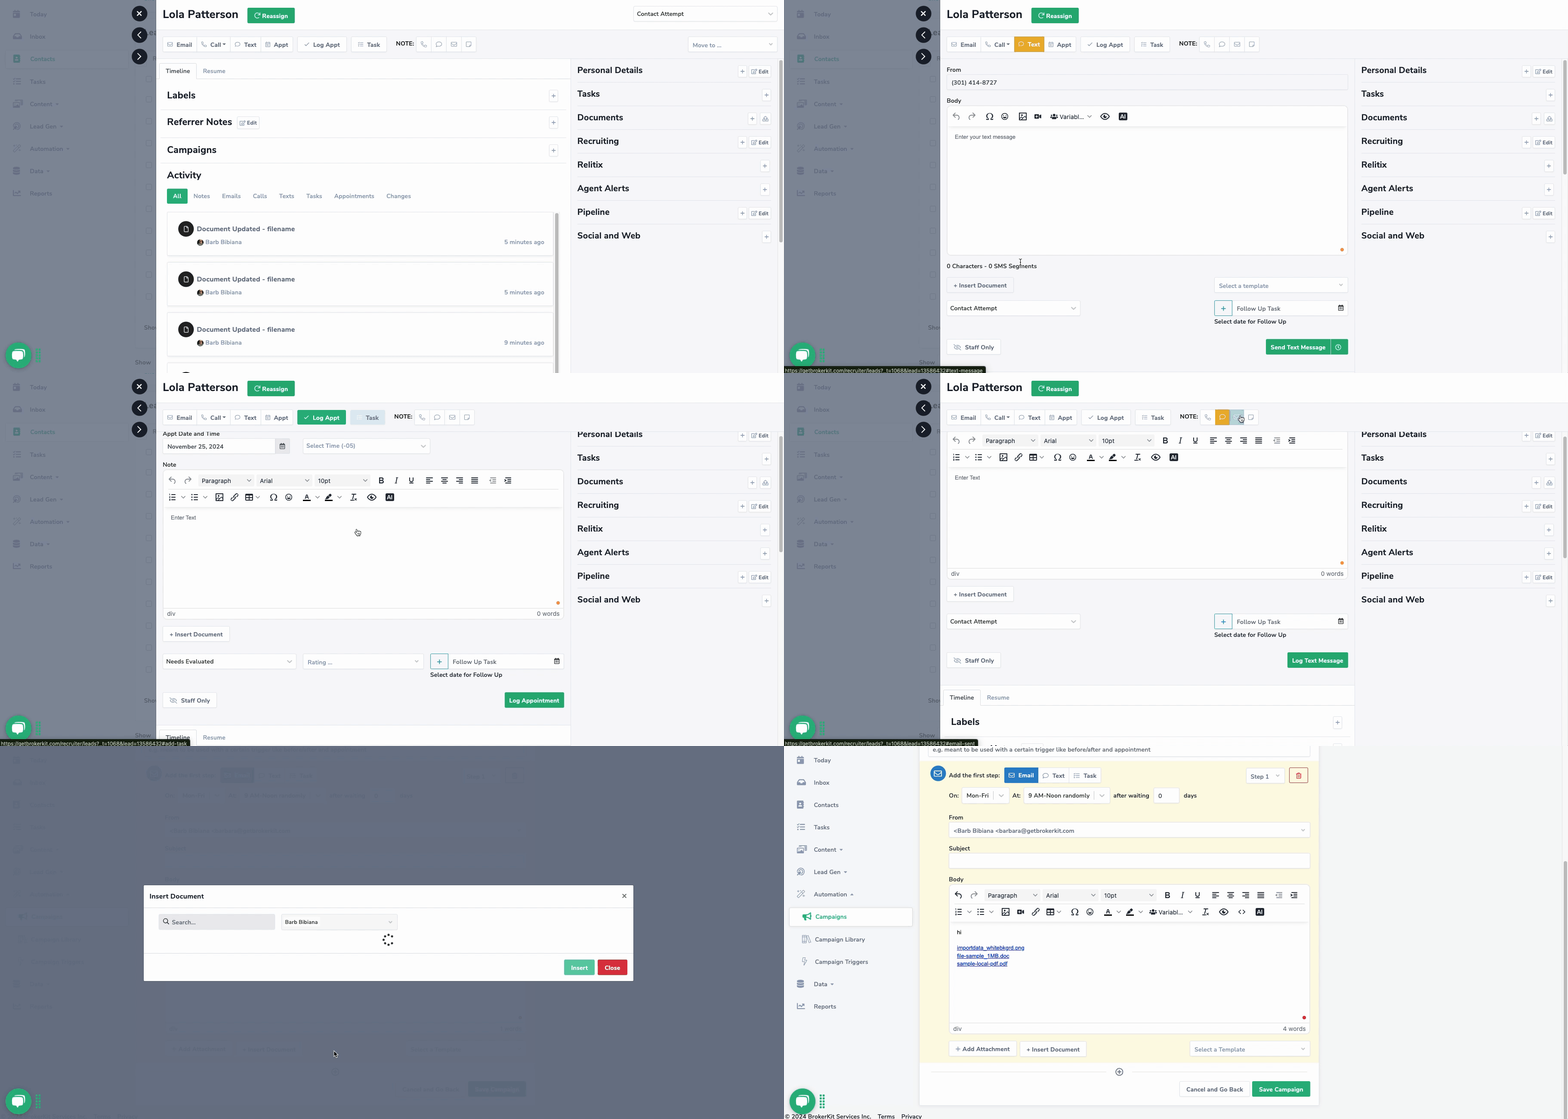
Documents sent will be provided as public links, allowing the recipient to view, print, or download them without needing Brokerkit access.
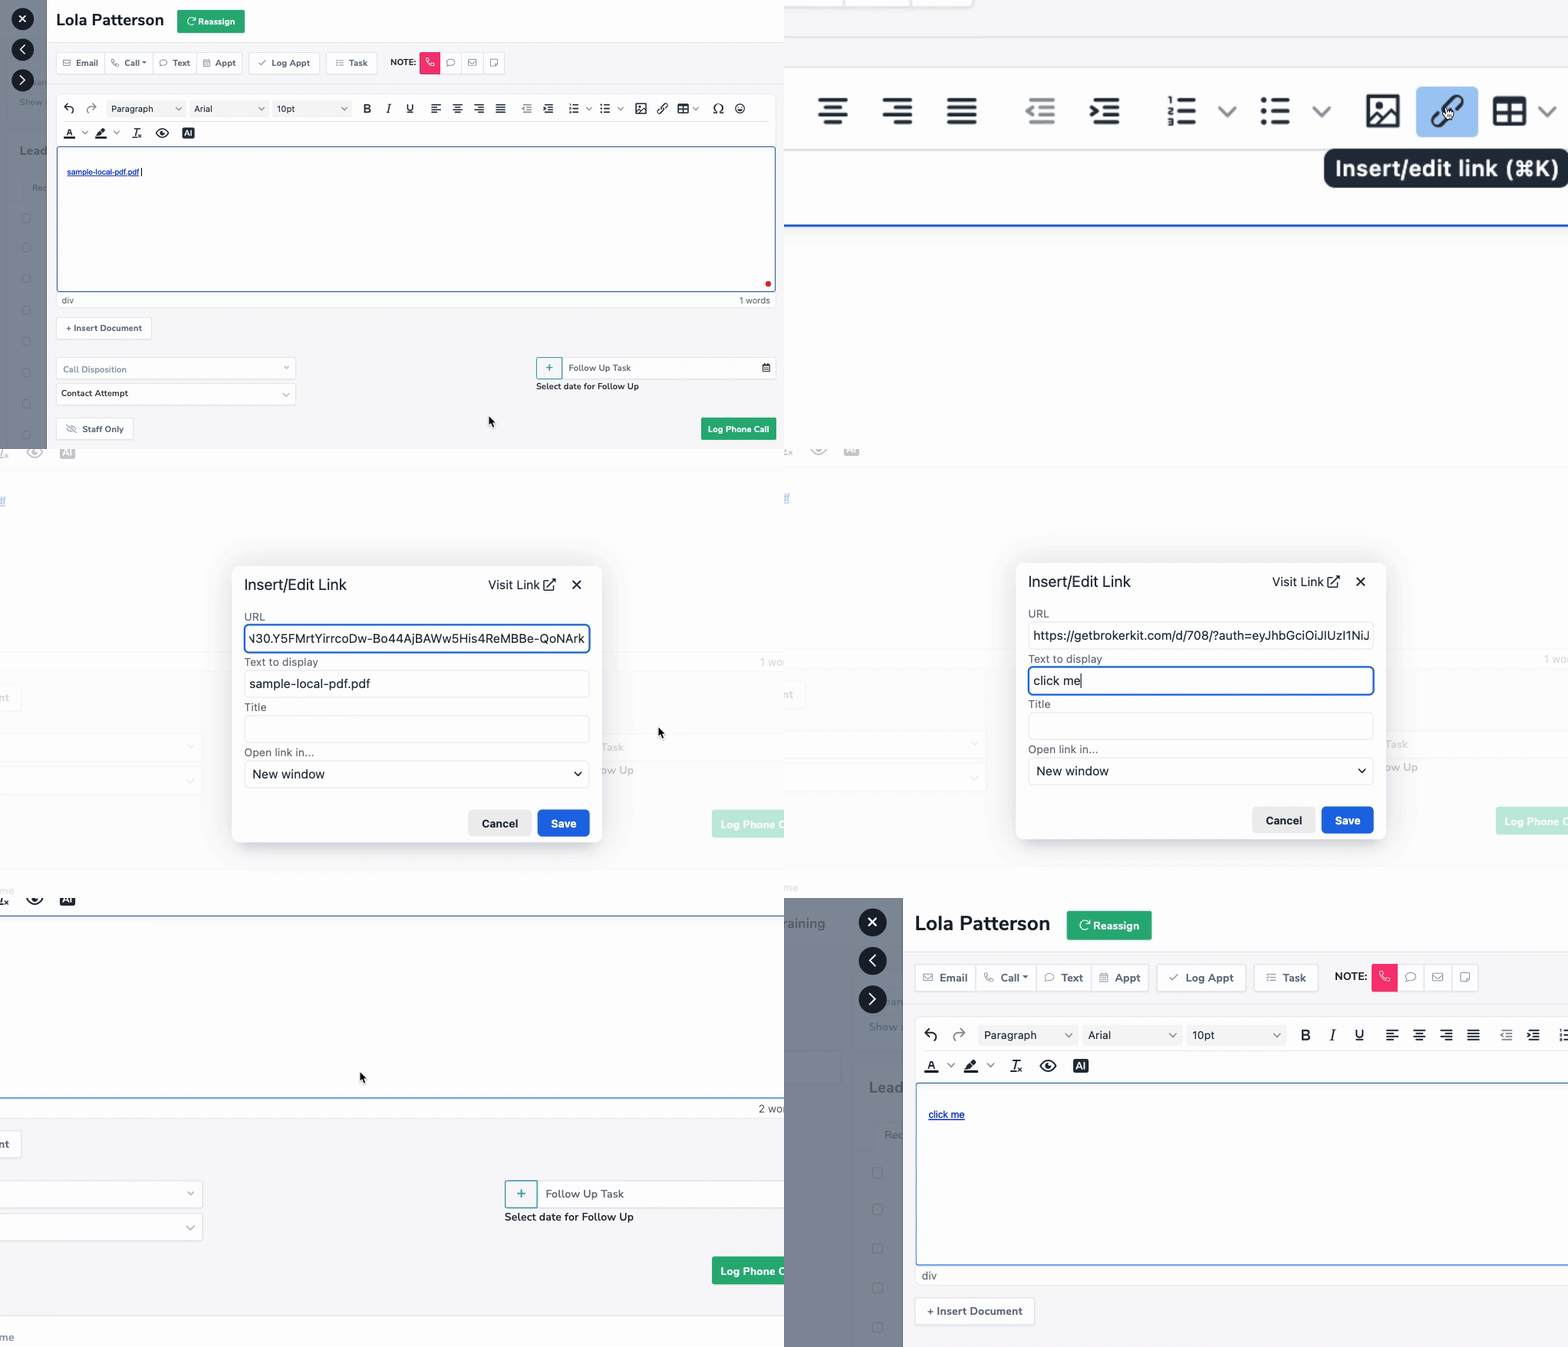
- Optional: Edit link display text
- click the link button in the text editor
- enter link display text
- click save to apply changes
Managing Deleted Documents
- Click "View Trash" in the bottom right of the Documents page
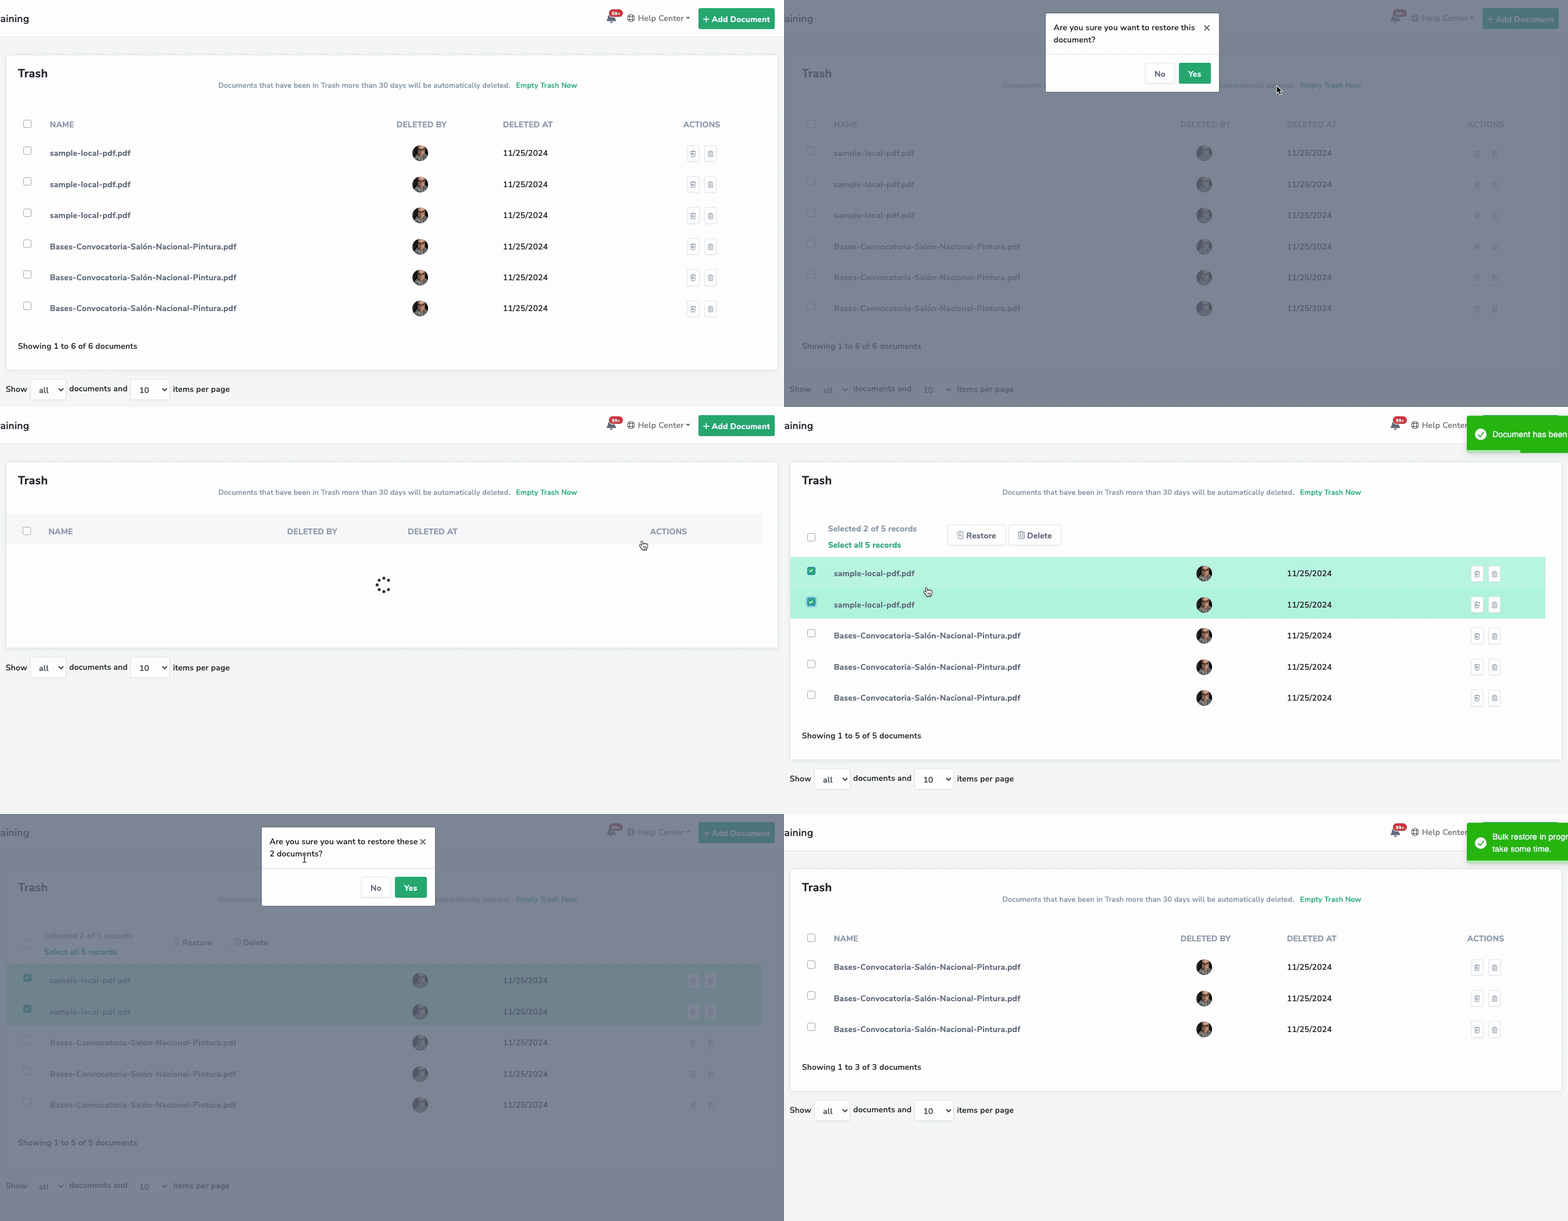
- To restore: Select document > Click Restore
- To permanently delete: Click Delete or Empty Trash
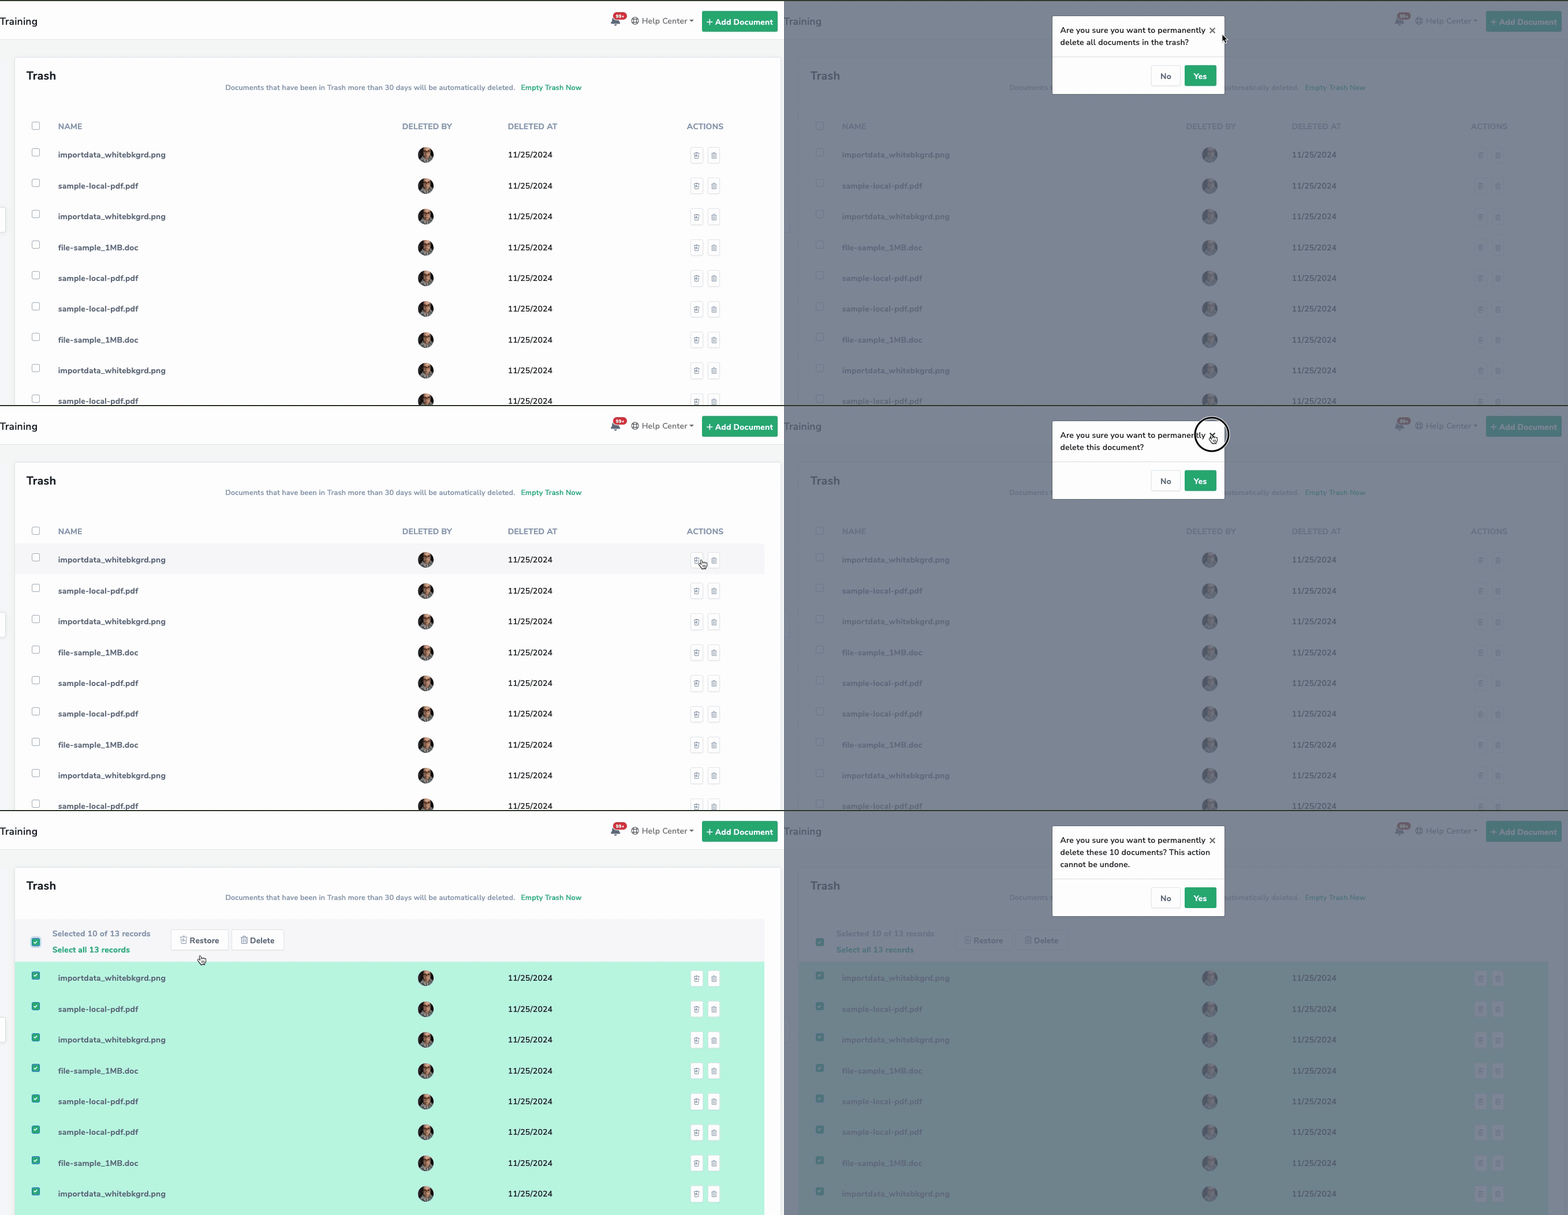
Documents auto-delete after 30 days in trash
Bulk Actions
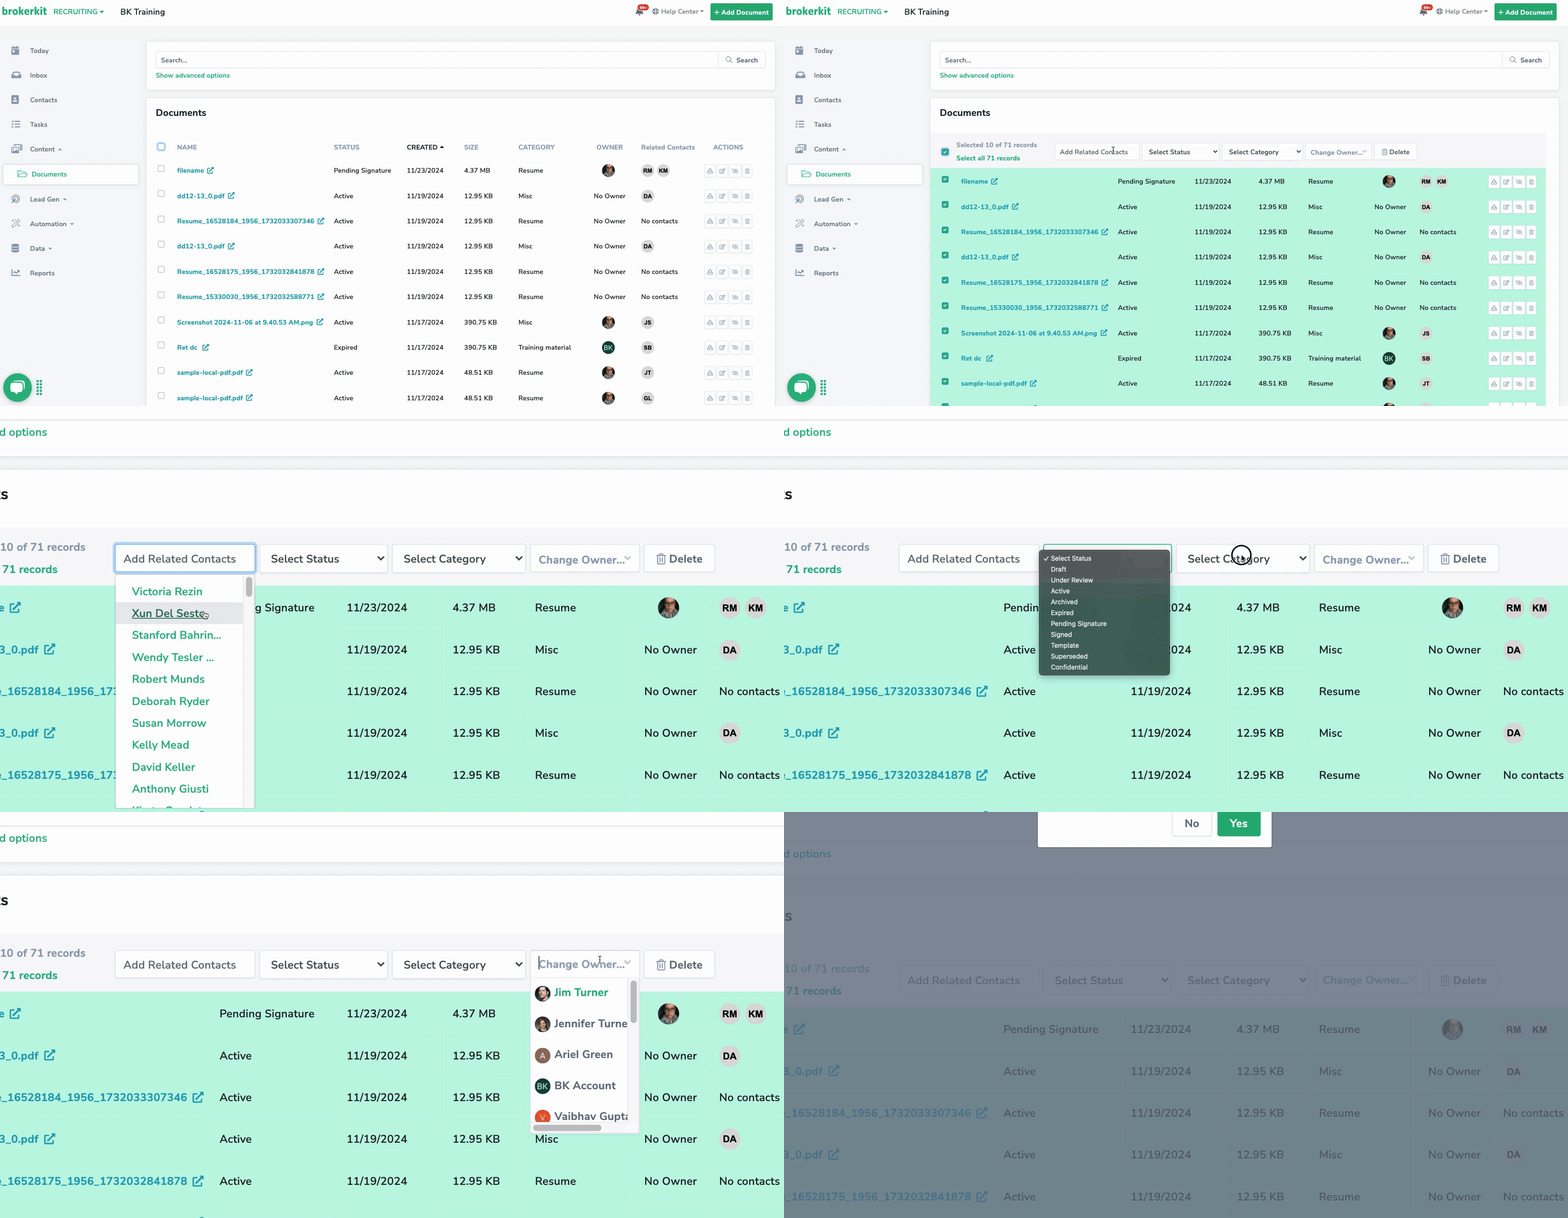
- Select multiple documents
- Use bulk options to:
- Add contacts
- Change status
- Update Category
- Change owner
- Delete
