Domains are obviously fundamental to begin using your Brokerkit account; it's where you're sending from! A custom or personal domain is required to send bulk, blast, or campaign emails through our platform, build a reputation, and establish a professional identity with your emails. Setting up your sending domains will increase your email deliverability for bulk, blast, and campaigns from Brokerkit.
How many sending domains can I add?You can add unlimited sending domains to your Brokerkit account. There are no restrictions on the number of domains you can configure for email sending. This allows you to:
- Use multiple business domains for different brands or subsidiaries
- Separate domains for different types of email campaigns
- Test new domains while maintaining existing ones
- Segment your email sending by domain for better deliverability management
Email Deliverability Requirements starting Feb 2024
The below are standards from Google that you need to comply with to get your emails delivered.
|
Requirement |
Under 5k Emails/Day |
Over 5k Emails/Day |
|
DKIM and SPF |
Required (either) |
Required (both) |
|
DMARC |
Optional |
Required |
|
Spam <.1% and never over .3% |
Required |
Required |
|
No more “sent on behalf” of another domain “For direct mail, the domain in the sender's From: header must be aligned with either the SPF domain or the DKIM domain. This is required to pass DMARC alignment.” |
Required |
Required |
|
One Click Unsubscribe |
Optional |
Required |
Adding A Domain or Changing Domain
We'll show you how to do this below:
- First, log in to the Brokerkit account (if you still need to do so).
-
Then on the top right navigation bar, click on the username to expand the list of sub-options.
- Next, click the Account Settings option.
- Next, click the Email tab.
- Click the Add Sending Domain button.
- Enter your Domain Name.
- Once you have entered your domain name and set your options, click Get Settings to save your new domain.
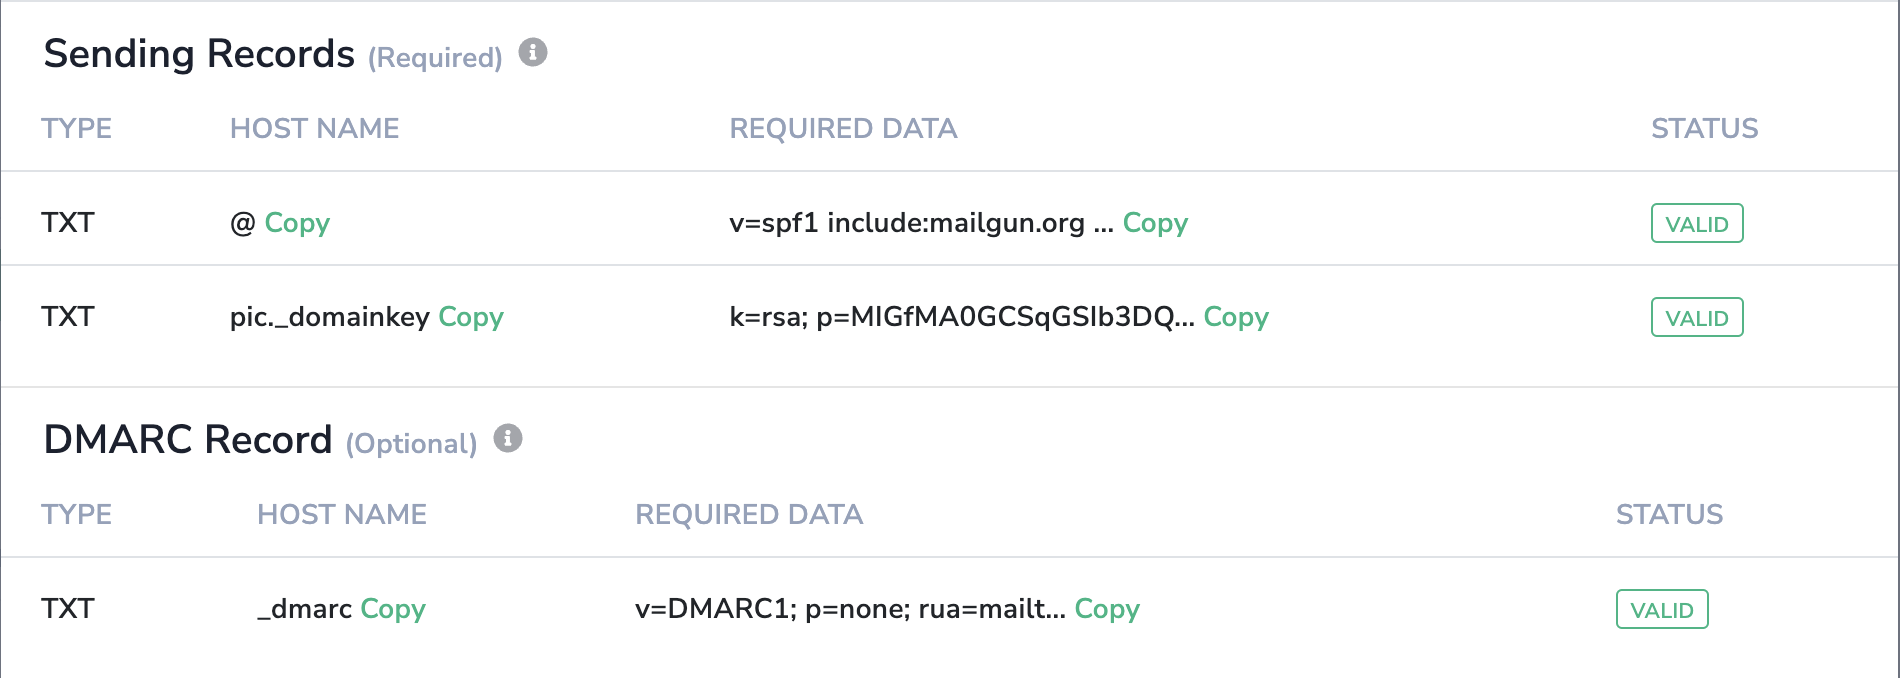
The opened window will provide you with the DNS records required for your domain to be verified. This information is also available in the Email tab by clicking the Settings button on a specific domain.
NOTICE: If you encounter an error message (i.e., "this domain already exists in our registry"), jump on our office hours calendar here, and we can help you address your issues.
Adding DNS Records to Hosting Provider
You can log in to your hosting provider and navigate to the DNS section. This area is called ‘DNS’ at Cloudflare/GoDaddy, but we’ve seen it called ‘Networking’ in Digital Ocean and ‘Zone Editor’ in cPanel.
Next, you’ll be asked what type of DNS records you want to add.
Please see below, the records that need to be added:
DKIM Record:
- Type: TXT
- Hostname: mailo._domainkey
- Value: k=rsa; p=MIGfMA0GCSqGSIb3DQEBAQUAA4GNADCBiQKBgQDMHTURiNAb4TIhoVhcUxB6RNa0F8O/+eQj/PMOPKS4bDi5KKQSwa1IqX9sNz4tJOazqGQBnwE+jX1yhX71CfKaYCSgO7ISYZ6UD7lnciwzscJl9m62rBgwA8f0EgwfCP8J5LfUGrGqYPYmiiu6PAaNqLehREbdhgp/alAHXxRsVQIDAQAB
SPF Record:
- Type: TXT
- Hostname: @
- Value: v=spf1 include:mailgun.org ~all
Note: If you already have an SPF record, add 'include:mailgun.org' to your existing record rather than creating a duplicate.
CNAME Record for Tracking:
- Type: CNAME
- Hostname: email
- Value: mailgun.org
DMARC Record:
- Type: TXT
- Hostname: _dmarc
- Value: v=DMARC1; p=none; pct=100;
We’ll go through each one individually.
TXT Records
The first records Brokerkit asks you to add are TXT records. We will add three separate TXT records, one for SPF, one for DKIM, and one for DMARC. These are required to send and receive bulk, blast, or campaign emails with Brokerkit.
SPF (Send Policy Framework)
- List all the mail servers you use to send emails from your domain. For example, if you use Office 365 and Gmail, you must include both in your list.
- Find the SPF record for each mail server in your list. An SPF record is a text that tells SPF which IP addresses are allowed to send emails for a domain. You can usually find the SPF record on the mail server’s website or documentation.
For example, the SPF record for Office 365 isv=spf1include:spf.protection.outlook.com -all
and the SPF record for Gmail isv=spf1 include:_spf.google.com ~all. - Combine the SPF records for all the mail servers in your list into one SPF record for your domain. You can do this by using the include mechanism, which tells SPF to look up another SPF record and add it to the current one. For example, if your domain is example.com and you use Office 365 and Gmail, your SPF record would be
v=spf1 include:spf.protection.outlook.com include:_spf.google.com -all. - Add the SPF record for your domain to your DNS settings. DNS is a system that helps computers find each other on the internet. You can access your DNS settings through your domain registrar or your internet service provider. You need to create a new TXT record with your domain name as the host name and your SPF record as the value. For example, if your domain is example.com and your SPF record is
v=spf1 include:spf.protection.outlook.com include:_spf.google.com -all, your TXT record would look like this:
|
Host name |
Type |
Value |
|
example.com |
TXT |
|
- Test your SPF record to make sure it works correctly. You can use online tools like SPF Record Checker or SPF Survey to verify your SPF record and see if it matches your mail servers. You can also send a test email from your domain to another email address and check the email header for the SPF result. The email header is a hidden part of the email that contains information about the sender, the recipient, and the delivery process. You can usually view the email header by clicking on an option like “show original” or “view source” in your email program. The SPF result should look something like this:
| Received-SPF: pass (domain of example.com designates 209.85.220.41 as permitted sender) |
If the SPF result says “pass,” it means that the email passed the SPF check and came from a trusted mail server. If the SPF result says “fail,”” soft fail,” “neutral,” or “none,” it means that the email failed the SPF check or the SPF check was not performed. If you see these results, you may need to fix your SPF record or your mail server settings.
DKIM (DomainKeys Identified Mail)
- List all of your sending domains, such as example.com or newsletter.example.com.
- Install a DKIM package, such as OpenDKIM, dkimpy, or Mailjet, that helps you create and manage your DKIM keys and signatures.
- Create the public and private DKIM key pair, which are two pieces of code that work together to sign and verify your emails. The public key is published in your DNS records, and the private key is stored securely on your email server or service.
- Publish your public DKIM key, by creating a TXT record in your DNS settings, with a specific name and value that include your domain name, a selector, and your public key.
- Hide your private DKIM key, by storing it on your email server or service, and making sure that only authorized people can access it.
- Configure your email server or service, by enabling DKIM signing and specifying your domain name and your selector.
- Test your DKIM setup, by sending a test email from your domain to another email address and checking the email header for the DKIM result.
DMARC (Domain-based Message Authentication Reporting & Conformance)
DMARC stands for Domain-based Message Authentication, Reporting, and Conformance. It is a standard that works with SPF and DKIM to authenticate mail senders and prevent spoofing and phishing. DMARC helps you specify how receiving mail systems should handle messages from your domain that fail SPF or DKIM checks. To set up DMARC, you need to follow these basic steps:
- Identify valid sources of mail for your domain, such as your own mail servers, third-party email providers, or marketing platforms.
- Set up SPF and DKIM for your domain, if you haven’t already done so. SPF is a DNS TXT record that lists authorized sending IP addresses for your domain. DKIM is a way of digitally signing your messages to prove they are from you.
- Generate a DMARC record, which is another DNS TXT record that contains your DMARC policy and preferences. You can use online tools to create your DMARC record, such as this one.
- Publish your DMARC record to your DNS and verify that it is correct and valid. You can use online tools to check your DMARC record, such as this one.
Monitor and analyze DMARC reports, which are XML files that provide feedback on your email authentication performance and compliance. You can use online tools to parse and visualize your DMARC reports, such as this one.
CNAME Record
Lastly, add the below CNAME record. The CNAME record is what enables Open and Click tracking. This step allows you to reap the full benefit of Brokerkit and gain insights into your email performance.
A misconfigured CNAME can cause the links in your emails to not work properly.

Advanced Settings
Contact us in our office hours here, if you need help or have questions before changing anything in this section
- Under the Advanced Settings section, more technical users will see options to add DMARC and MX records as well for that extra level of email deliverability protection. Note that this is for more advanced technical users and more complex use cases and the basic configuration steps above should be sufficient for most users.
Deleting A Domain
What if you no longer use a domain or if there is a typo in the domain name? Thankfully, it can be deleted. Note that the same domain can only be added once in a given Brokerkit account or organization. We'll show you how to do this below:
- First, log in to the Brokerkit account (if you have not already done so).
-
Then on the top right navigation bar, click on the username to expand the list of sub-options.
- Next, click the Account Settings option.
- Next, click the Email tab.
-
Finding the domain you need Click the "Delete domain" button.
- Click the Yes button and confirm your intention to delete the domain by clicking the Yes button in the pop-up modal.