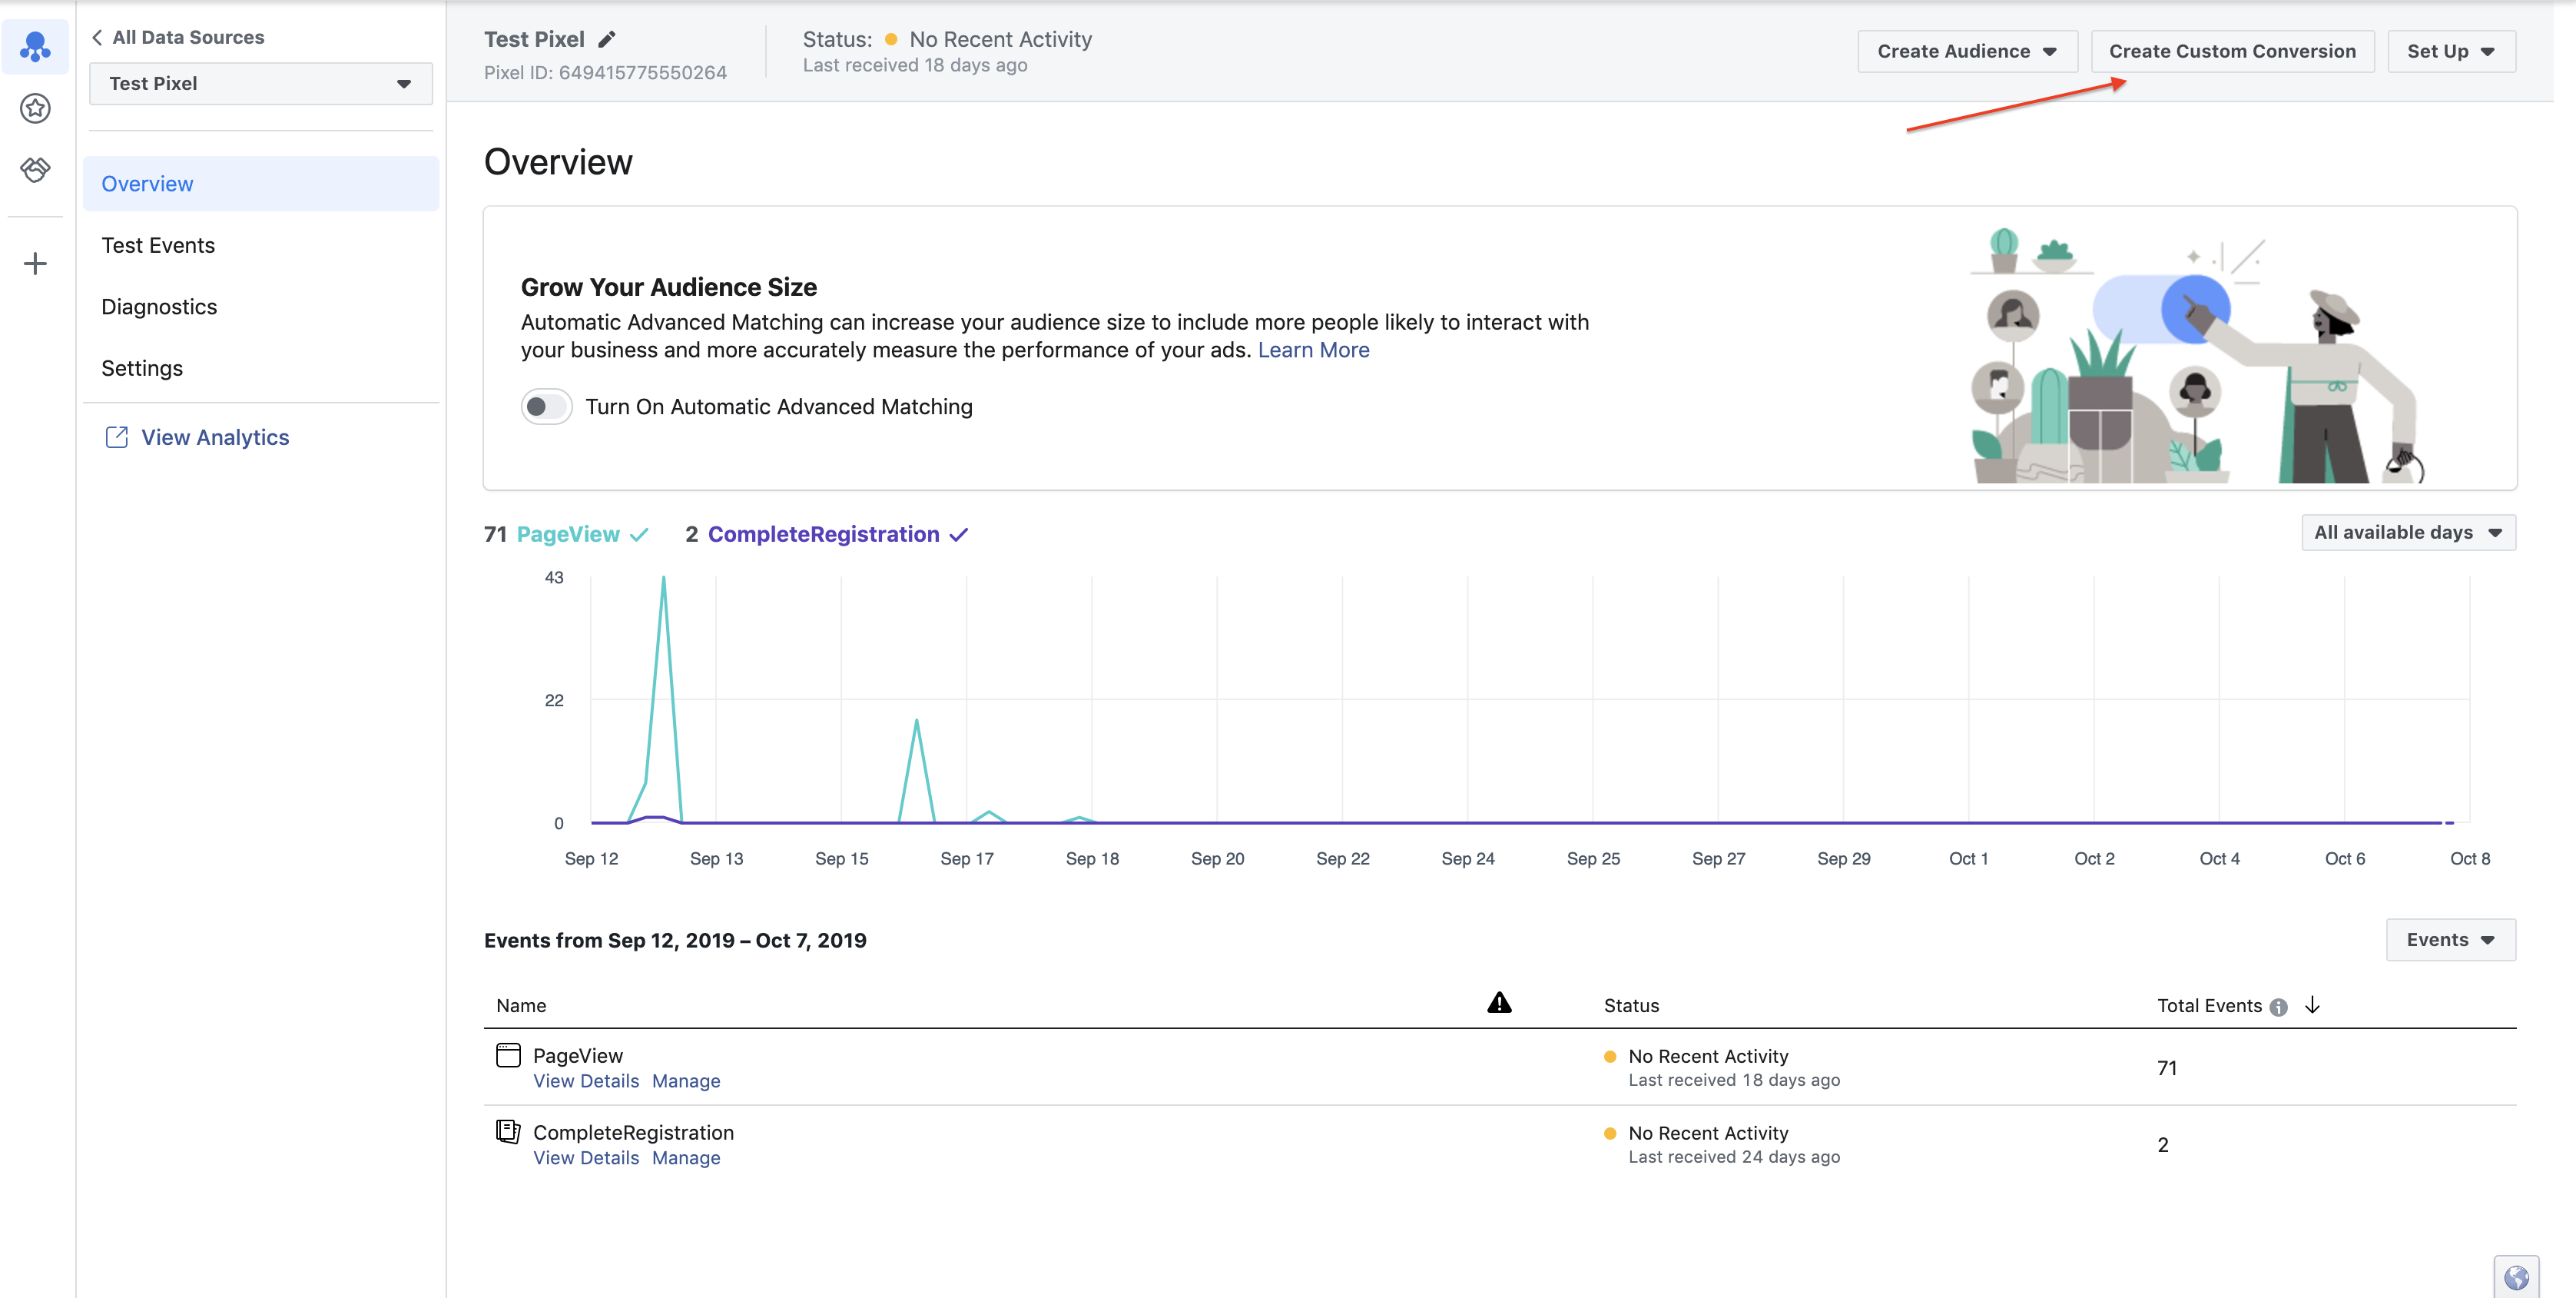
1. Log in to Facebook and navigate to your Pixel. On Events Manager, go to the Pixels tab. Copy “Pixel ID” from FB Pixel found on top of the page.
![]()
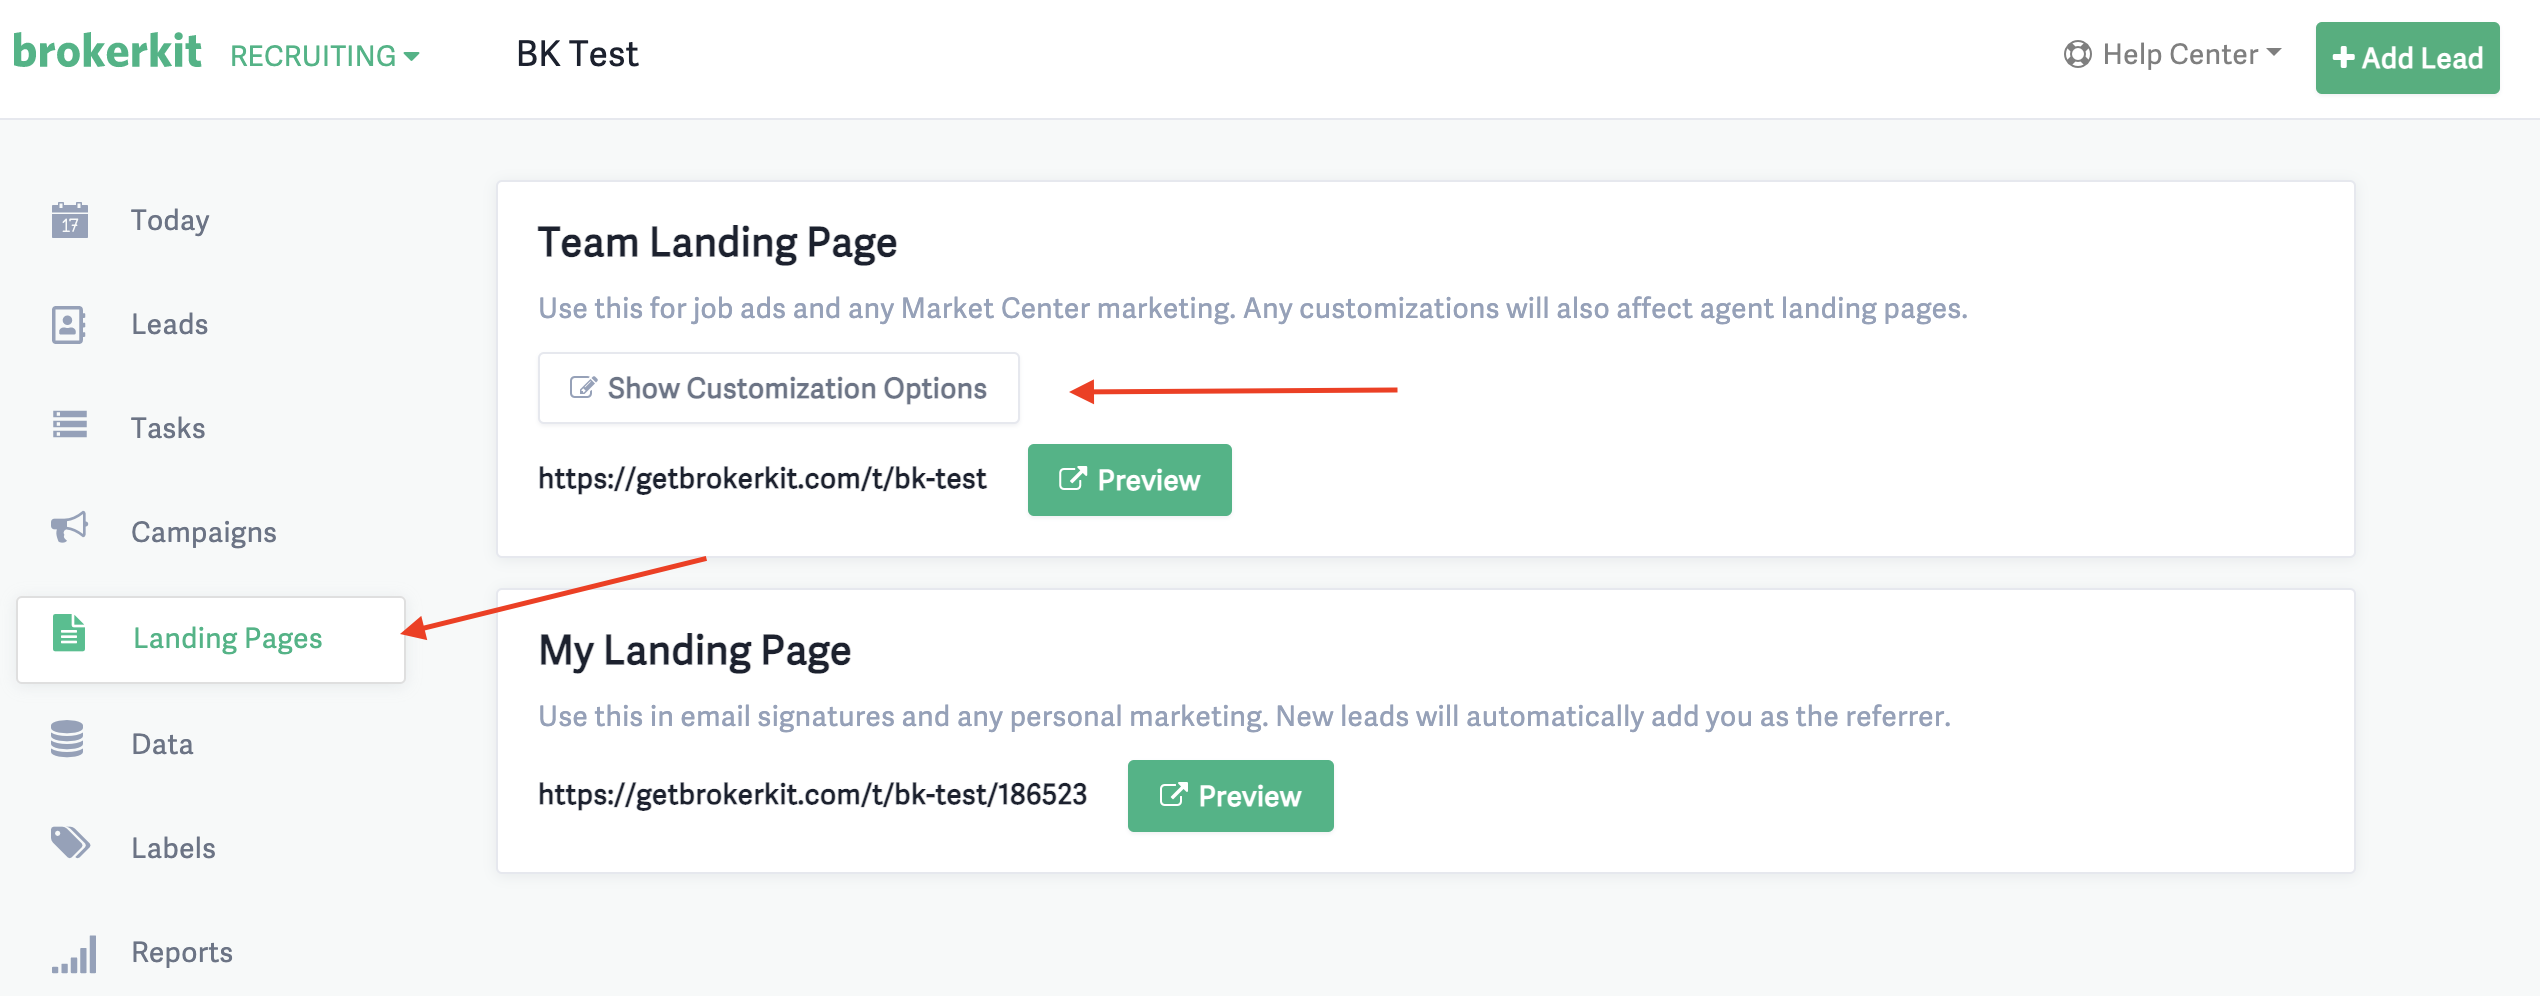
2. Now go to the Brokerkit Tool, once logged in, use the menu on the left-hand side of your screen, then select “Landing Page”. On “Landing Page”, click on the "Show Customization Options" button.
 3. Scroll to the bottom and fill in the “Facebook Pixel ID” from step number 2. Click on “Save Changes” once done.
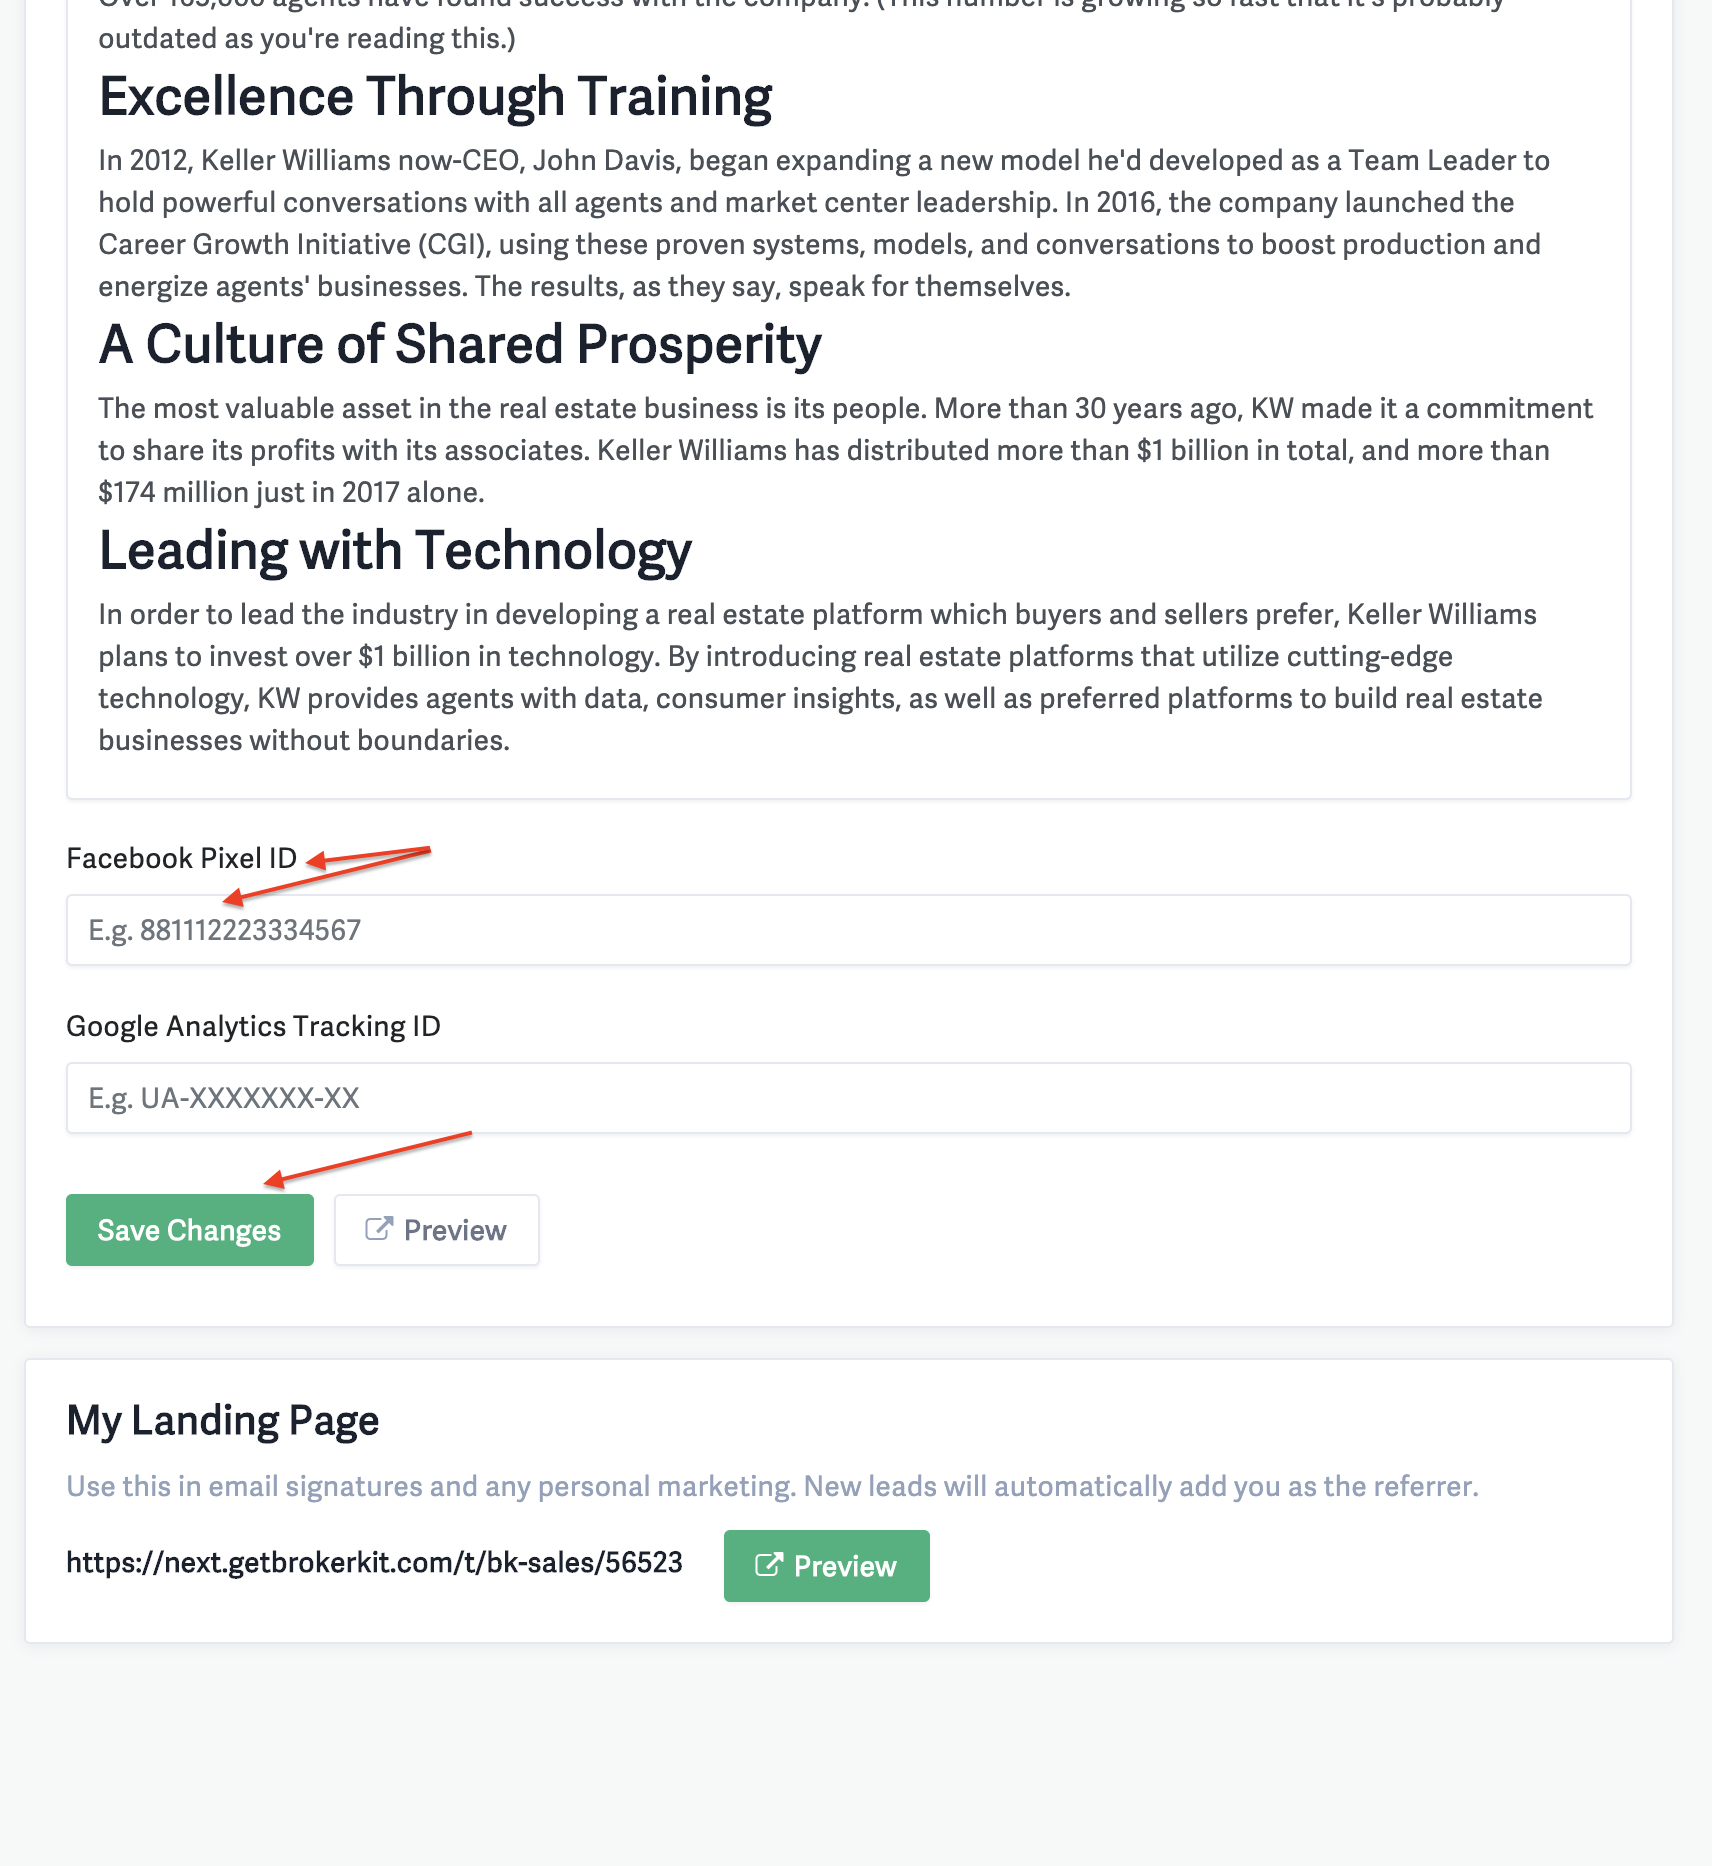
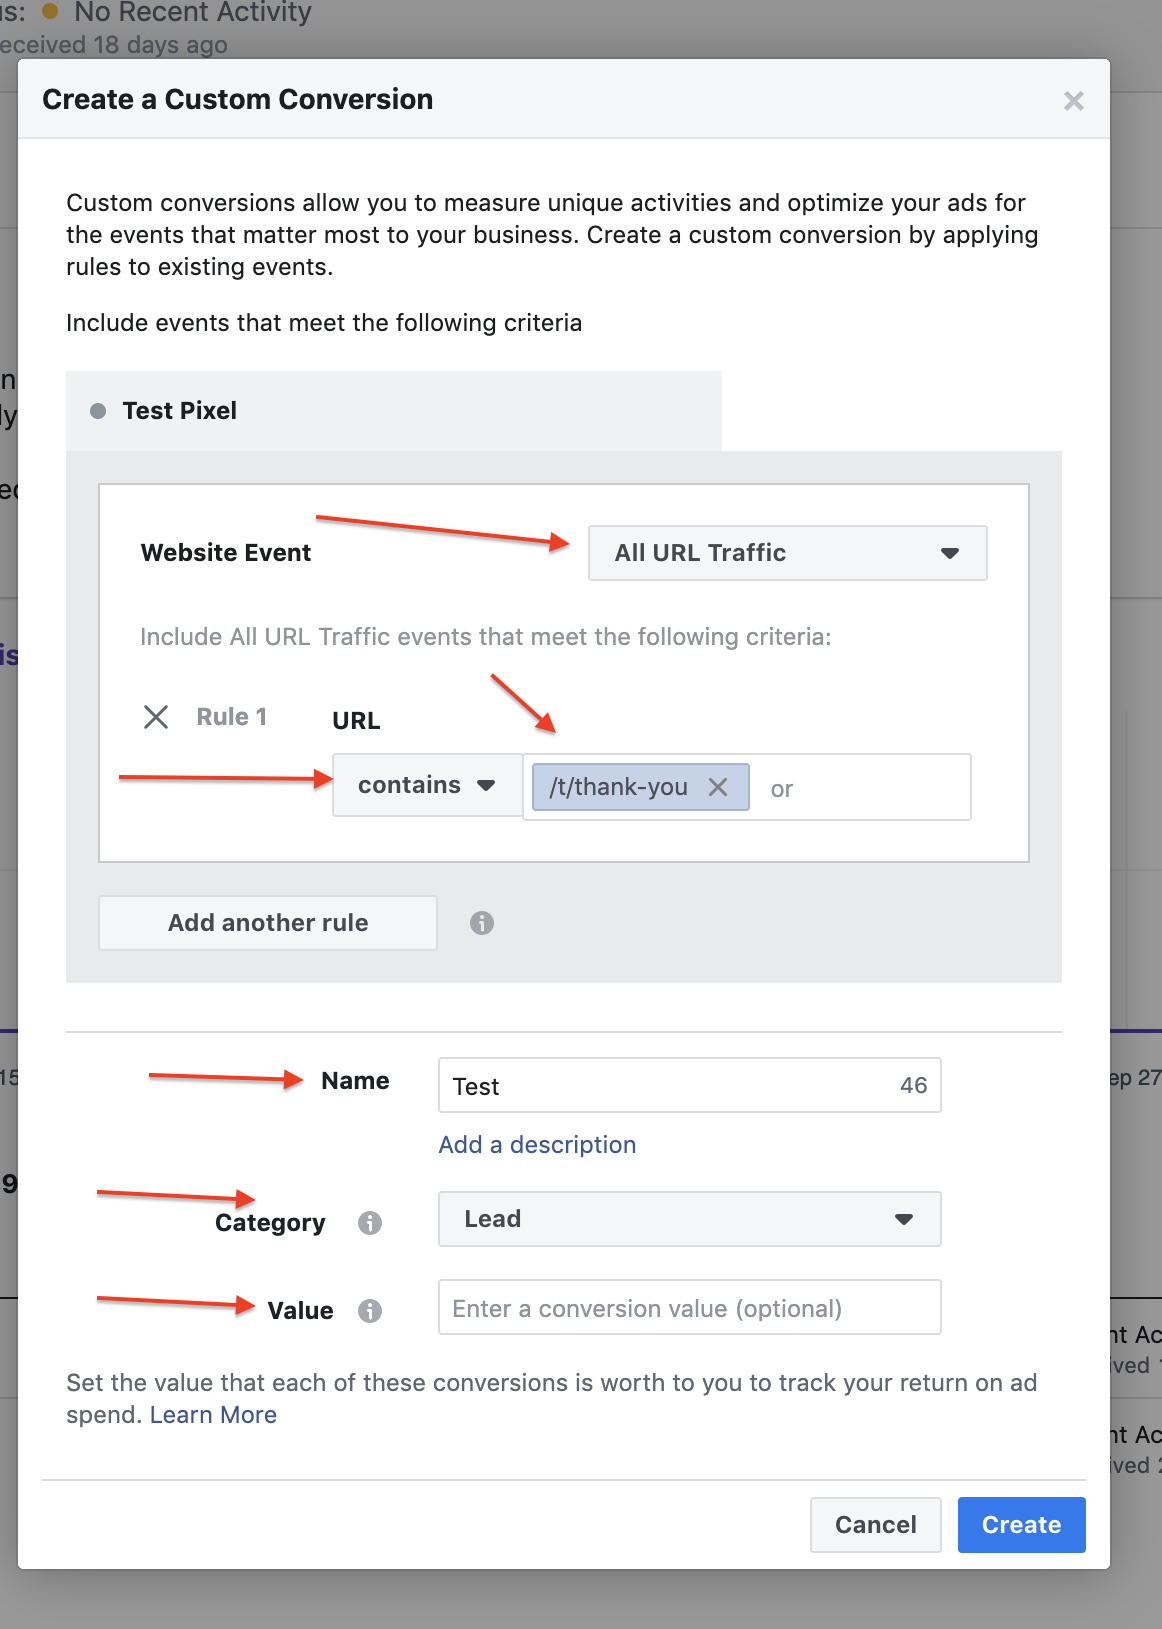
5. On the pop-up screen, select "All URL traffic" on the "Website Event" field.
Set Rule 1 on “URL” click “contains” and fill in the text field with "/t/thank-you". Fill in the “Name” of the conversion. For “Category,” select “Lead,” then fill in the conversion value in the "Value" field as desired. Then click the “Create” button to complete the process.