Adding “Labels” to your leads and agents provides a quick and easy way to segment and filter your data. It also helps you create a list of contacts based on your preferences, offering a flexible way to add custom segmentation options not covered under Advanced Search.
Applying Labels to Leads/Agents
Labels can be applied individually from the Lead Profile or in bulk.
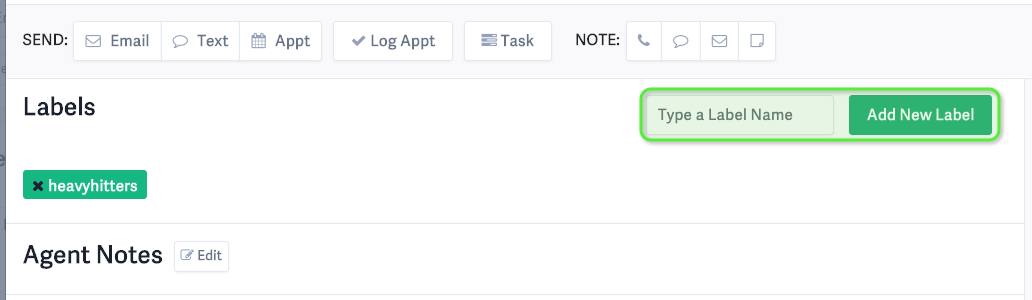
From the Recruiting or Retention module, select a lead or agent to open their profile. Just below the top action bar, click Add New Label next to Type a Label Name. You can either select an existing label that appears with the auto-complete function or create a new label.
📝 Note: Type a Label Name and Add New Label options are accessible from both the lead and agent profile screens.
Bulk Actions with Labels
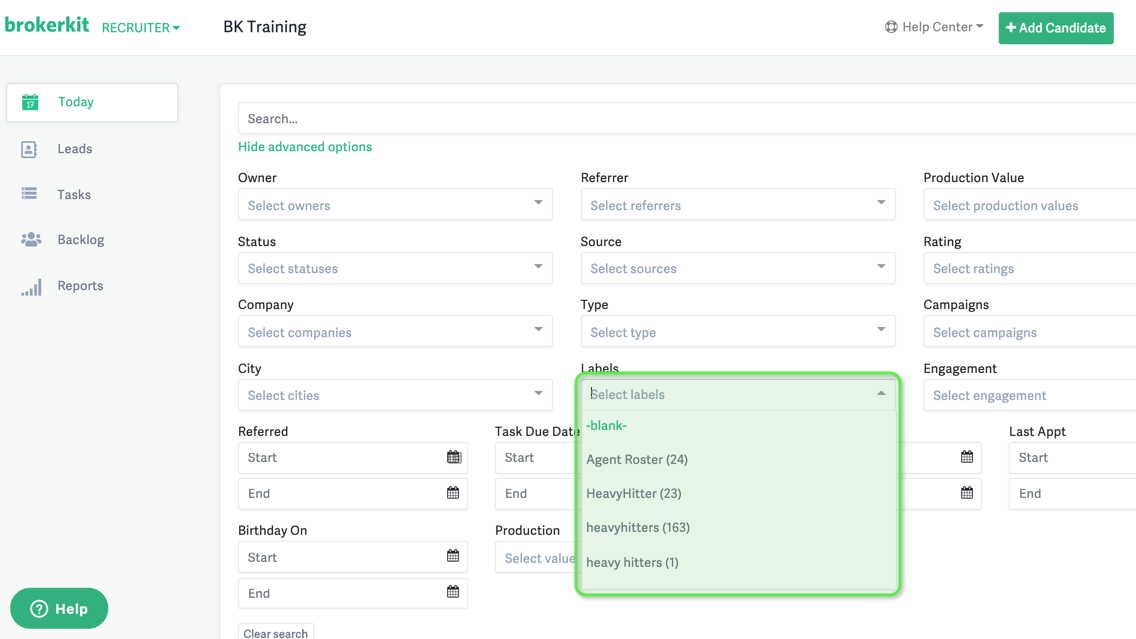
- When you need to find your leads, select the proper label in the Label filter in the Advanced Search.
- You can add labels or remove labels in bulk with the bulk action Add Label to Leads/Agents or Remove Labels from Leads/Agents. To bulk add a label, just remember you need to create the labels first.
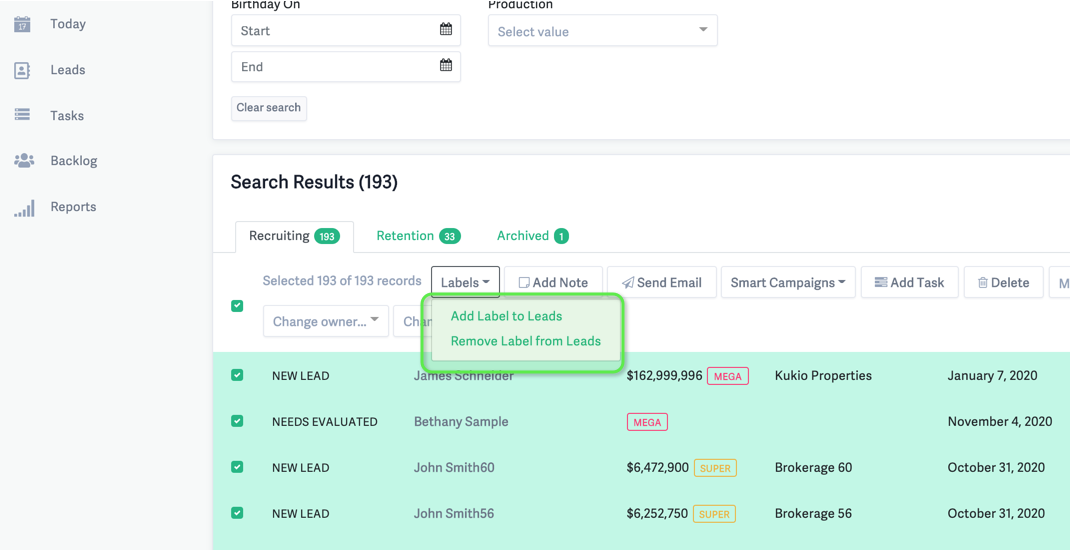
- To perform other bulk actions on this group, simply Select All, and you can Send Emails, Add Notes, Add to Smart Campaigns, and Add Tasks.
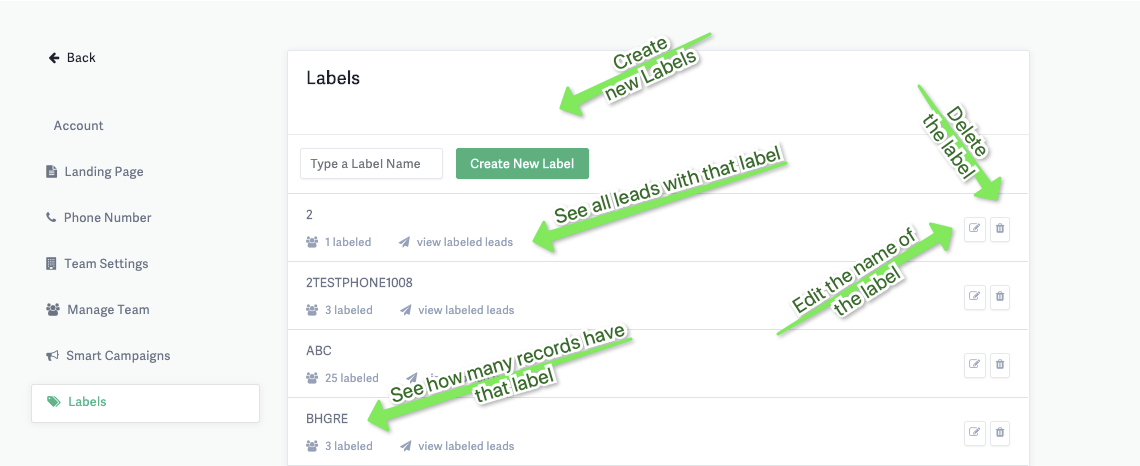
Updating Your Labels
- By navigating to Labels, you will go to the following screen where you can update your labels

Navigating to Data, then Labels in the left-hand menu will take you to the Labels management screen where you can:
- View all labels and the number of contacts assigned to each
- Edit label names by clicking the edit button
- Delete labels permanently by clicking the trash bin icon - this will remove the label from all contacts (you'll see a confirmation warning before deletion)
- Search for or create new labels using the search bar