Check out our 2 Part Video Tutorial series covering tasks:
Part 1 - Creating Tasks
Part 2 - Managing Your Tasks
Creating Tasks
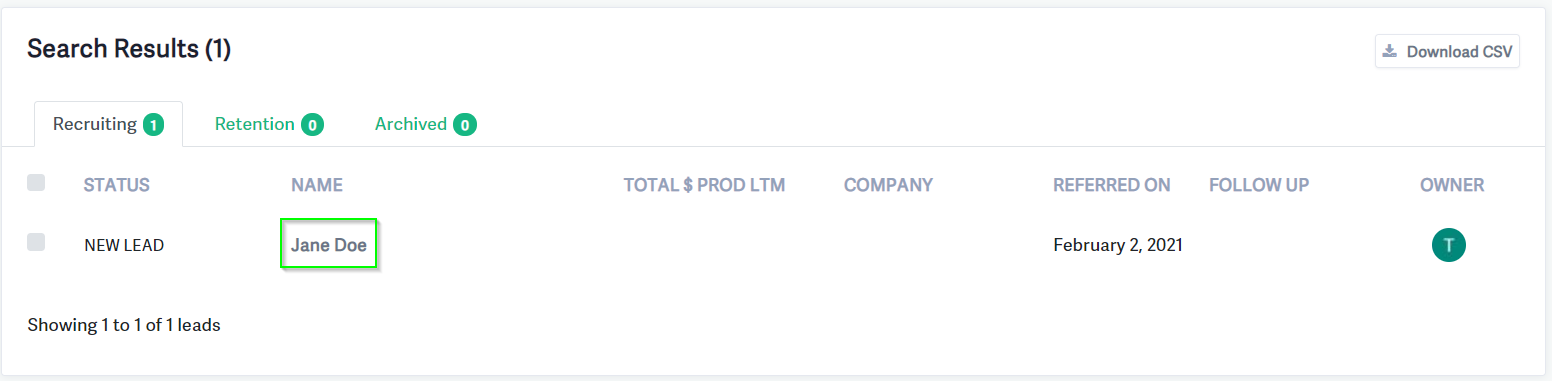
1. Log in to Brokerkit and search for an individual you wish to follow up with.
2. Add any filters from the "advanced options" menu as needed.
3. Click on the name of the individual you wish to set a task for.
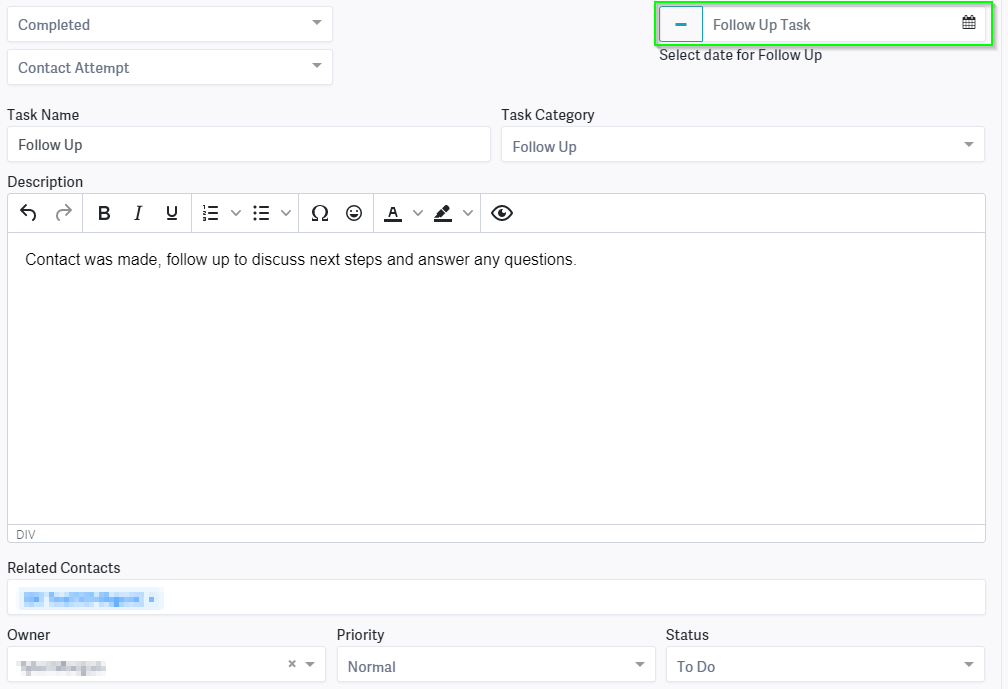
4. Select the task option.
5. Fill out the required information to set a name, task category, and the date for the task to be completed.
You can use the "Description" section to add notes for the task.
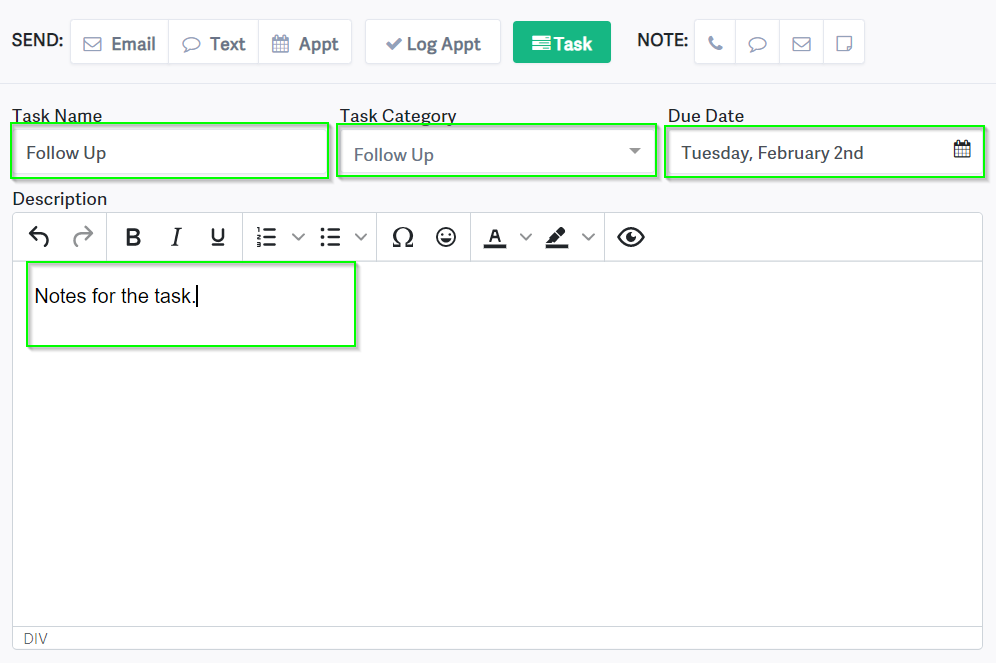
6. Assign an owner, priority level, and status. Once you are finished, select "Add Task," and it will be saved. 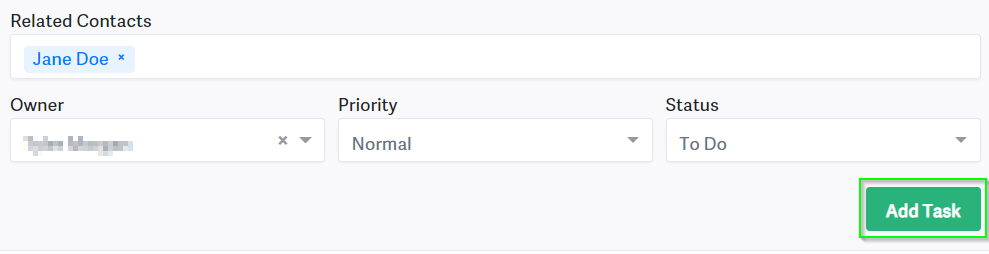
Tip: If you choose to set yourself as the owner of a task, you won’t receive an email notification. However, if you assign the task to someone else, they will get an email letting them know that a task has been assigned to them for a contact.
Adding Follow-Up Tasks on Activities
1. Follow-up tasks can be added while adding or editing any activity on an individual's profile. You can also add them when sending communications like emails or texts or logging notes or activities.
If you would like to learn more about logging activities for a contact, you can click here. You can start by finding the individual and selecting their name to pull up their profile.

2. Next, you will need to select the icon representing the proper method of communication or activity being performed. You may also edit previous activities to bring up this same menu. A "Follow-Up Task" can be added to any activity assigned to a profile. 
3. Fill out the textbox with any relevant information. The picture below uses the note as an example; this process can be replicated for any activity.
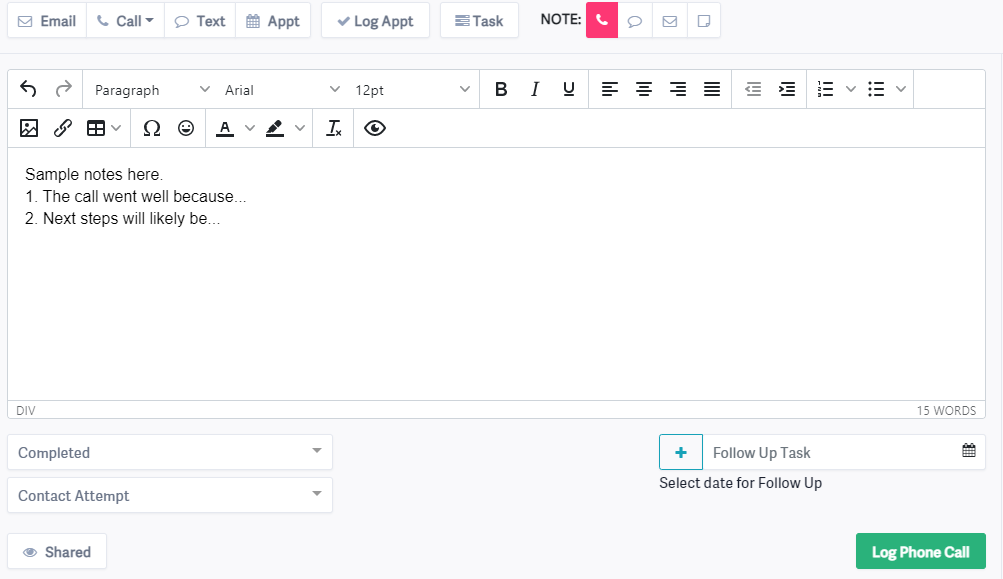
5. Once you are finished adding any notes, you can click the button to log the action, and all of the notes will be saved to the individual's profile. The follow-up will be added to your tasks for the day you selected. Select the "Shared" icon on the left to adjust the visibility settings.
Creating Tasks as Campaign Steps
- You can also have tasks automatically created and assigned as steps in campaigns.
- You can assign them to a specific owner or select contact owner, and the task will automatically be assigned to the user set as the contact owner.
- Each task step can be assigned to a different person
- You can create recruiting or retention task plans, such as for the tasks you need to do for each agent onboarding. This type of campaign would be a series of functions with On=Any Day and At=Any Day, and since it would not have date/time constraints, it would immediately create and assign out all of the functions.
- Note that email notifications are turned on by default for these tasks, but they can be toggled off in the campaign task step.

Task Email Notifications
- When you assign a task to another user, they will receive an email notification that a task has been assigned.
- You won't get an email notification if you assign the task to yourself.
- For tasks created as a campaign step, email notifications are turned on by default, but they can be toggled off in the campaign task step.