Video Library Subscription Limits
- There is a limit on the count of videos that can be stored in the video library for an account which is based on the pricing plan for that account.
- Our current pricing plans have allocations for a certain number of videos in your library, but some of our legacy pricing plans will not have an allocation.
- Please check your Brokerkit billing page here to see what the limits are by the pricing plan.
To increase video limits, upgrade to a current pricing plan on the Brokerkit billing page here or contact support@getbrokerkit.com for assistance.
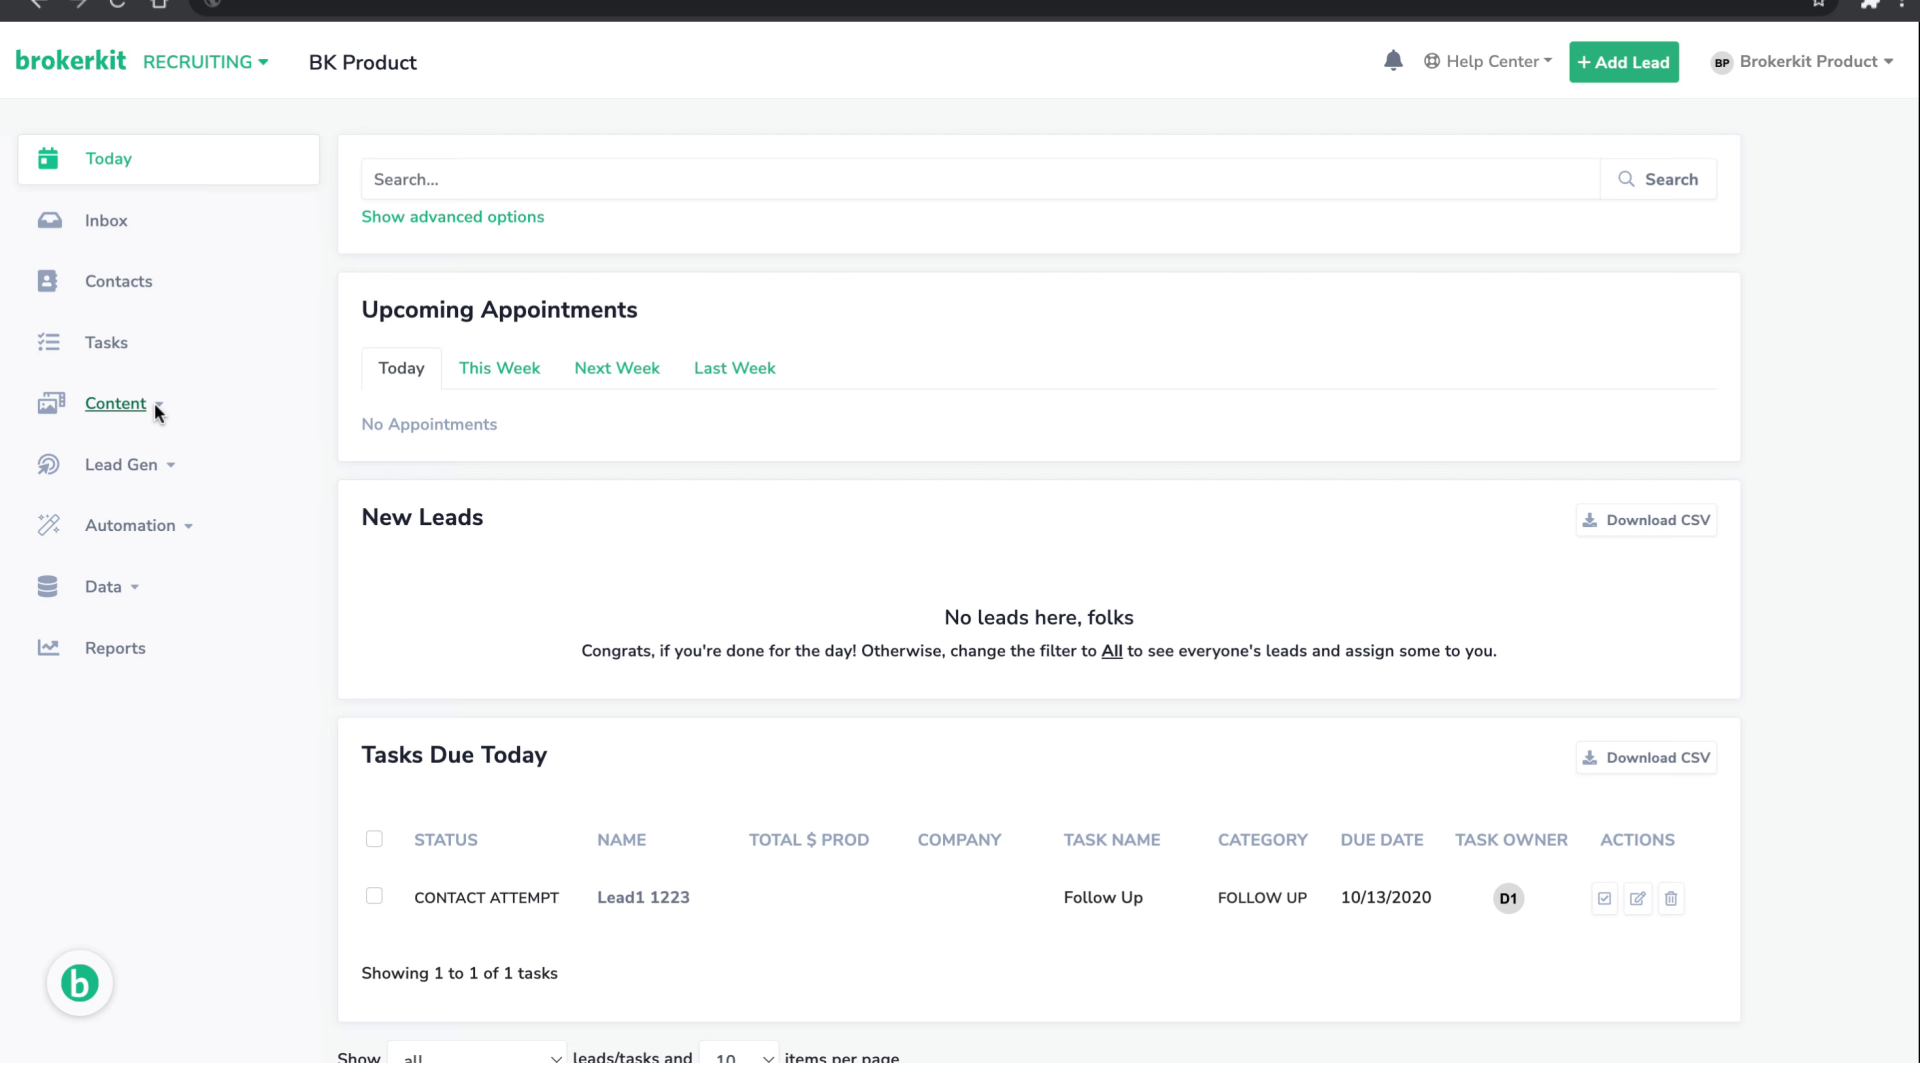
How to navigate the video library?
Welcome to this tutorial on how to navigate the new Videos Library. This library will be a central hub where you can view and organize all your videos in one place.
1. Introduction
To start, please access the Brokerkit platform.
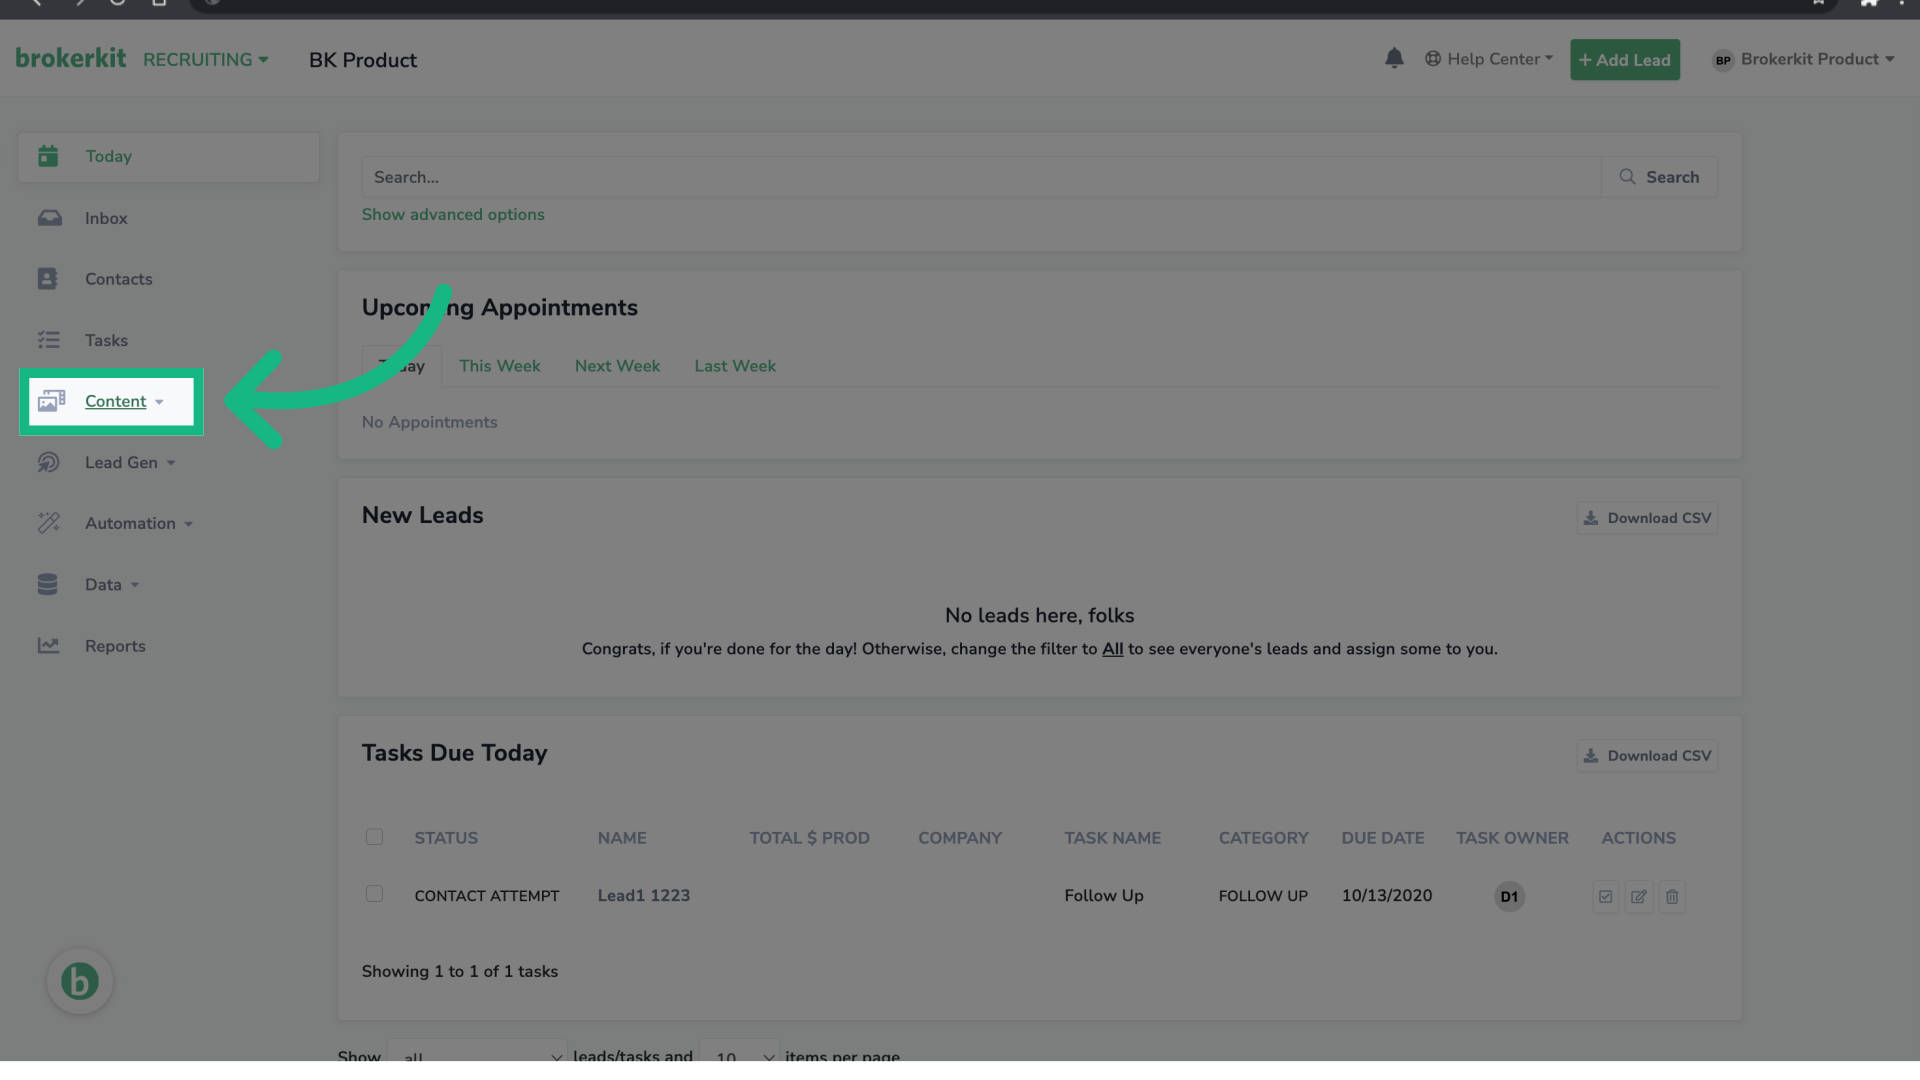
2. Click "Content"
Go to the left menu, and select Content.
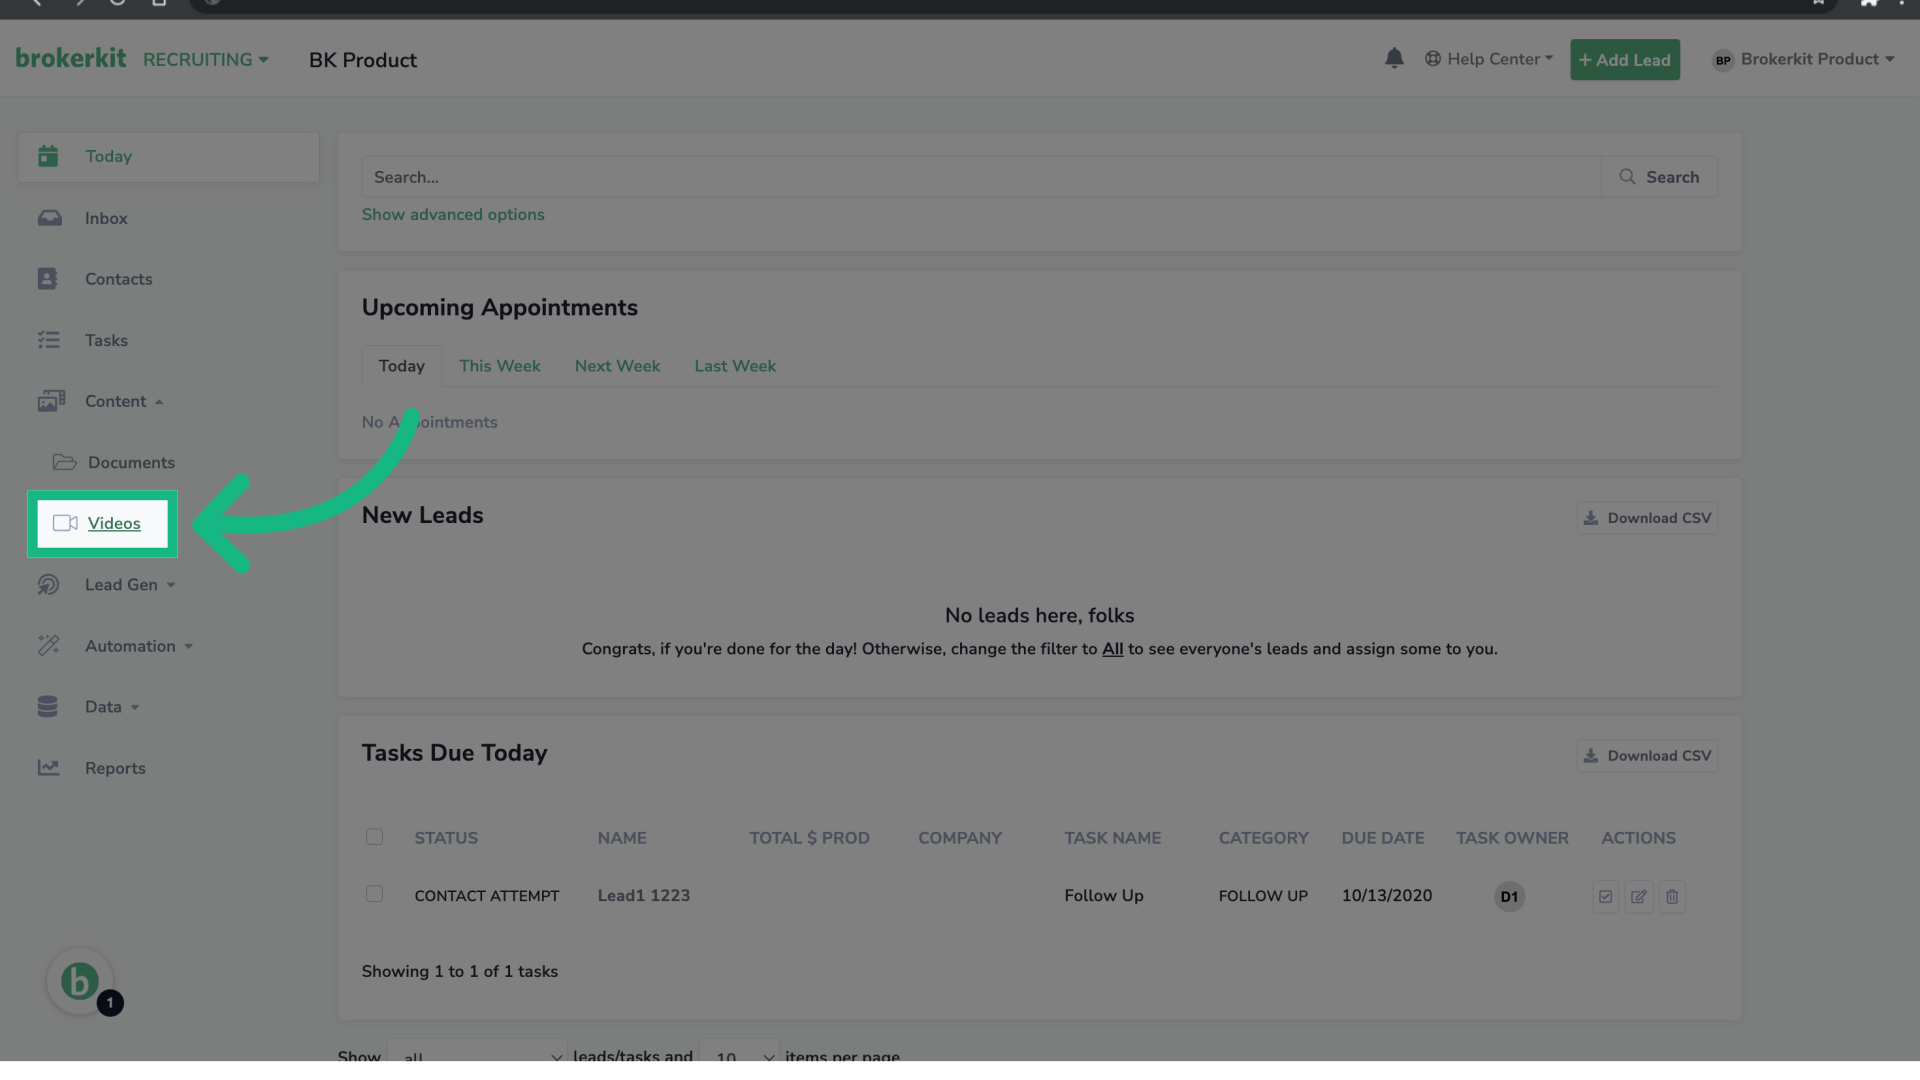
3. Click "Videos"
Then select Videos.
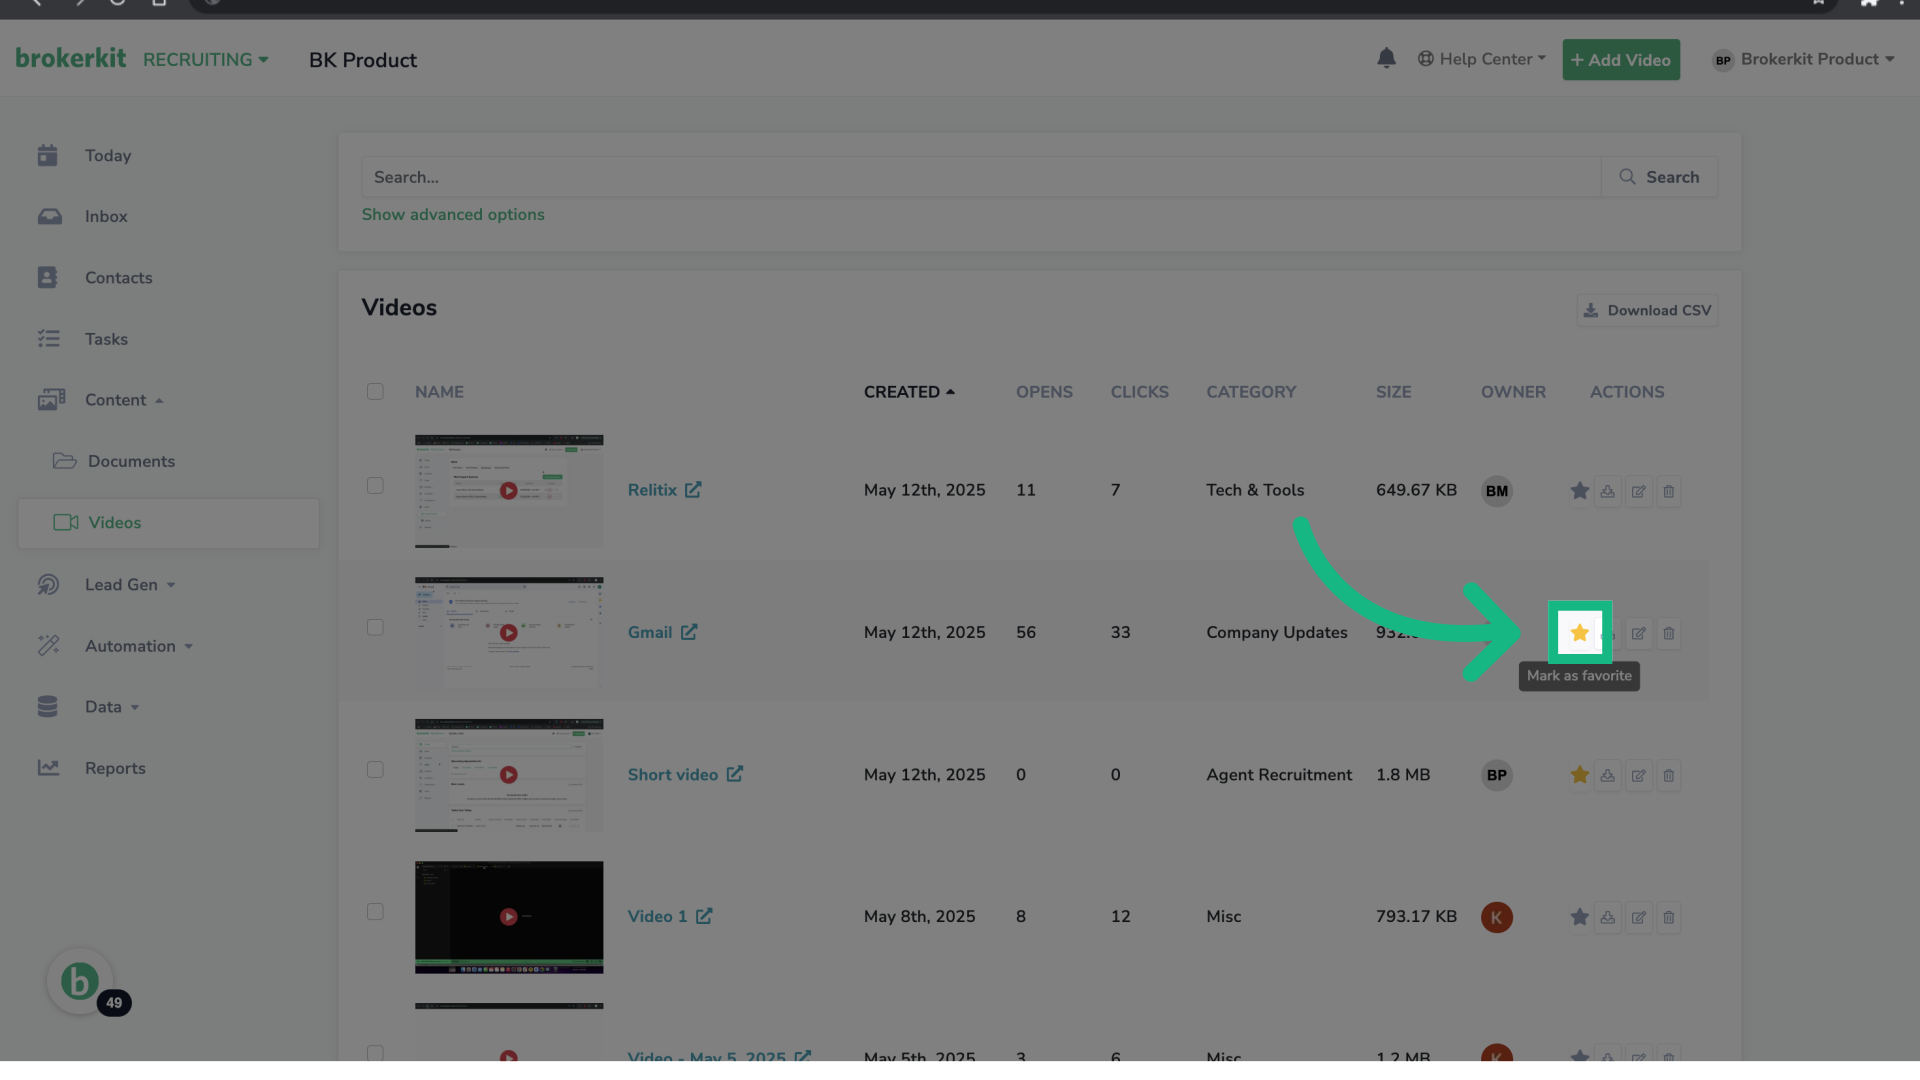
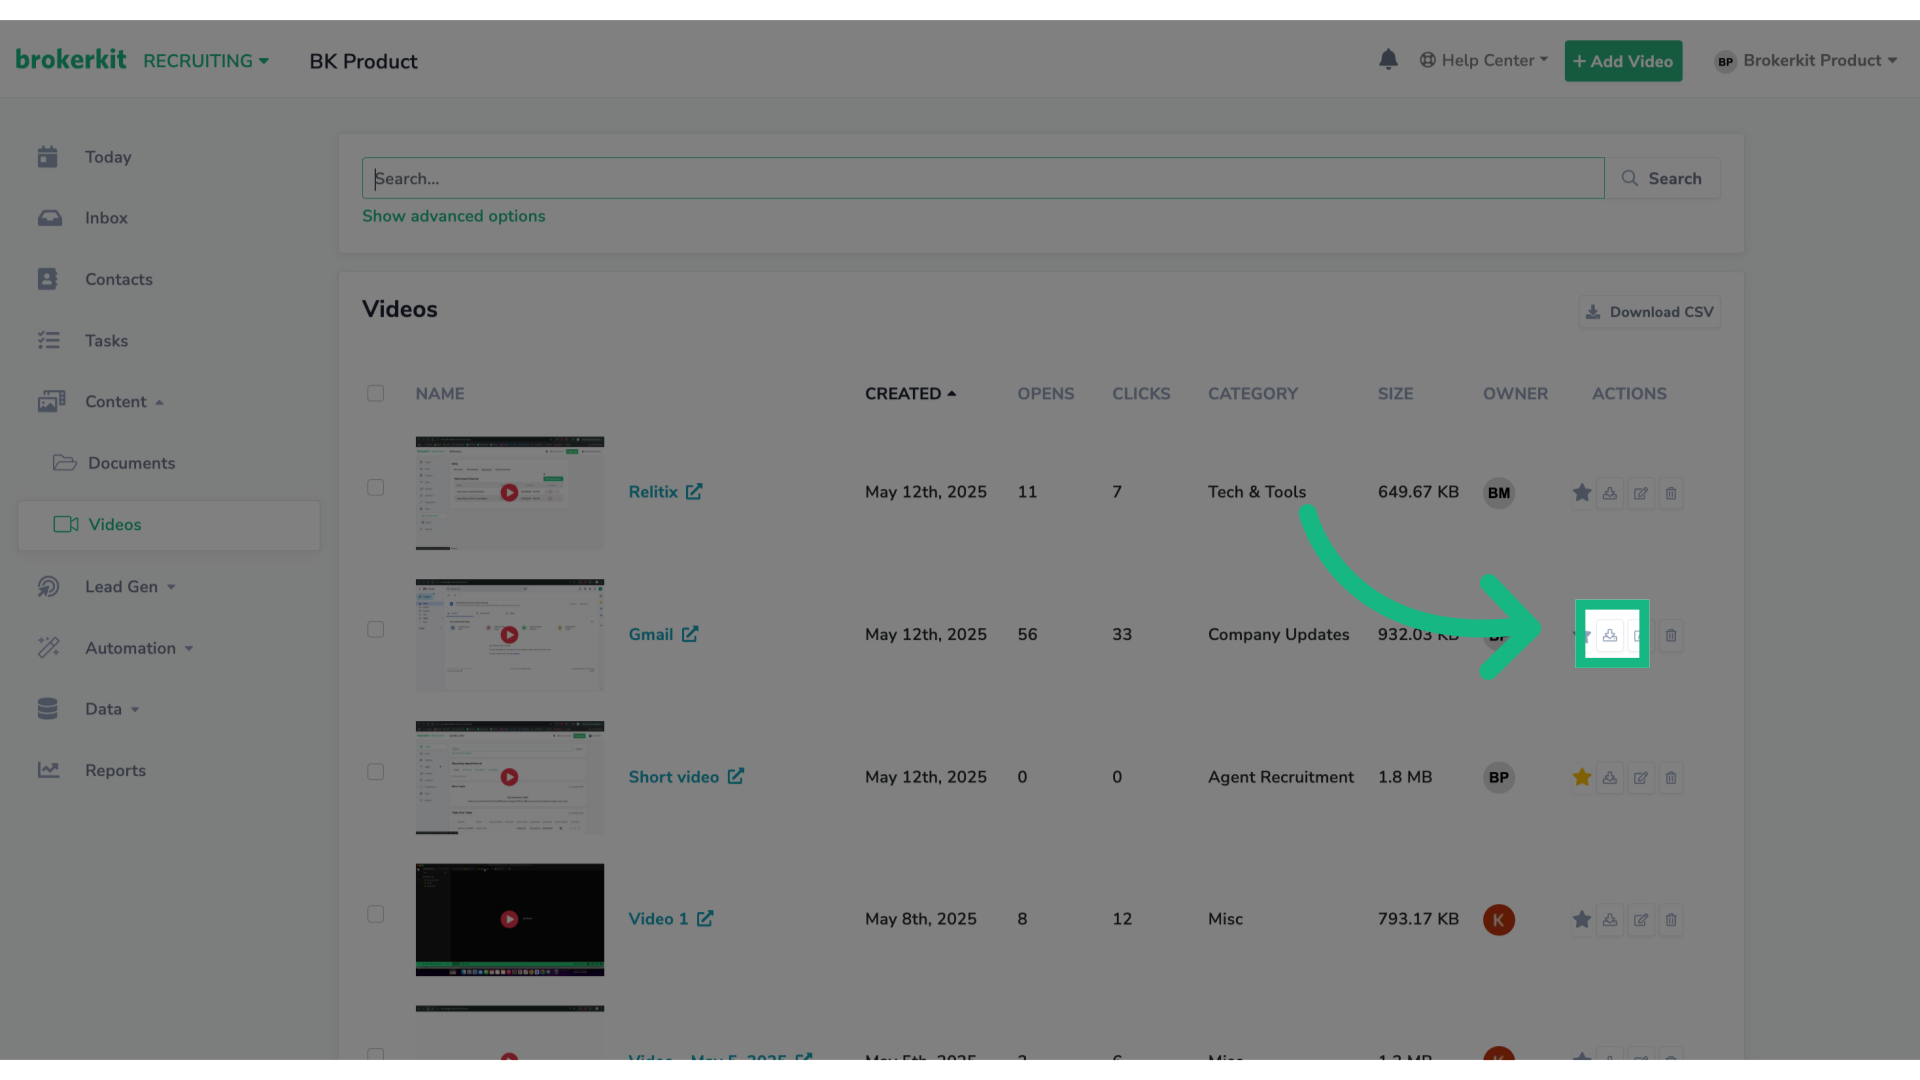
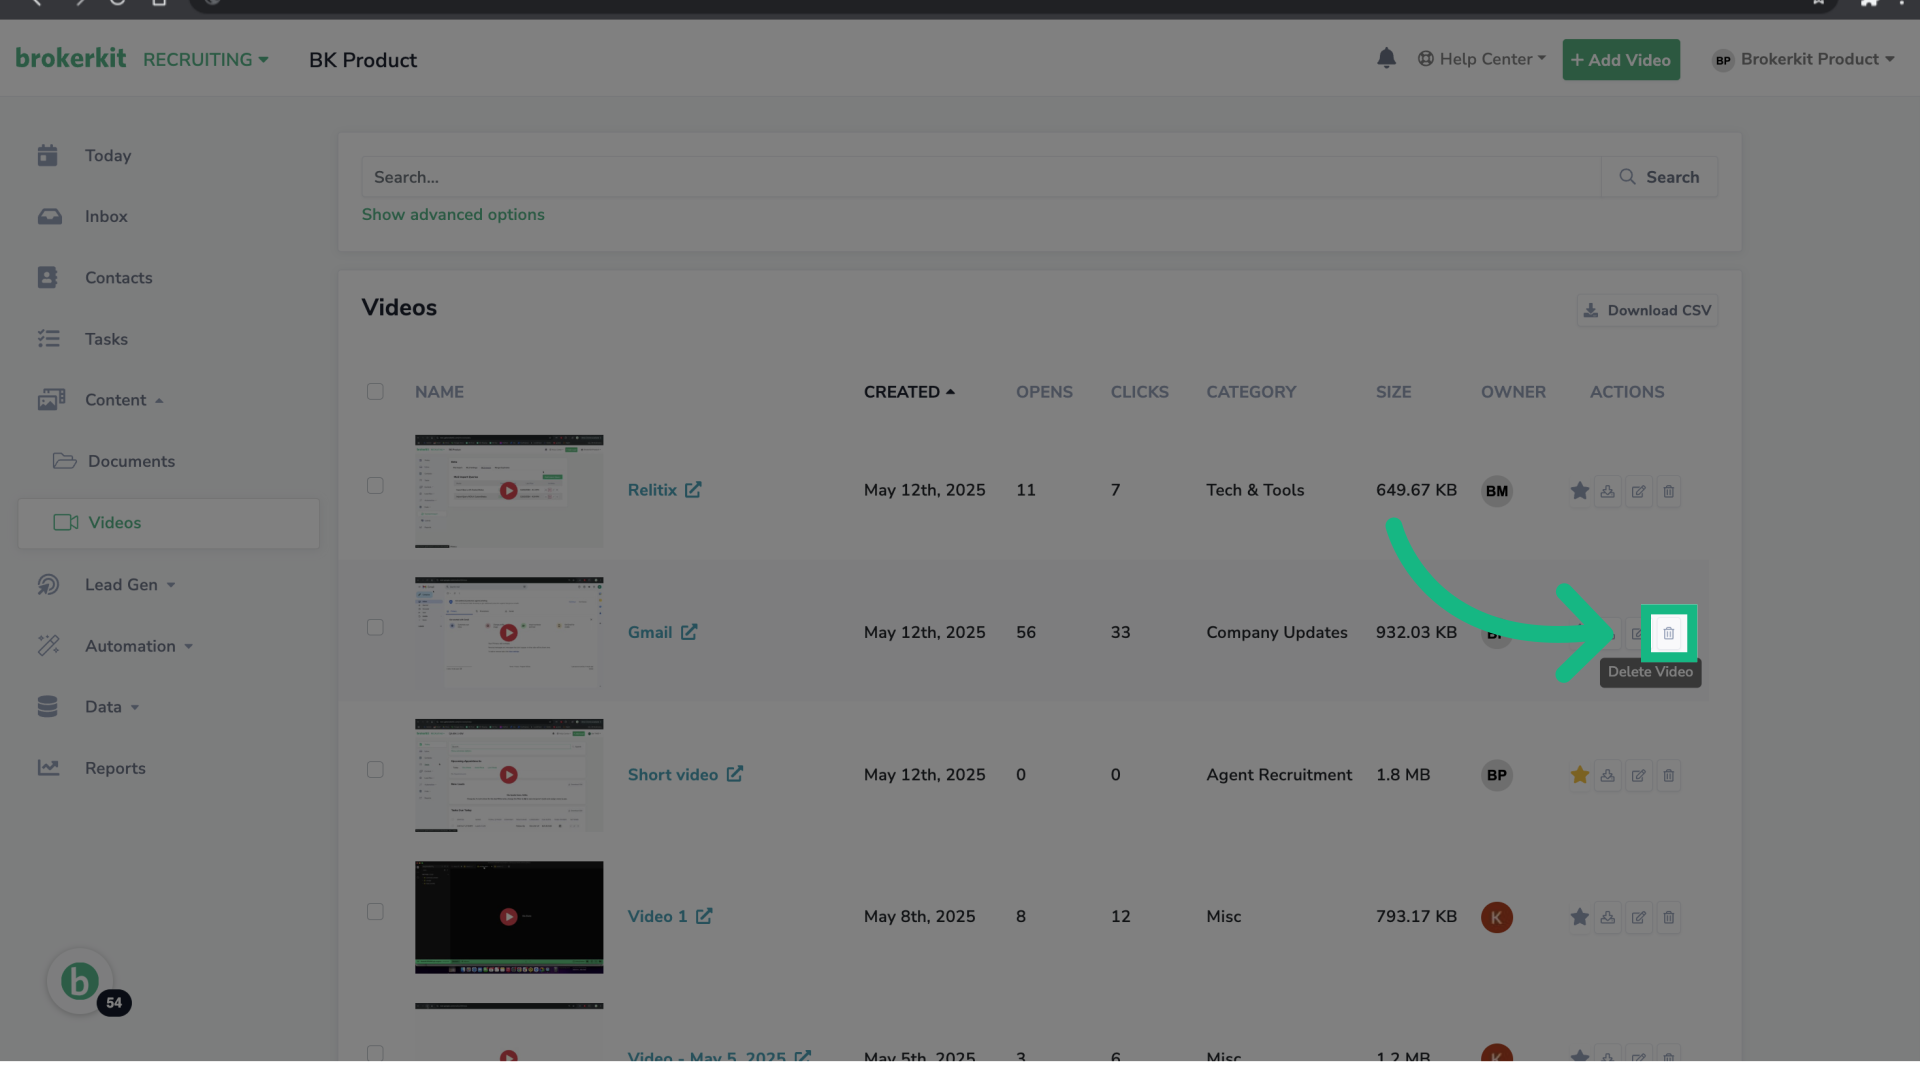
4. Videos Page
You can mark a video as favorite, download it, edit it or delete it.
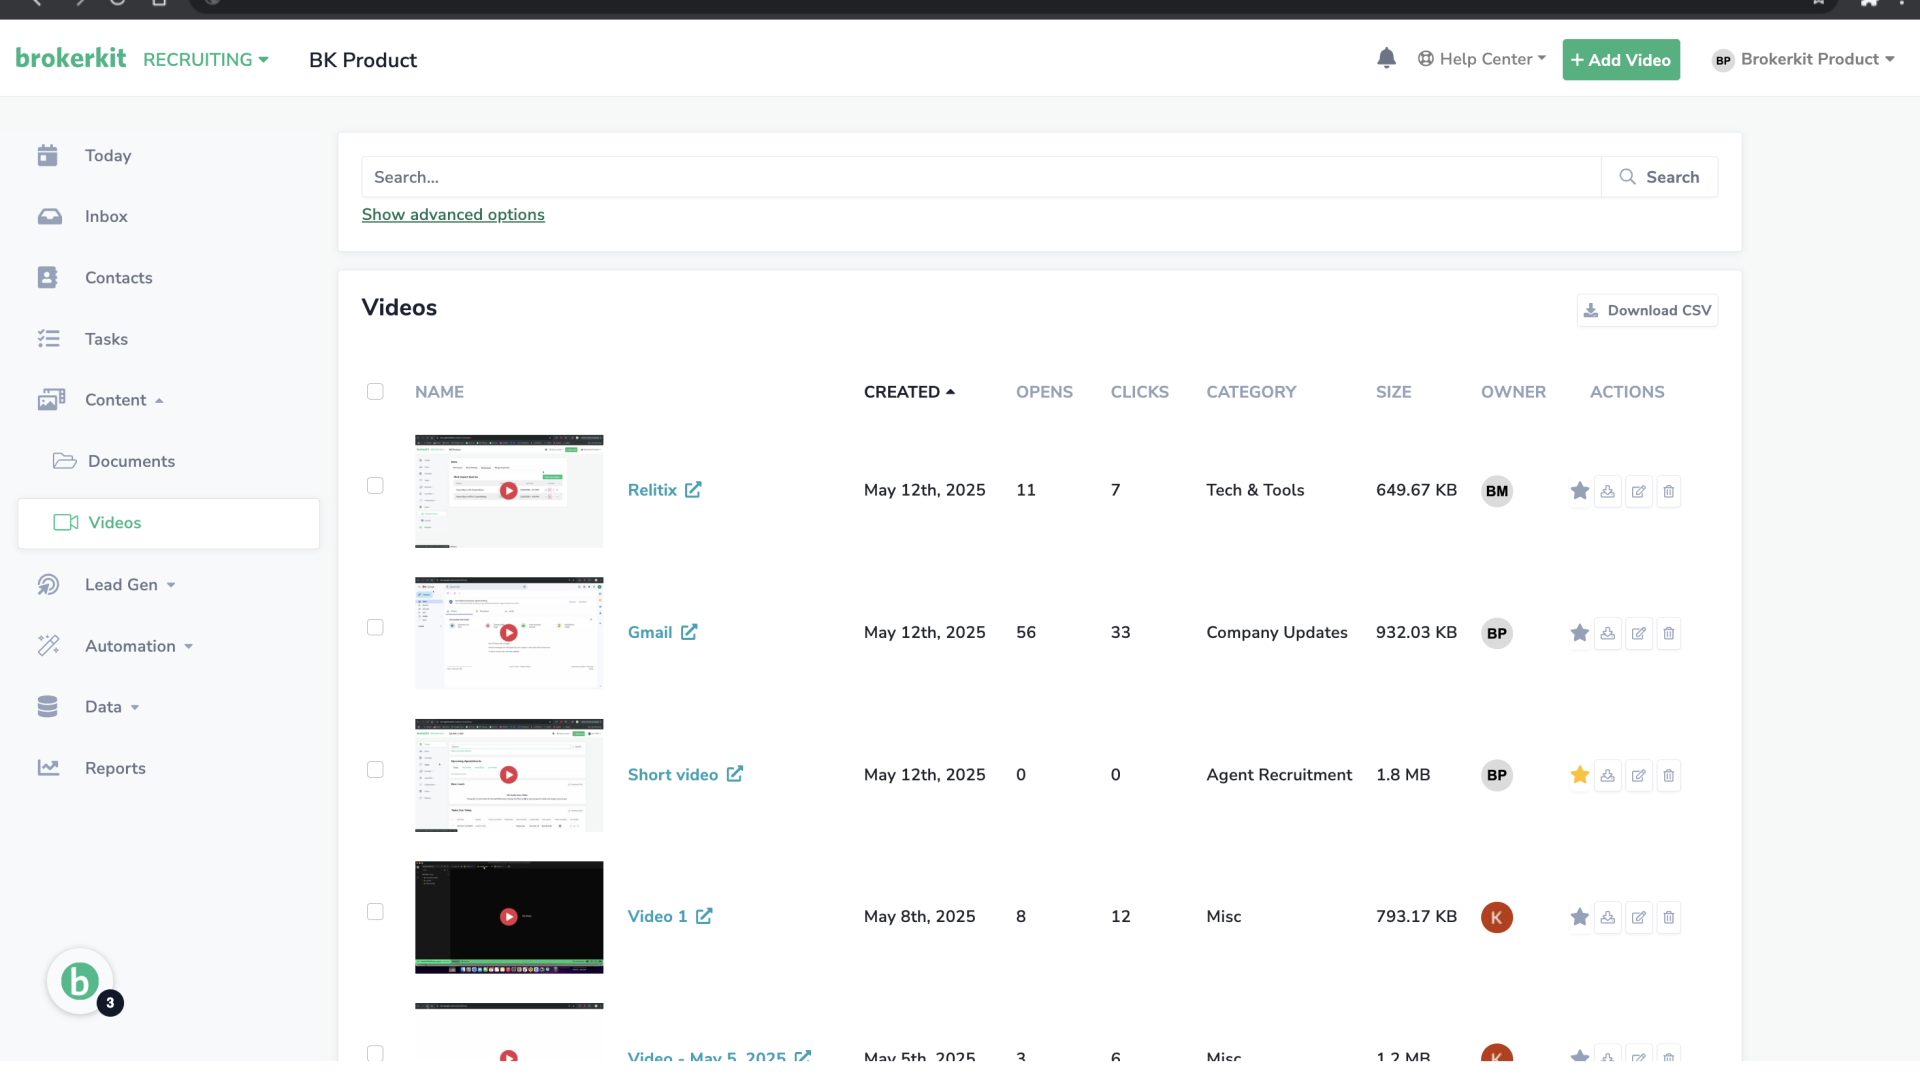
5. Mark as favorite
To mark it as favorite, click on the star, to unfavorite just click again.
6. Click to download
To dowload the video, click the download icon.
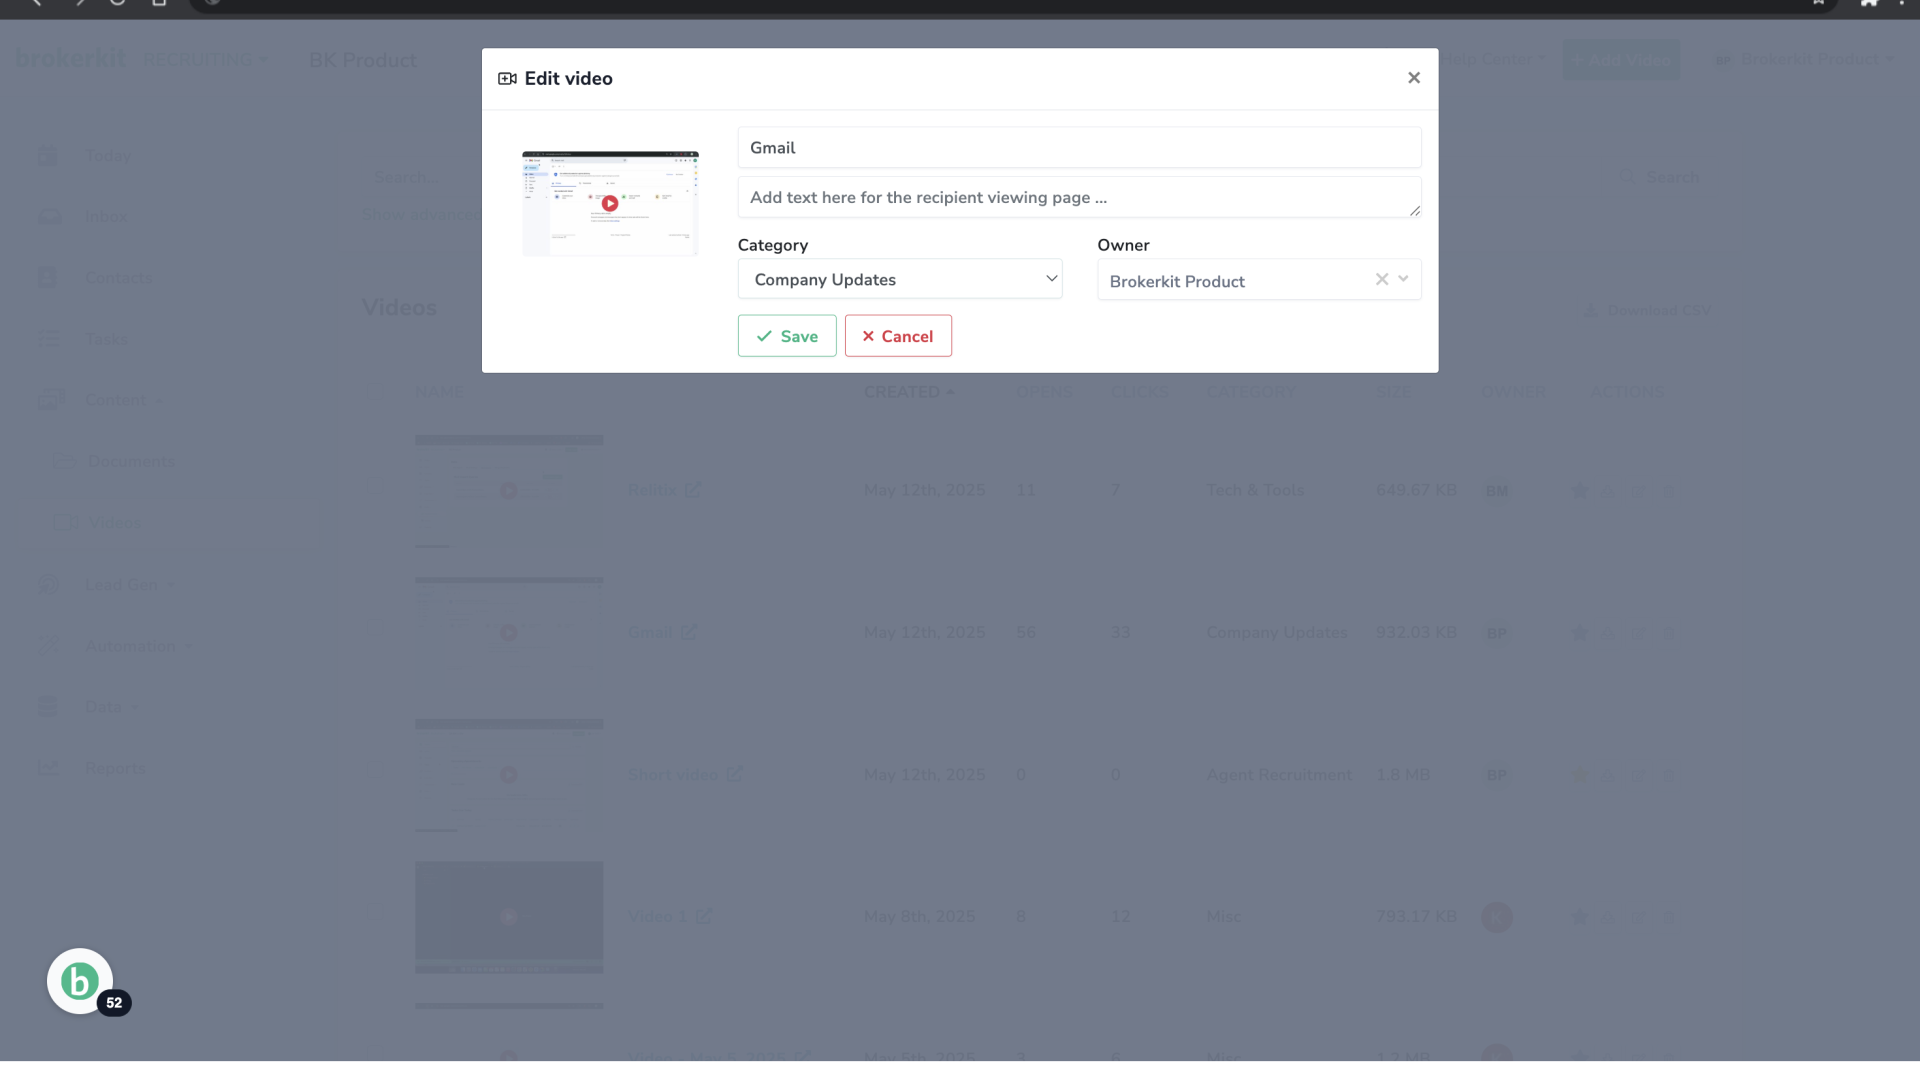
7. Click to edit
To edit the video, click the edit icon.

8. Edit a Video
You can edit the name, category or owner. Don't forget to click Save.
9. Click to delete
To delete a video, click the trash icon. Deleted videos are moved to the Trash page, where they remain for 30 days.
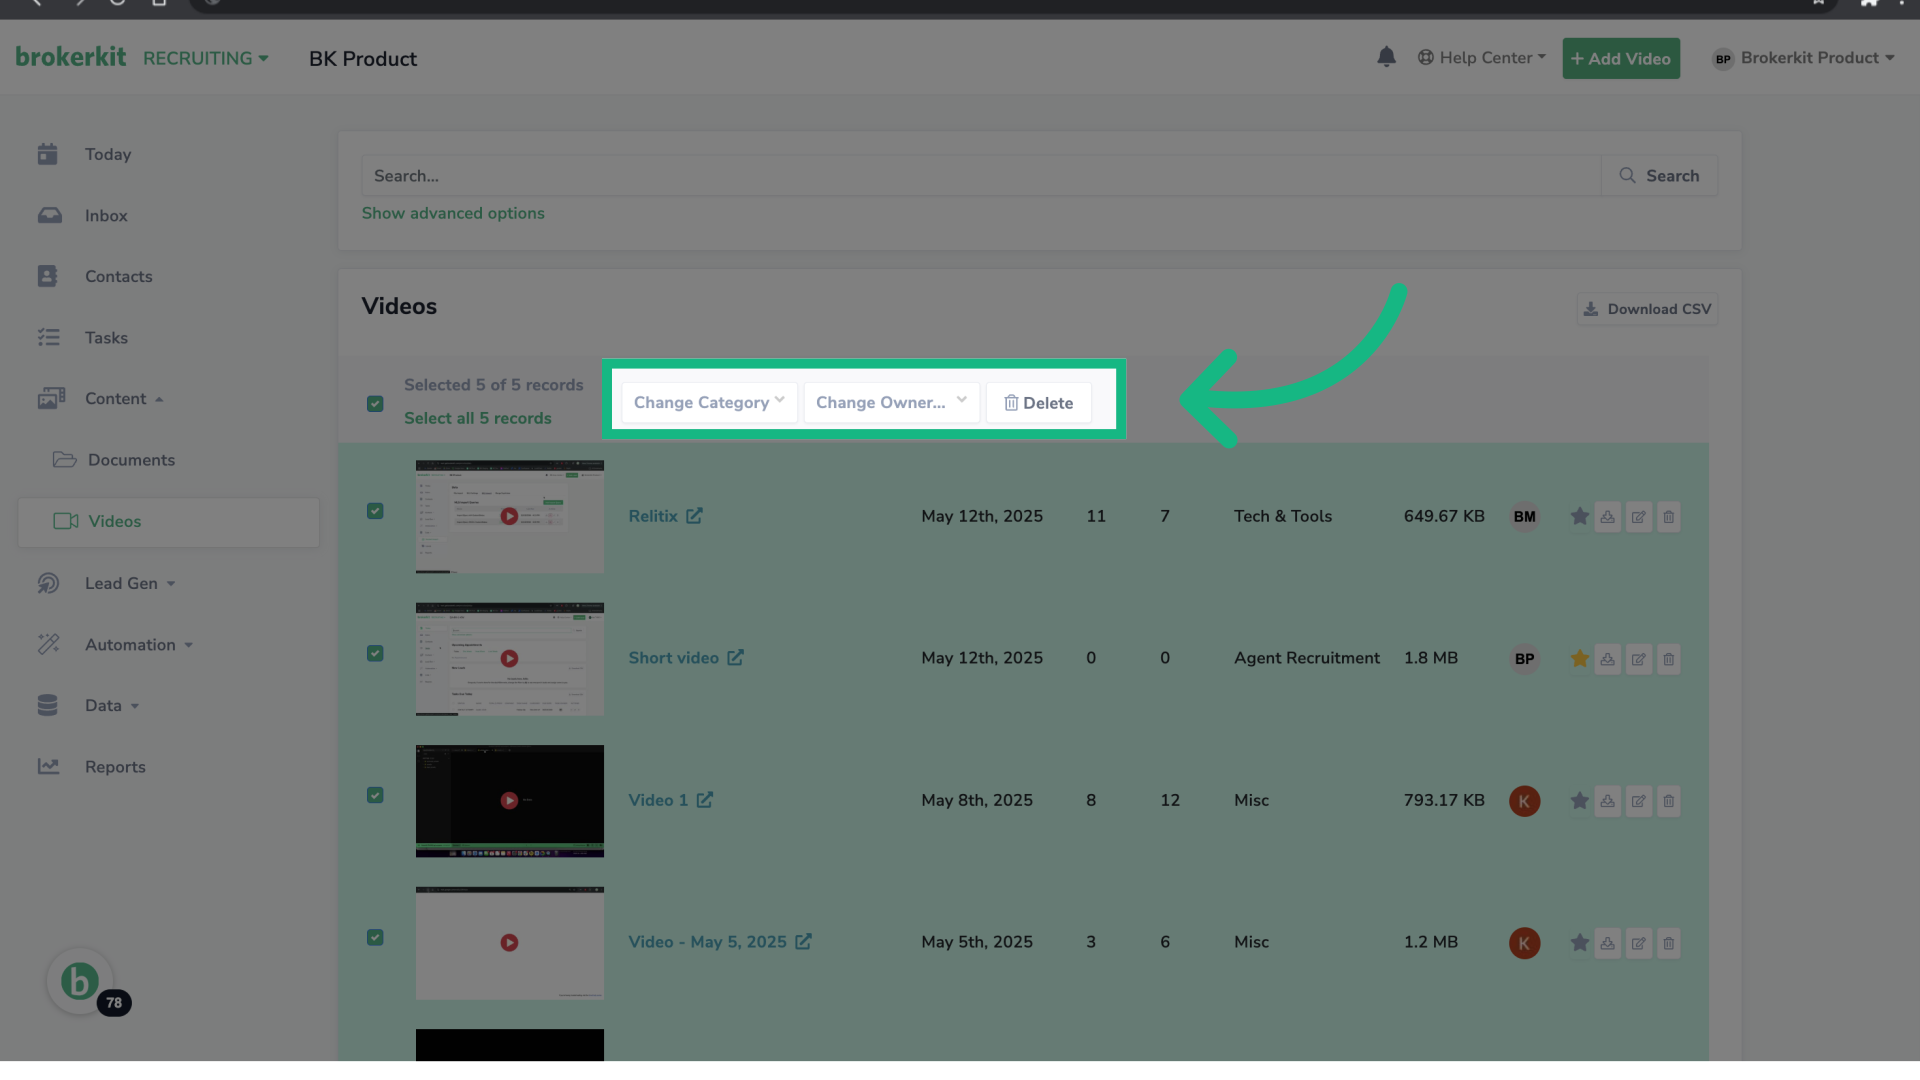
10. Bulk Actions
Also, you can perform bulk actions, including changing categories, owners or deleting videos.
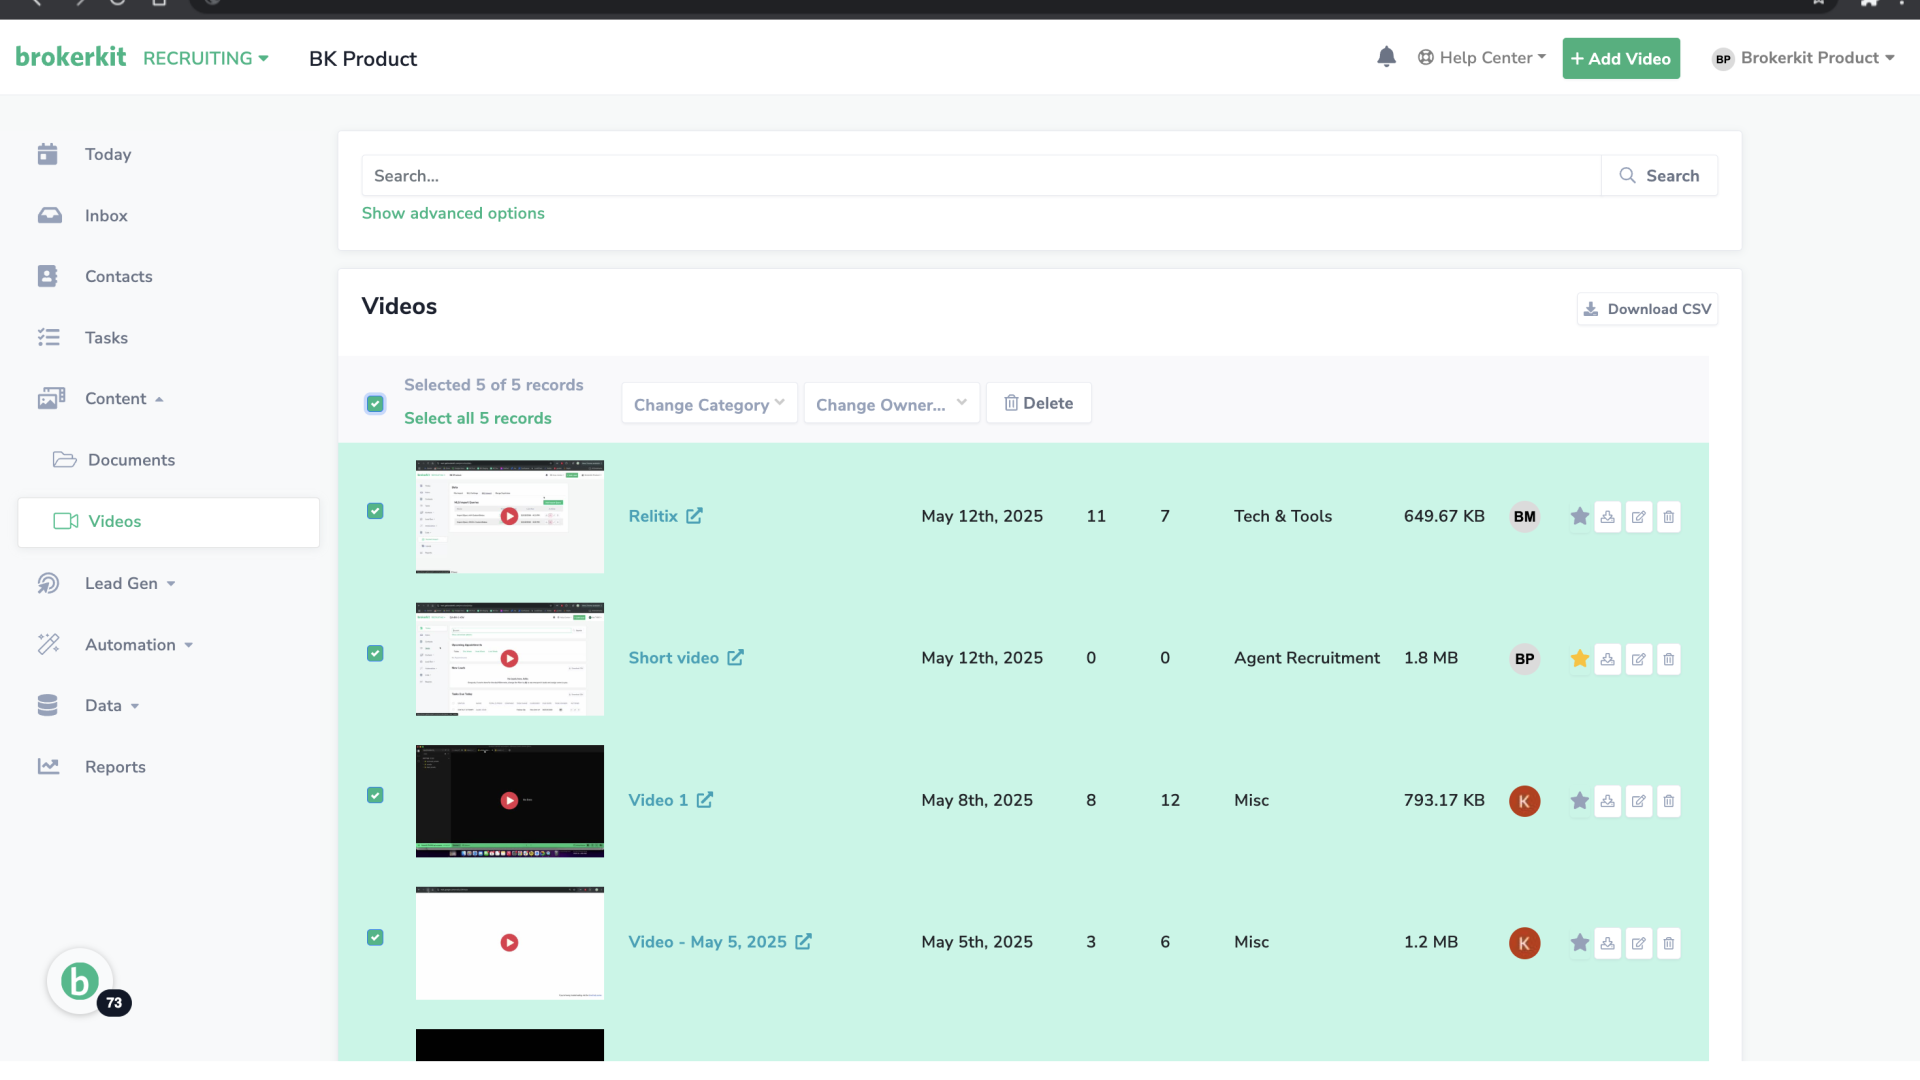
11. Choose the action
First, select the videos you want to work with. Then, choose the bulk action.
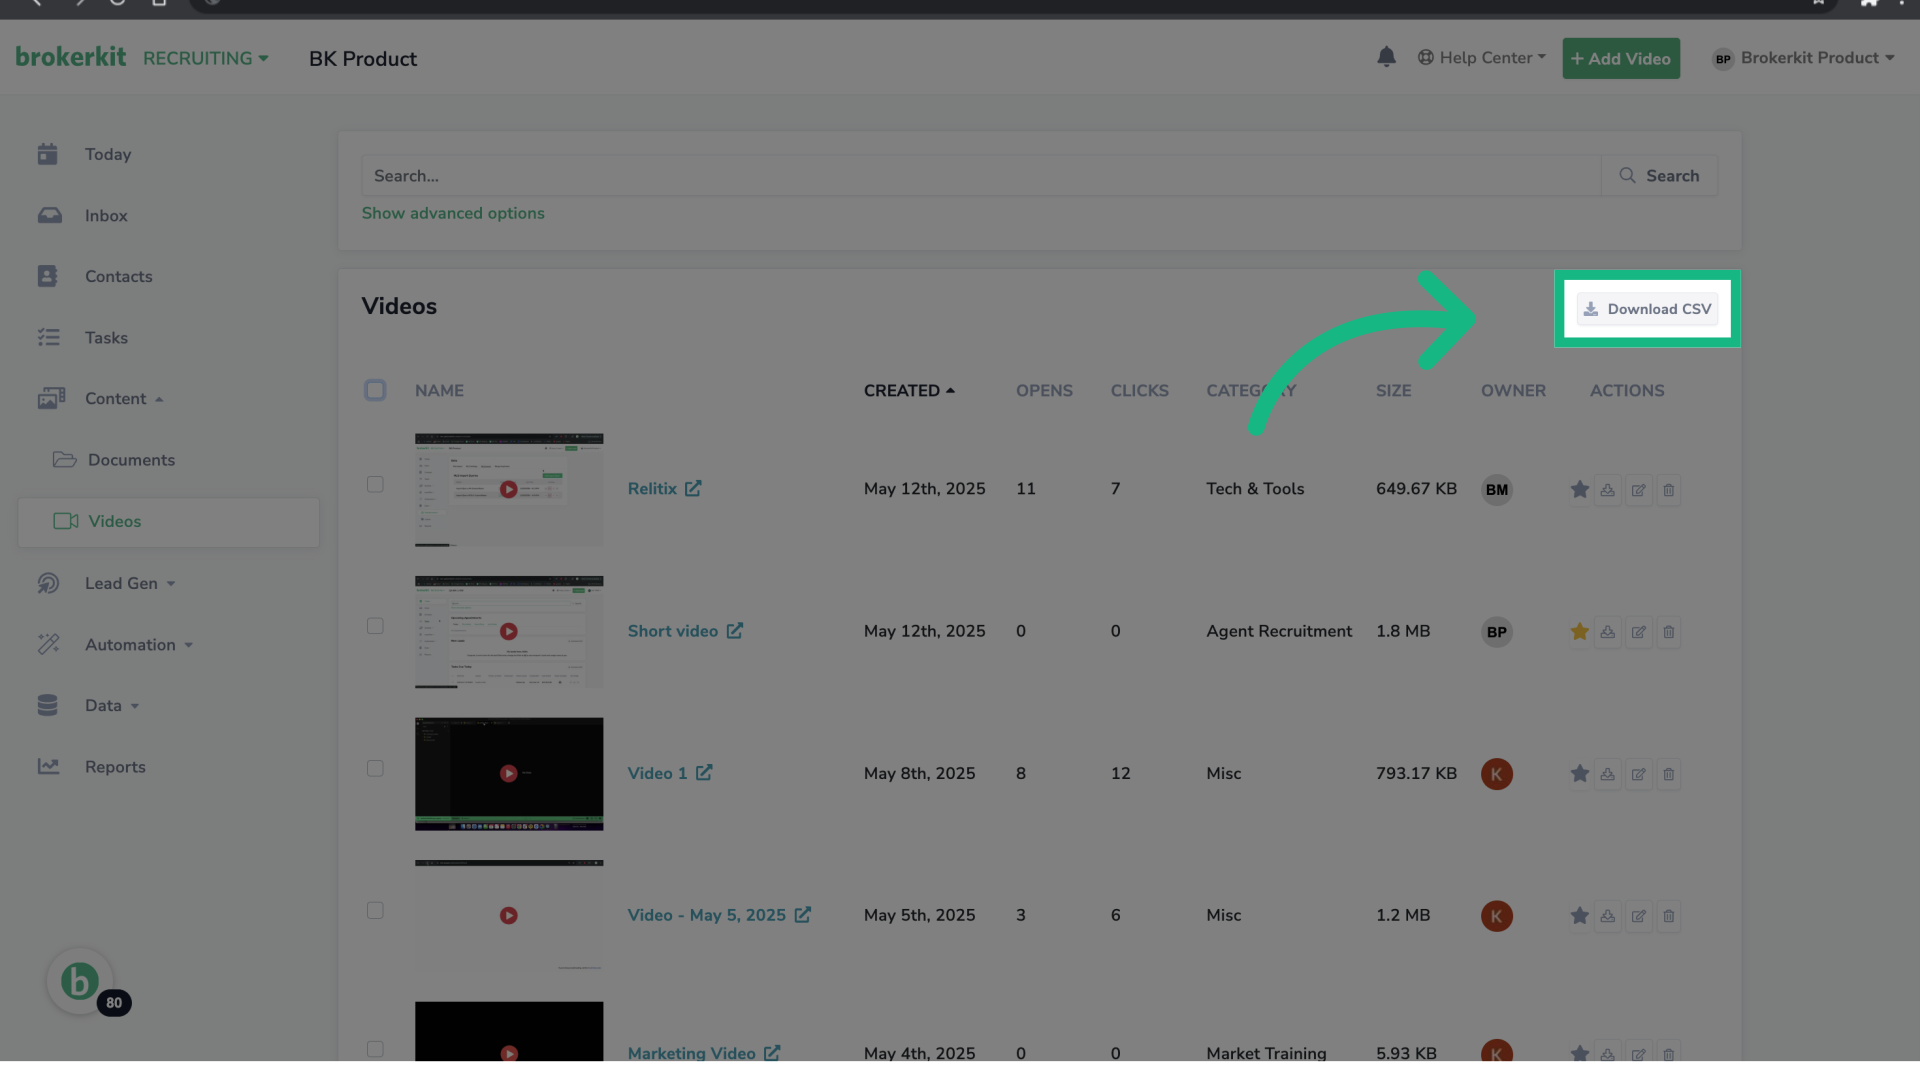
12. Click "Download CSV"
Finally, if you'd like to have your video info as a table, click Download CSV.
A CSV will be generated and sent to your email.
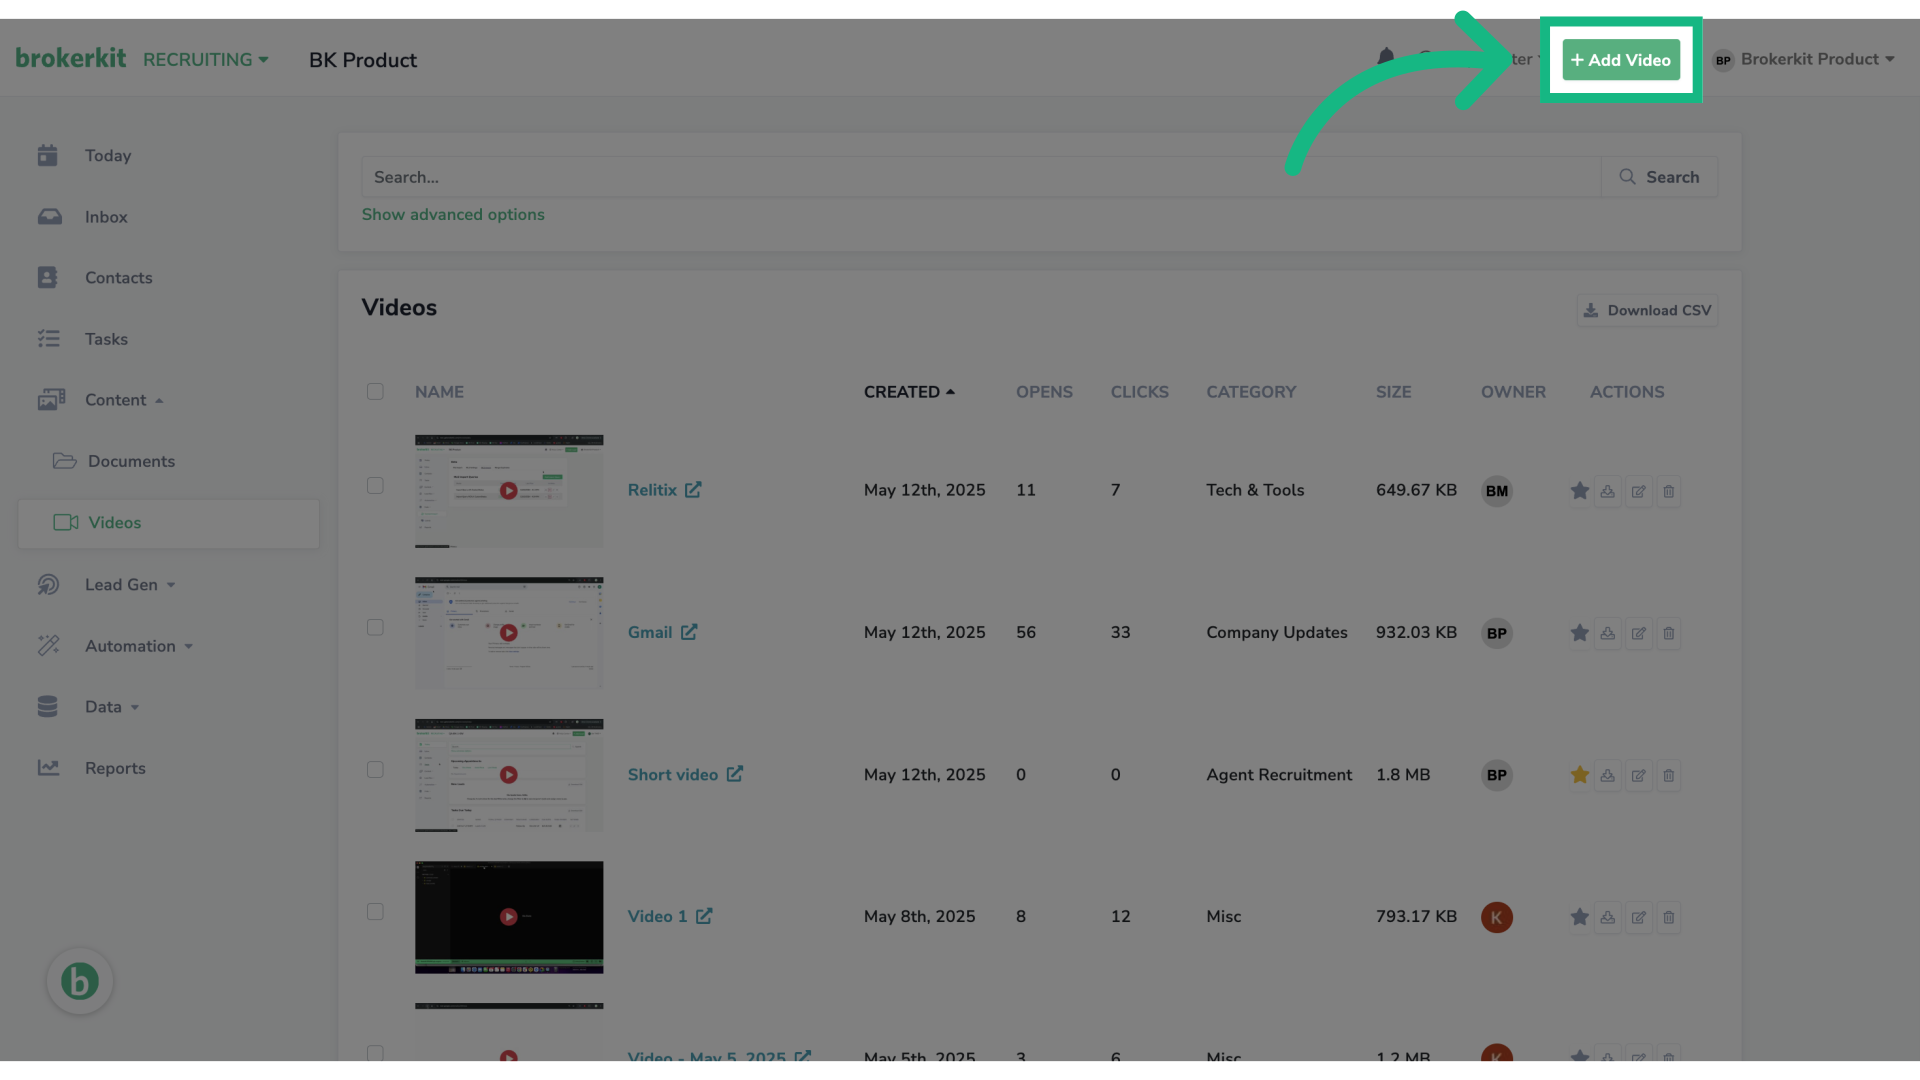
13. How to add or upload a new video?
Now, let's see how to add a new video. For more information, please go to this video ➡️
Learn How To Send Email/Texts with your Videos
14. Click "Add Video"
At the top of the page, click the button Add video.
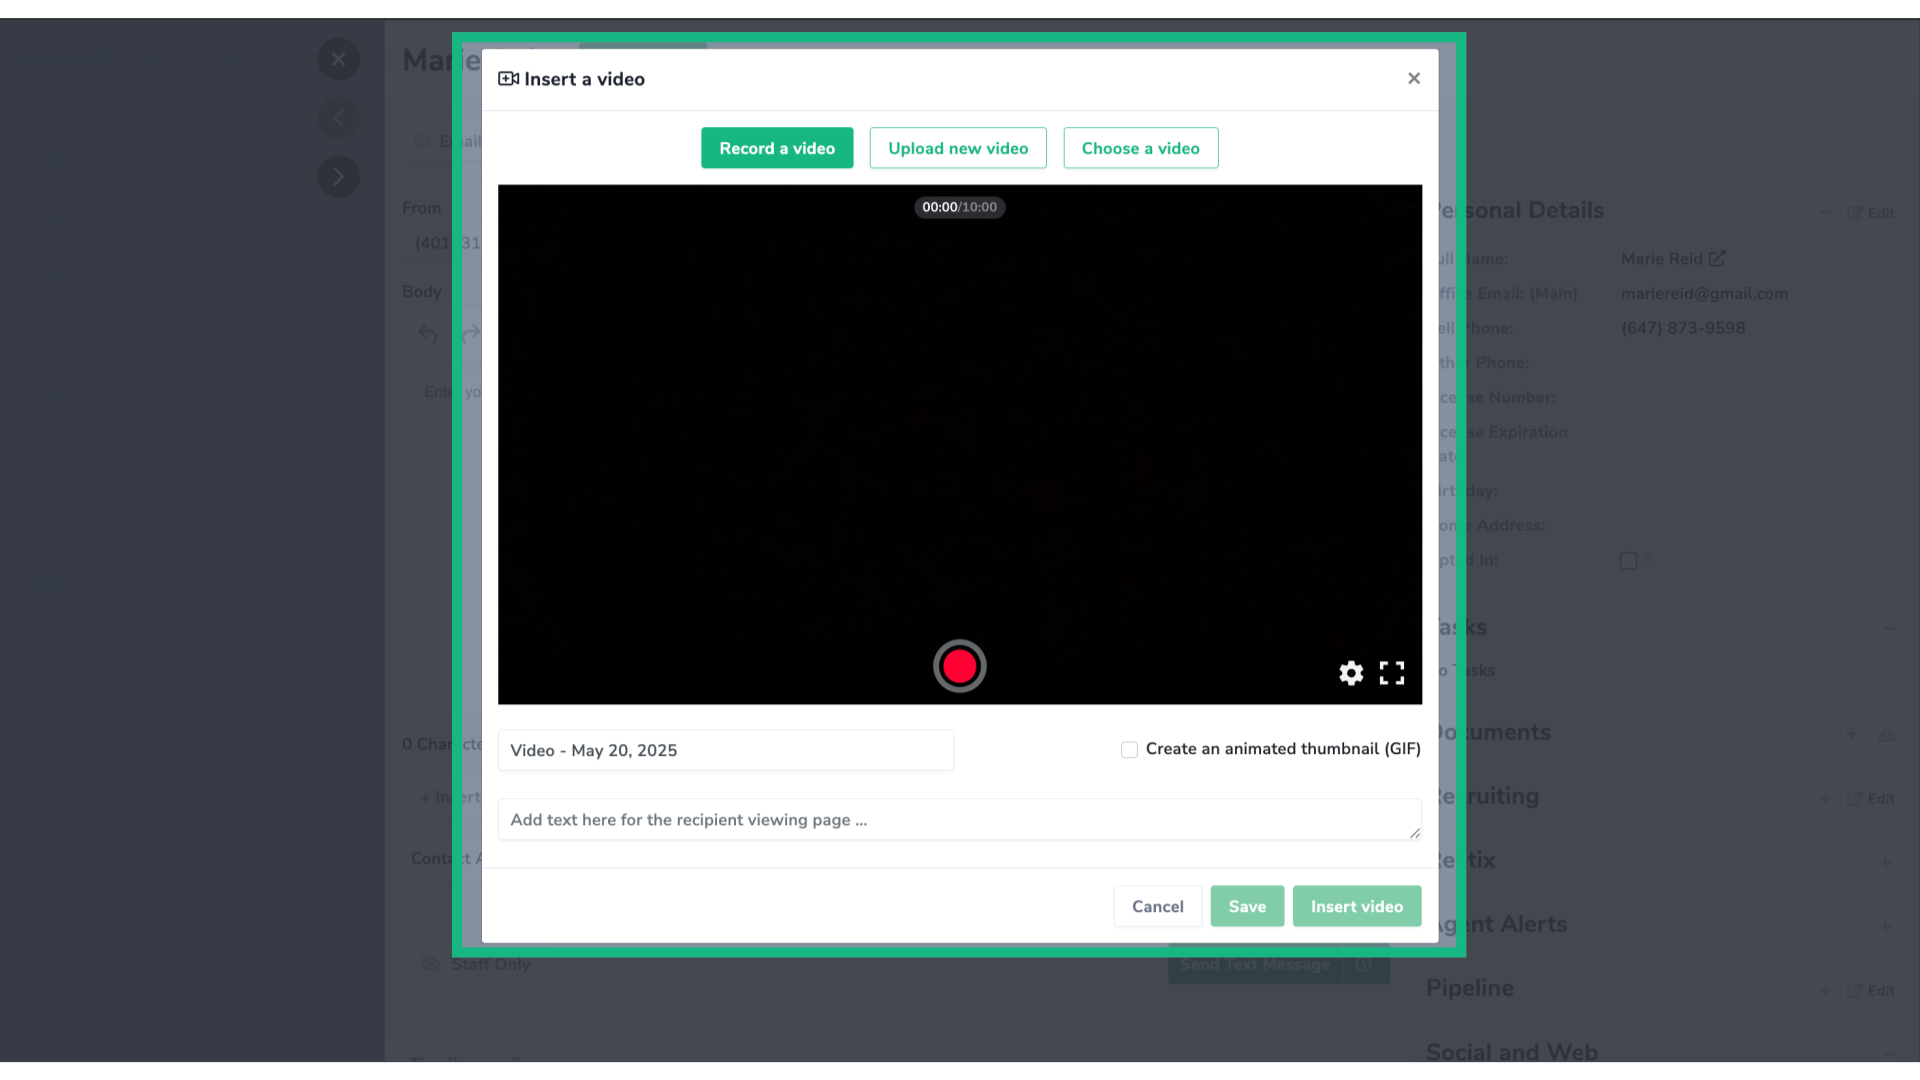
15. Record online video
If you want to record an online video, click the red button to start recording, then click it again to stop it.
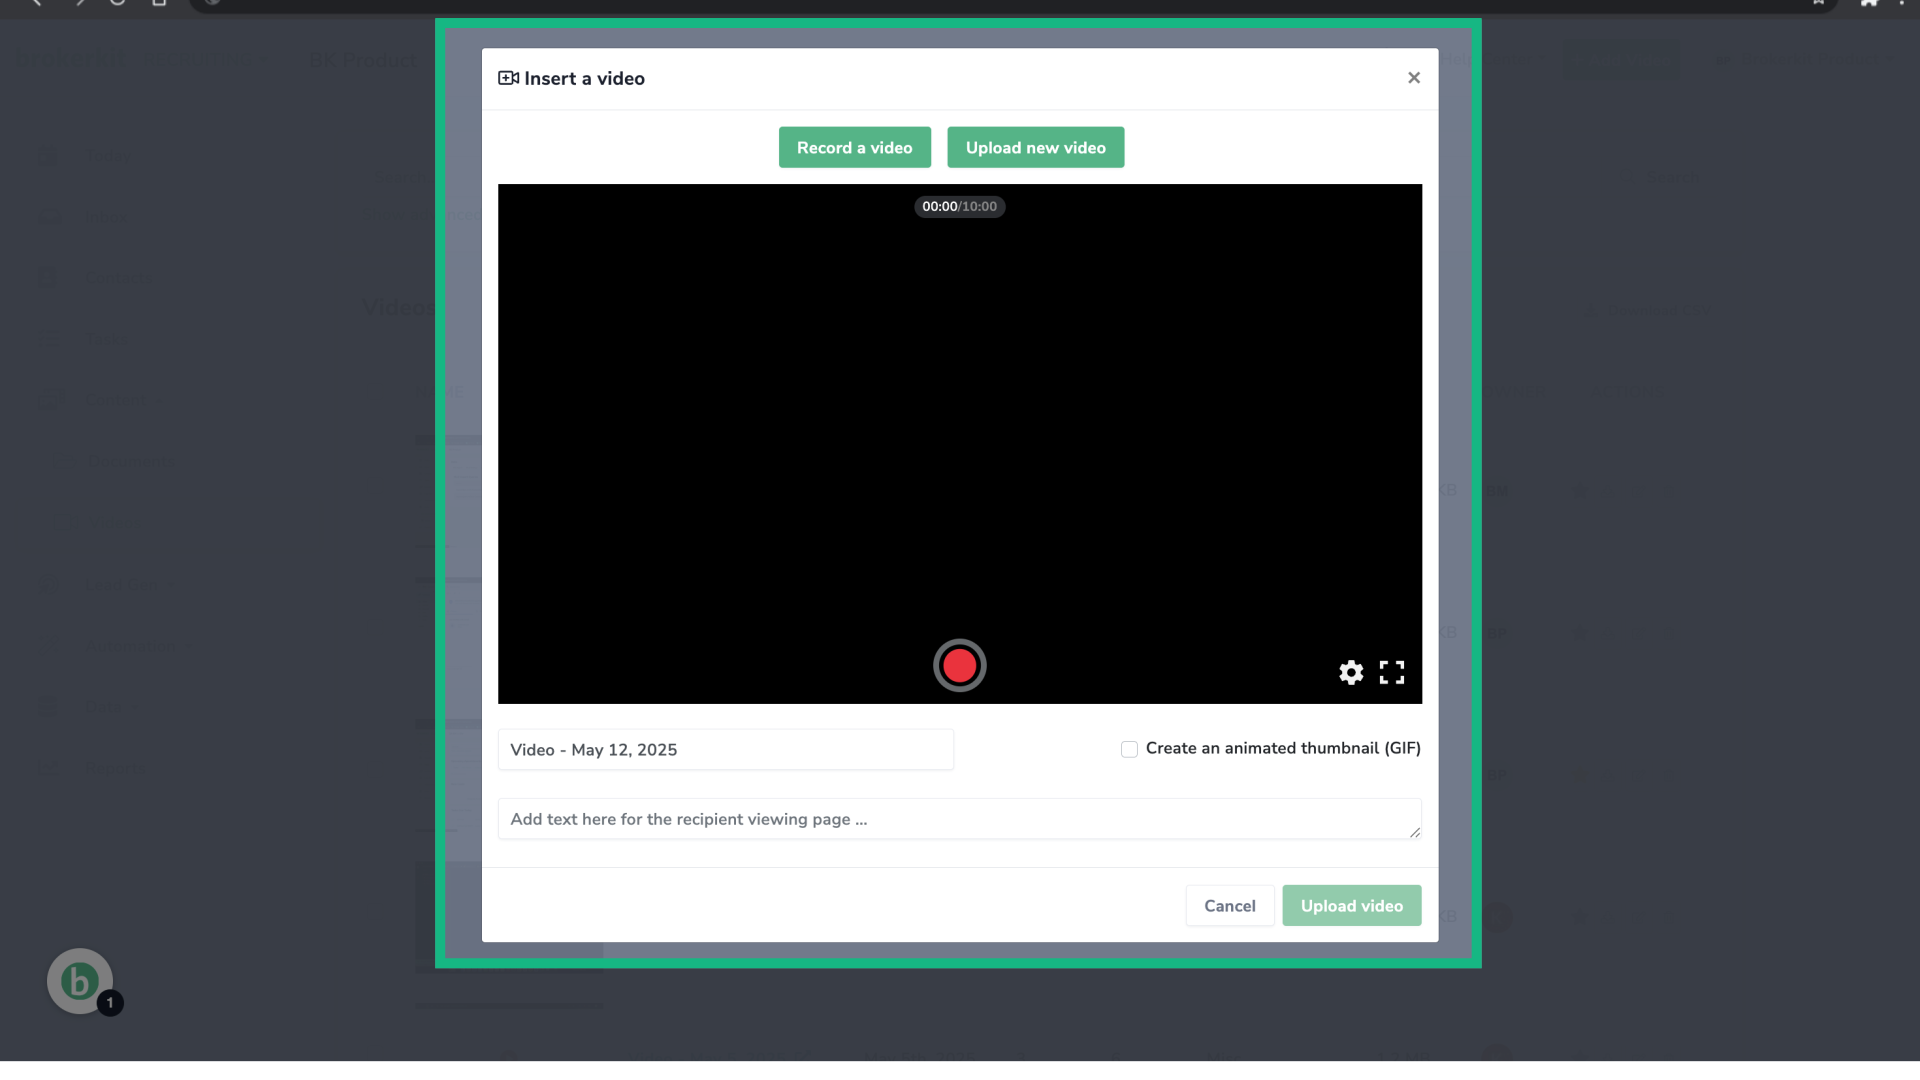
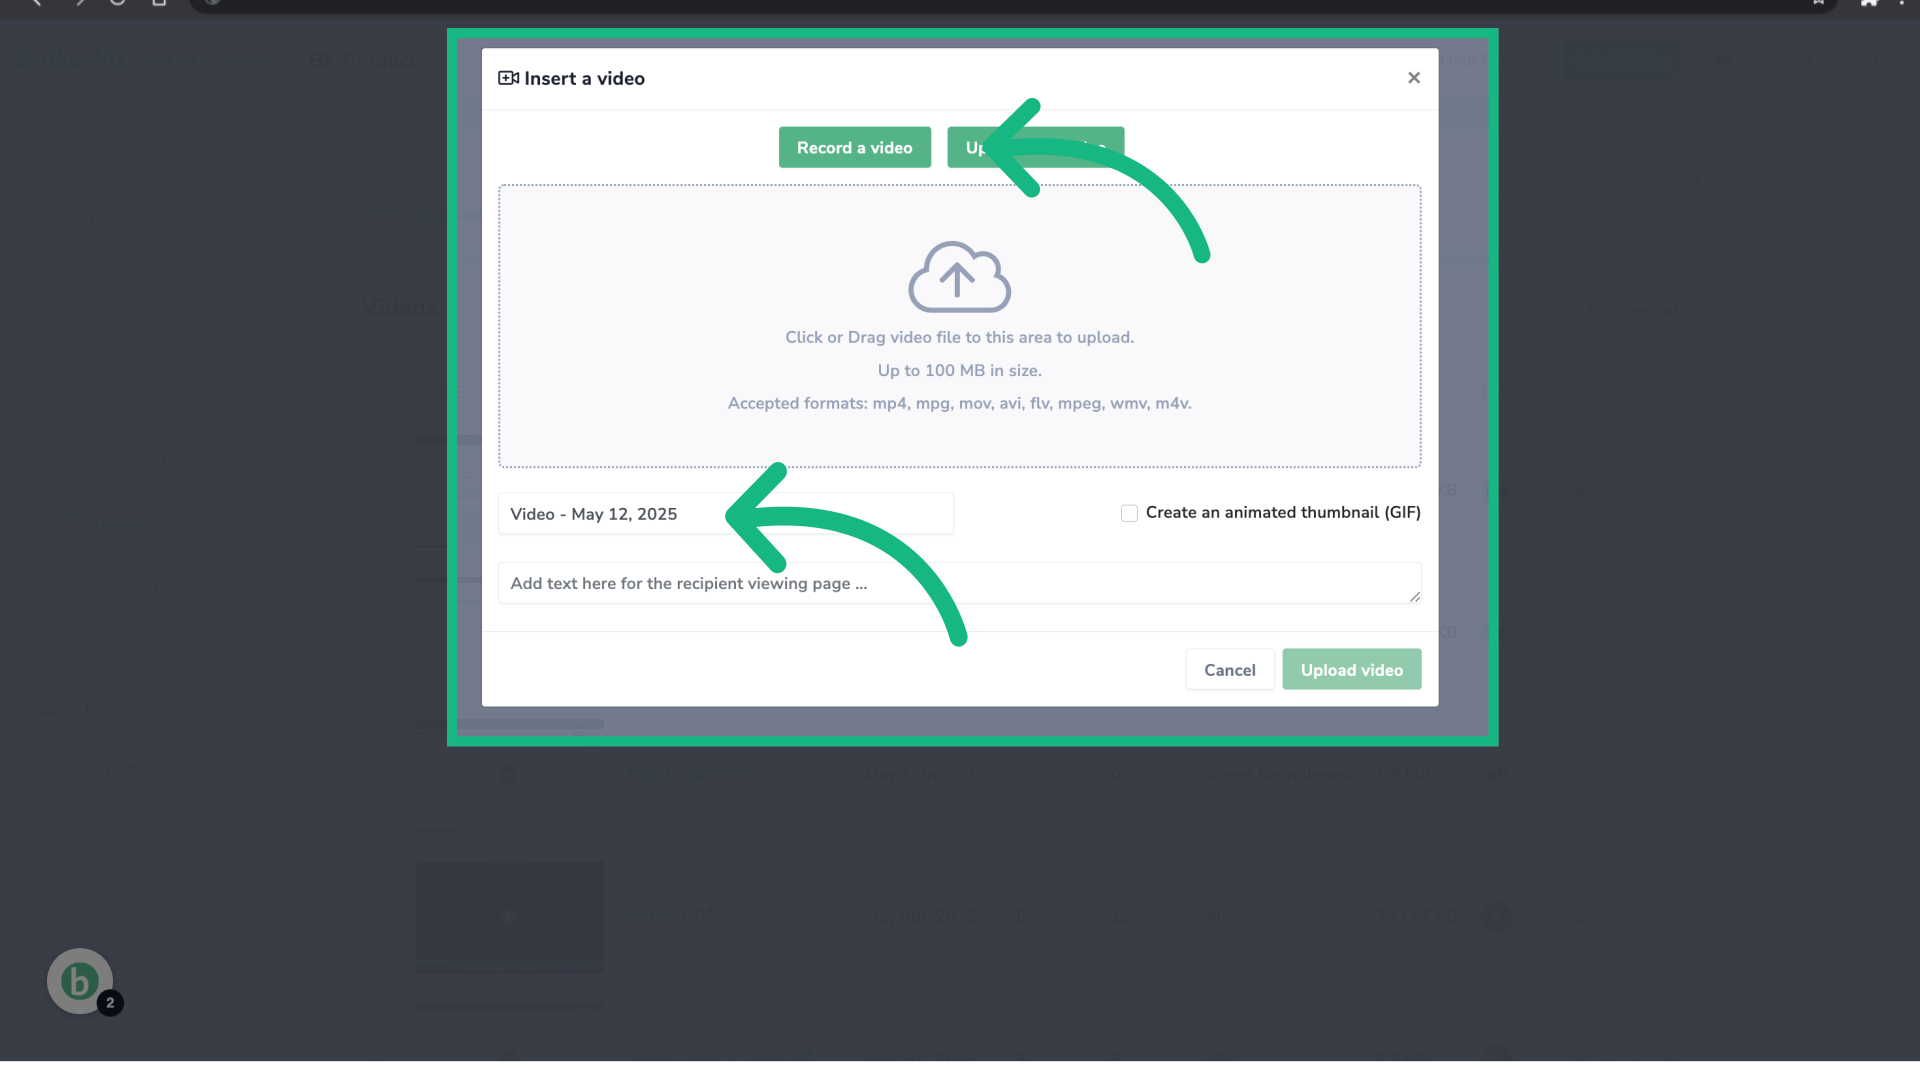
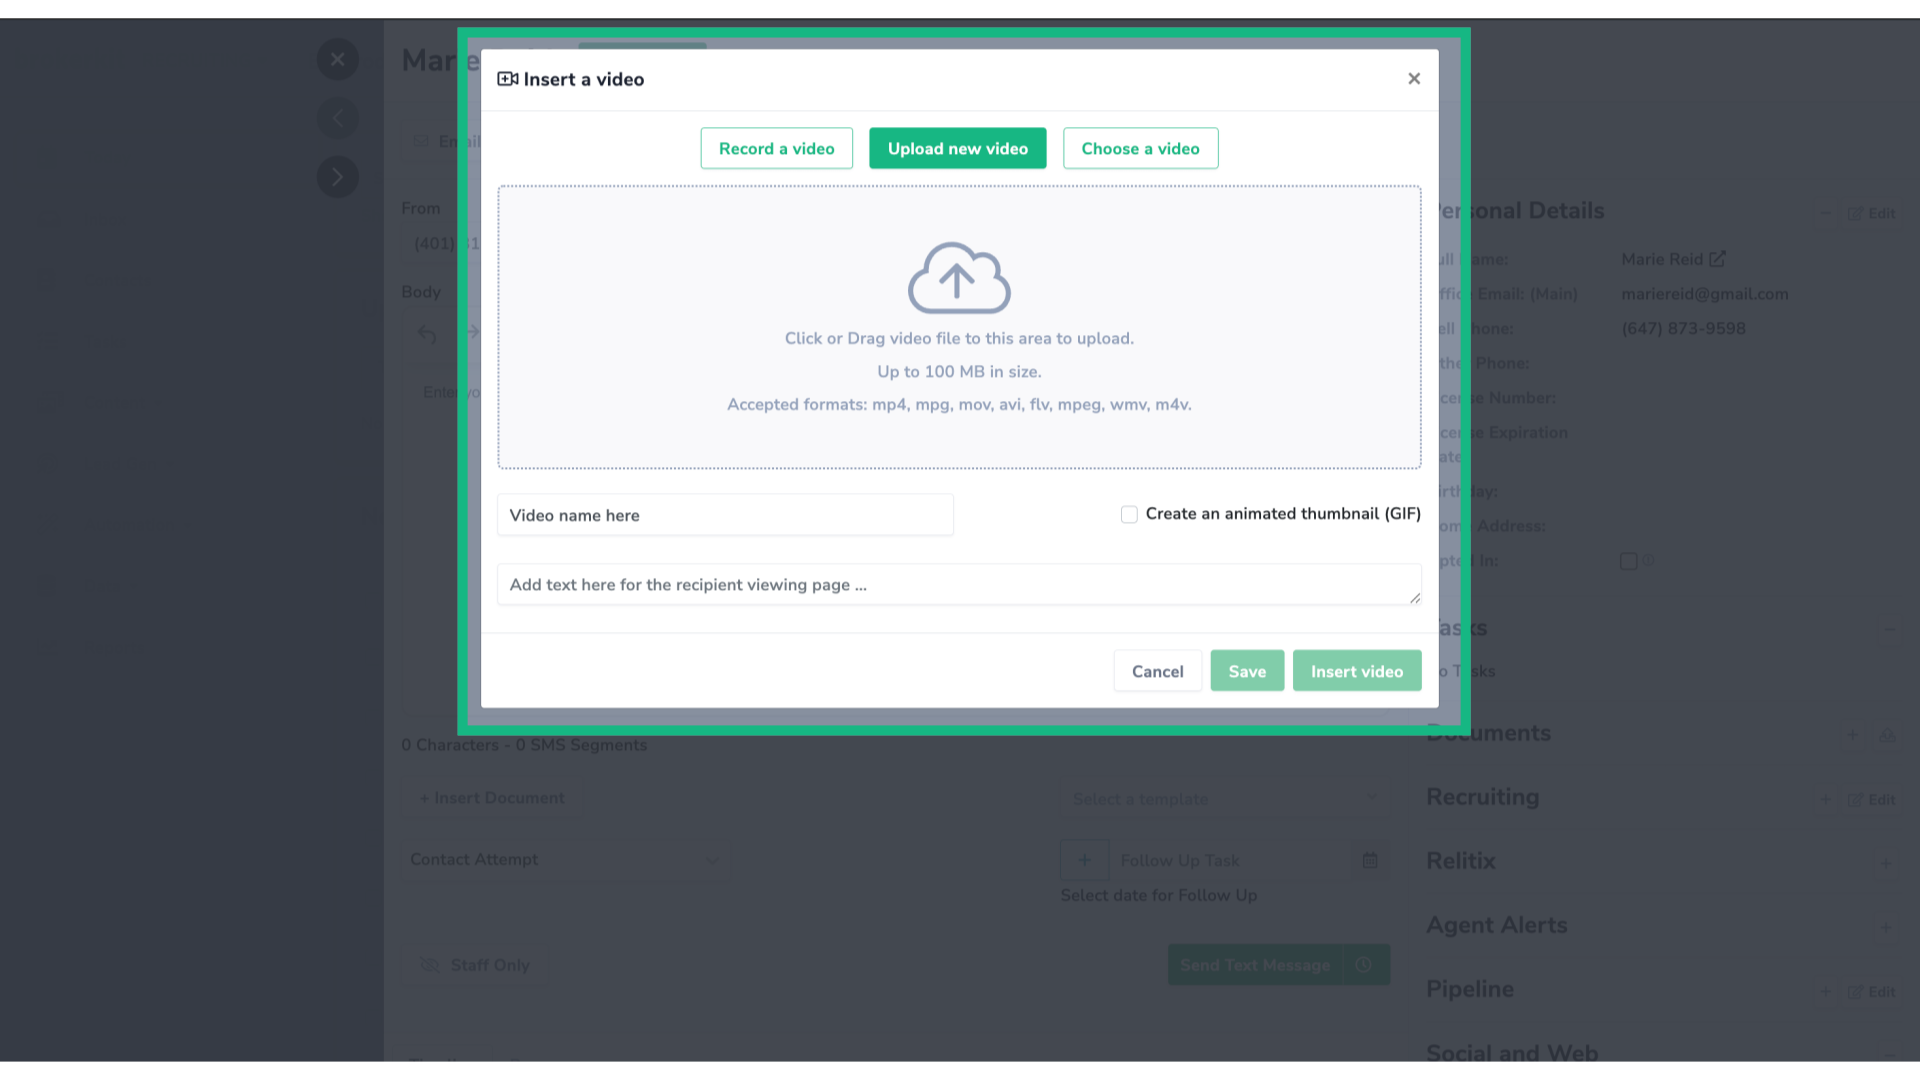
16. Upload a video
If you want to upload a video, select it from your computer, it has to be in the format supported and under 100 MB.
Add a video name and then hit the Upload video button.
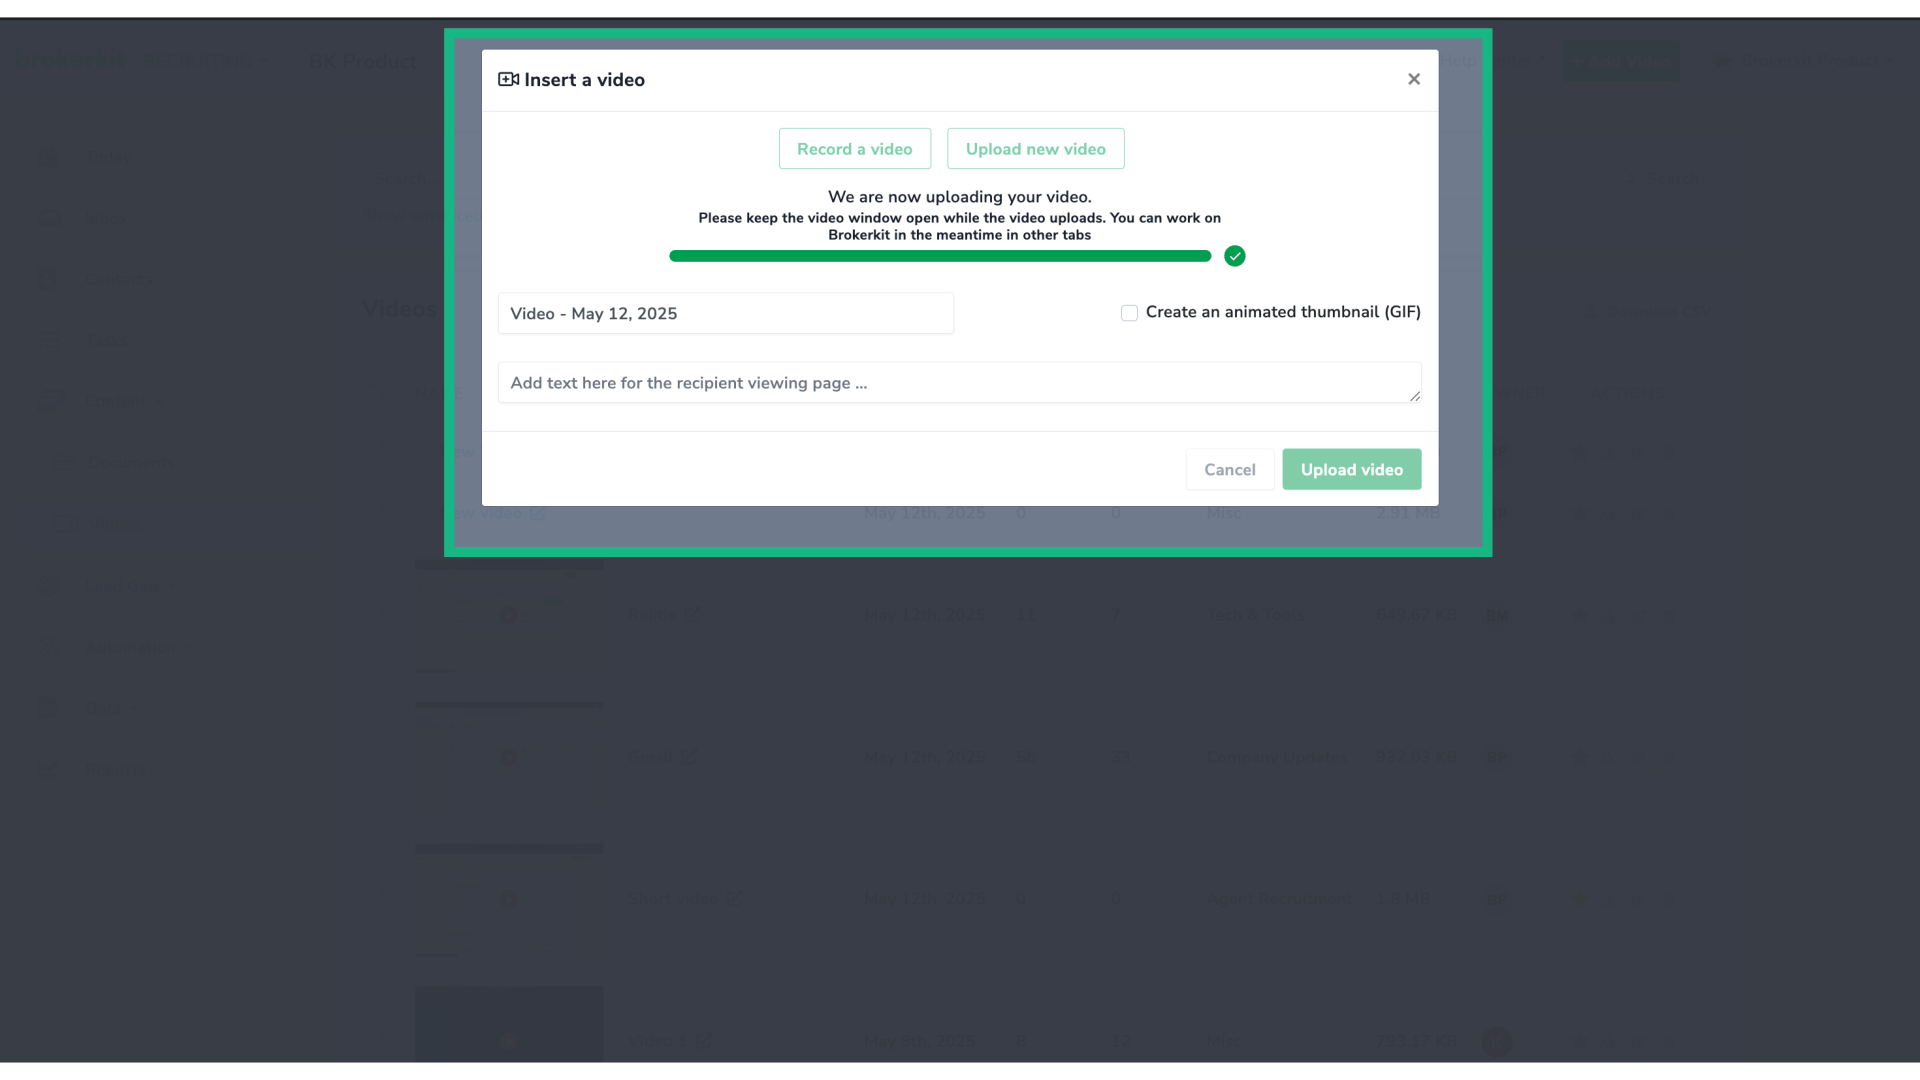
17. Wait for the upload
Wait for the video to get uploaded to your library, once you see the green check, it means it was successfully uploaded.
18. How to navigate the new Video Page using advanced filters?
Now, let's talk about filters.
19. Search by video name
To quickly find a video, use the search bar to look it up by name.

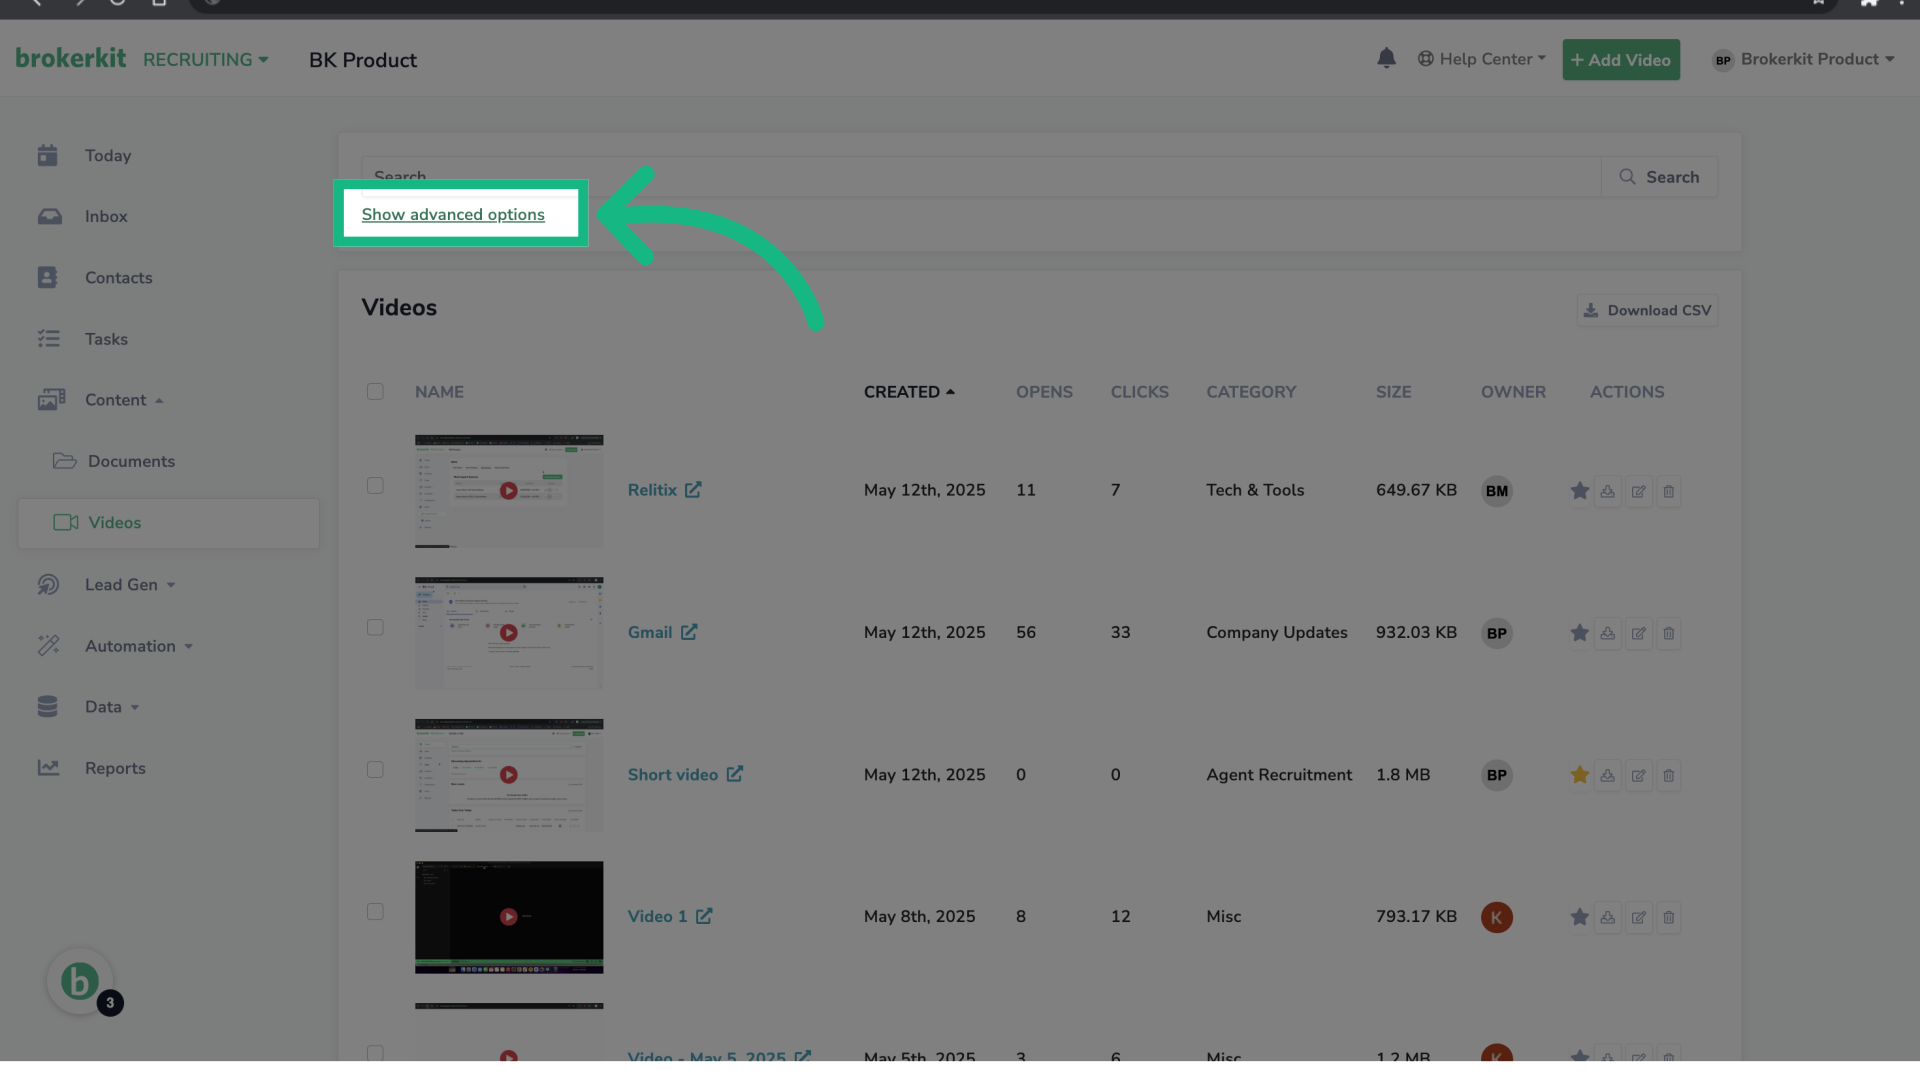
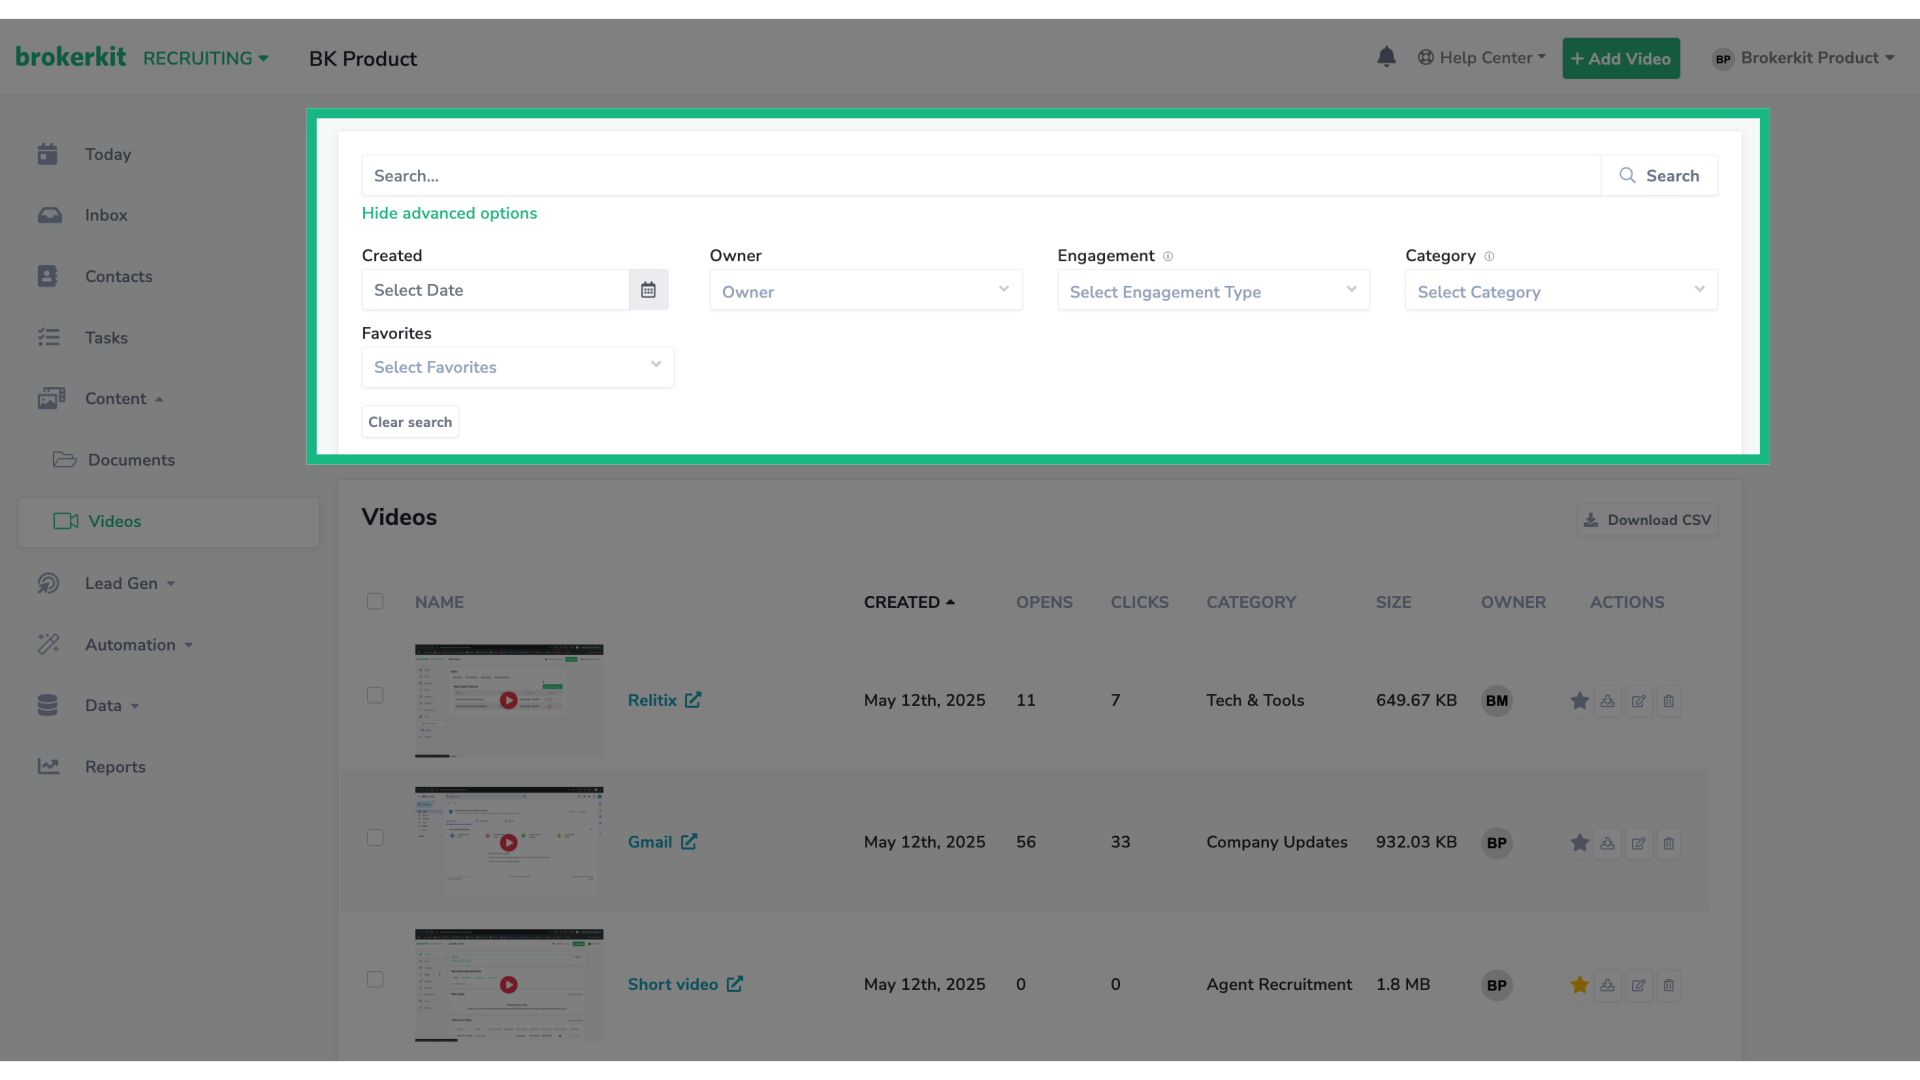
20. Click "Show advanced options"
For a more specific search, click on Show Advanced Options to reveal additional options to filter your videos.
21. Filter options
You can filter by Created Date, Video Owner, Engagement, Category, or Favorite status.
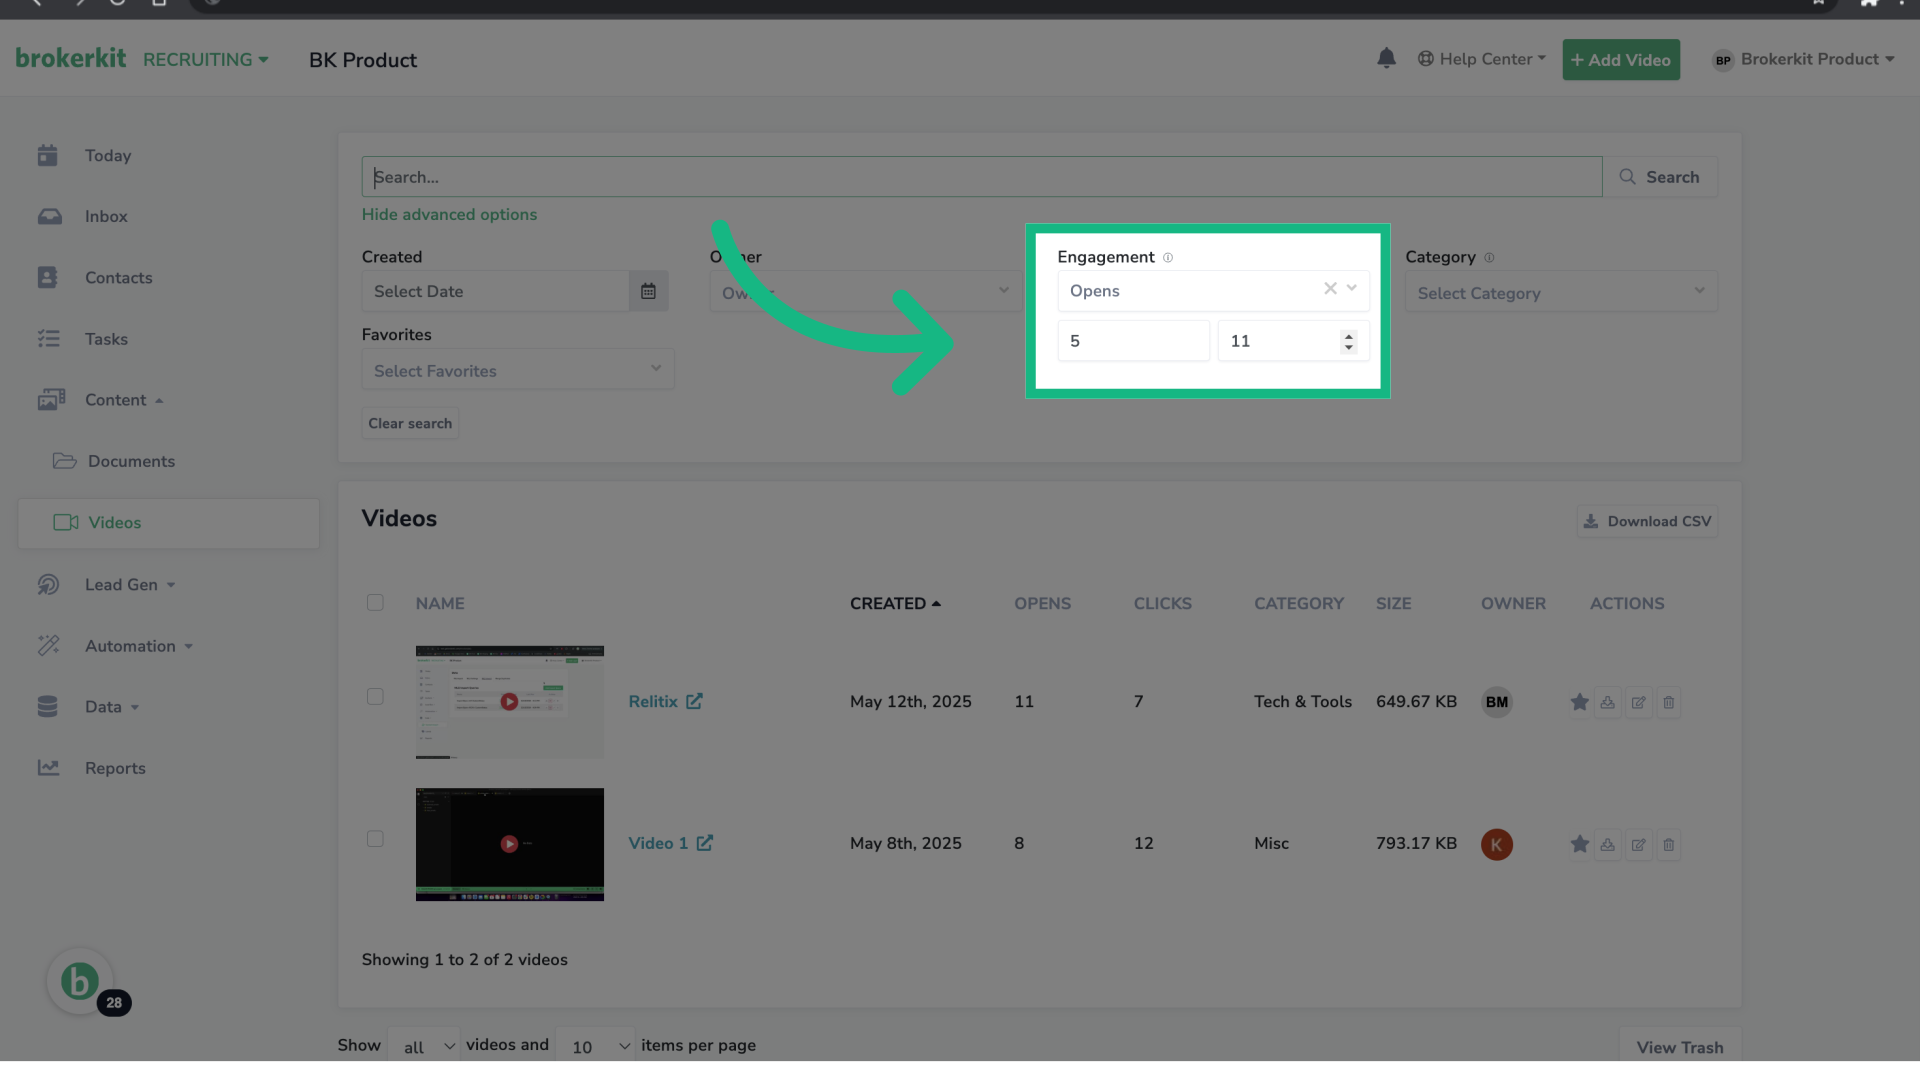
22. Filter by Engagement
For example, you can filter videos that have had between 5 and 11 opens.
23. Filter by Favorites
Or you can filter only favorite videos.

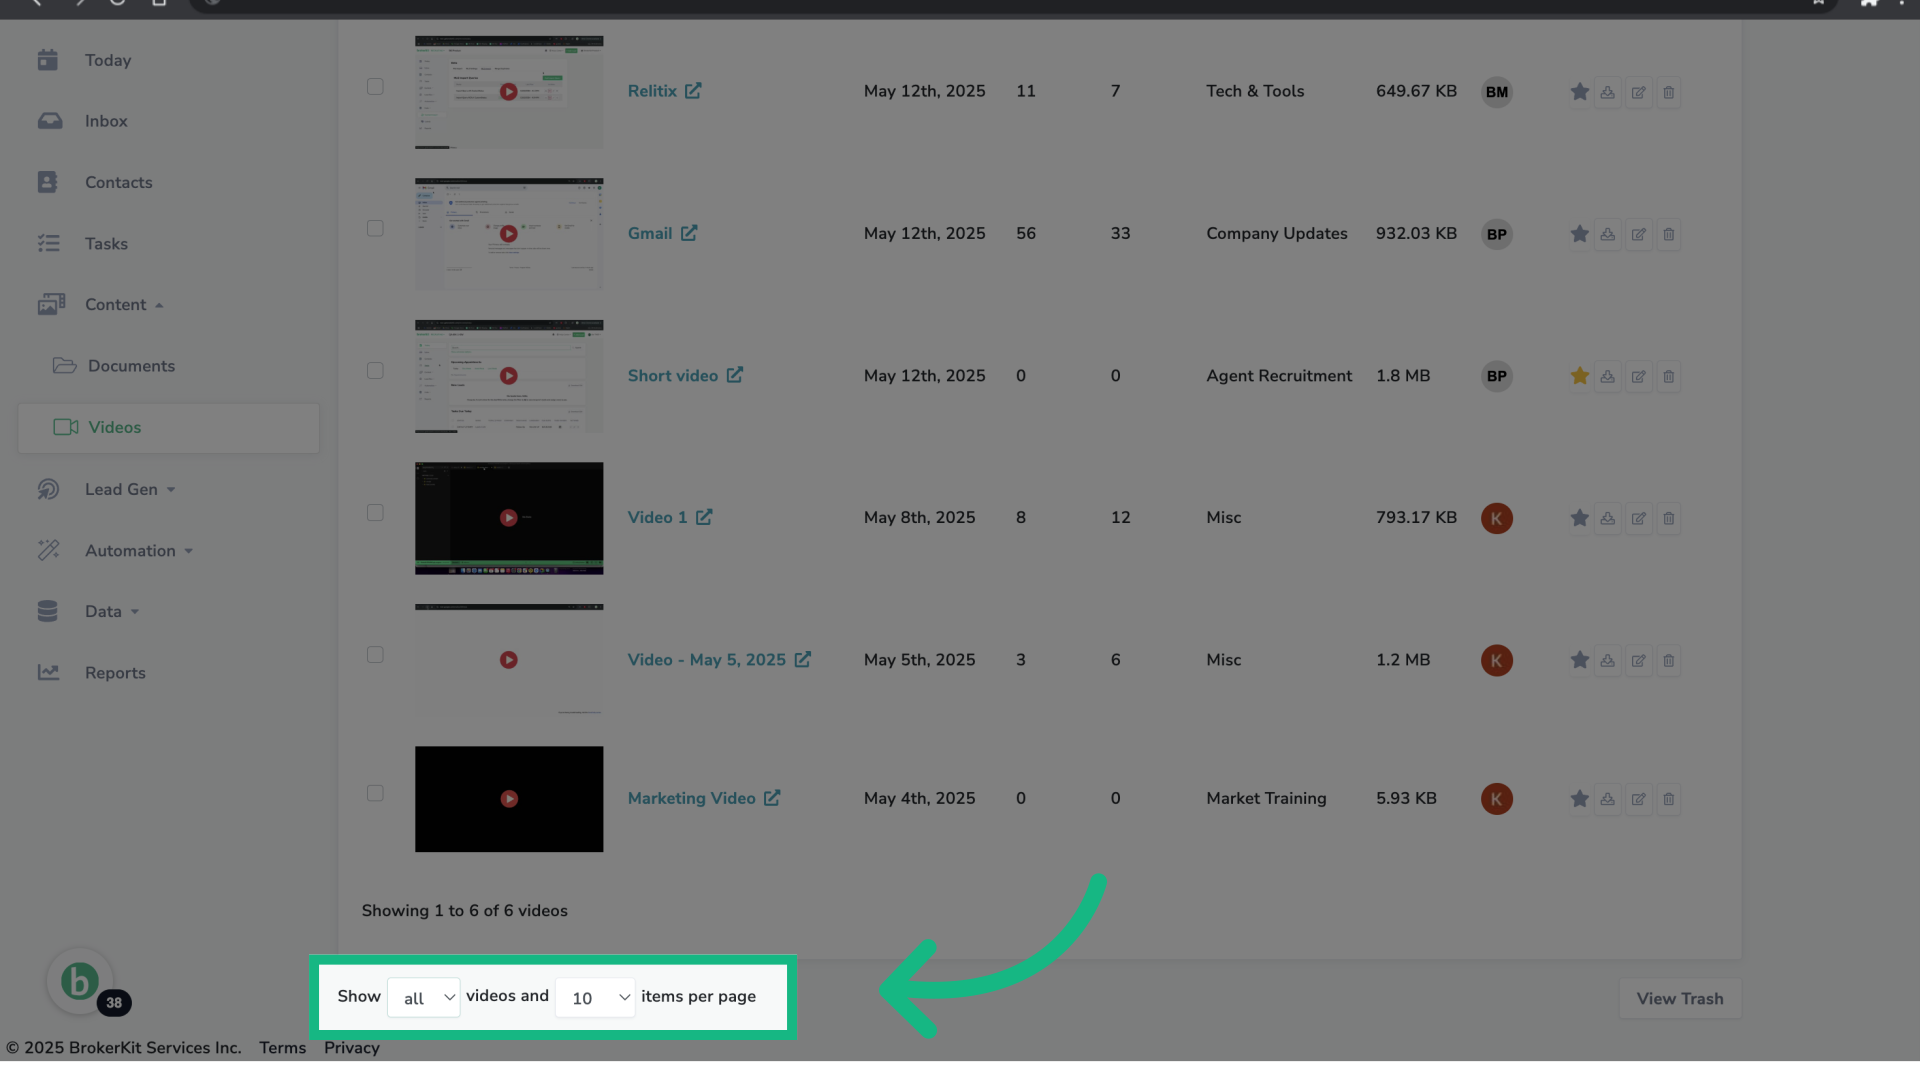
24. Generic filter
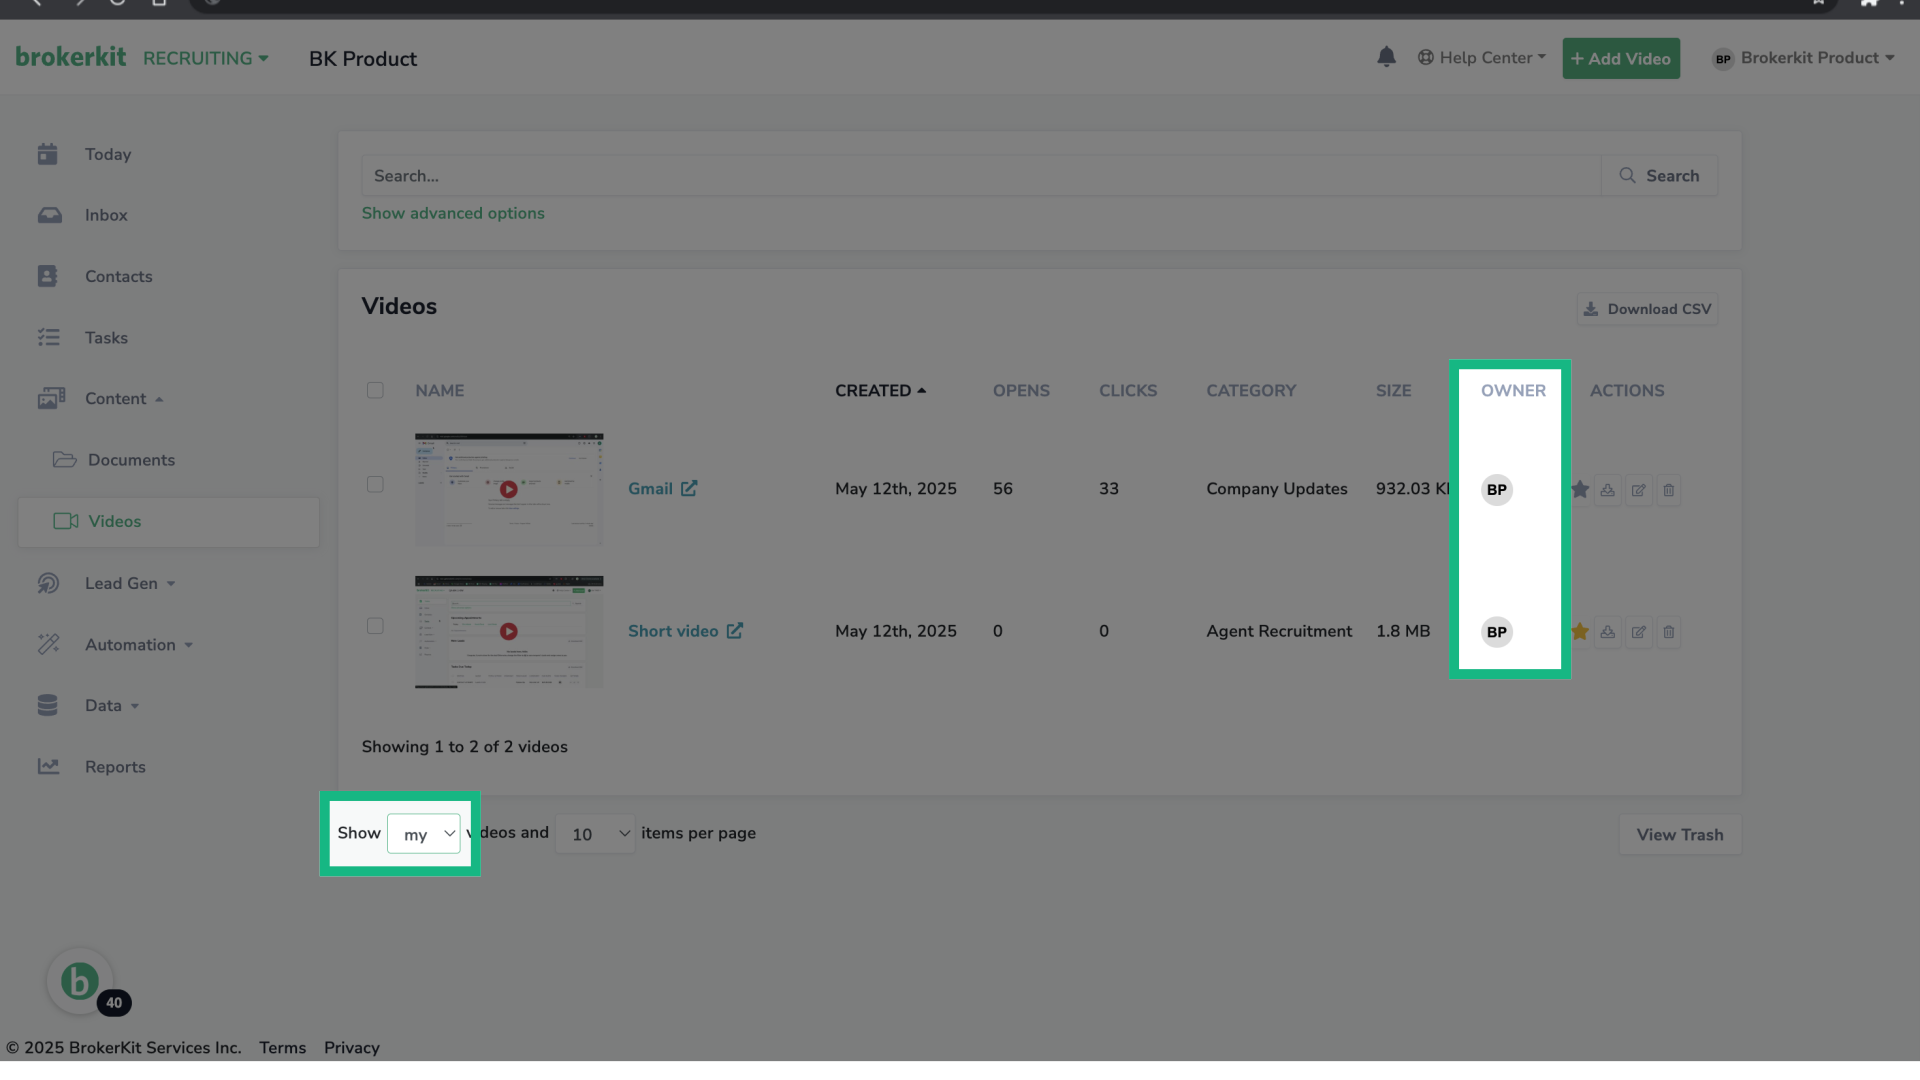
At the bottom of the page, you'll find a filter that lets you choose between viewing all videos or only your videos.
25. Example: Only show my videos
For example, if you set it as Show my videos, only the videos where you are the owner will be shown.
26. How to access the Trash Page?
Now, let's take a look at the Trash Page.
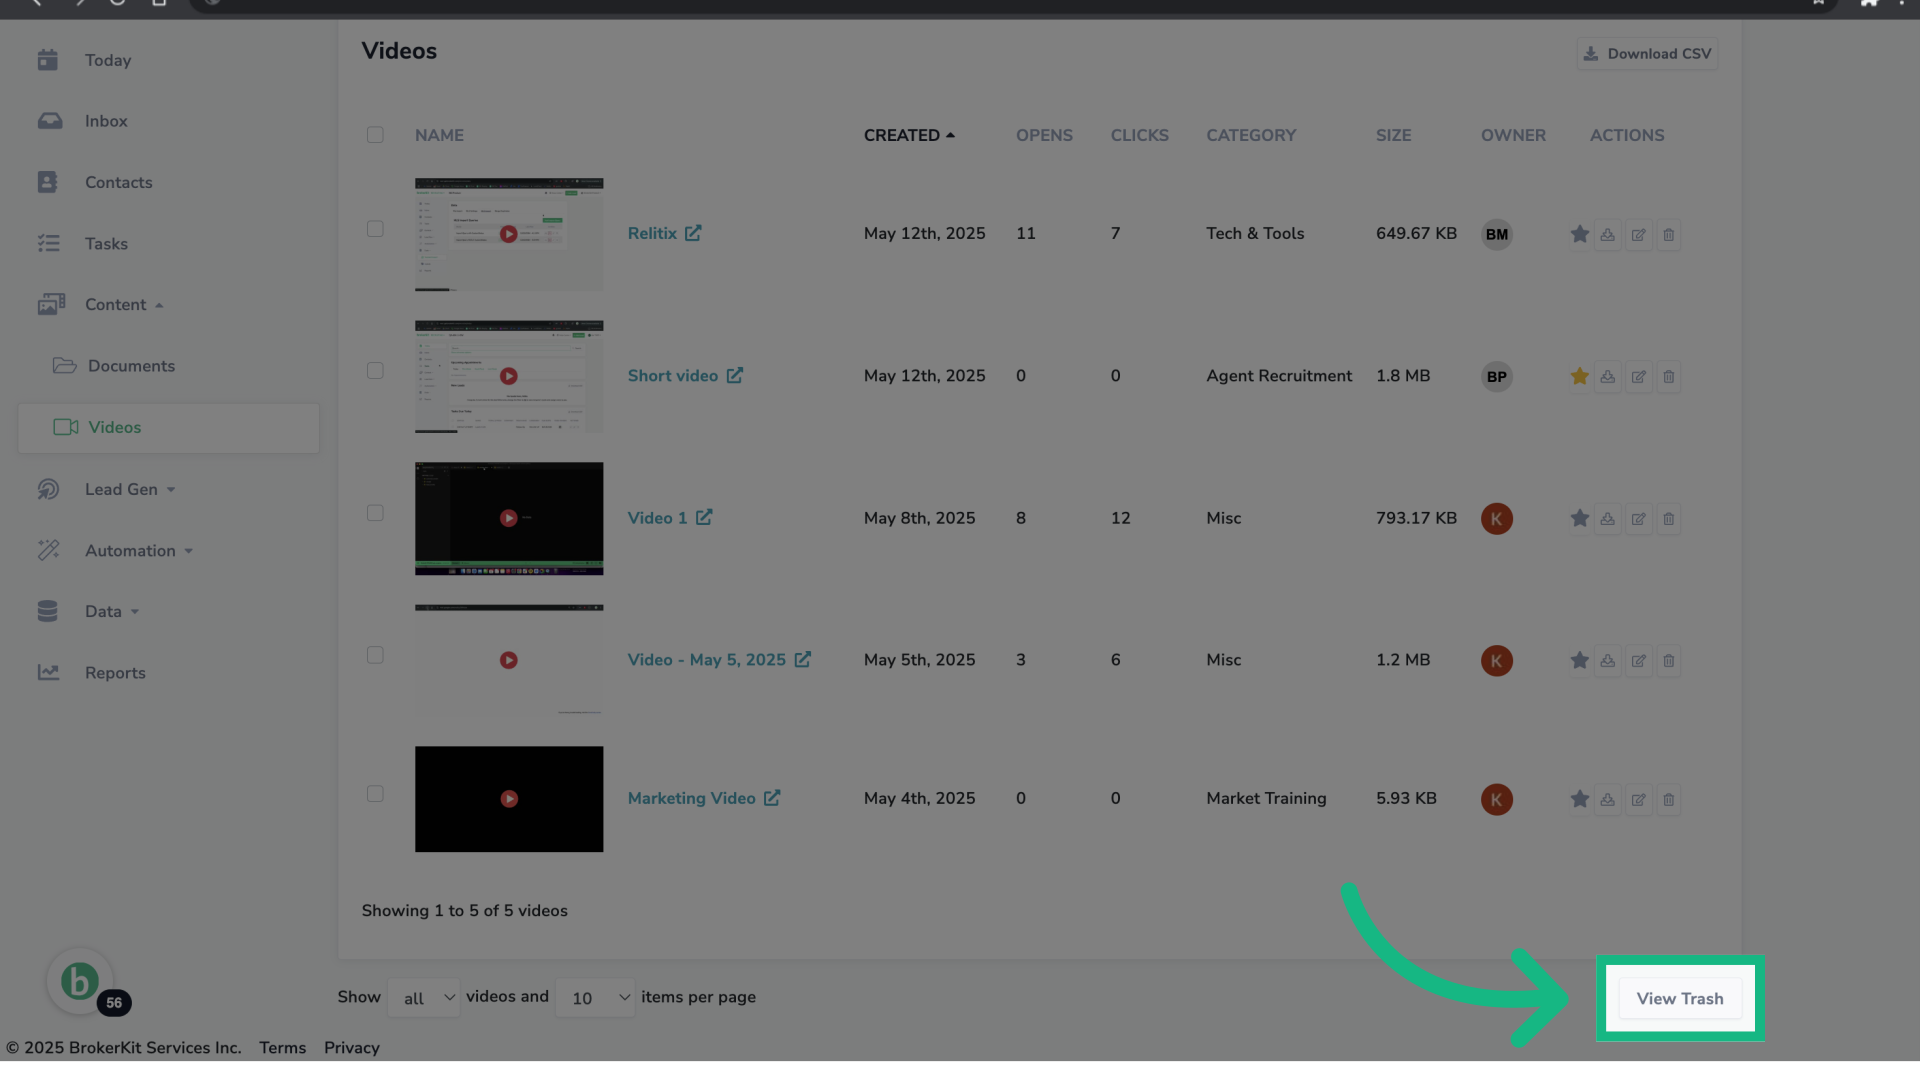
27. Click "View Trash"
Access the Trash page by clicking the button View Trash that is located at the bottom of the page.
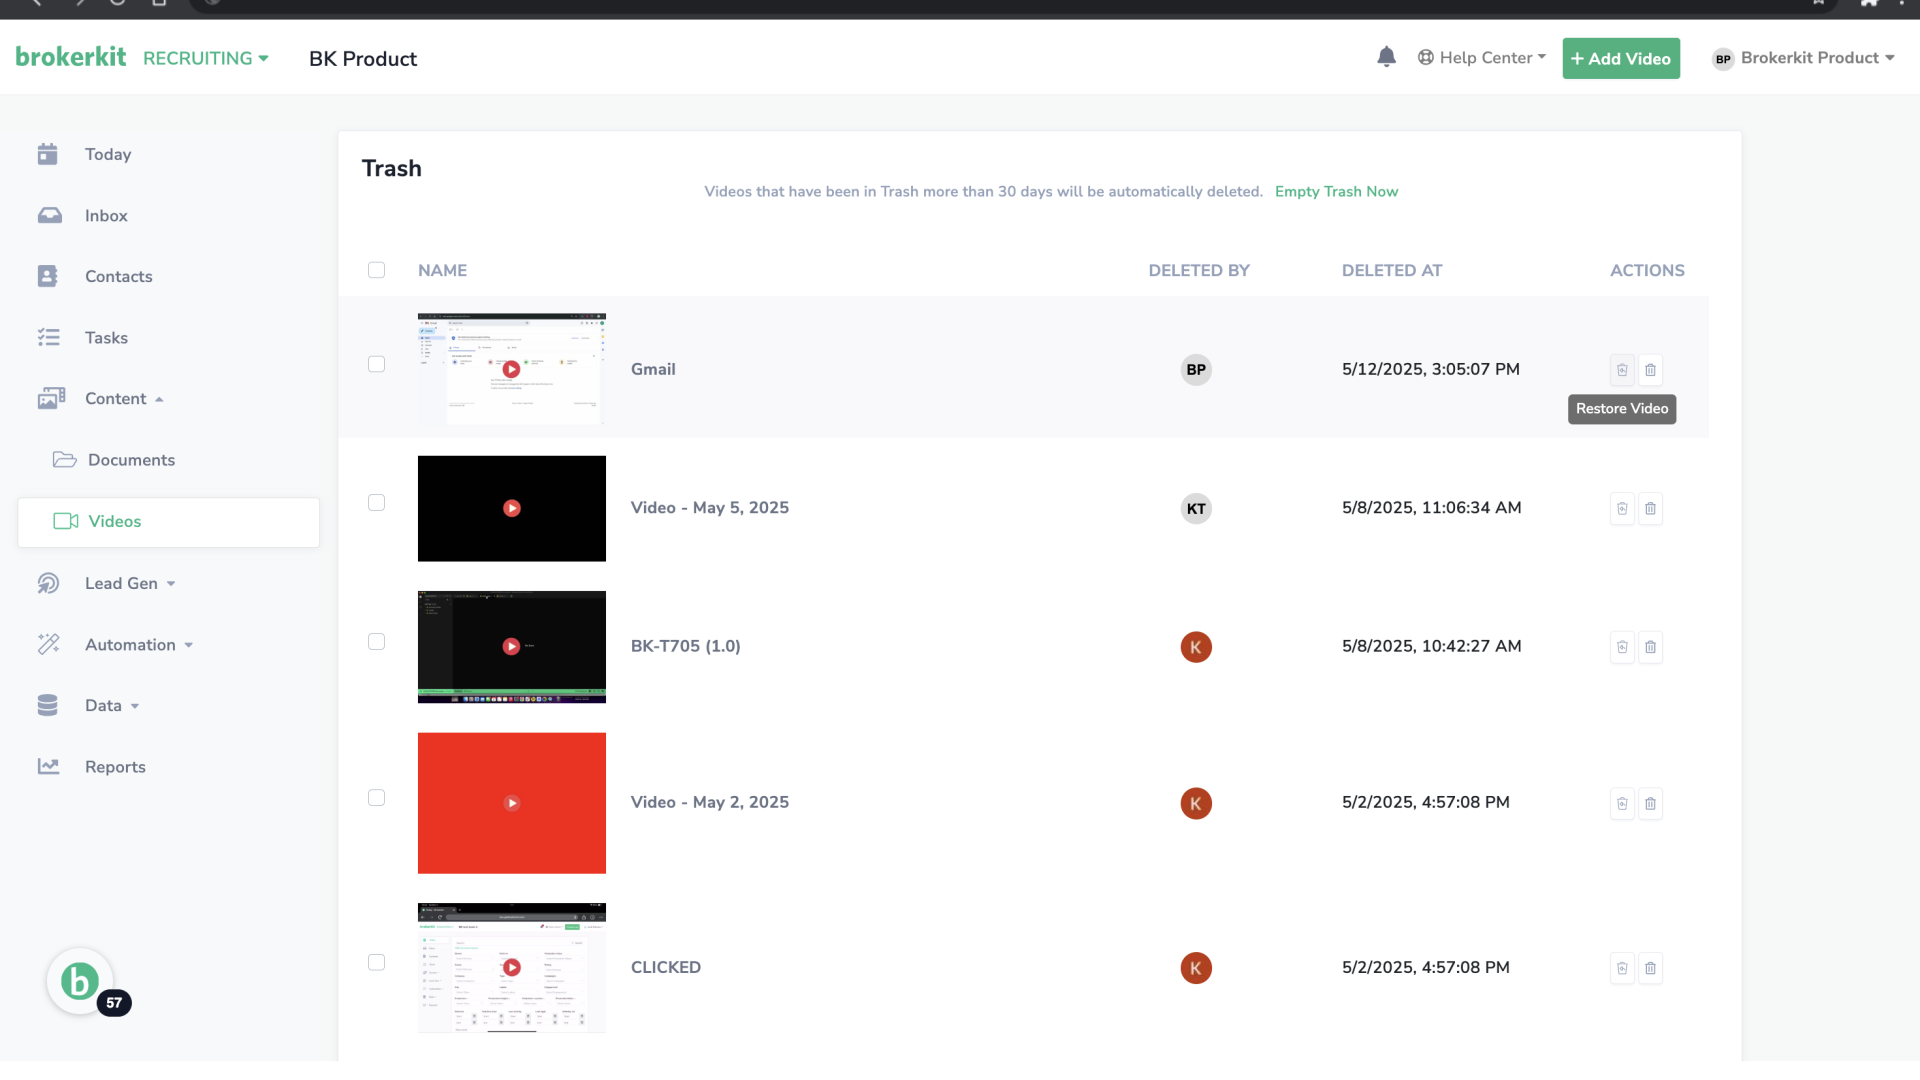
28. Trash Page
The Trash page will show the videos that were deleted from the Video Library. They remain here for 30 days before being permanently deleted.
Here, you will be able to see who deleted the video, when it was deleted, and perform 2 actions: restore or permanent delete the video.
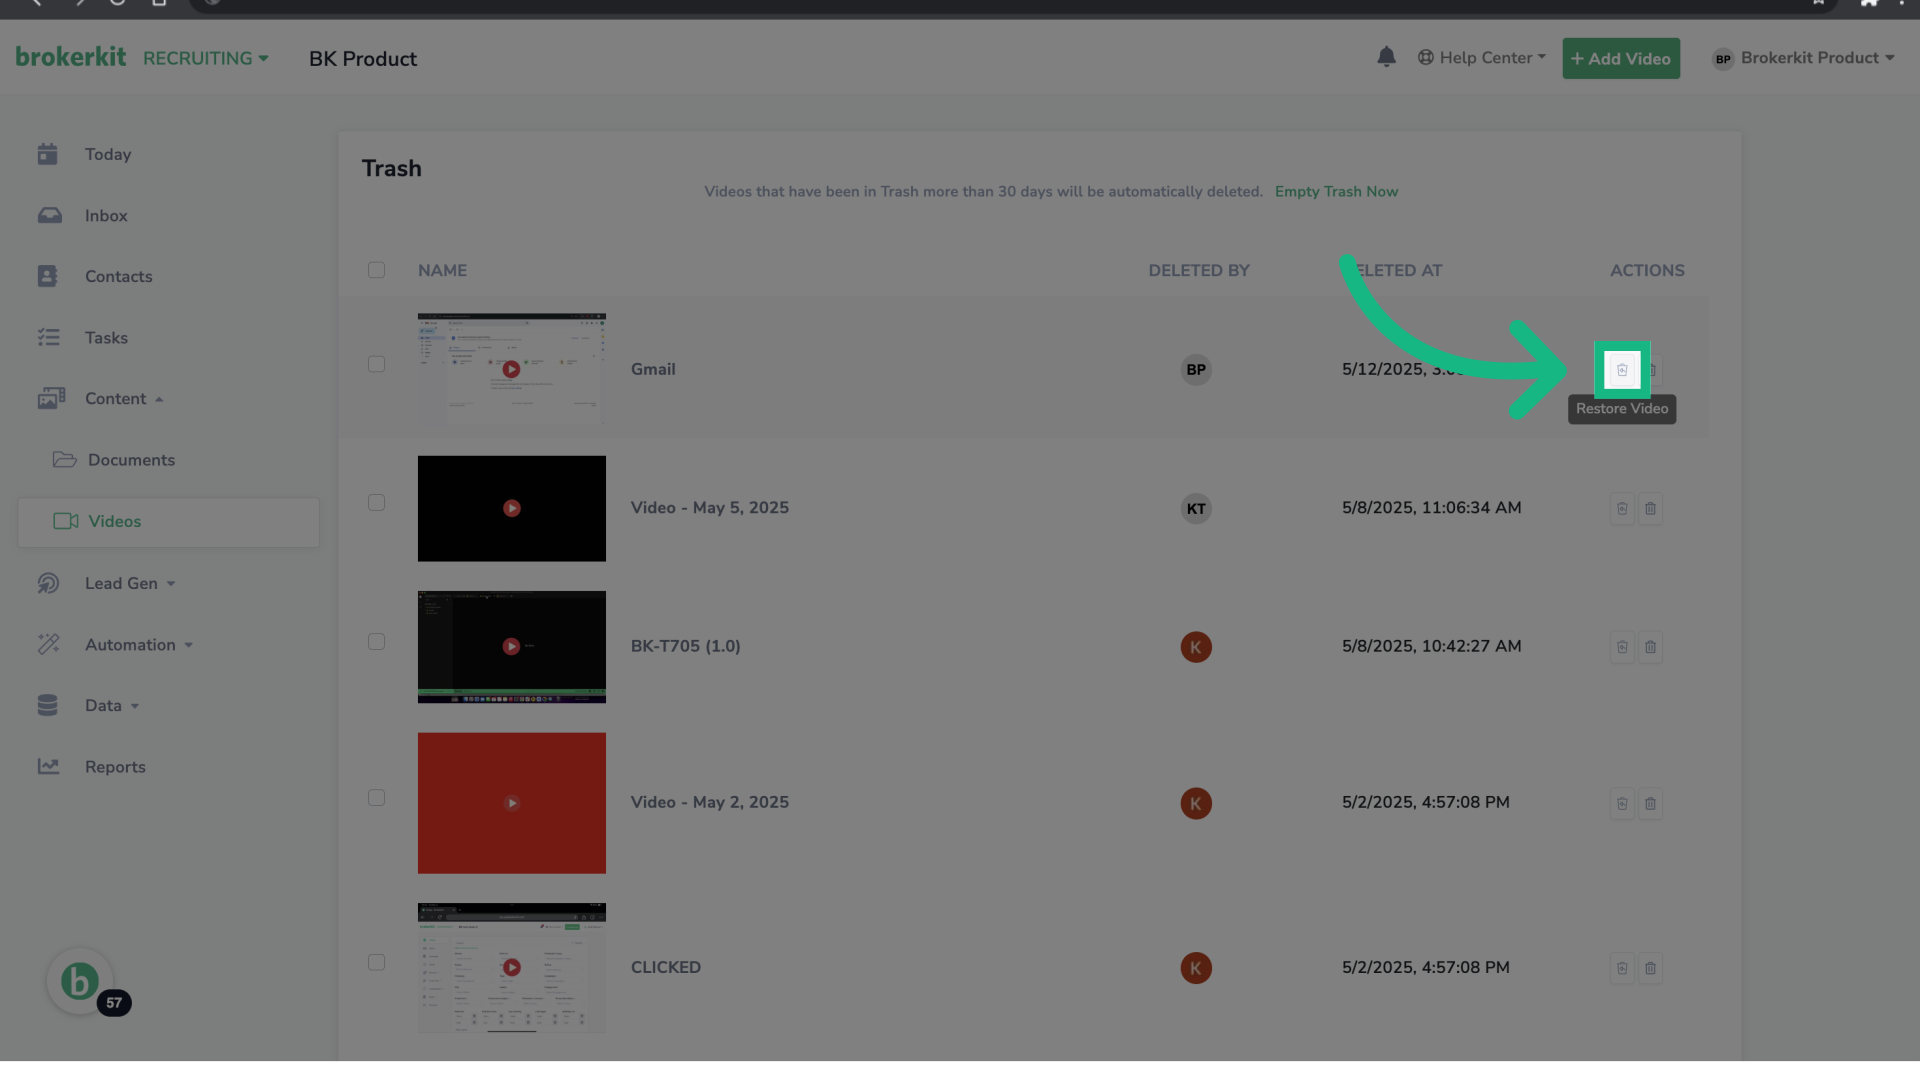
29. Restore a Single Video
To restore a video, click on the first icon.
Remember, you have 30 days to restore it before it's permanently deleted.
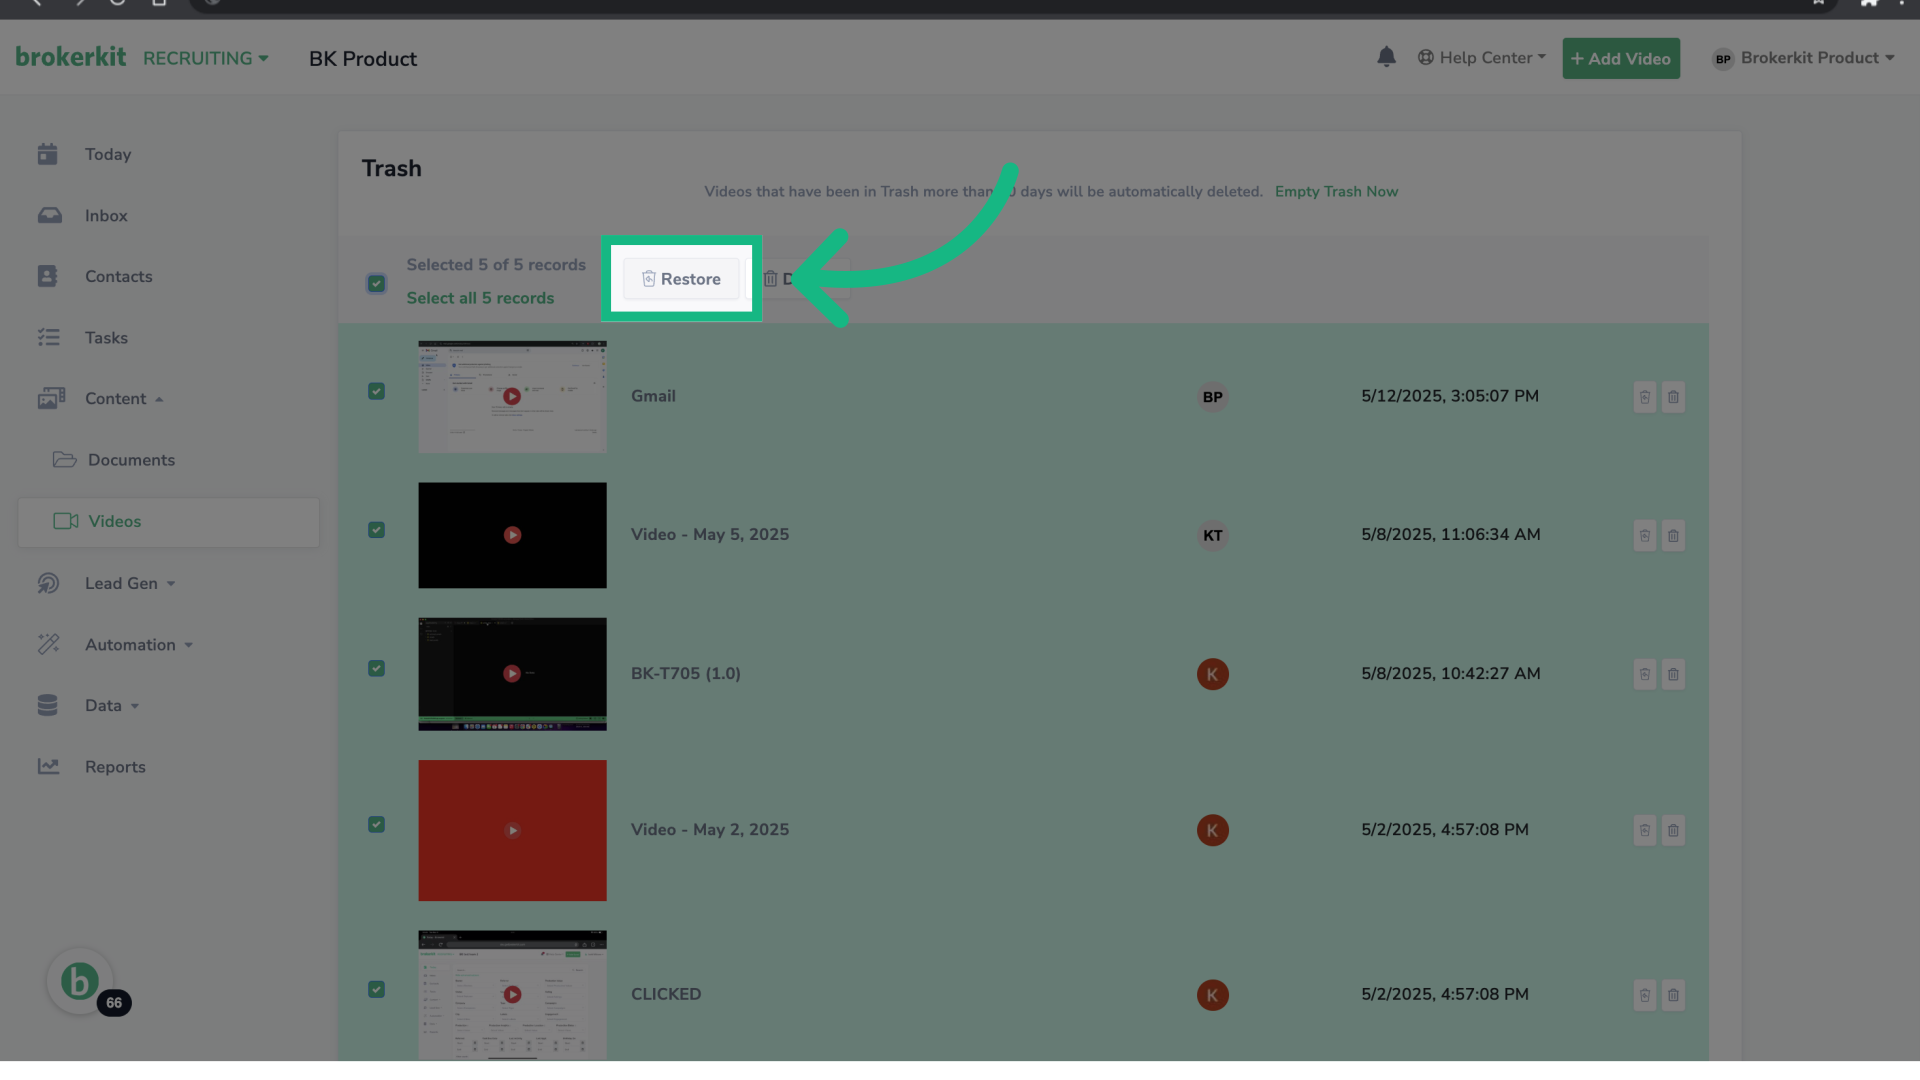
30. Bulk Restore Videos
To bulk restore videos, select the videos you want to restore and click the button Restore.
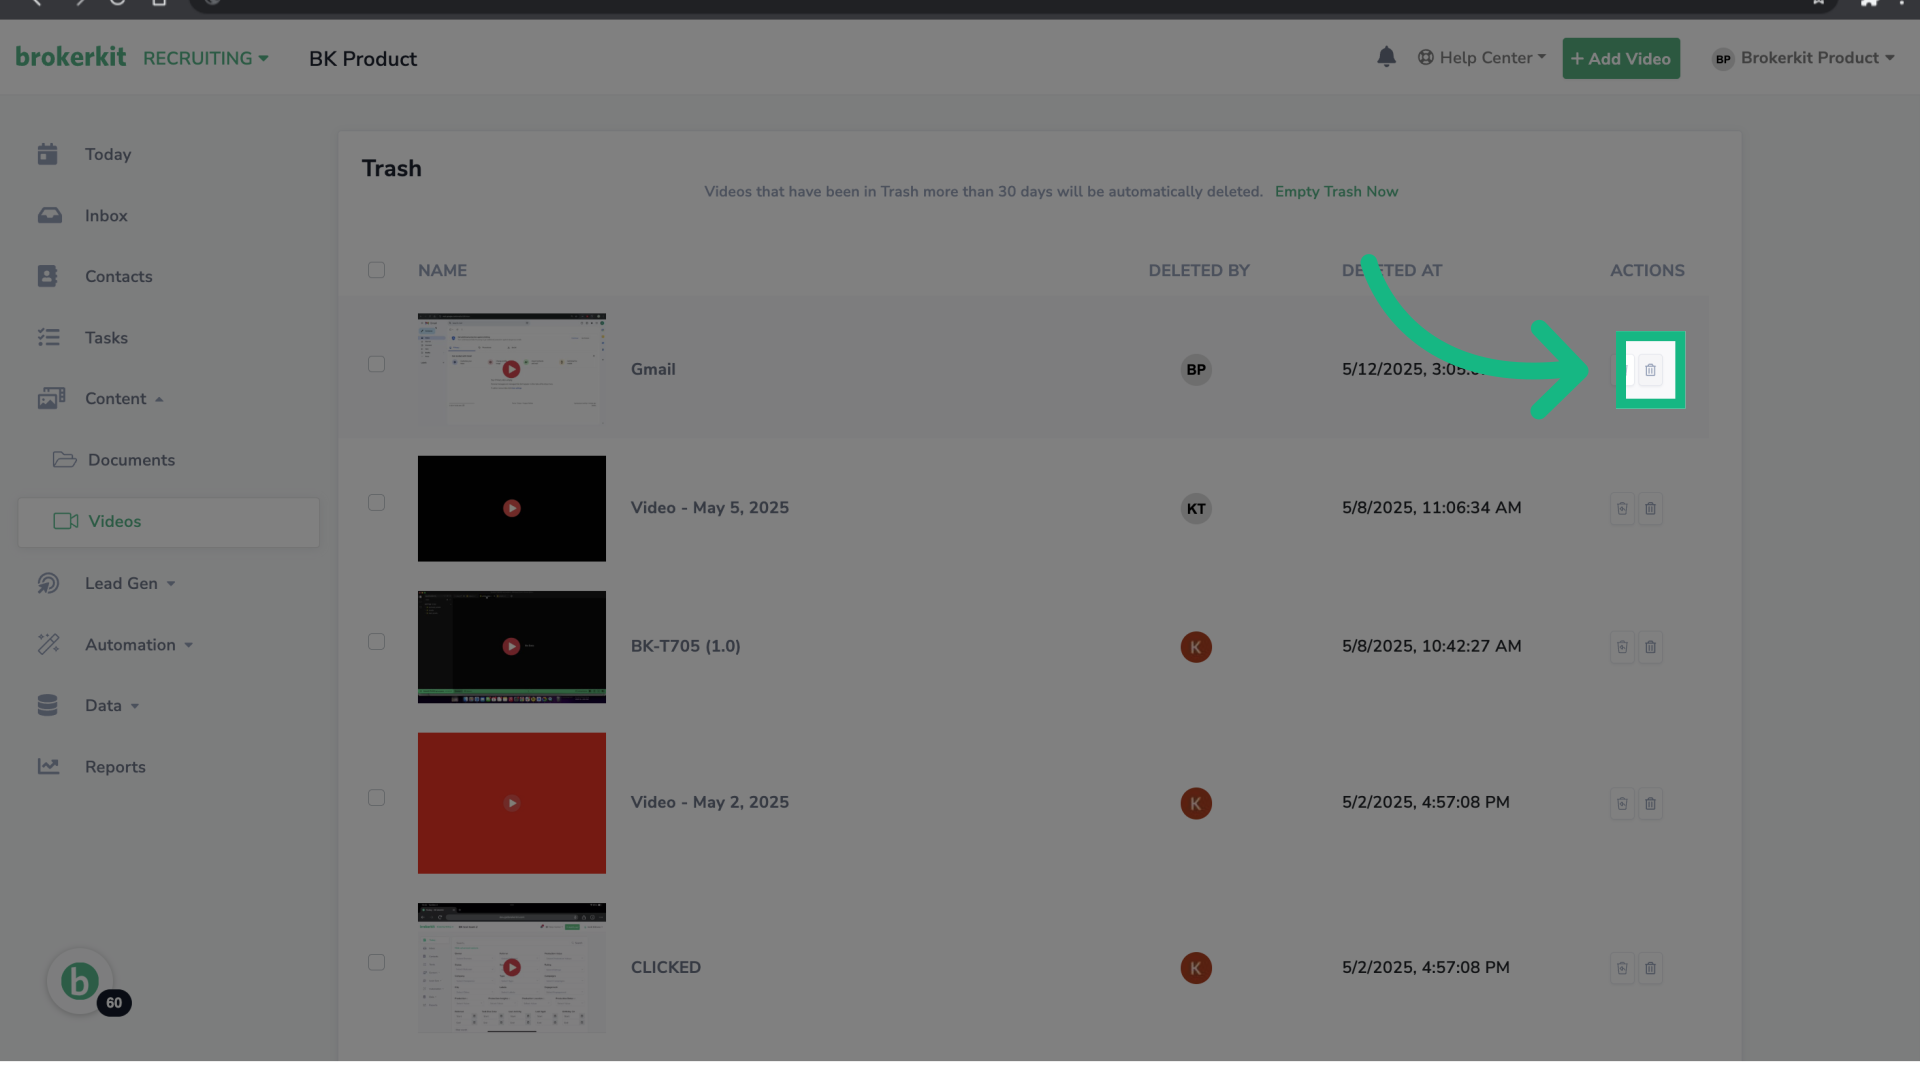
31. Permanently Delete a Single Video
To permanent delete a video, click on the trash icon.
Remember, 30 days after a video is moved to the Trash, it will be permanently deleted automatically.
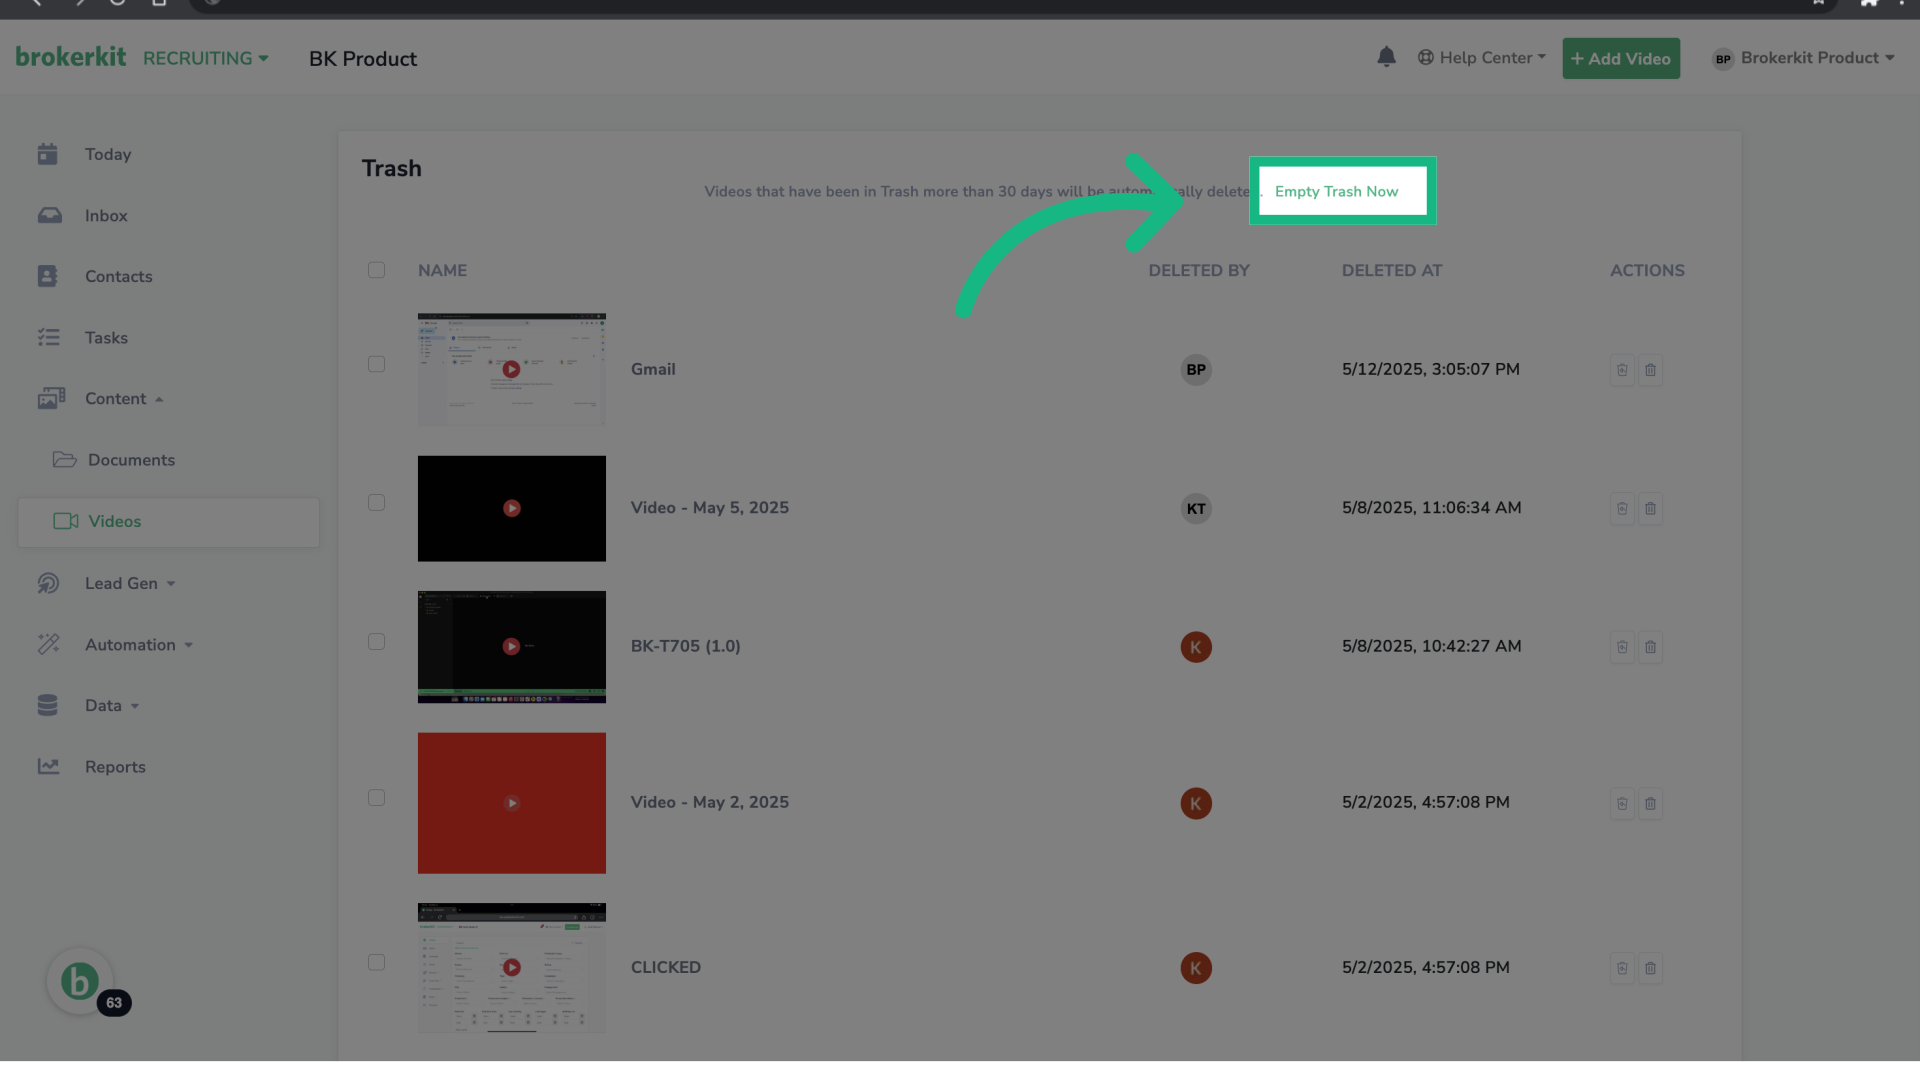
32. Bulk Permanently Delete Videos
To permanent delete all videos, click the option Empty Trash Now.
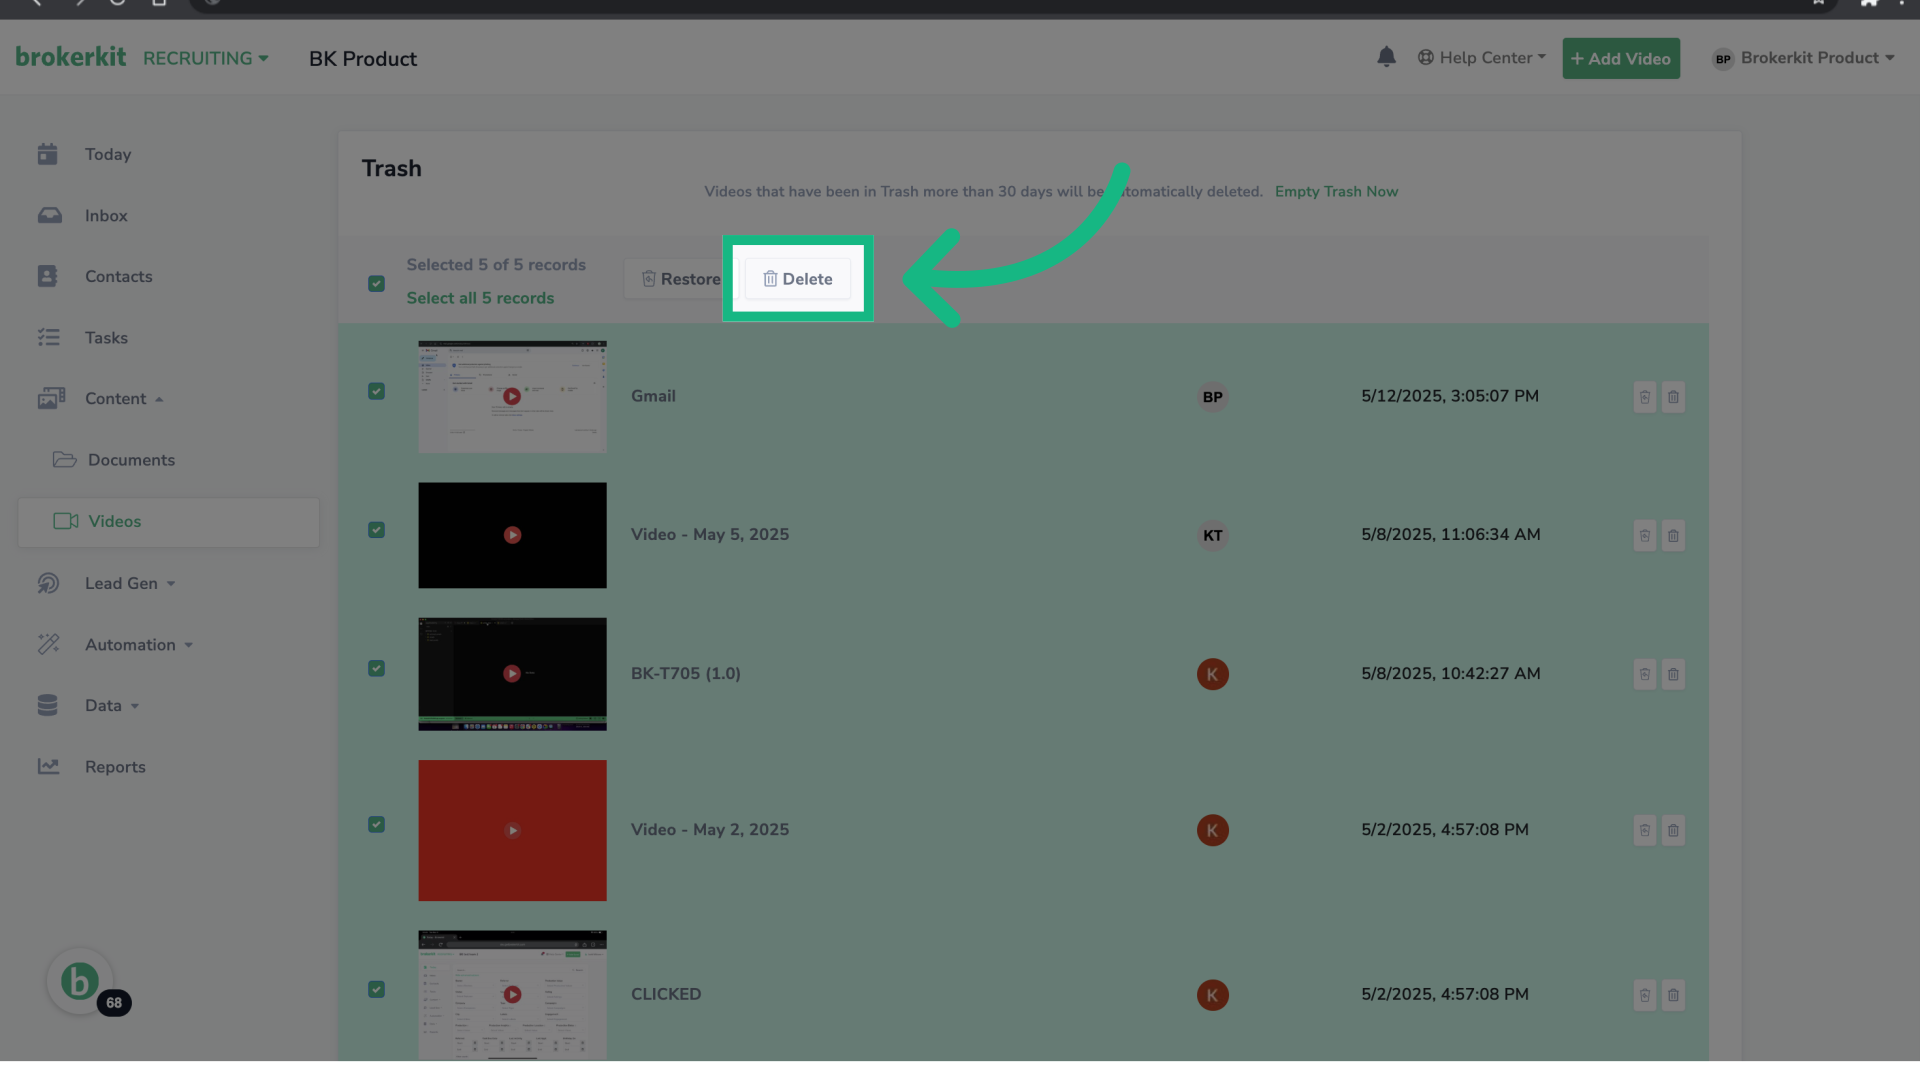
33. Click "Delete"
Alternatively, you can bulk select all videos and click the Delete button.
34. Let's give it a try
Now, for the fun part—let's see how easy it is to use your videos in emails and texts!

35. Open your Brokerkit
Go to your Brokerkit platform and select a contact.
36. You can send videos in emails or texts
In the contact profile, select email or text.
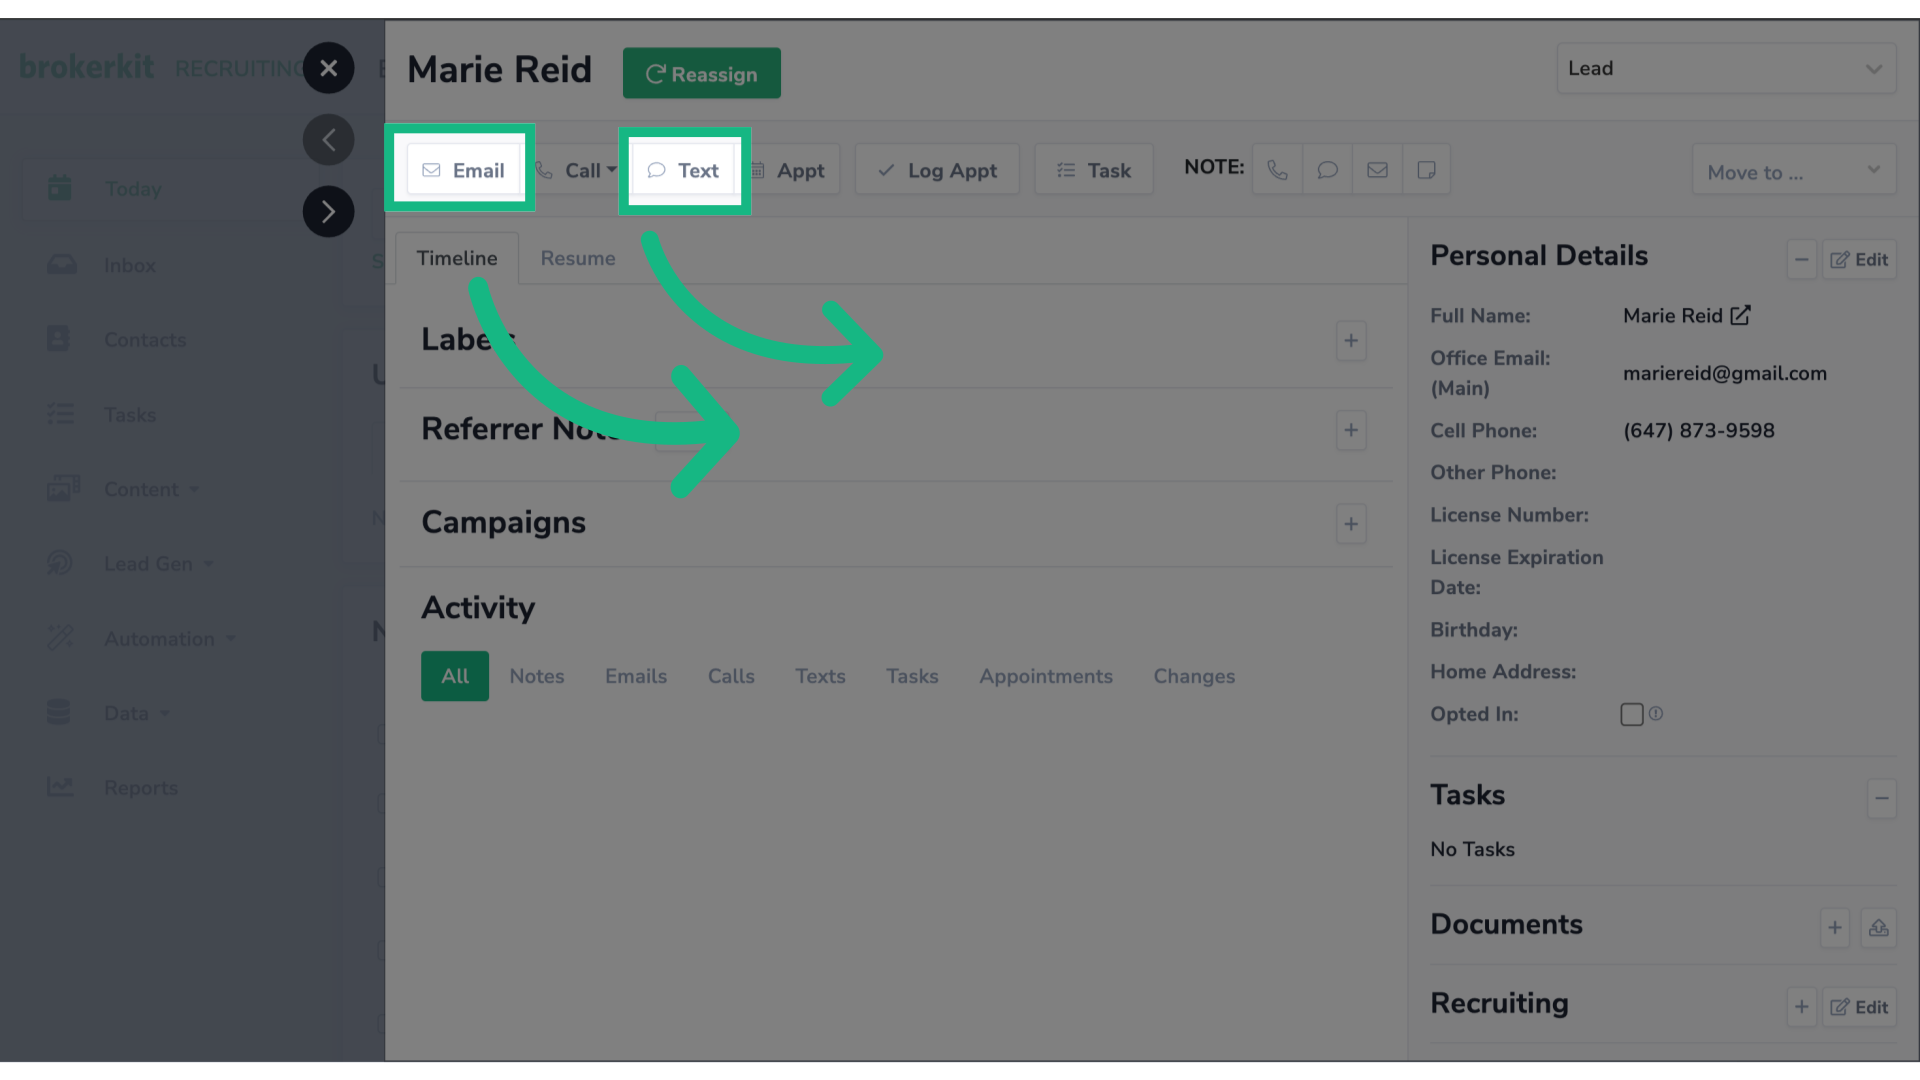
37. Click the video icon
Click the video icon.
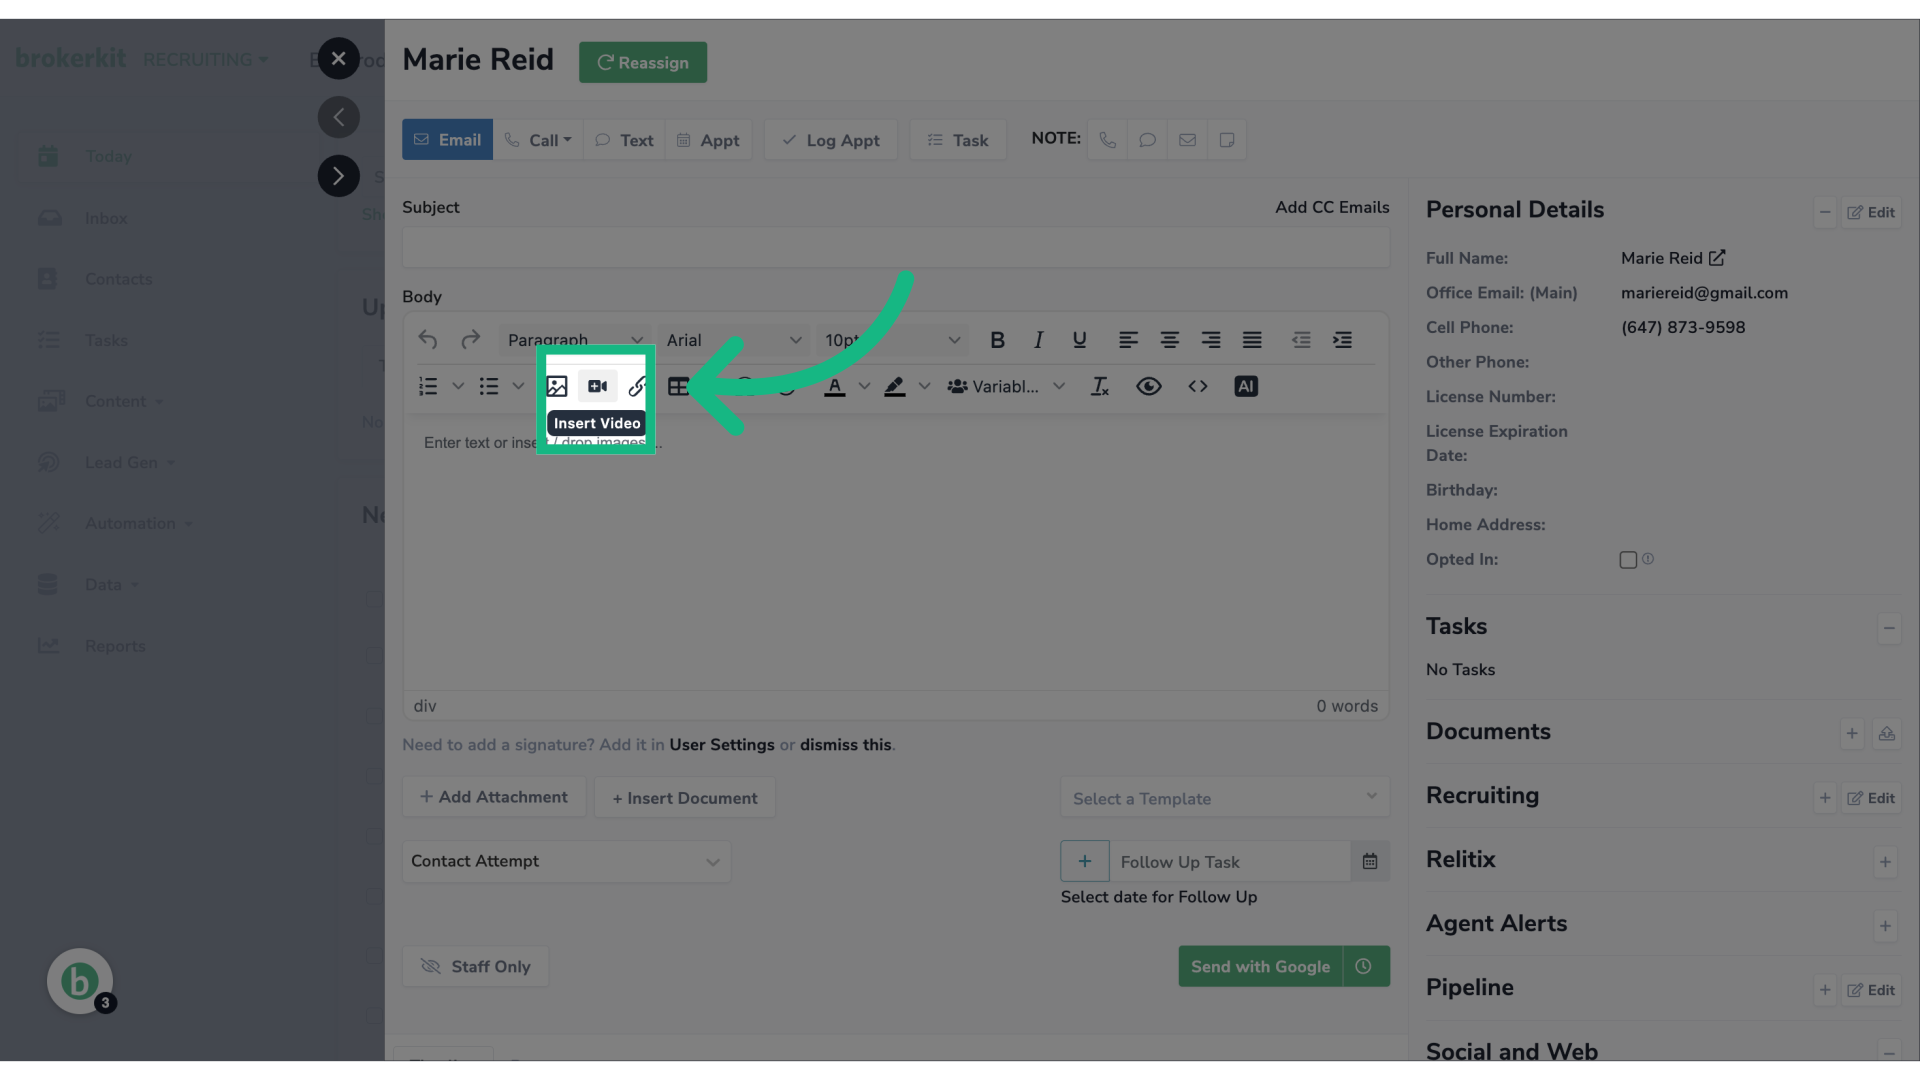
38. Record a new online video
There's 3 different options you can add a video to your email or text. The first is by recording a video on the spot.
39. Upload a new video
The second is by uploading a new video from your computer.
40. Choose from video library
The thrid is by choosing a video from your library.
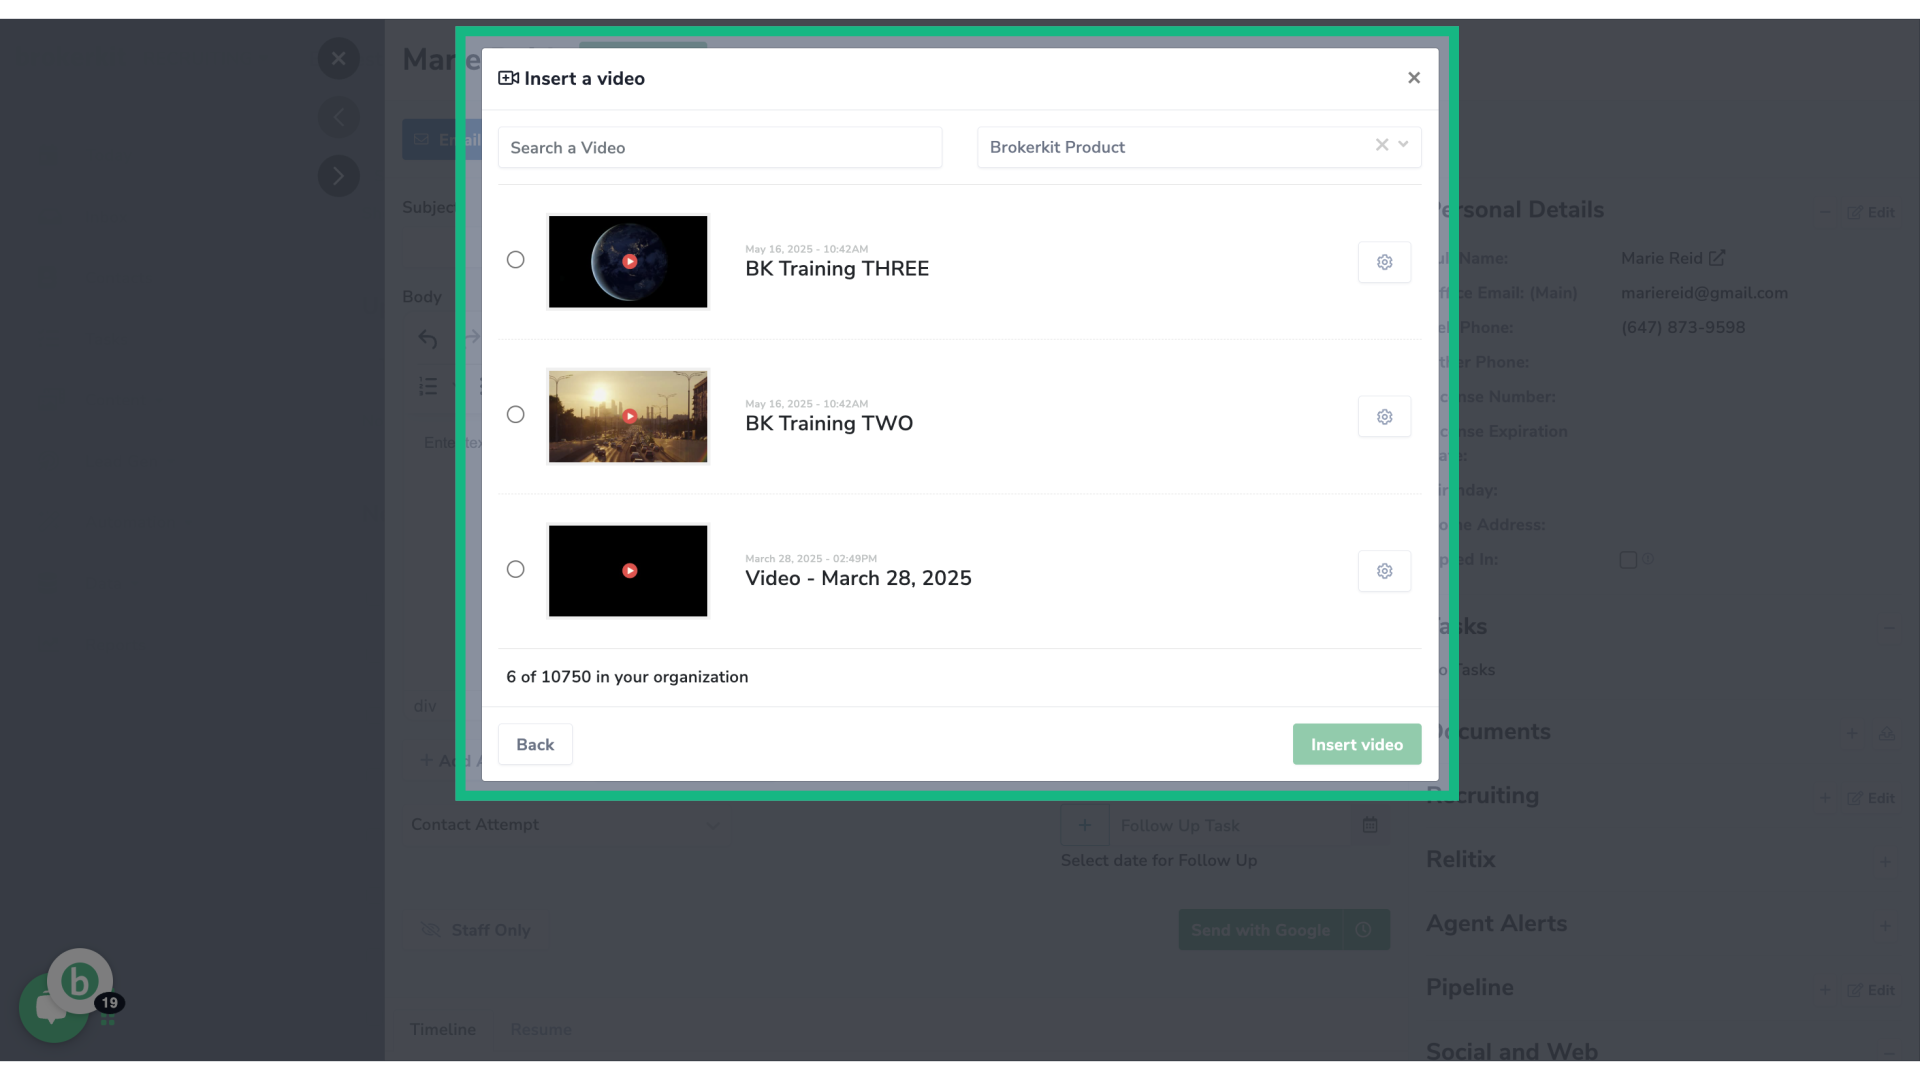
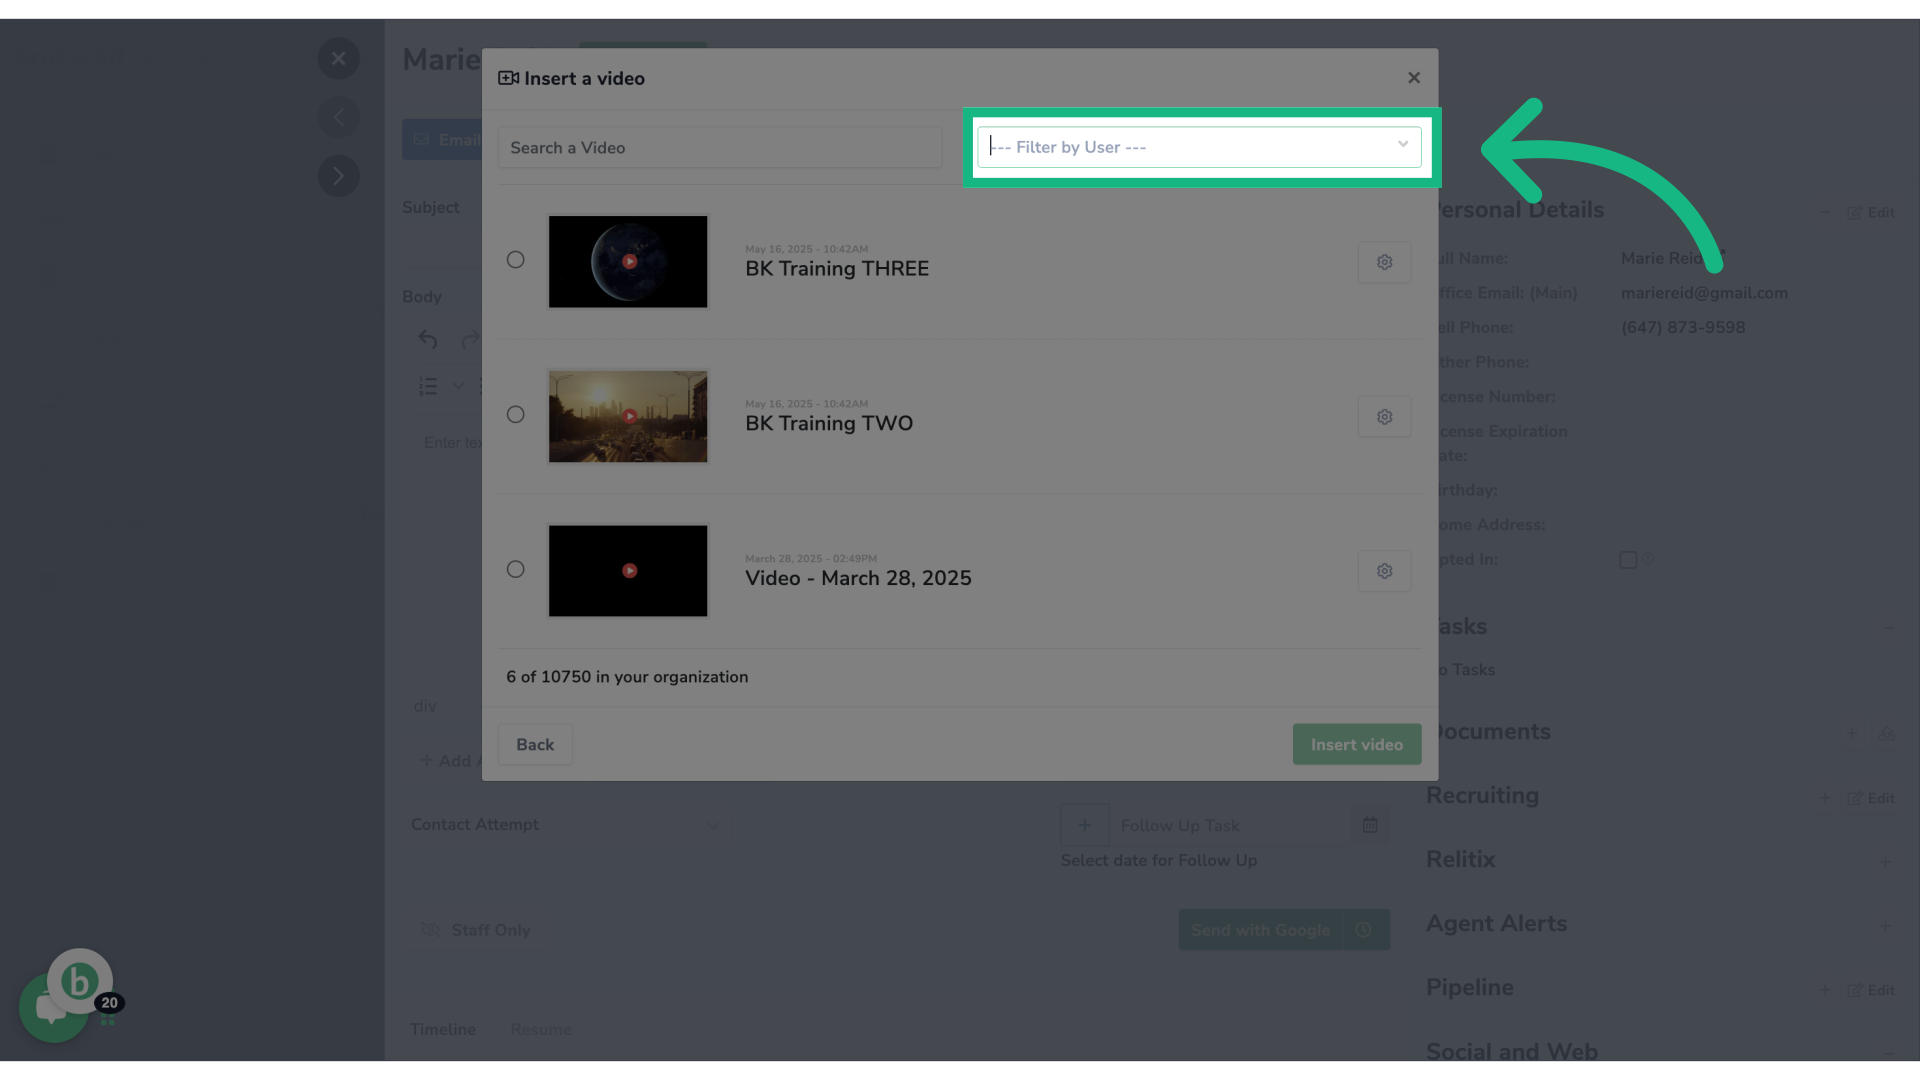
41. Clean the filter
To see all videos and not only the ones you own, be sure to clean the filter.
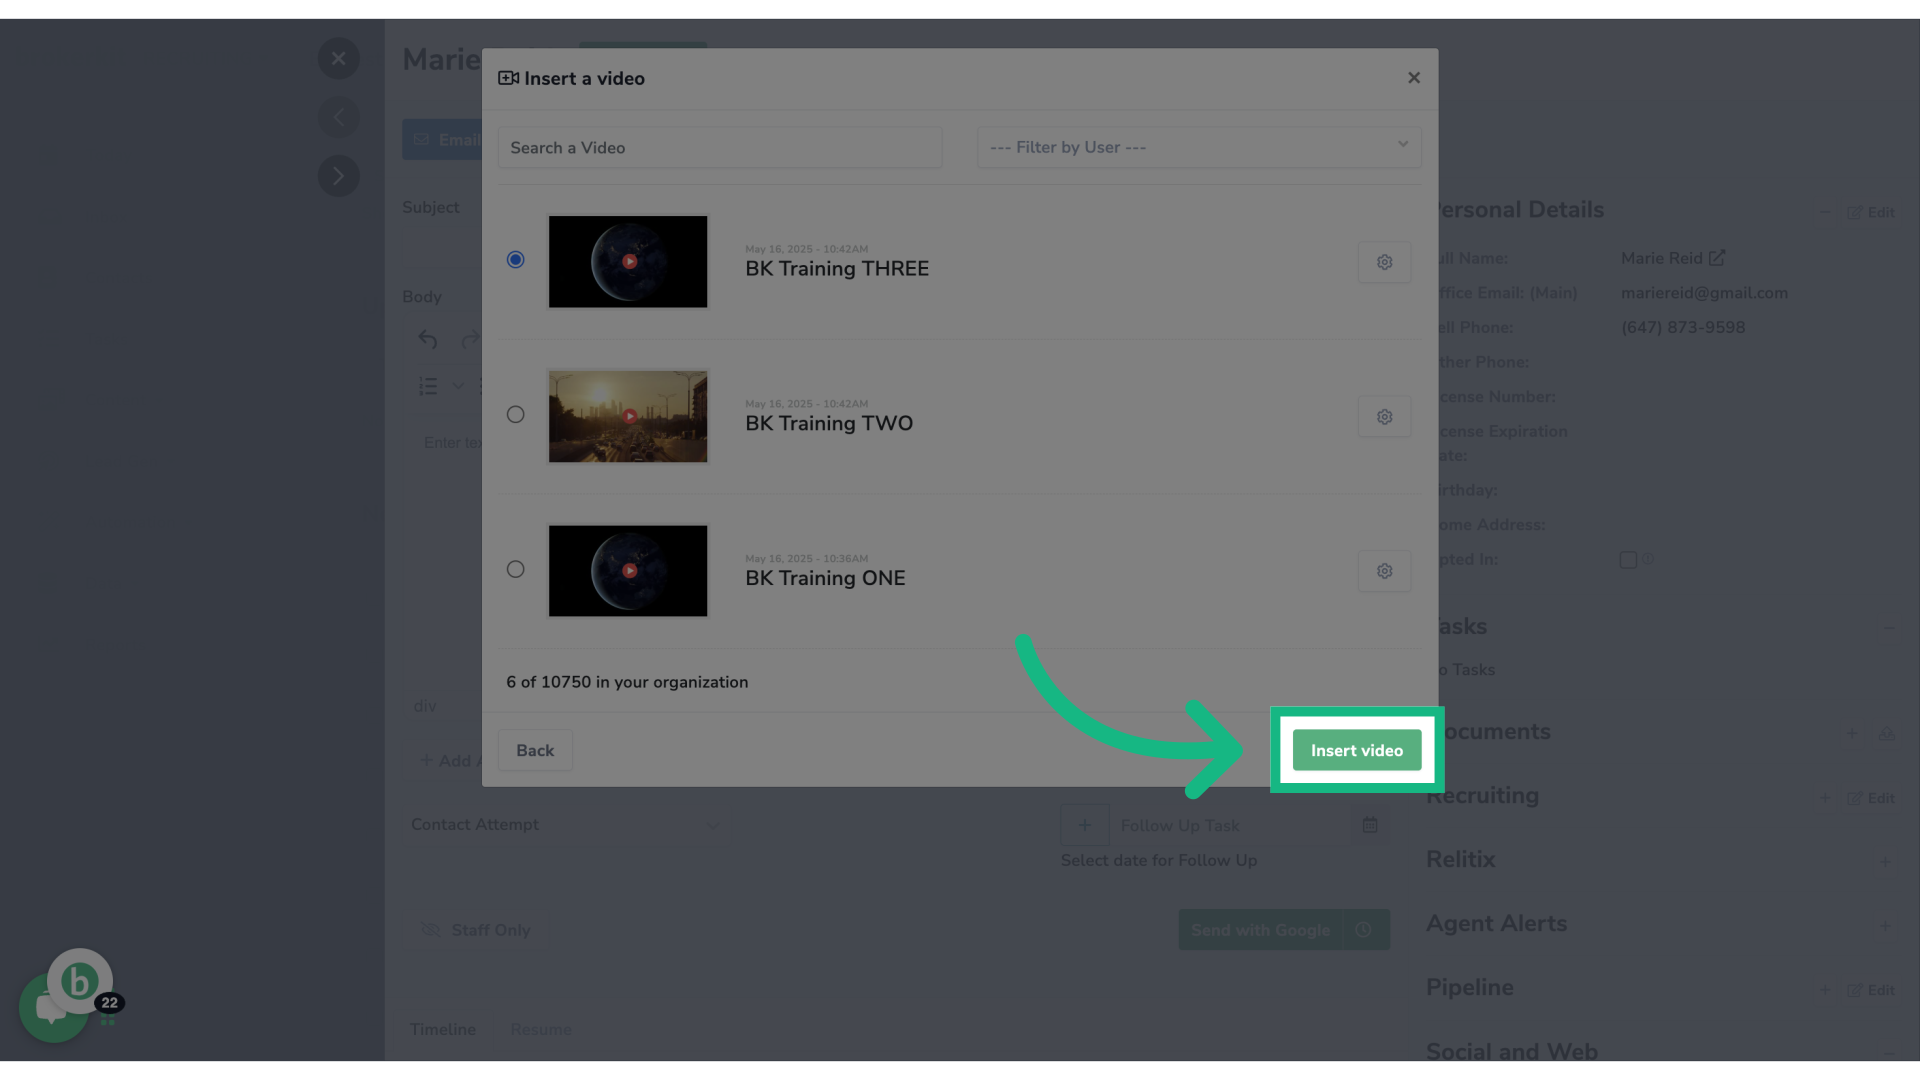
42. Click "Insert video"
Once you select the video you want, click Insert video.
43. Video will be inserted in your email or text
Be sure to add a call to action so the recipient knows to click the image to watch the video.

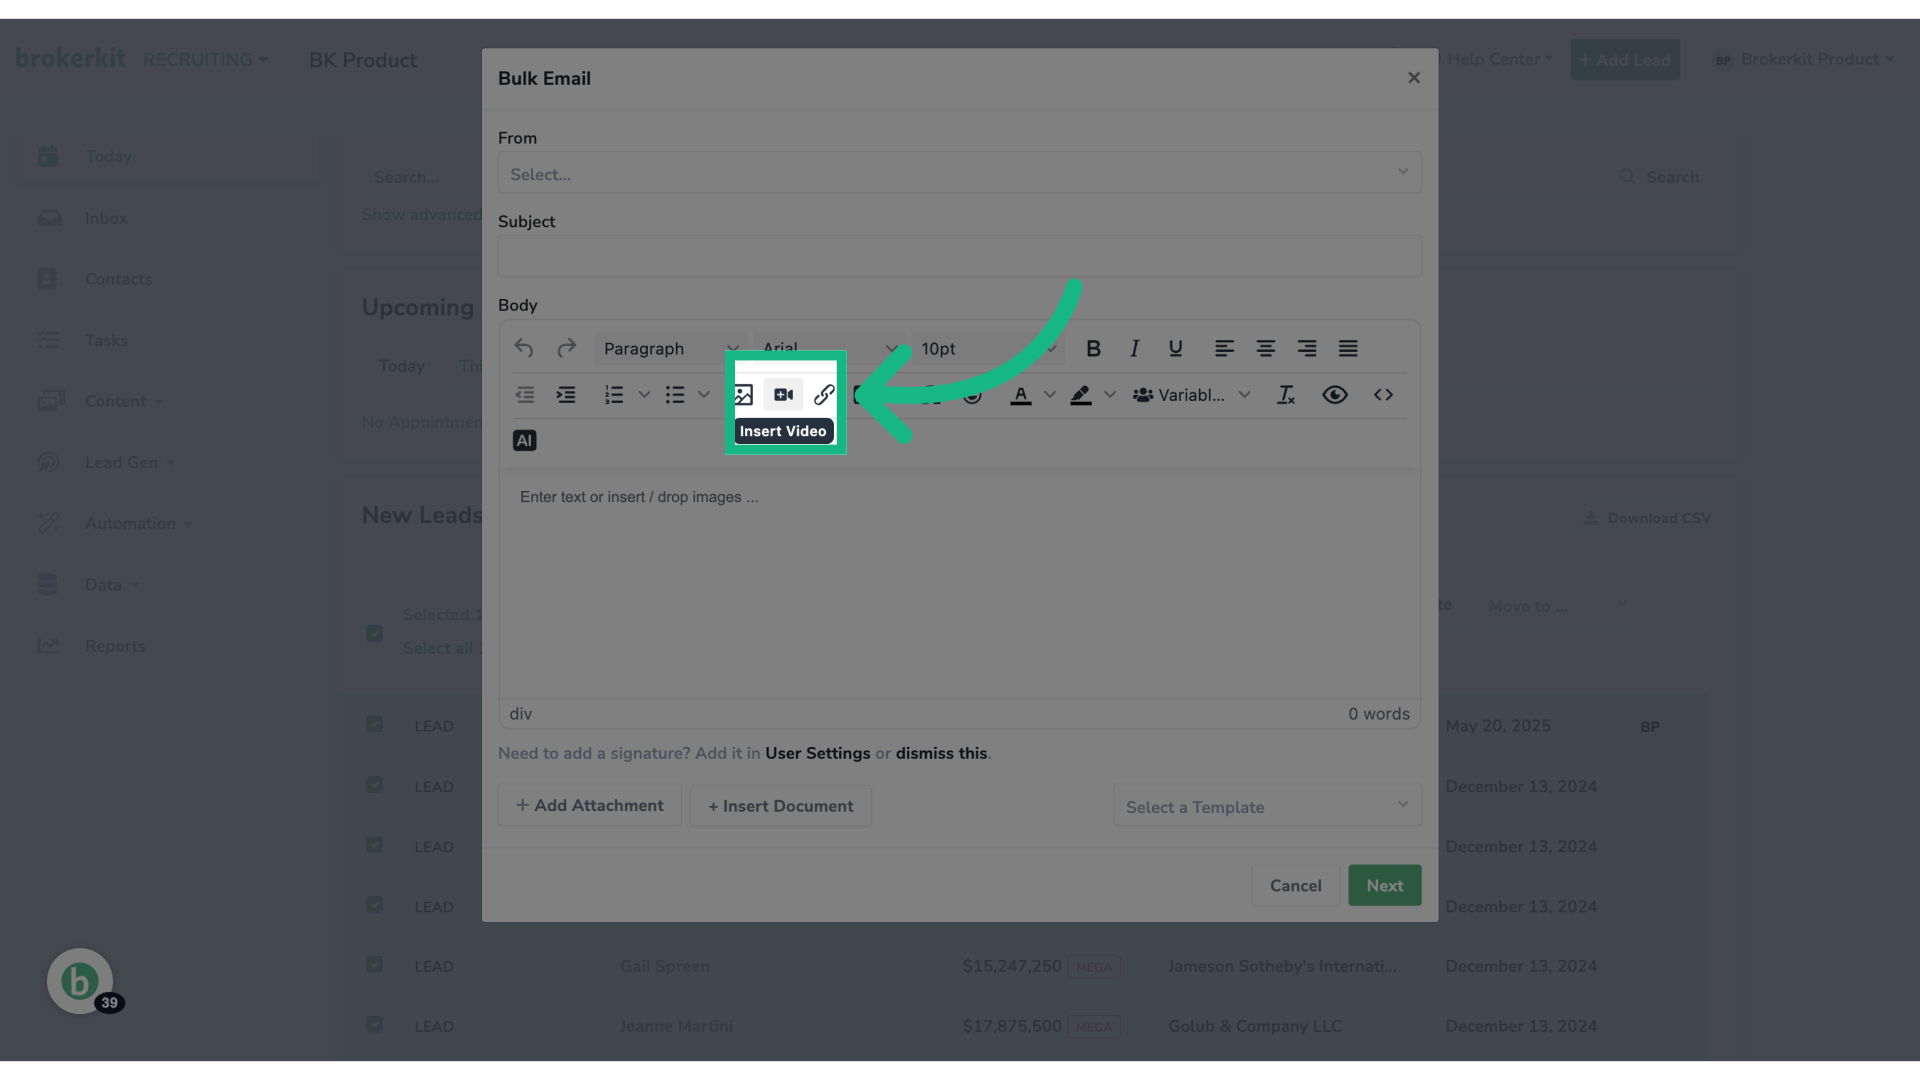
44. Send videos in Bulk emails or texts
Keep in mind that you can also send videos in bulk emails or texts. Just select the contacts, then choose the bulk action.
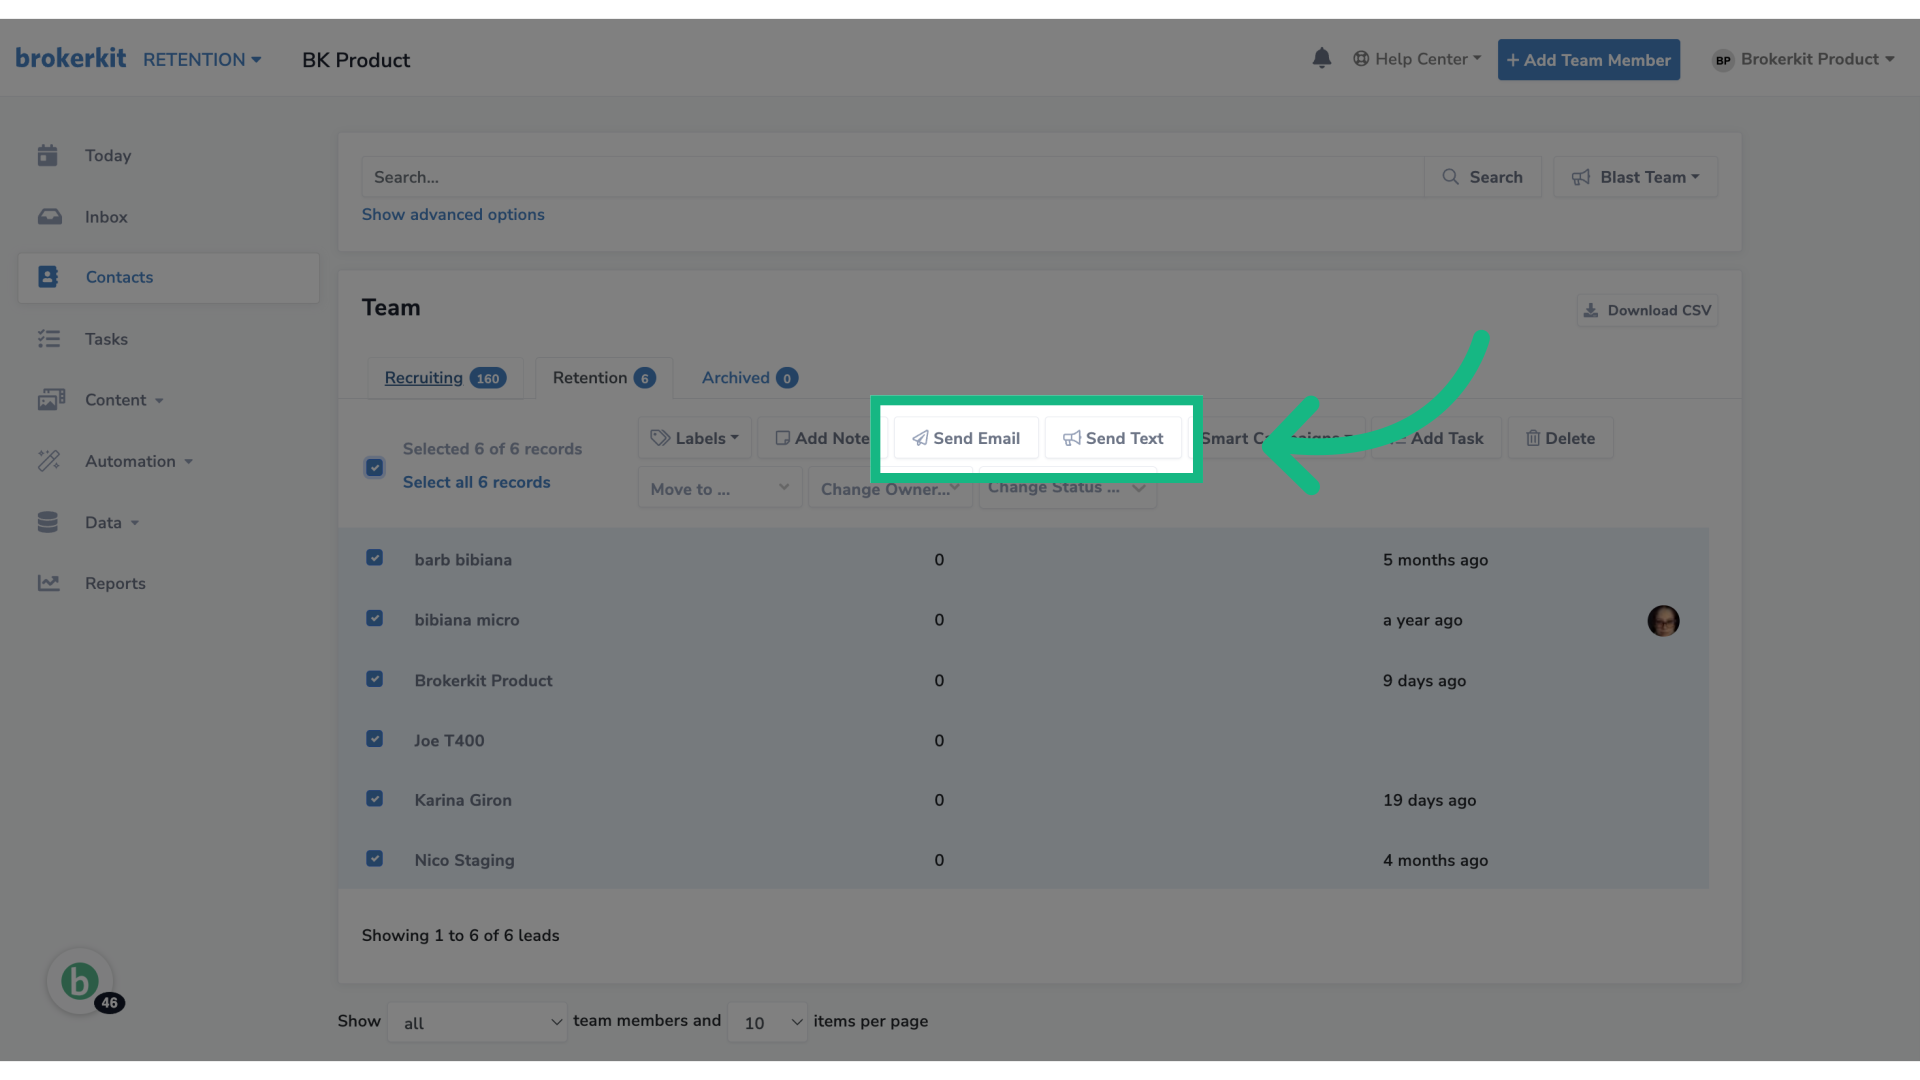
45. Click the video icon
And finally click the video icon to insert your video.
To know more about videos, please watch this tutorial ➡️Learn How To Send Email/Texts with your Videos.
If you have any questions, please reach out to our support team at support@brokerkit.com.