How to verify an email domain with GoDaddy
Learn how to verify your email sending domain to improve email deliverability and security.
Go to getbrokerkit.com
1. Introduction
This step-by-step guide walks you through adding necessary DNS records to your domain registrar for successful domain authentication.
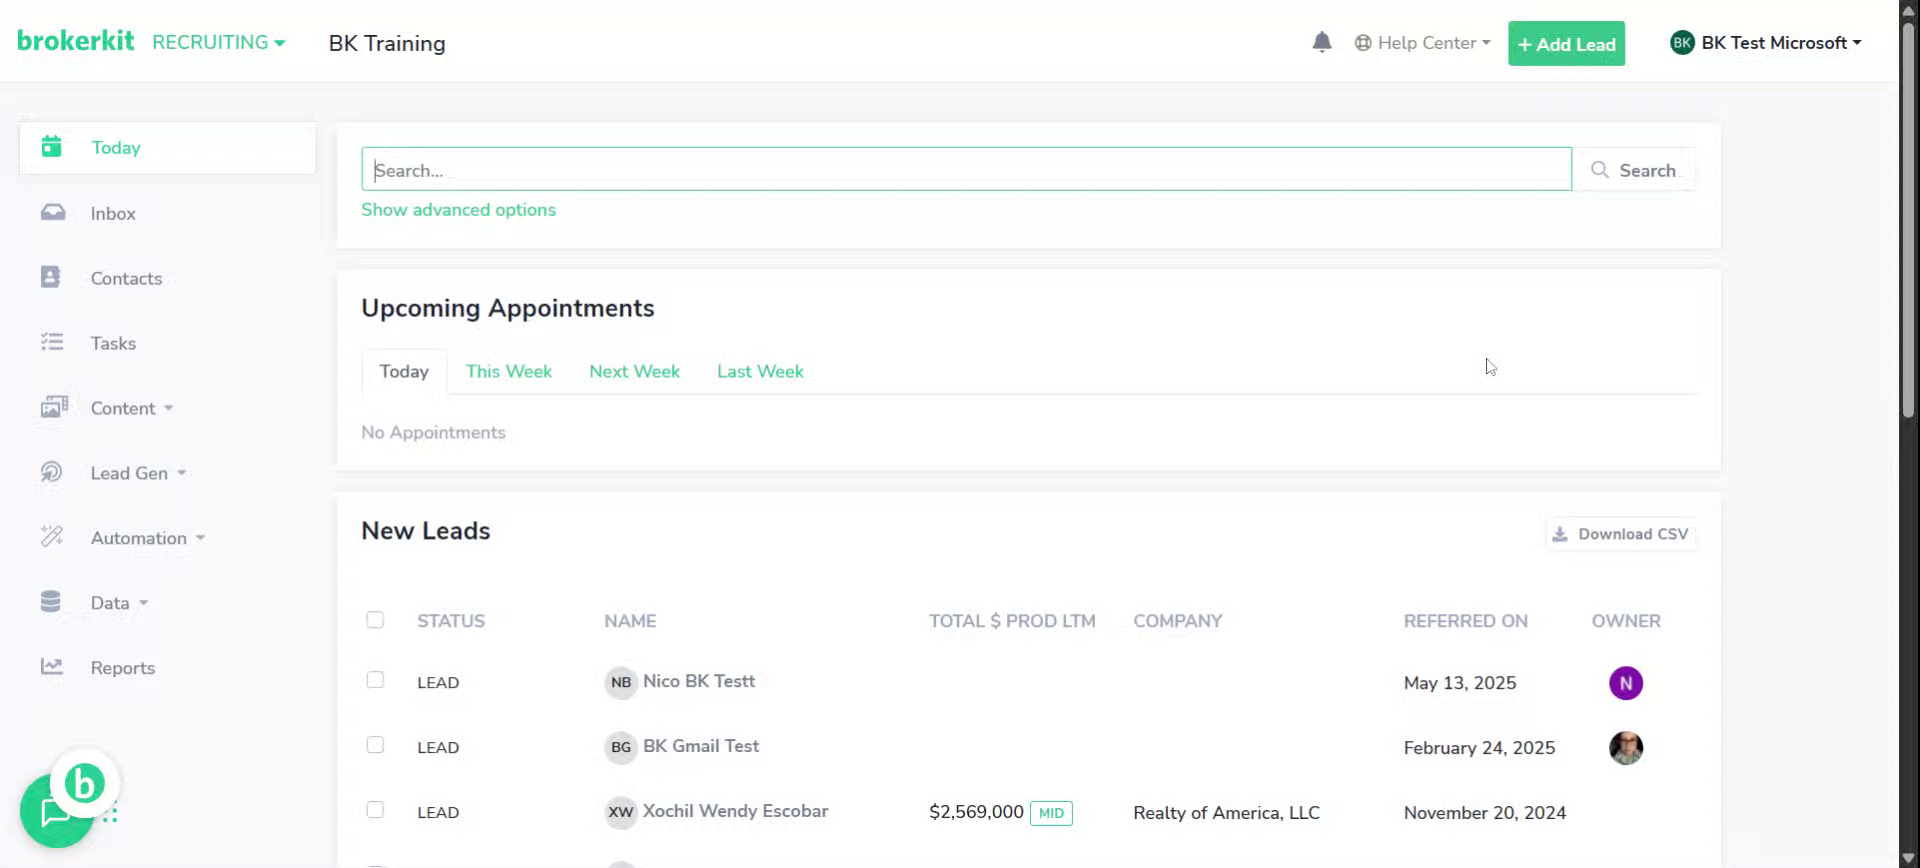
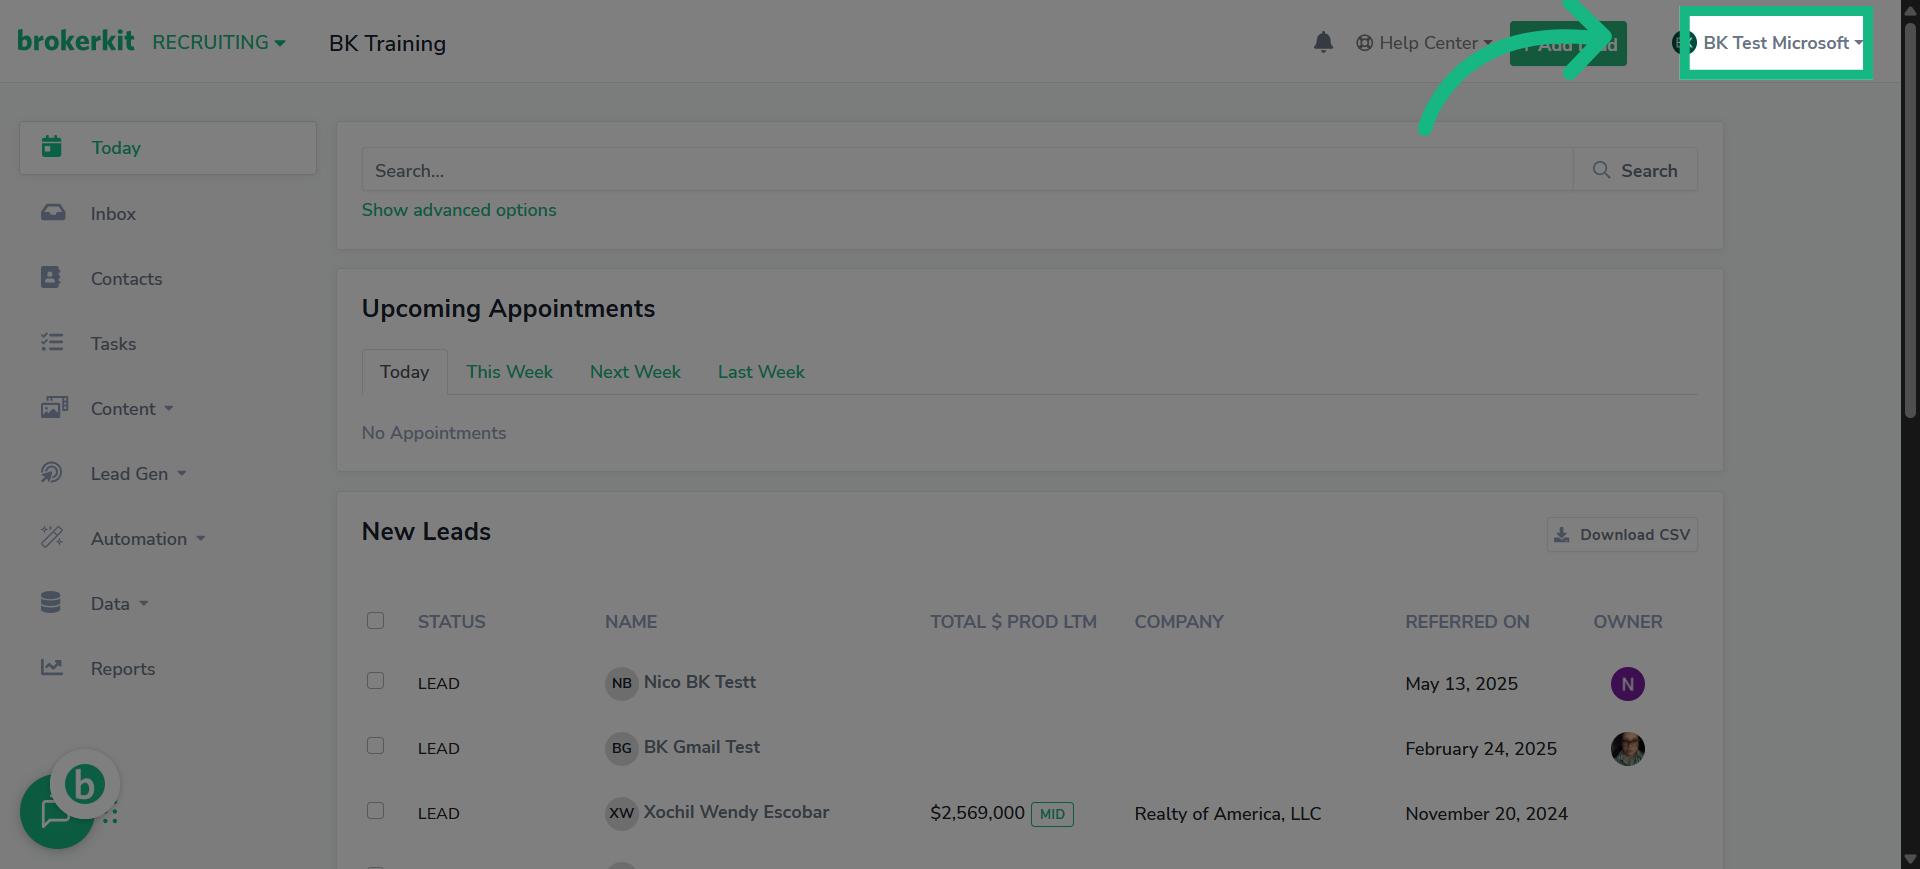
2. Go To Your Brokerkit account
Access your Brokerkit dashboard and select your desired account to begin domain verification.
3. Click "Account Settings"
Navigate to the Account Settings section to manage your email configurations.

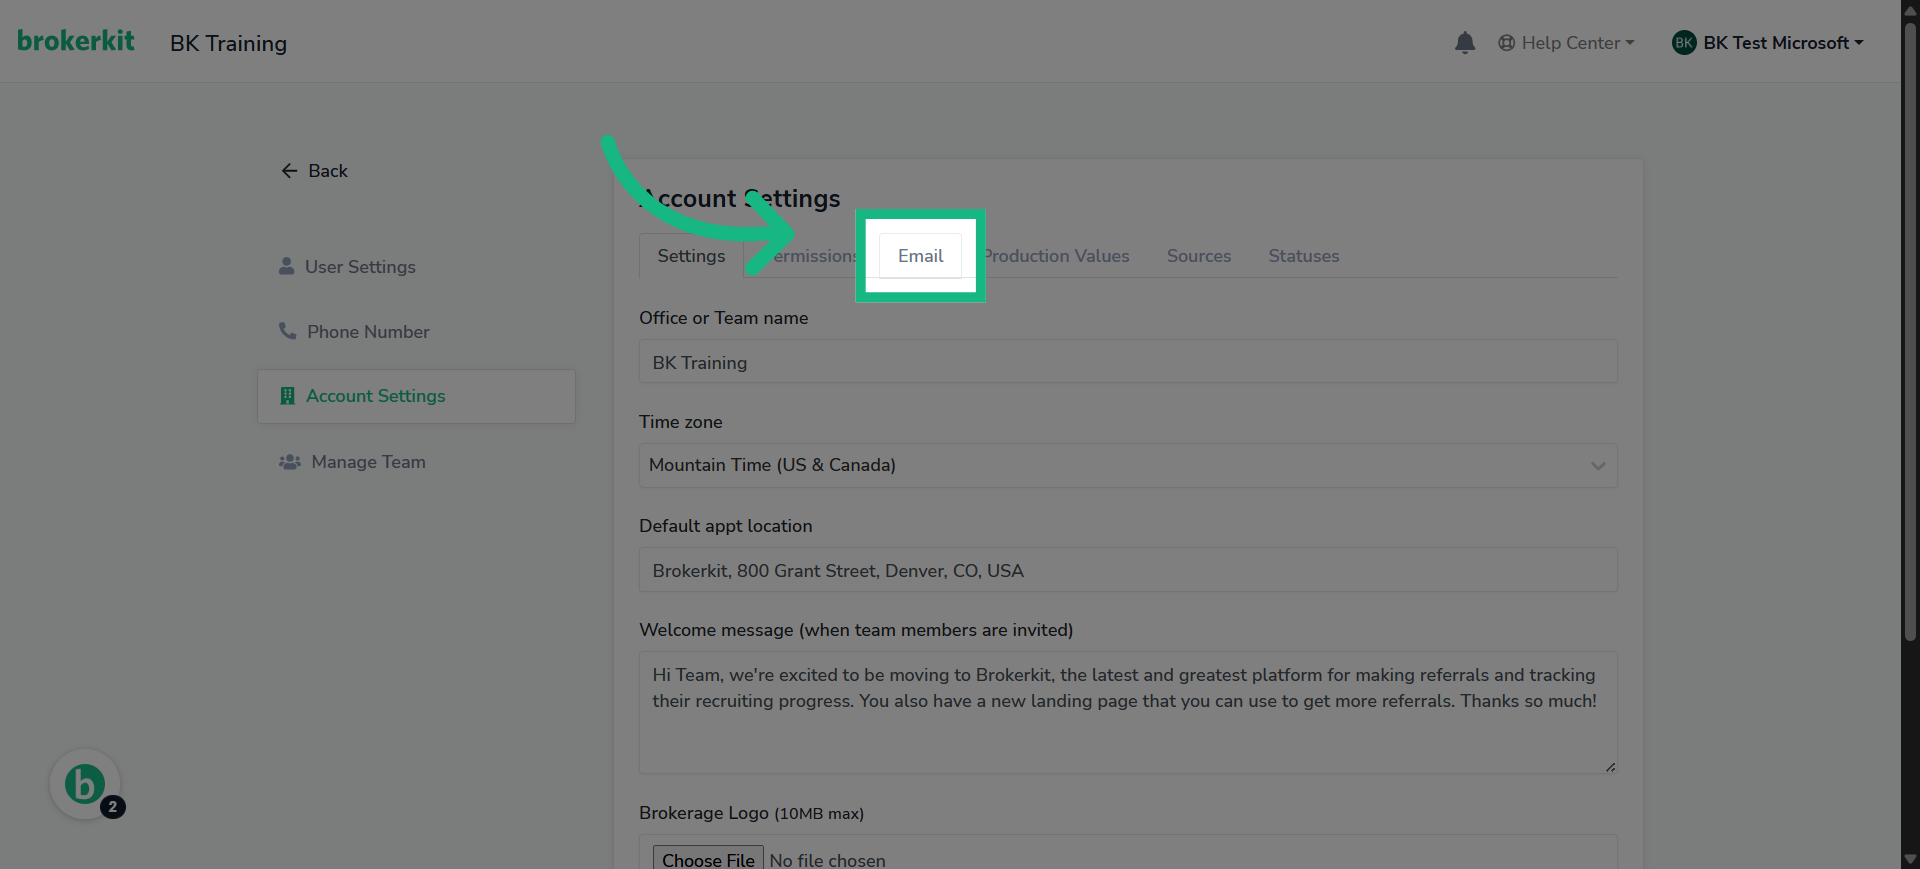
4. Click "Email"
Open the Email tab to access domain sending options.
5. Click here
Initiate the process to add a new sending domain for your emails.
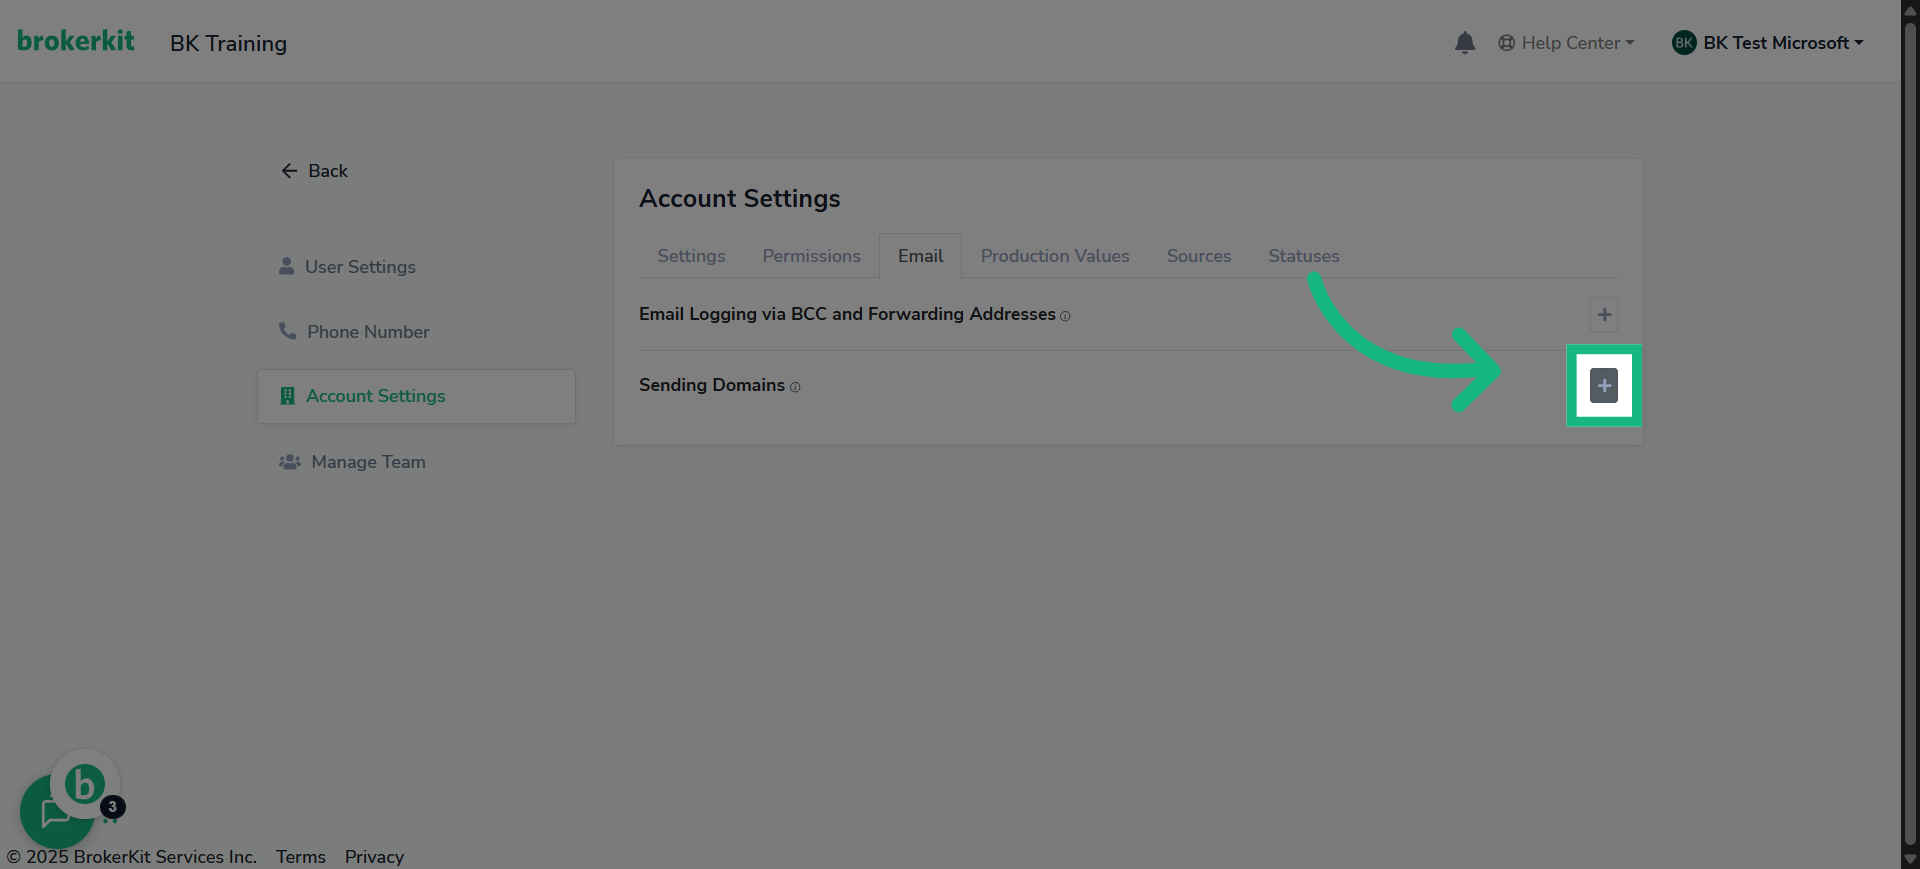
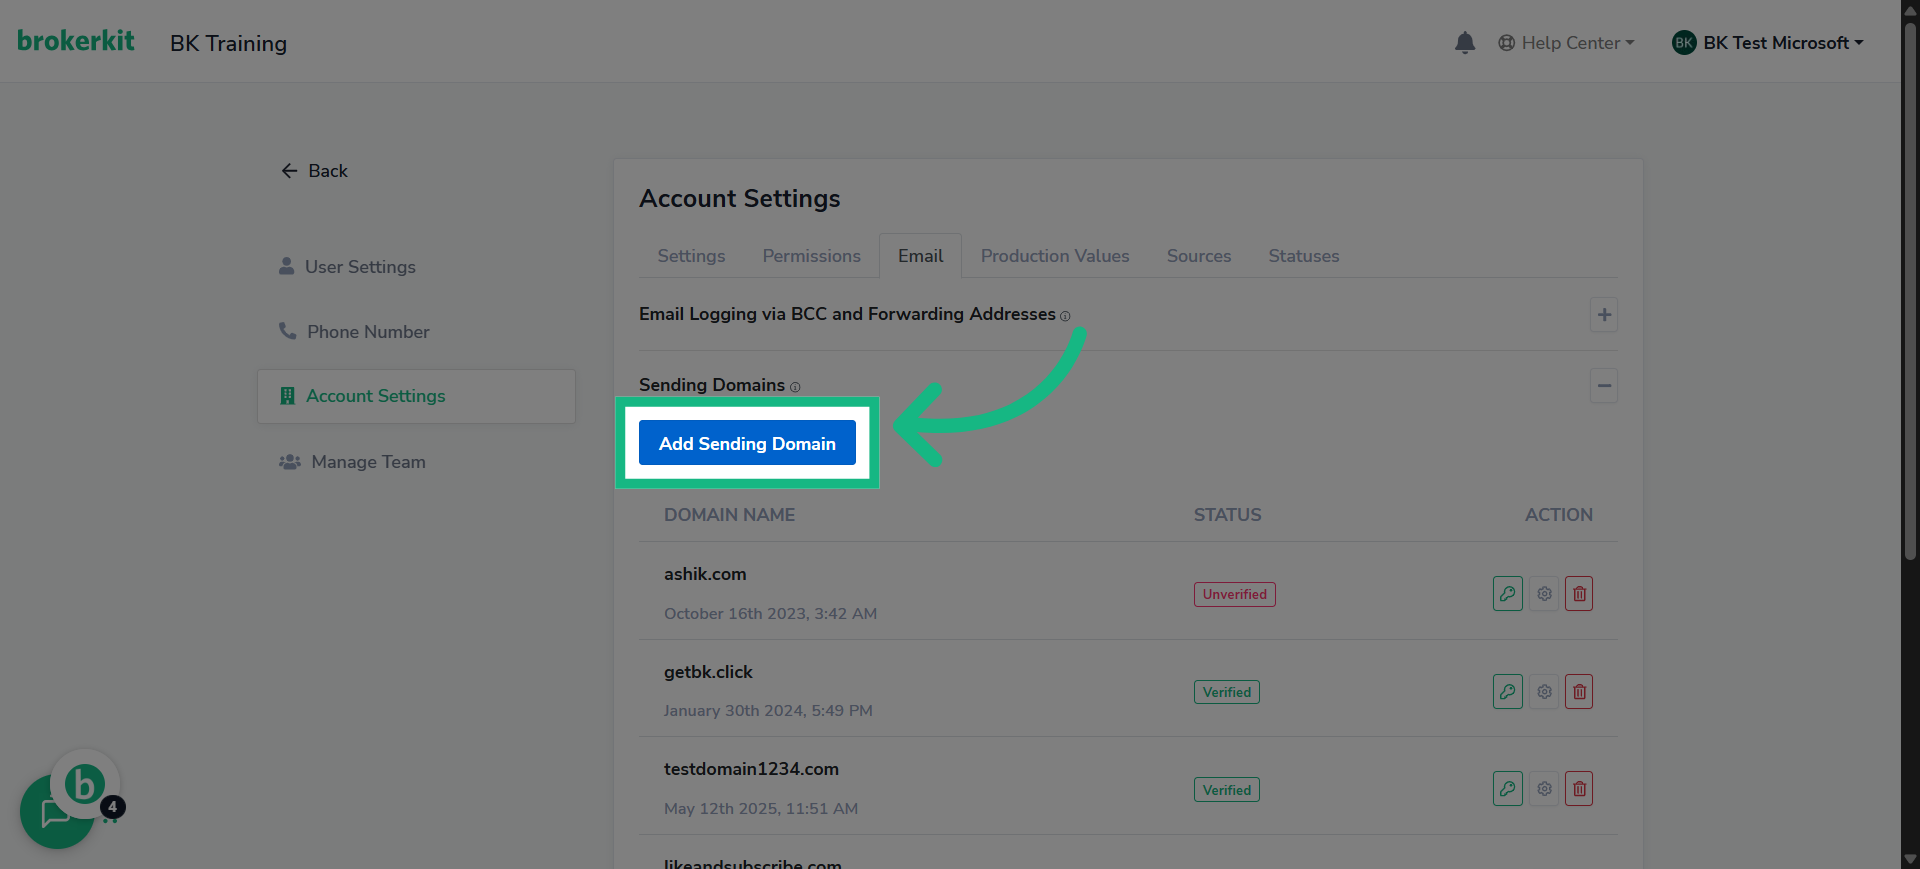
6. Click "Add Sending Domain"
Go ahead and click "Add Sending Domain" to tell BrokerKit you're setting up a new one.
7. Click "Type domain name"
Enter the domain name you wish to verify for sending emails.
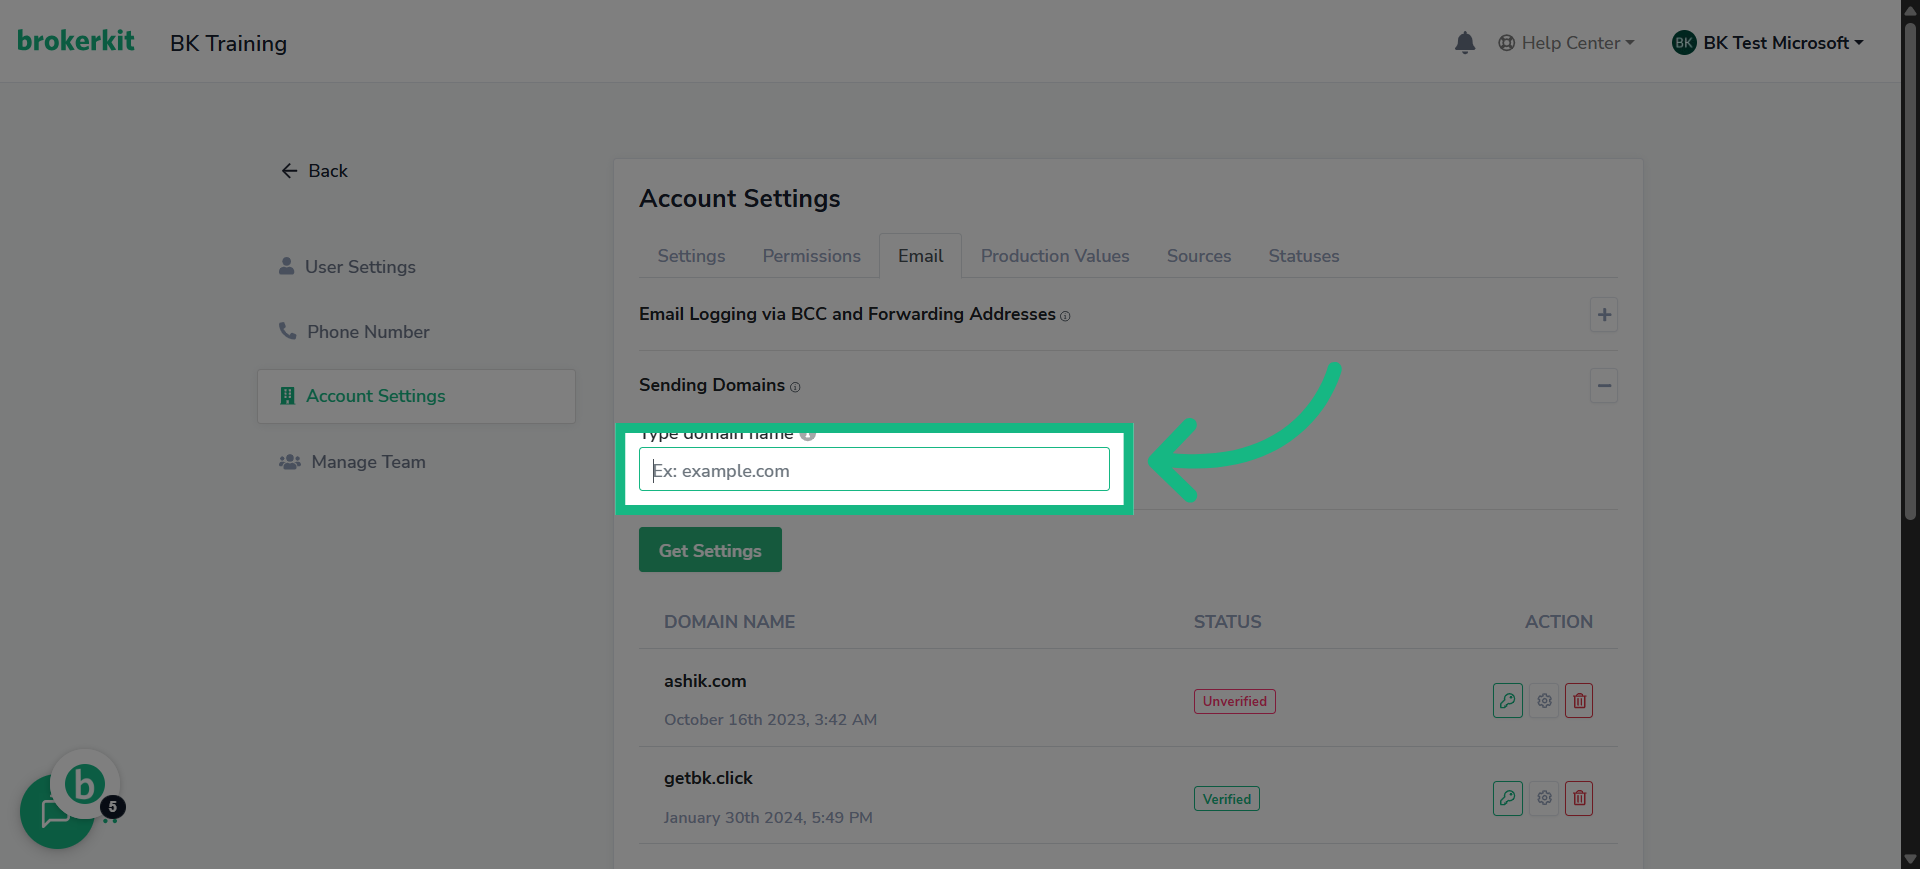
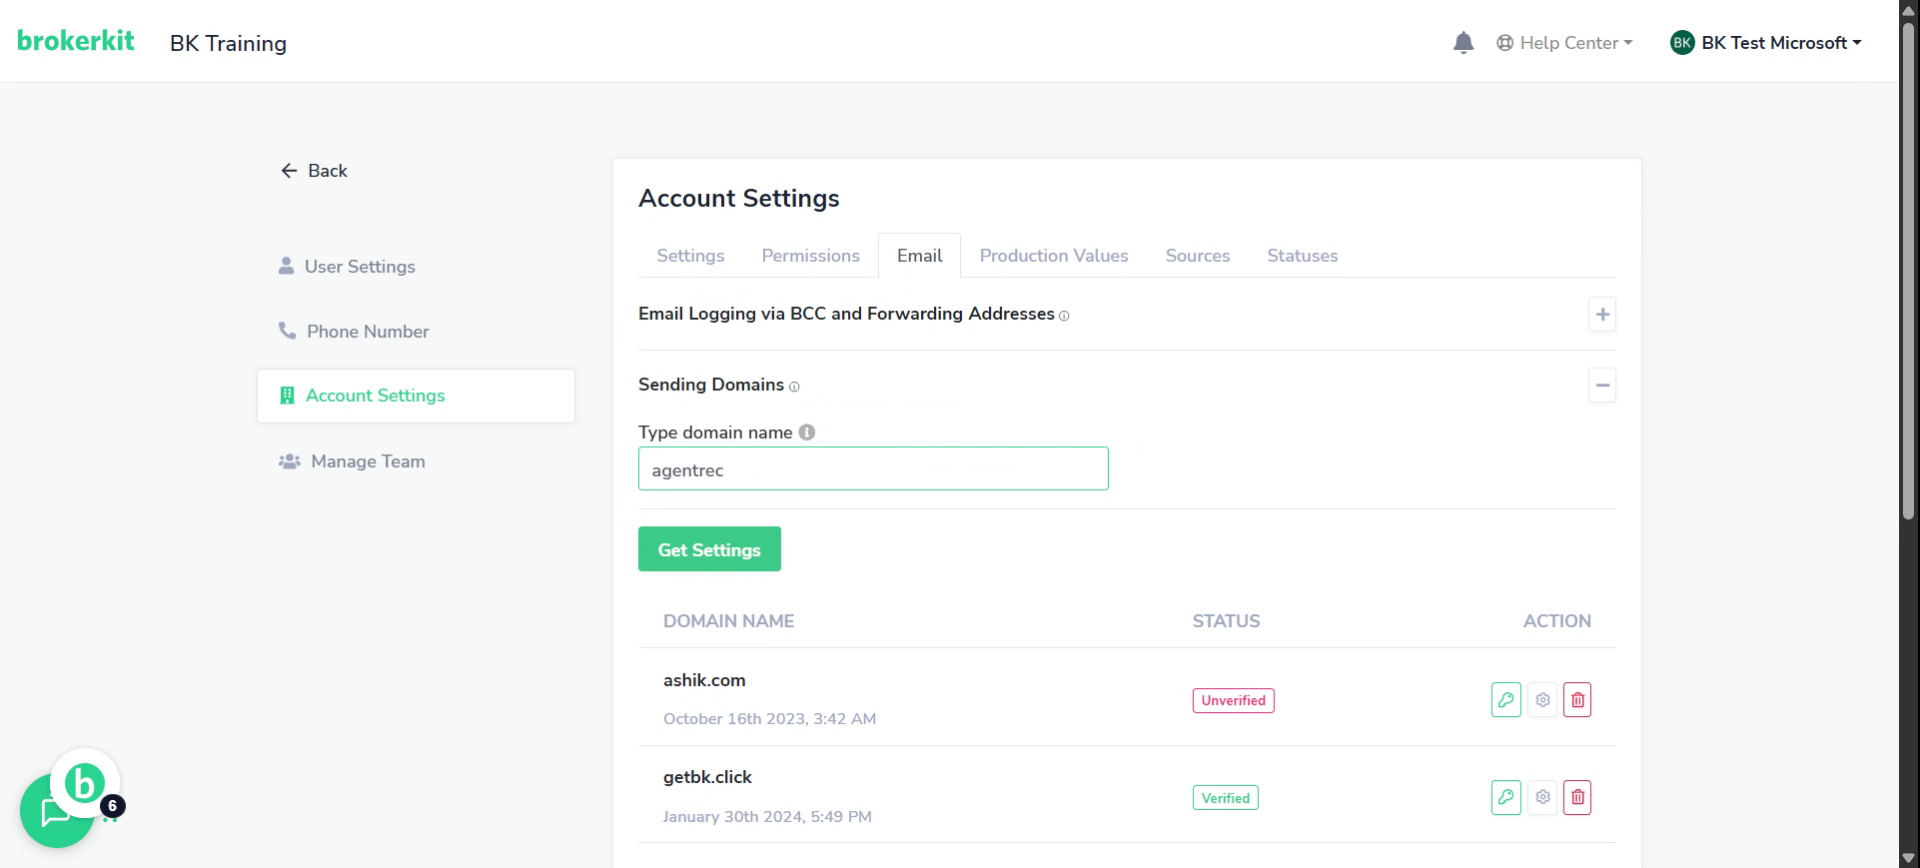
8. Fill with your email domain
Input your specific domain name to proceed with verification.
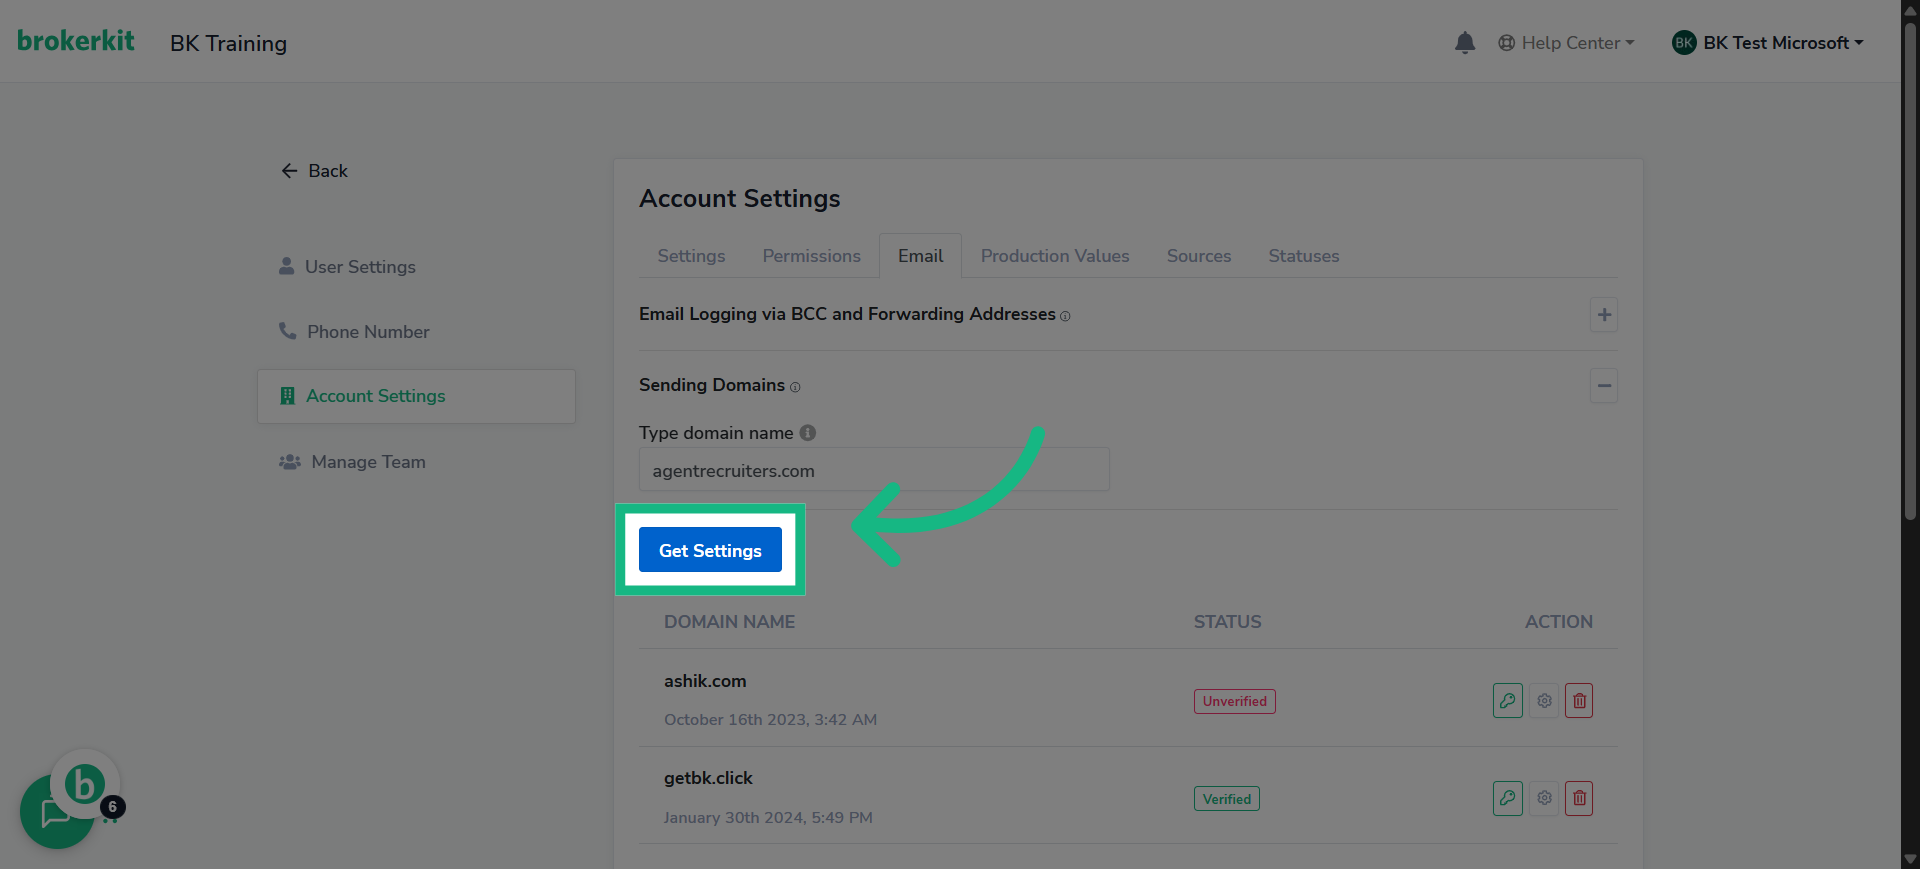
9. Click "Get Settings"
once that's done click get settings
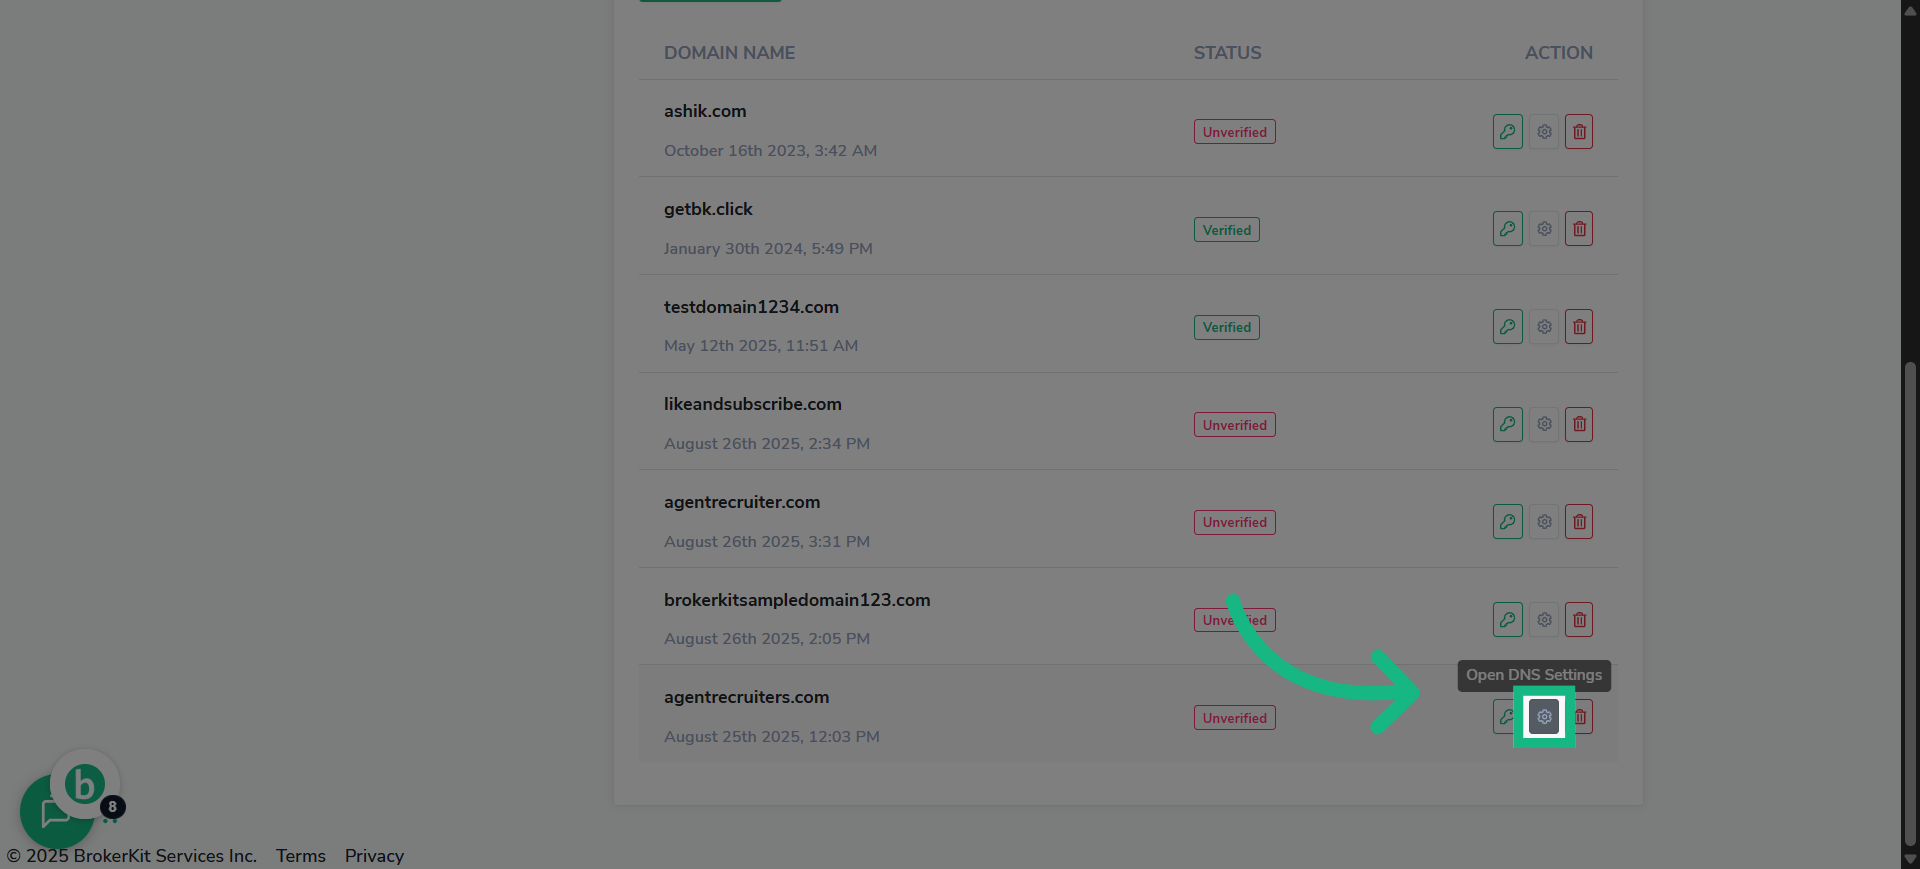
10. Click here
or if you wish to verify an email domain that already exist click this gear
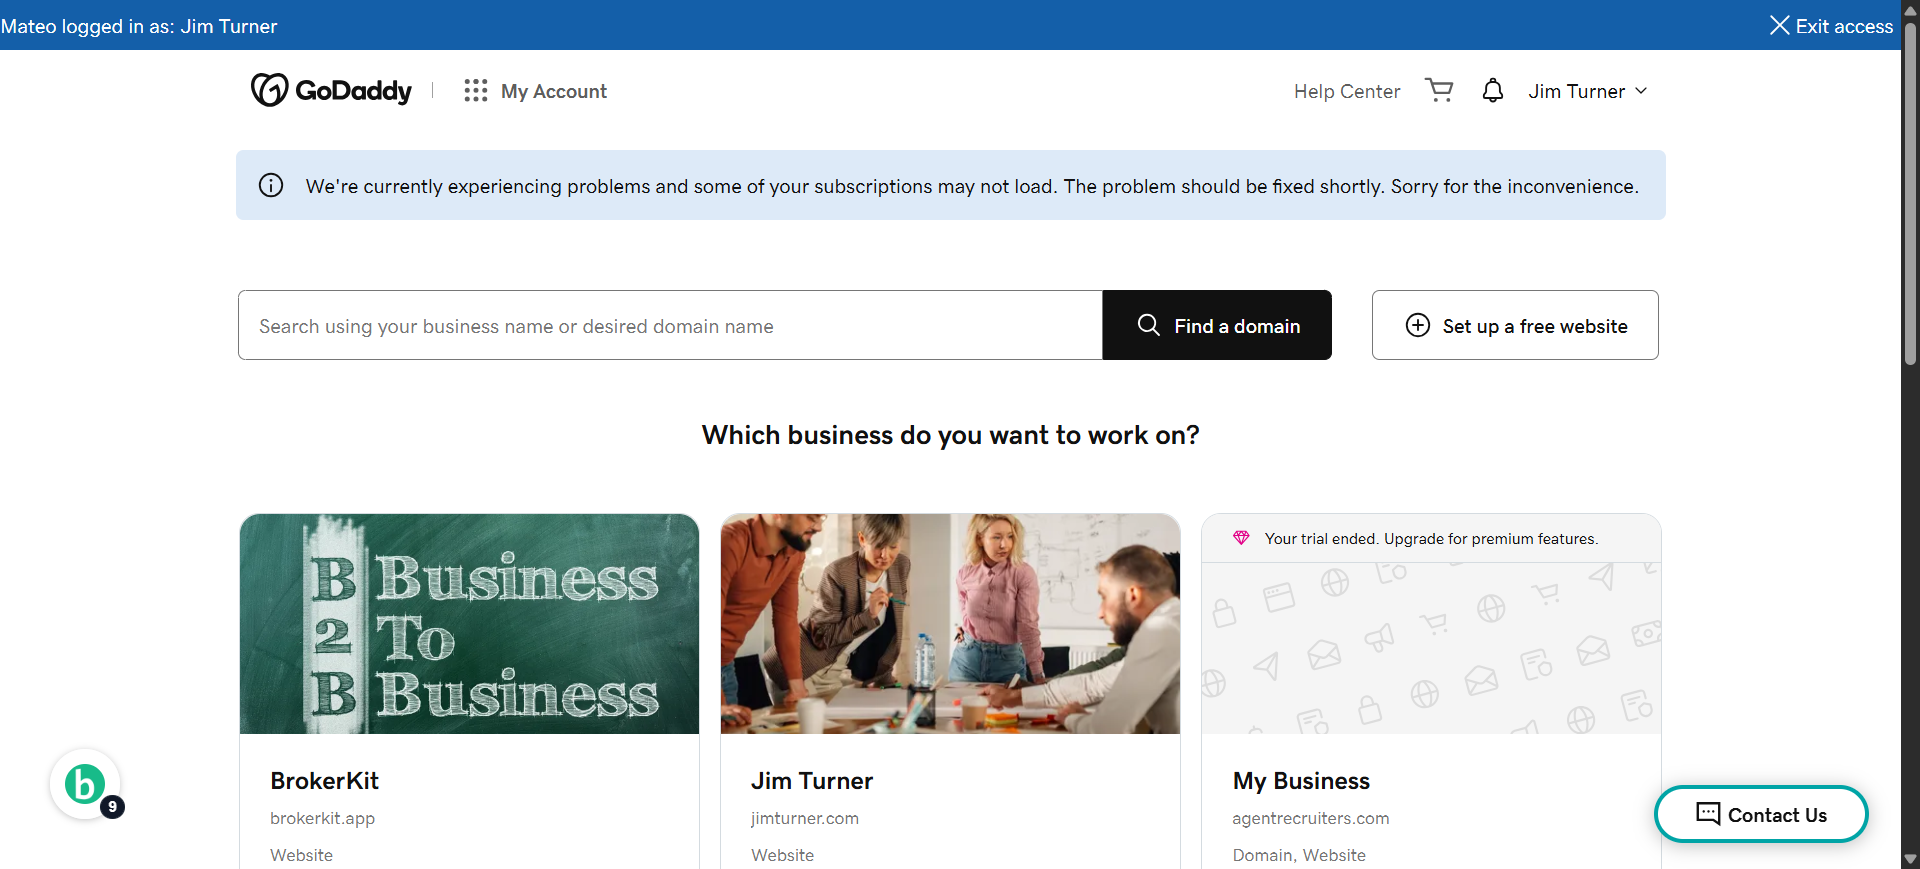
11. Switch to your godaddy account
Switch to your godaddy account, Open a new tab for this!
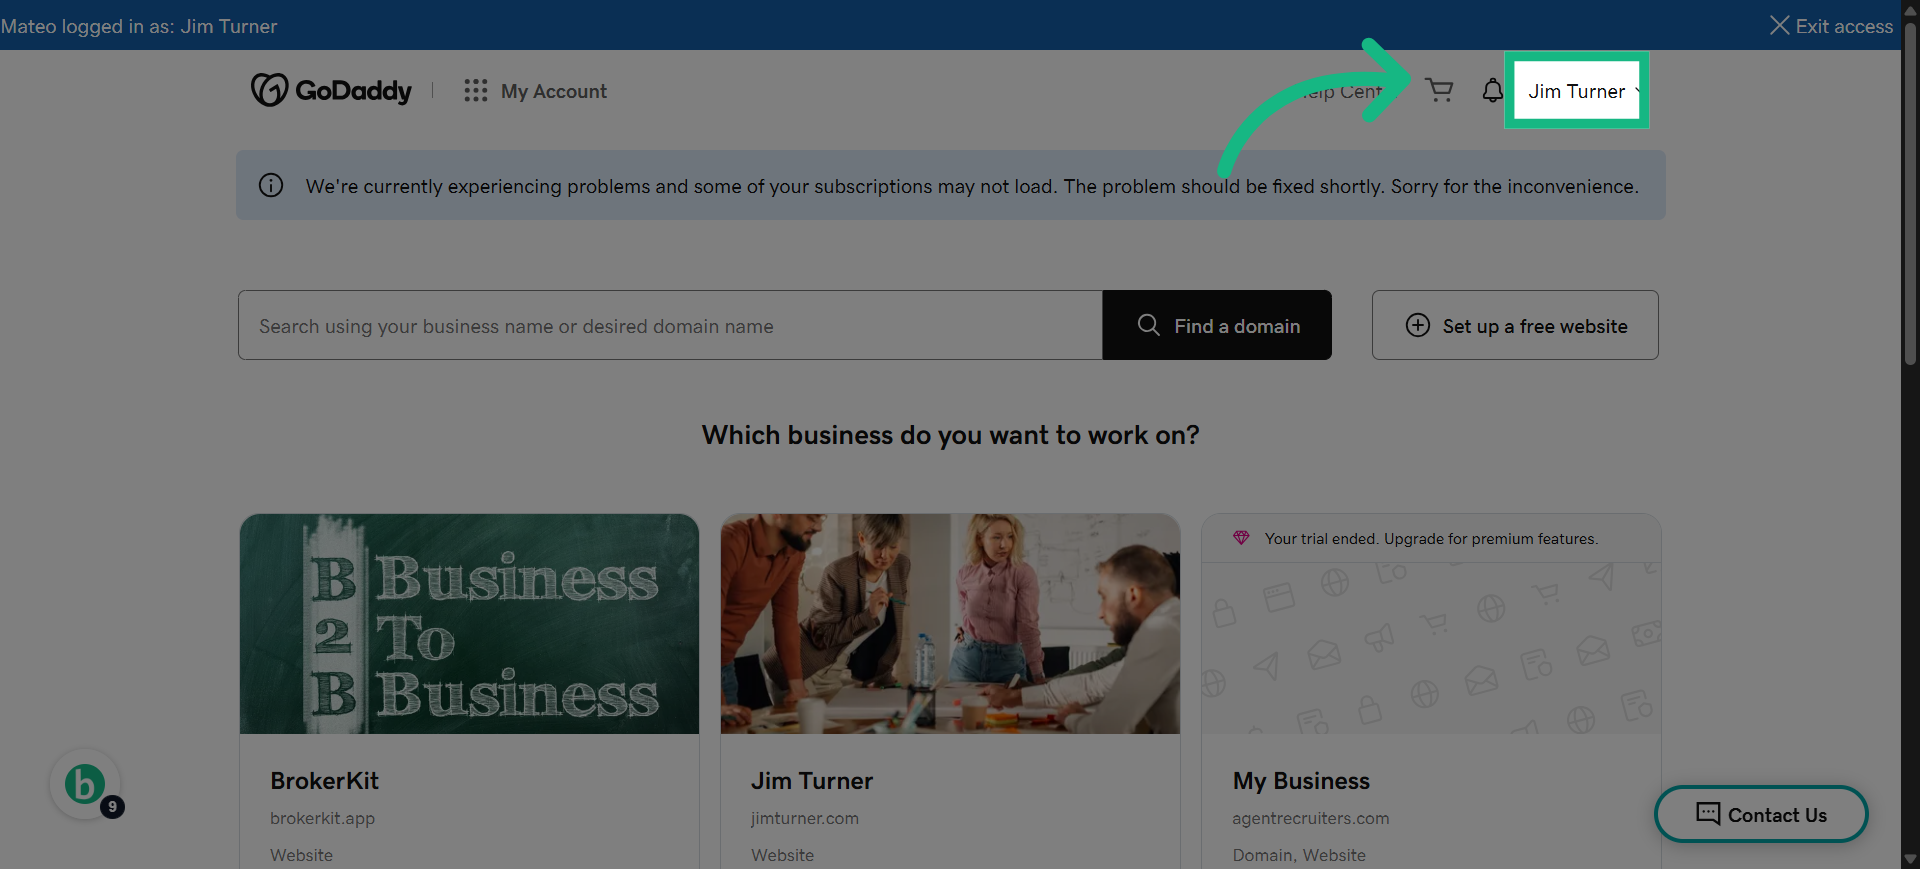
12. Click on your name
Click On Your name at the top right corner
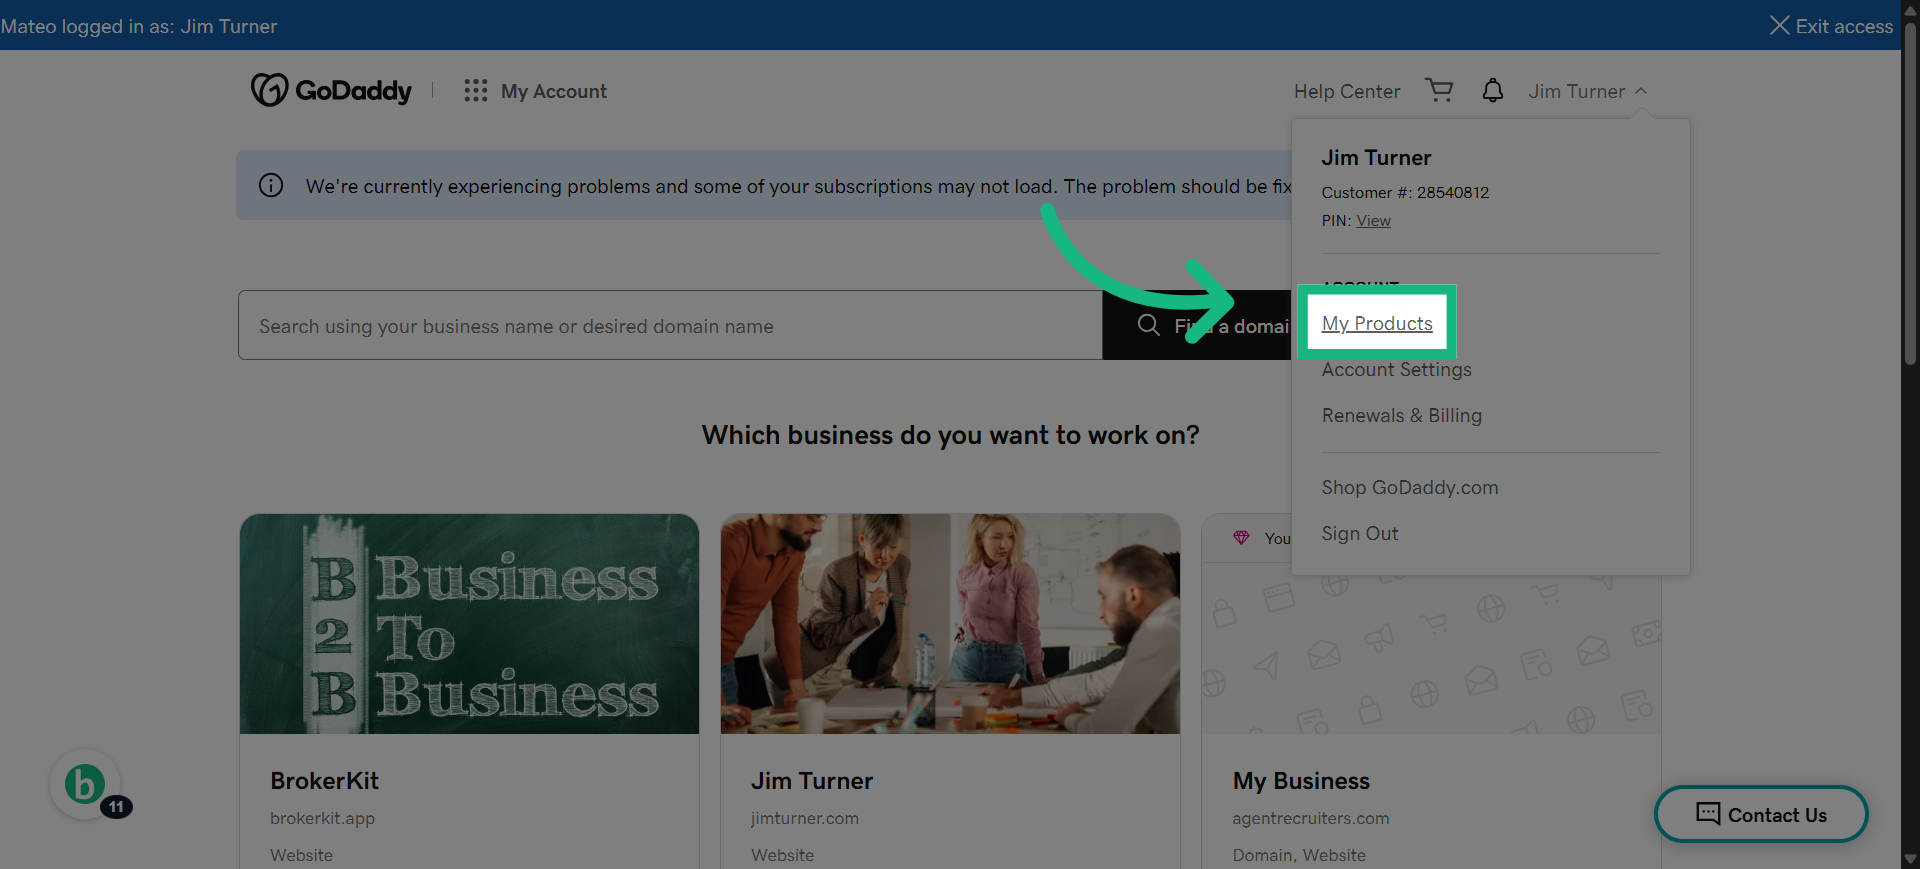
13. Click "My Products"
Go To My products
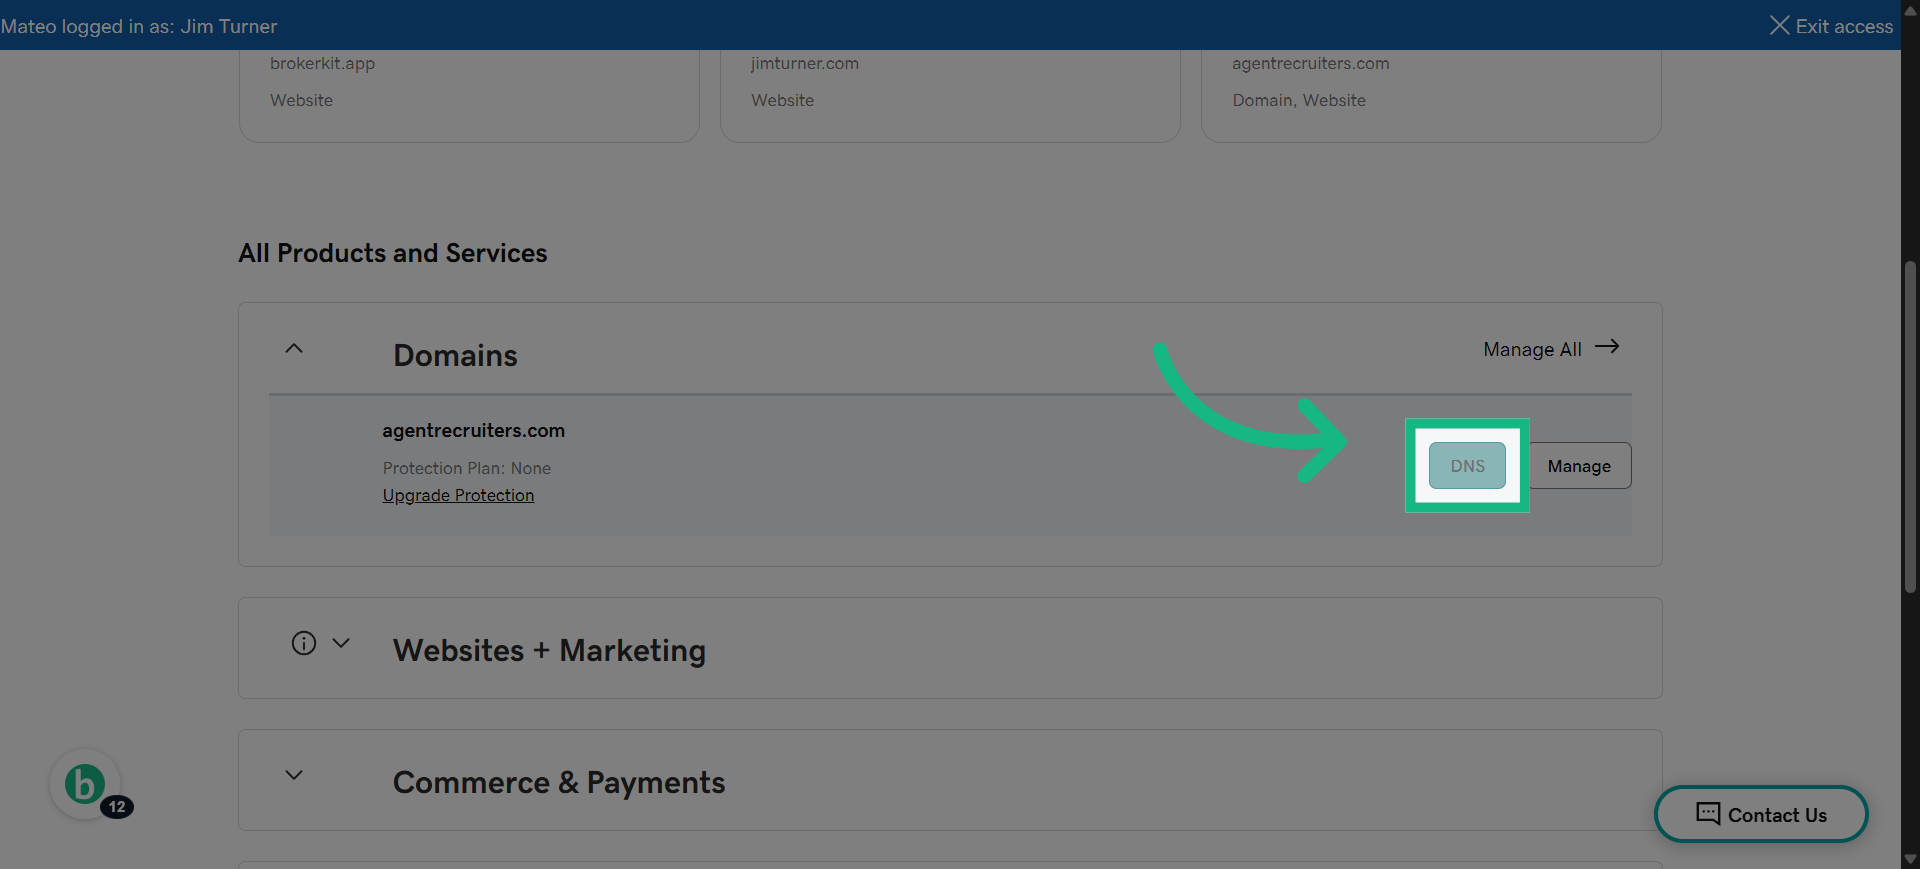
14. Click "DNS"
Select the DNS management option for your domain.
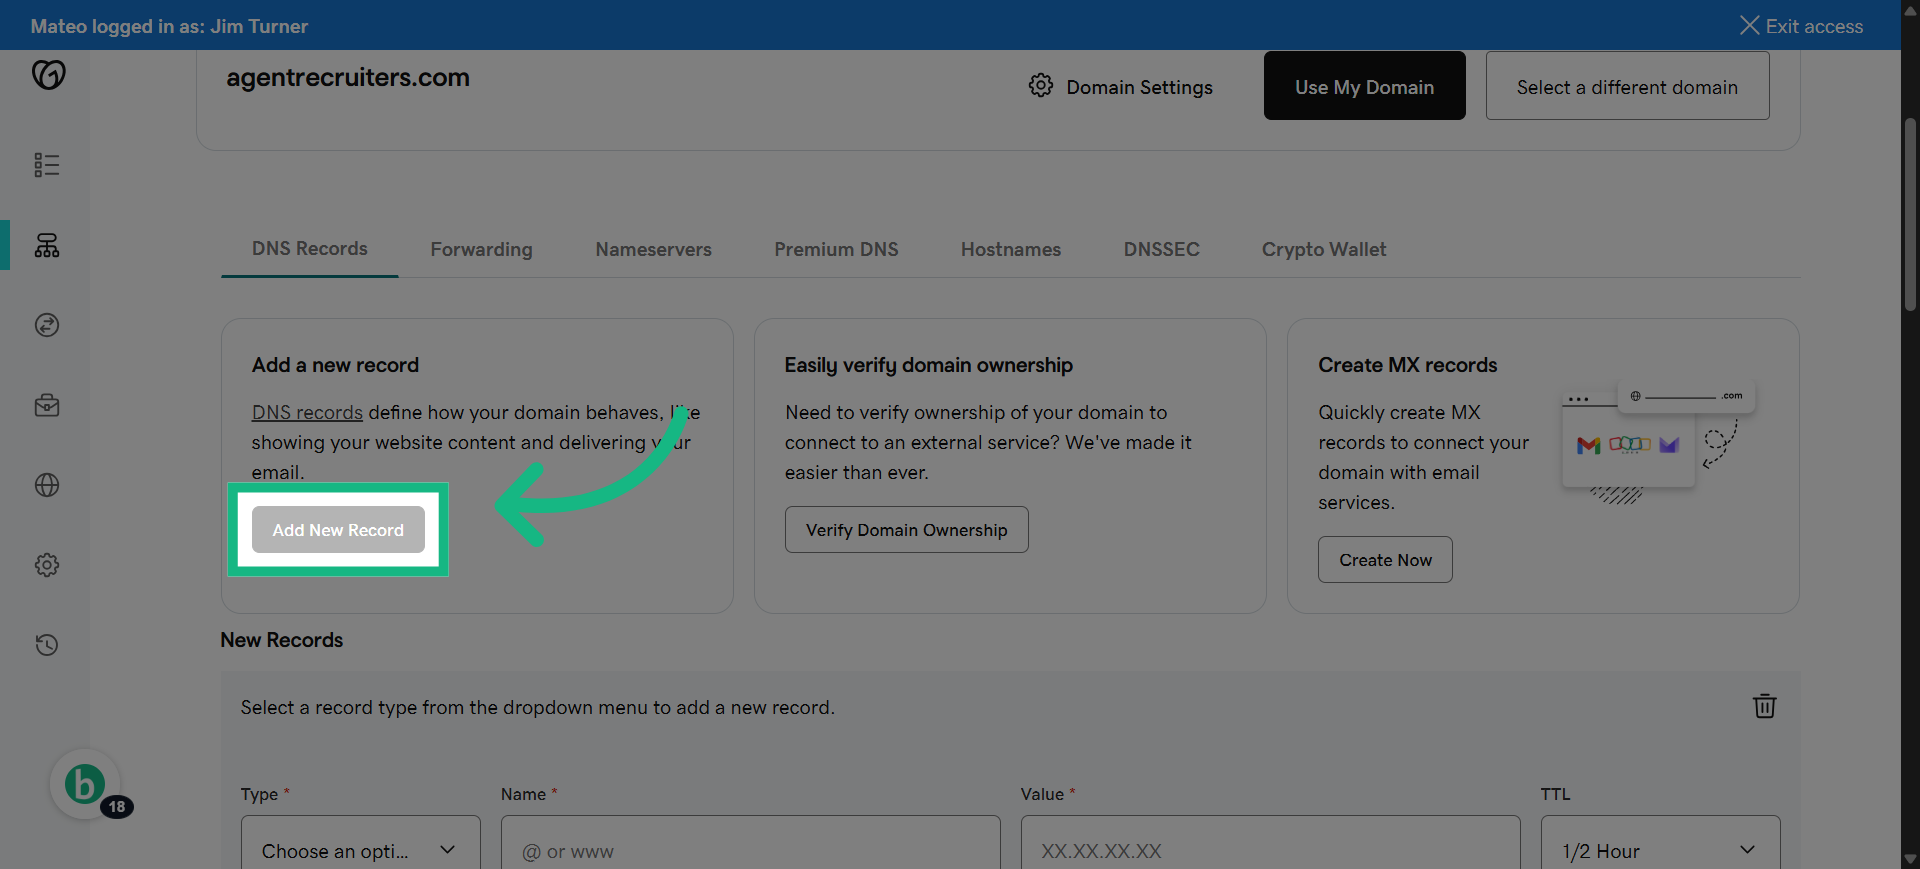
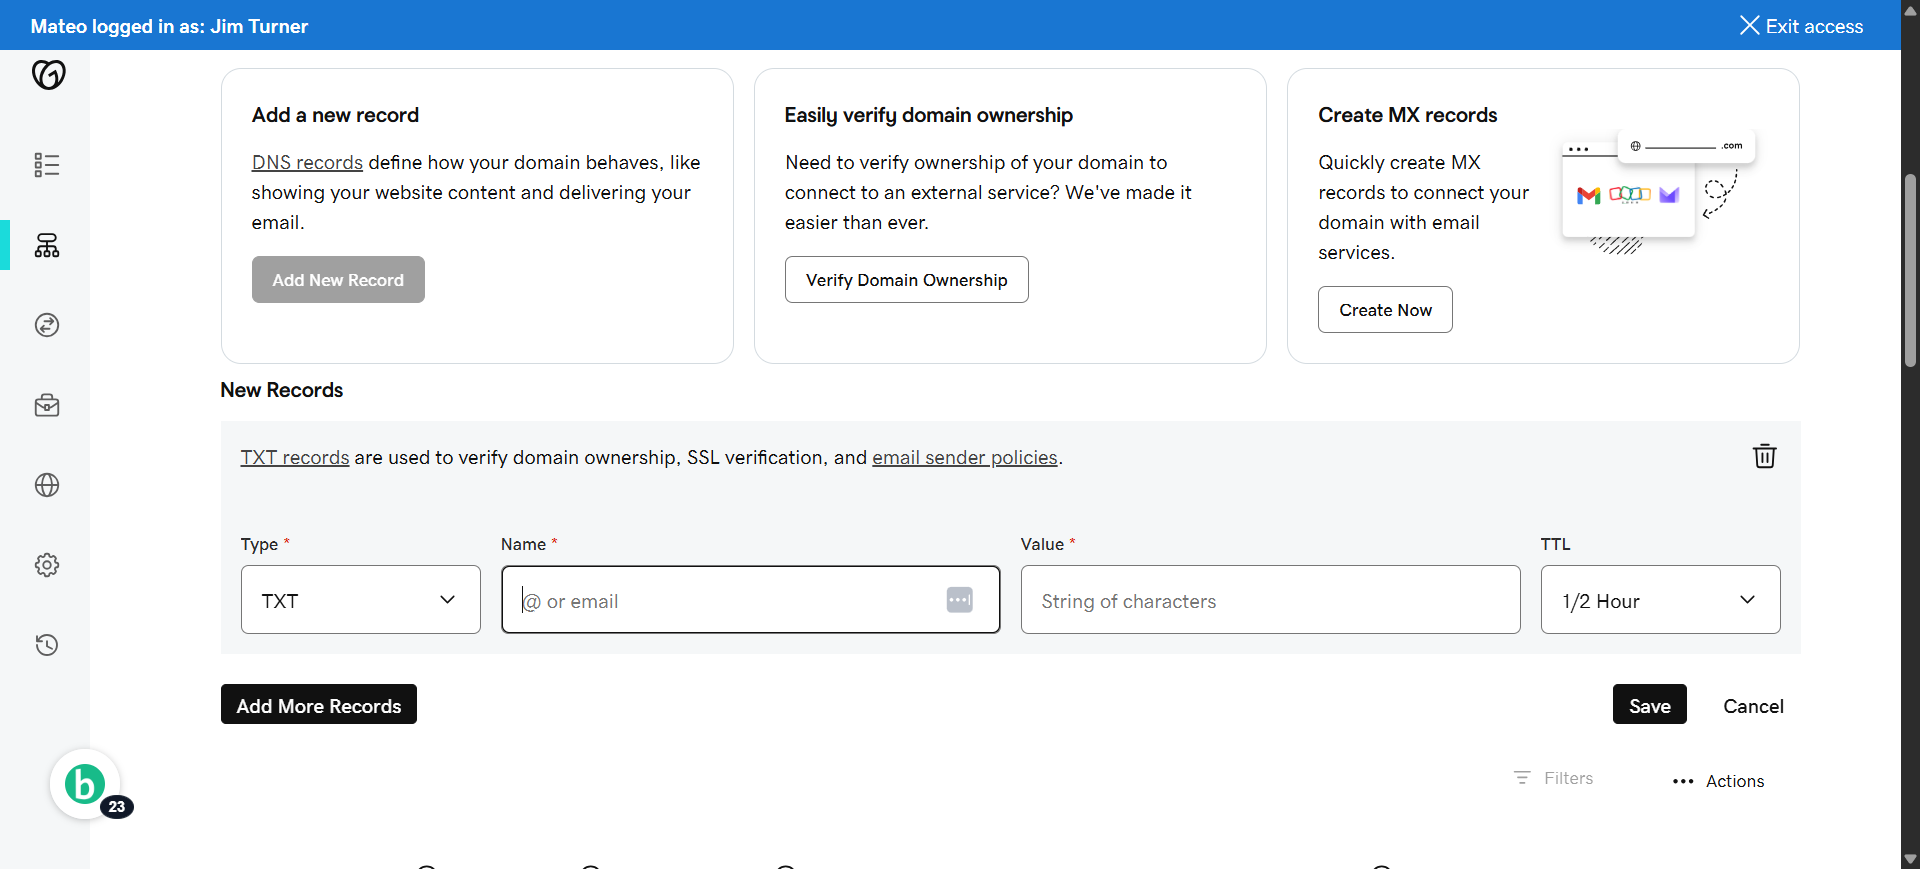
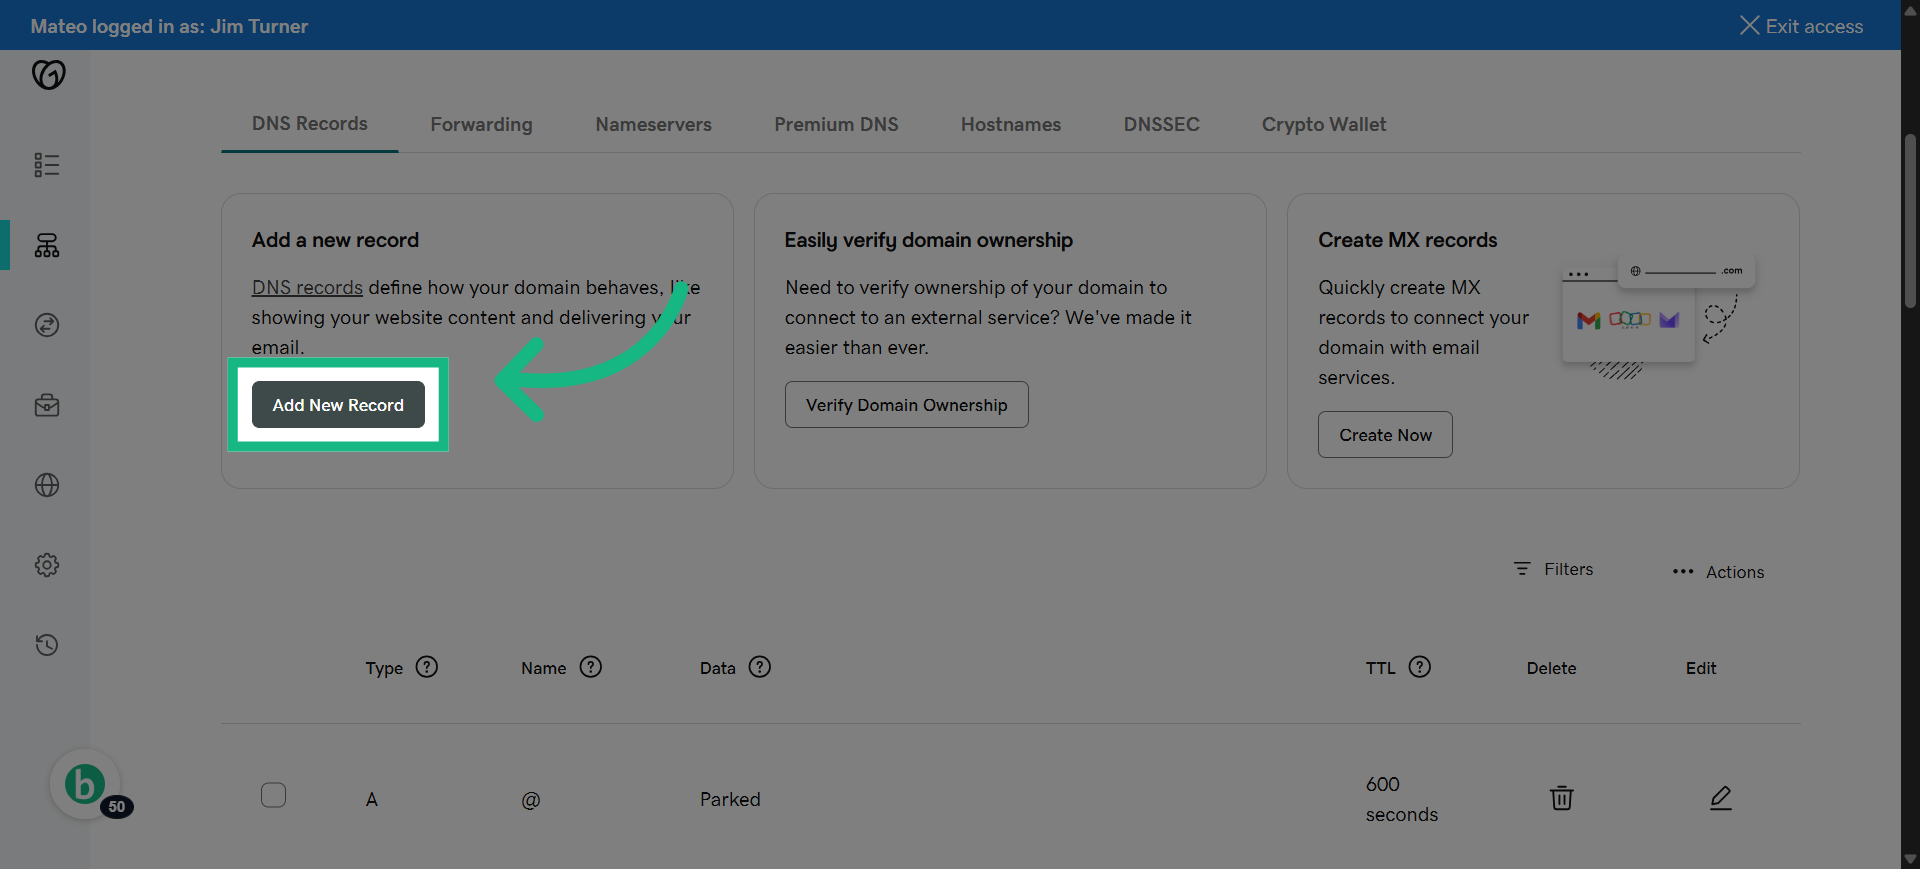
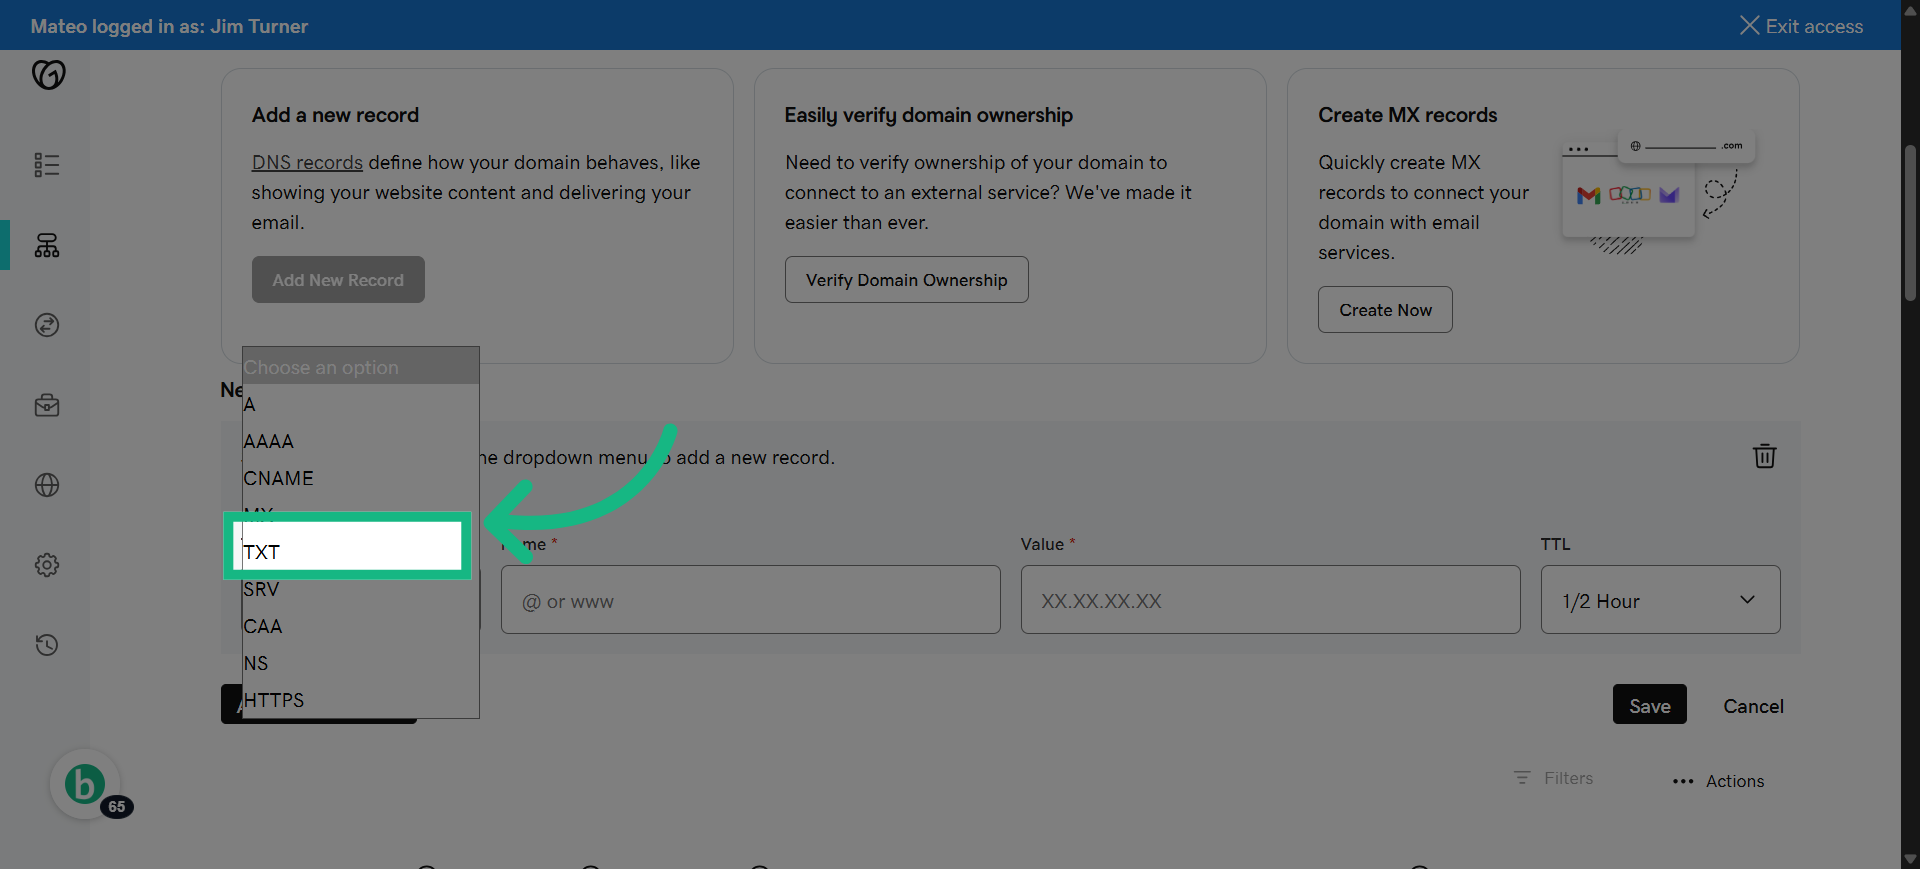
15. Click "Add New Record"
Start adding a new DNS record to authenticate your domain.
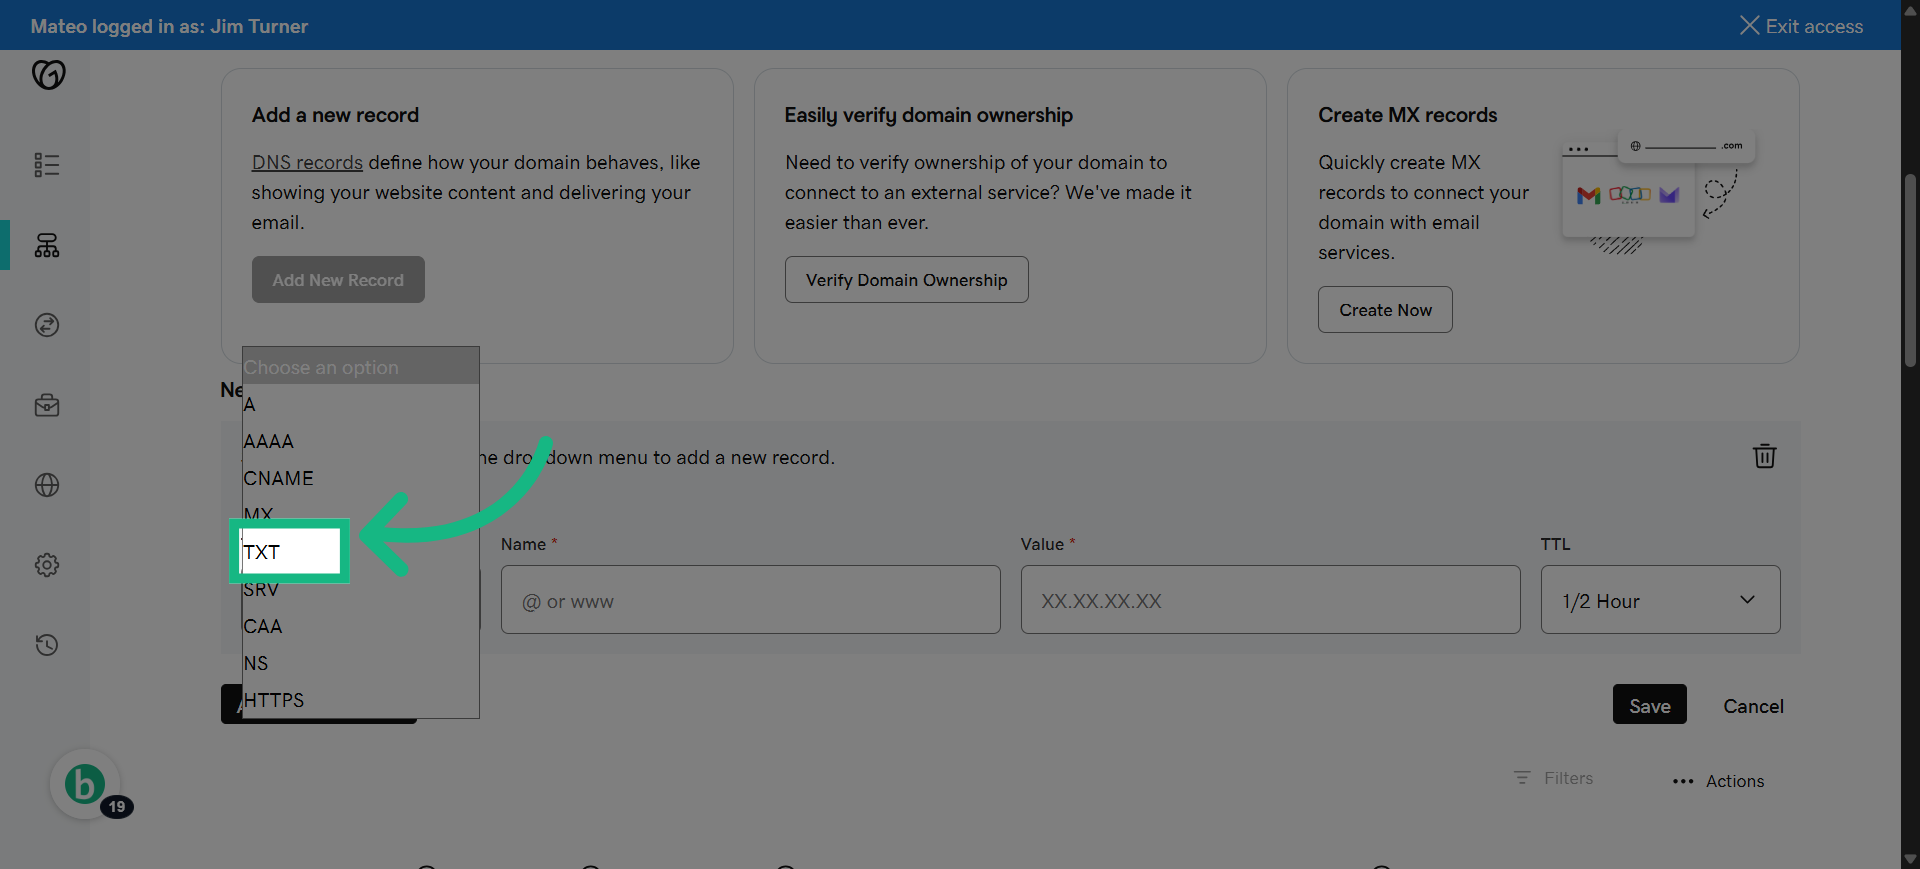
16. Select TXT
Select the type of DNS record you need to add for verification.
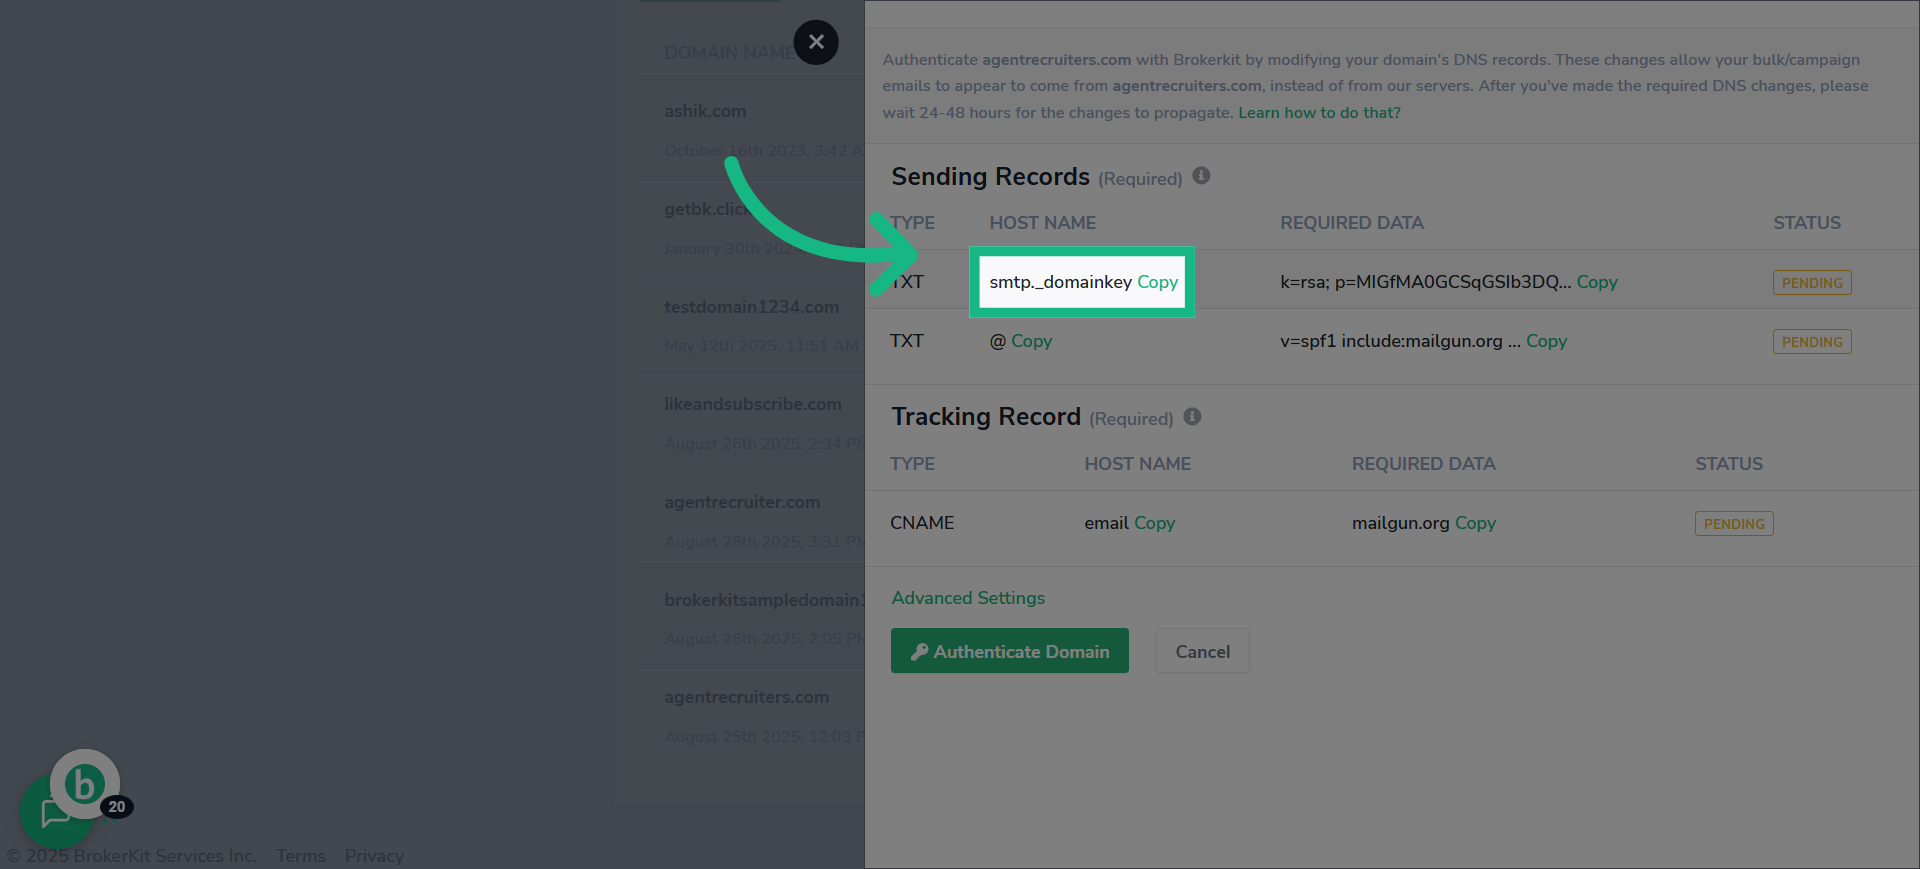
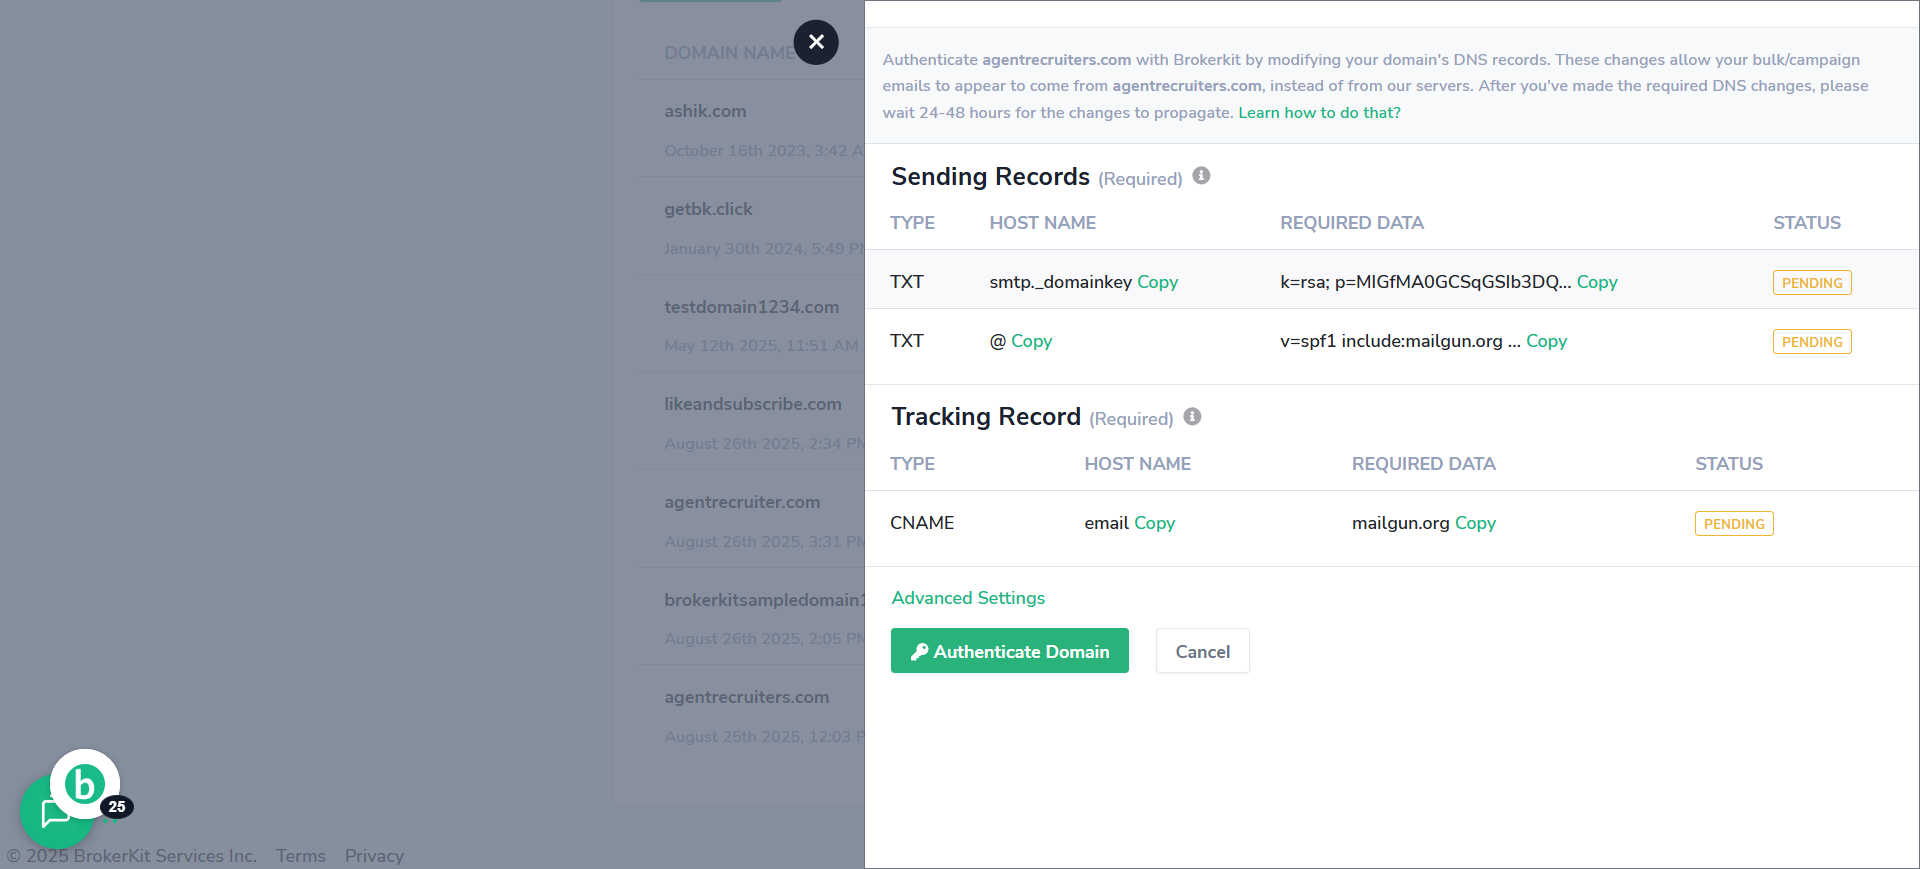
17. Switch to brokerkit
Return to Brokerkit to copy the specific DNS record value.

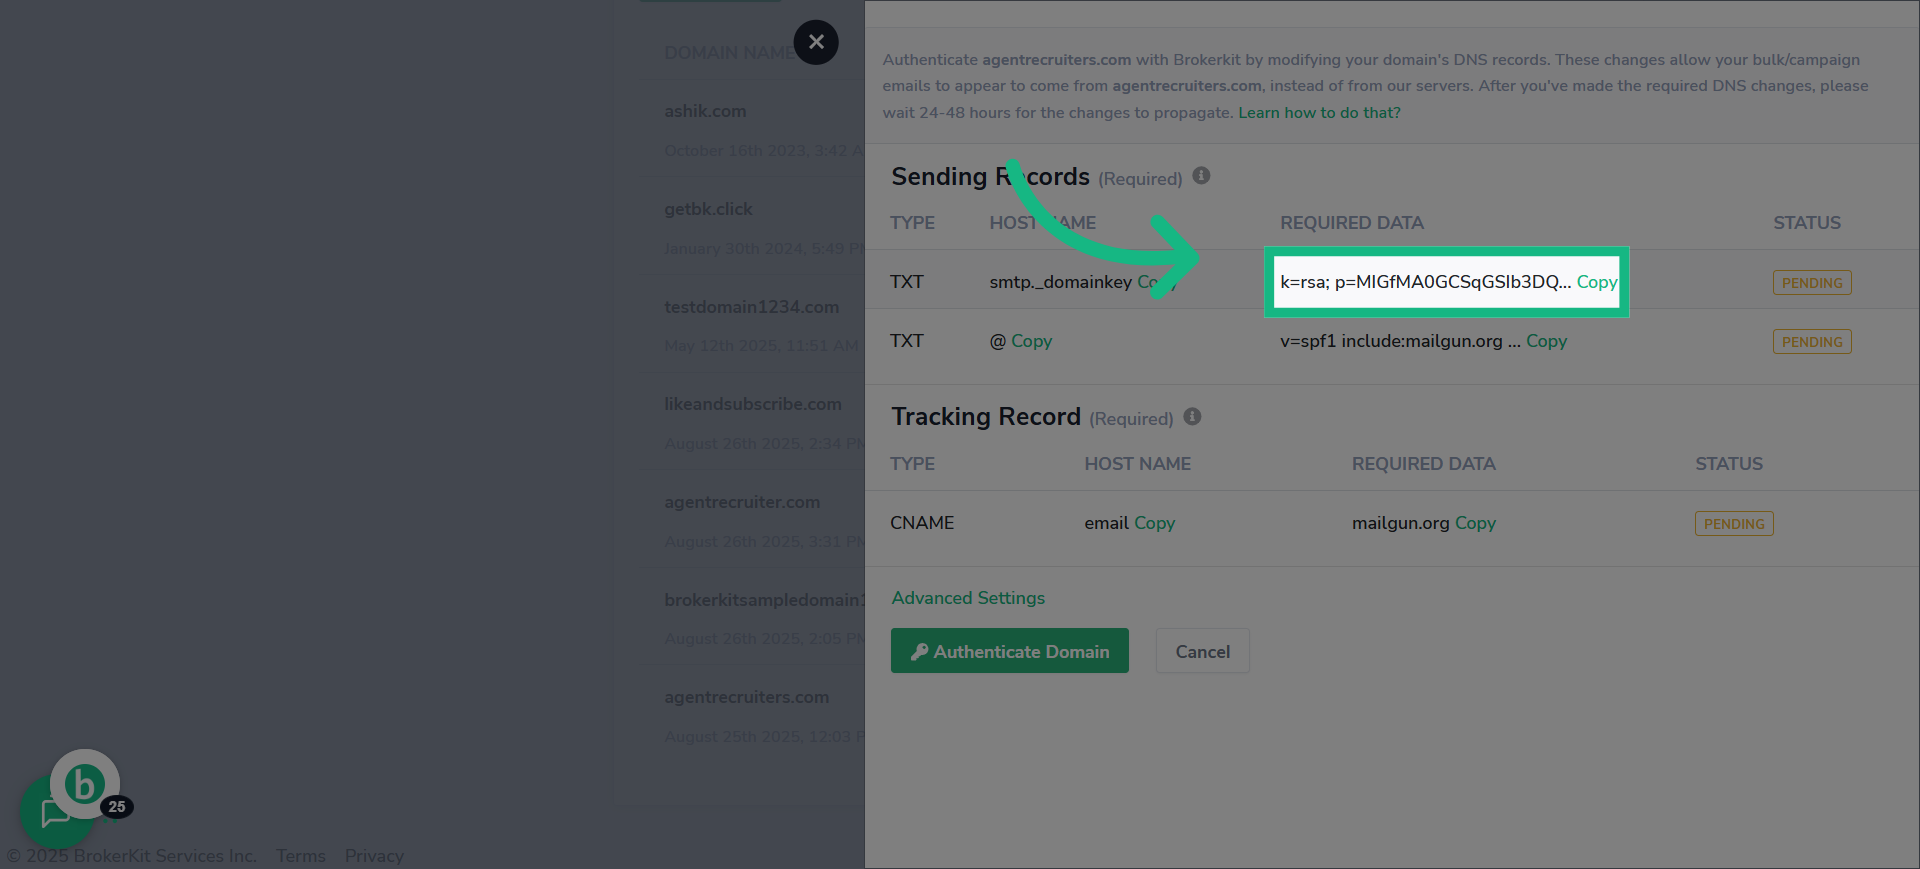
18. Click "Copy"
Copy the DNS record value provided by Brokerkit for your domain.
19. Switch to godaddy
Switch back to your domain registrar's DNS management page.
20. Click "Name*"
Select the field to enter the DNS record name.
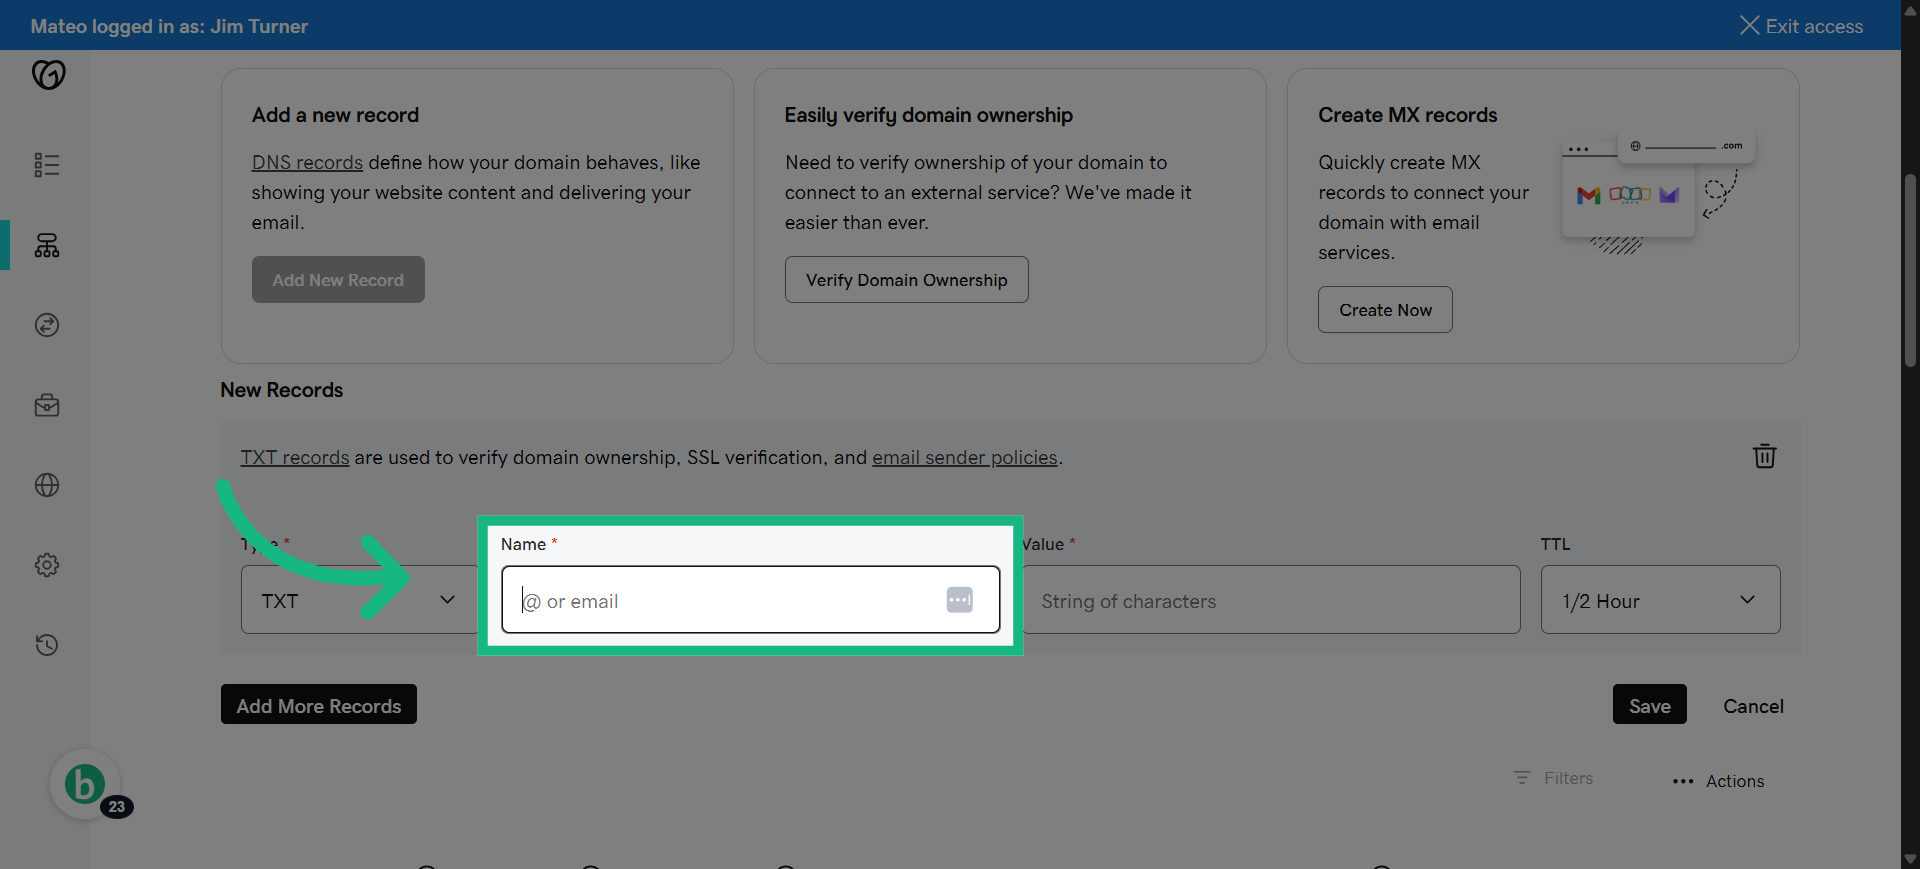
21. paste what you copied
Enter the DNS record name exactly as specified by Brokerkit.

22. Switch to brokerkit
Return to Brokerkit to copy the corresponding DNS record content.
23. Click "Copy"
Copy the DNS record content to be added to your DNS settings.
24. Switch to godaddy
Switch again to go daddy
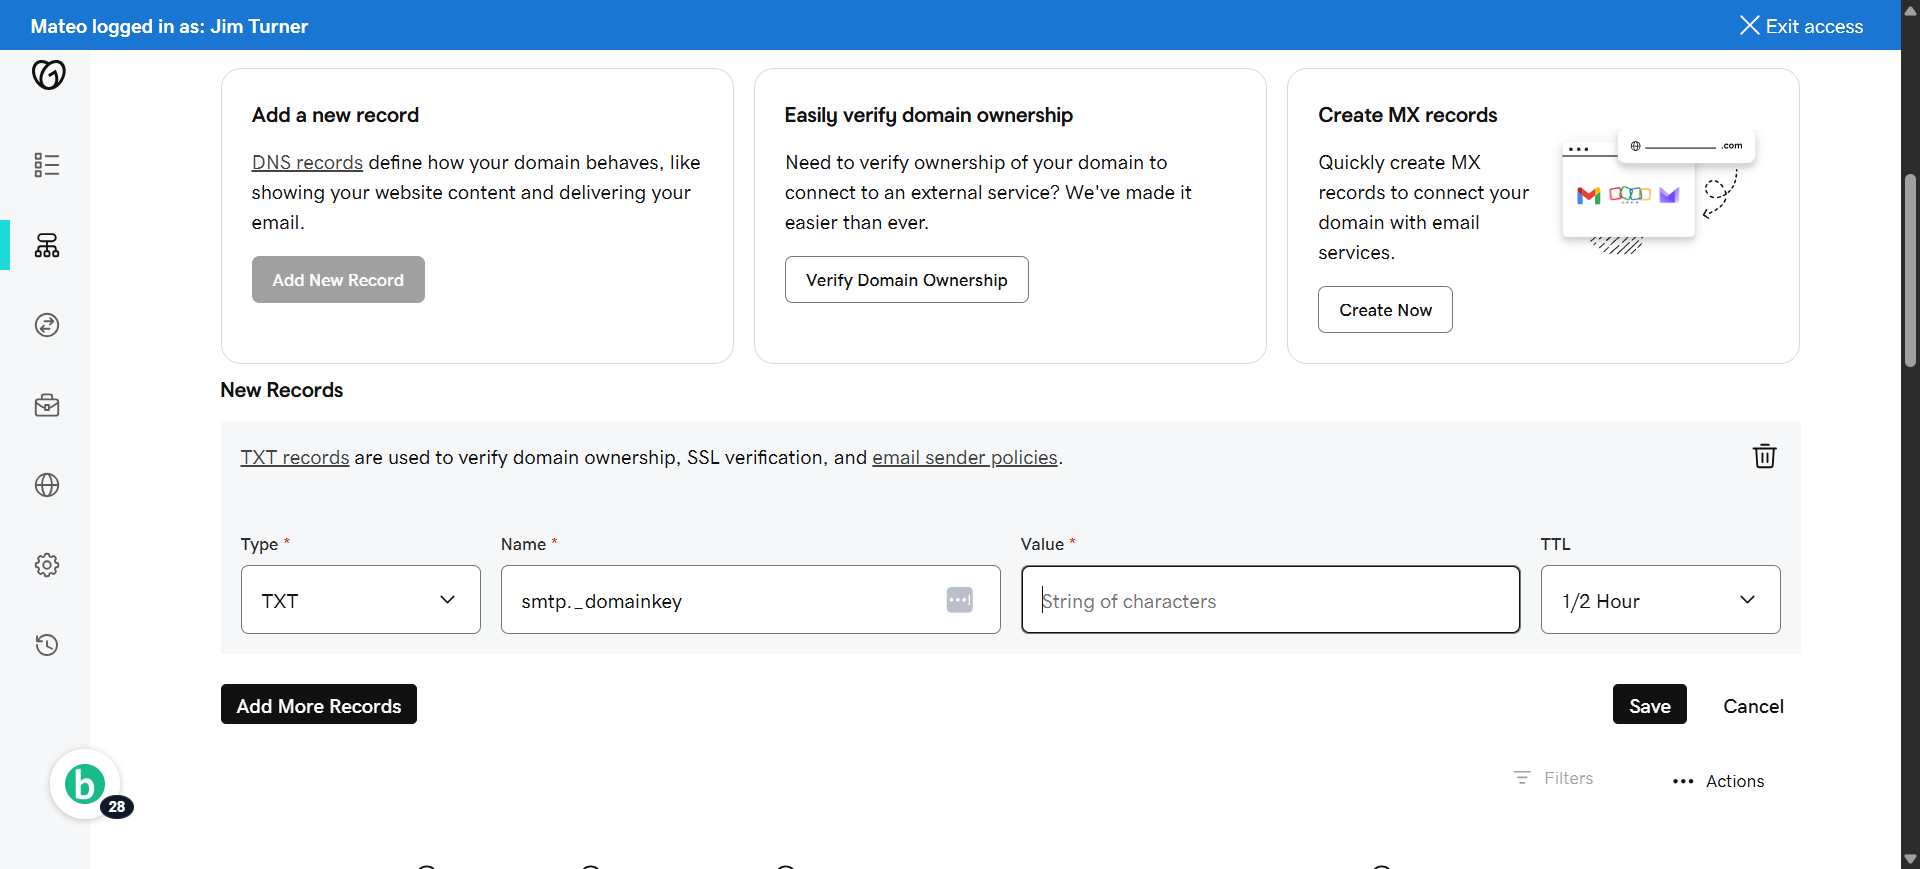
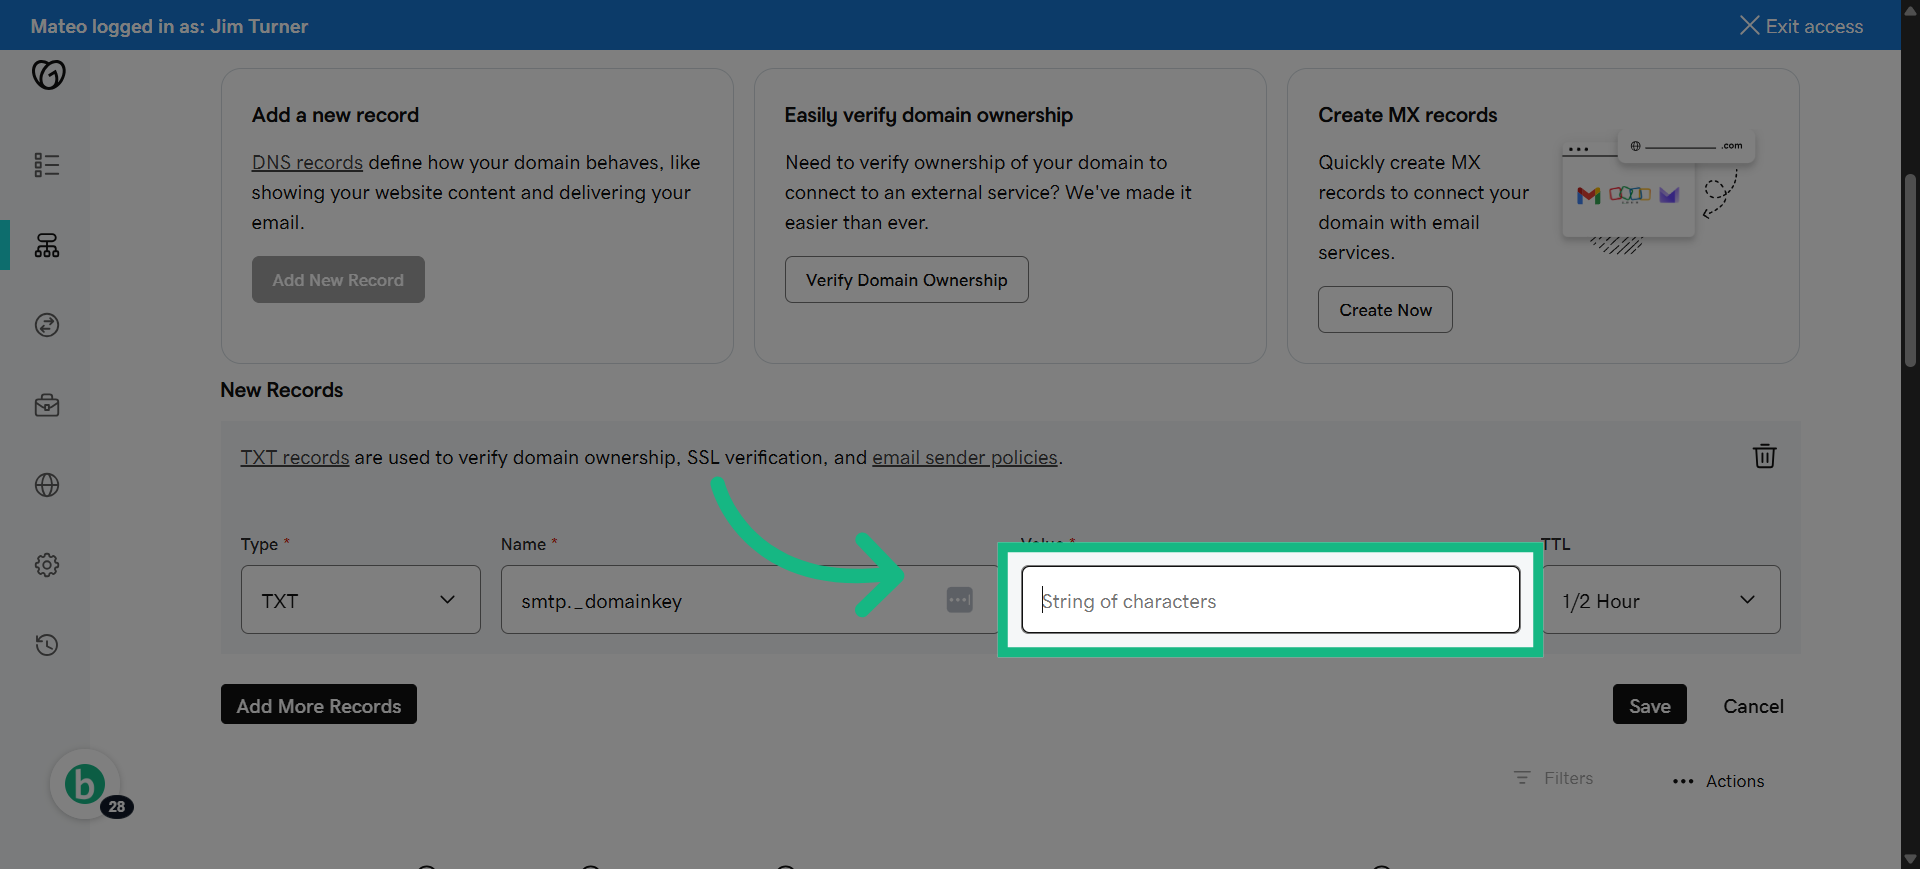
25. Click "Value*"
Select the field to enter the DNS record value.
26. paste the copied information
Paste the copied DNS record content into the value field.

27. Click "Save"
Save the newly added DNS record to your domain settings.

28. View "DNS Management"
before adding a new record scroll down to Verify that you don't have an existing spf record for this sending domain.
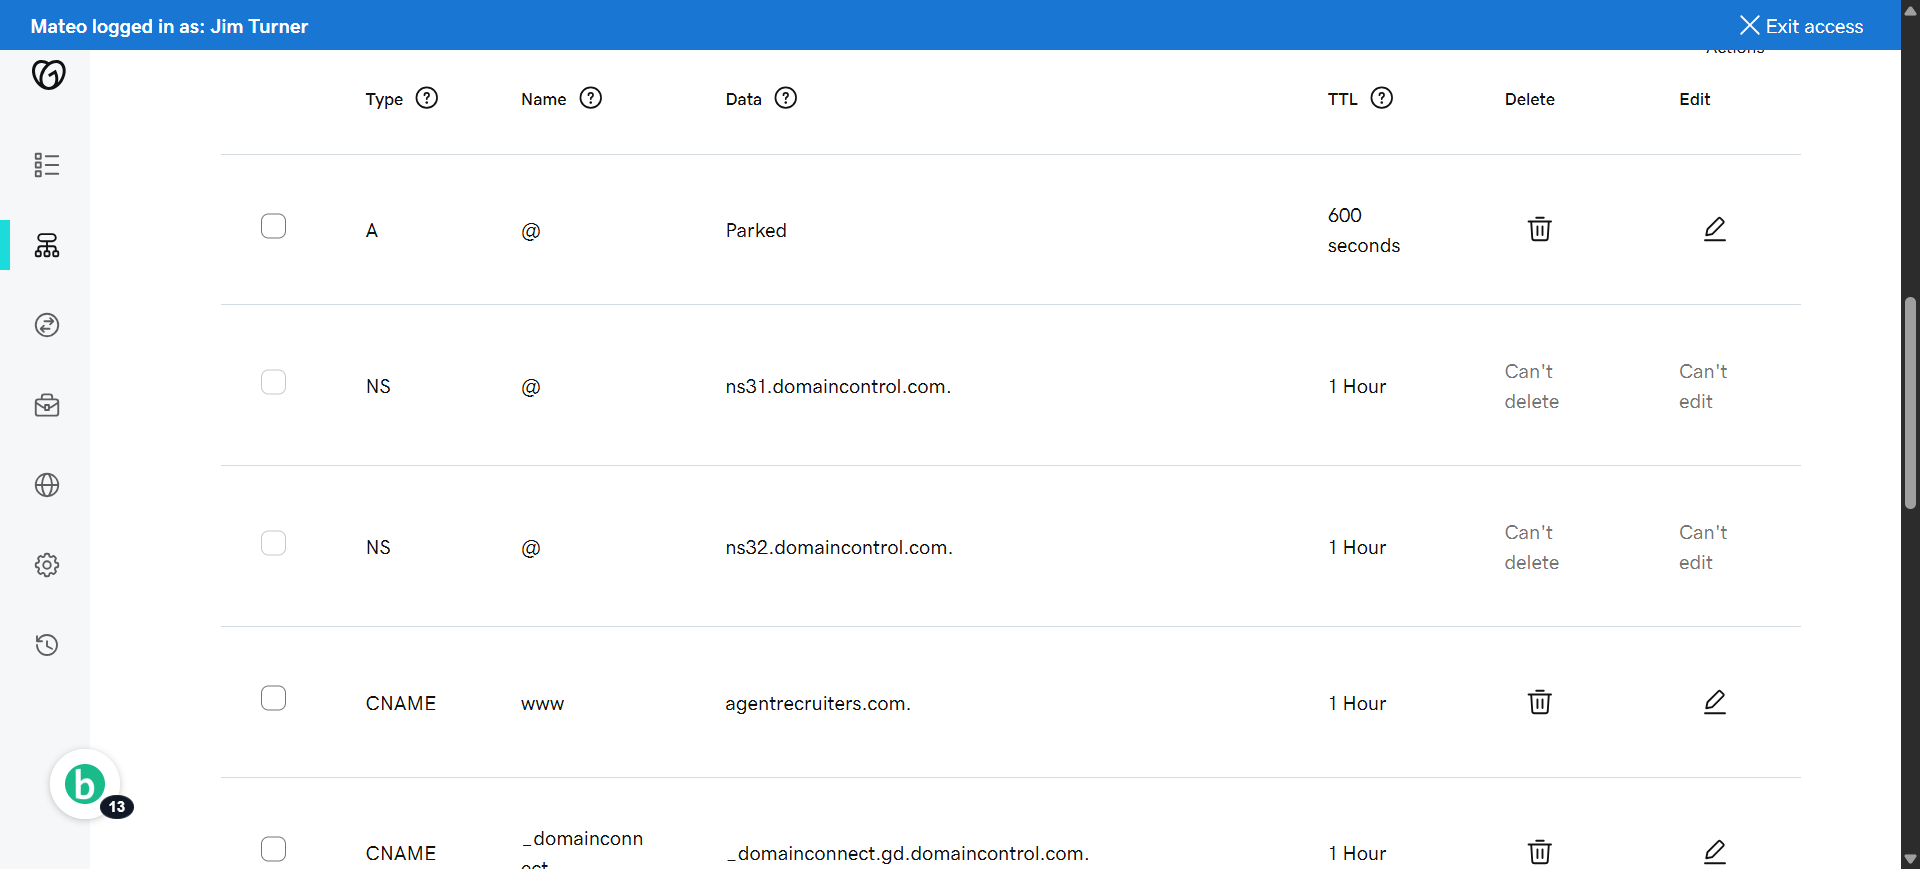
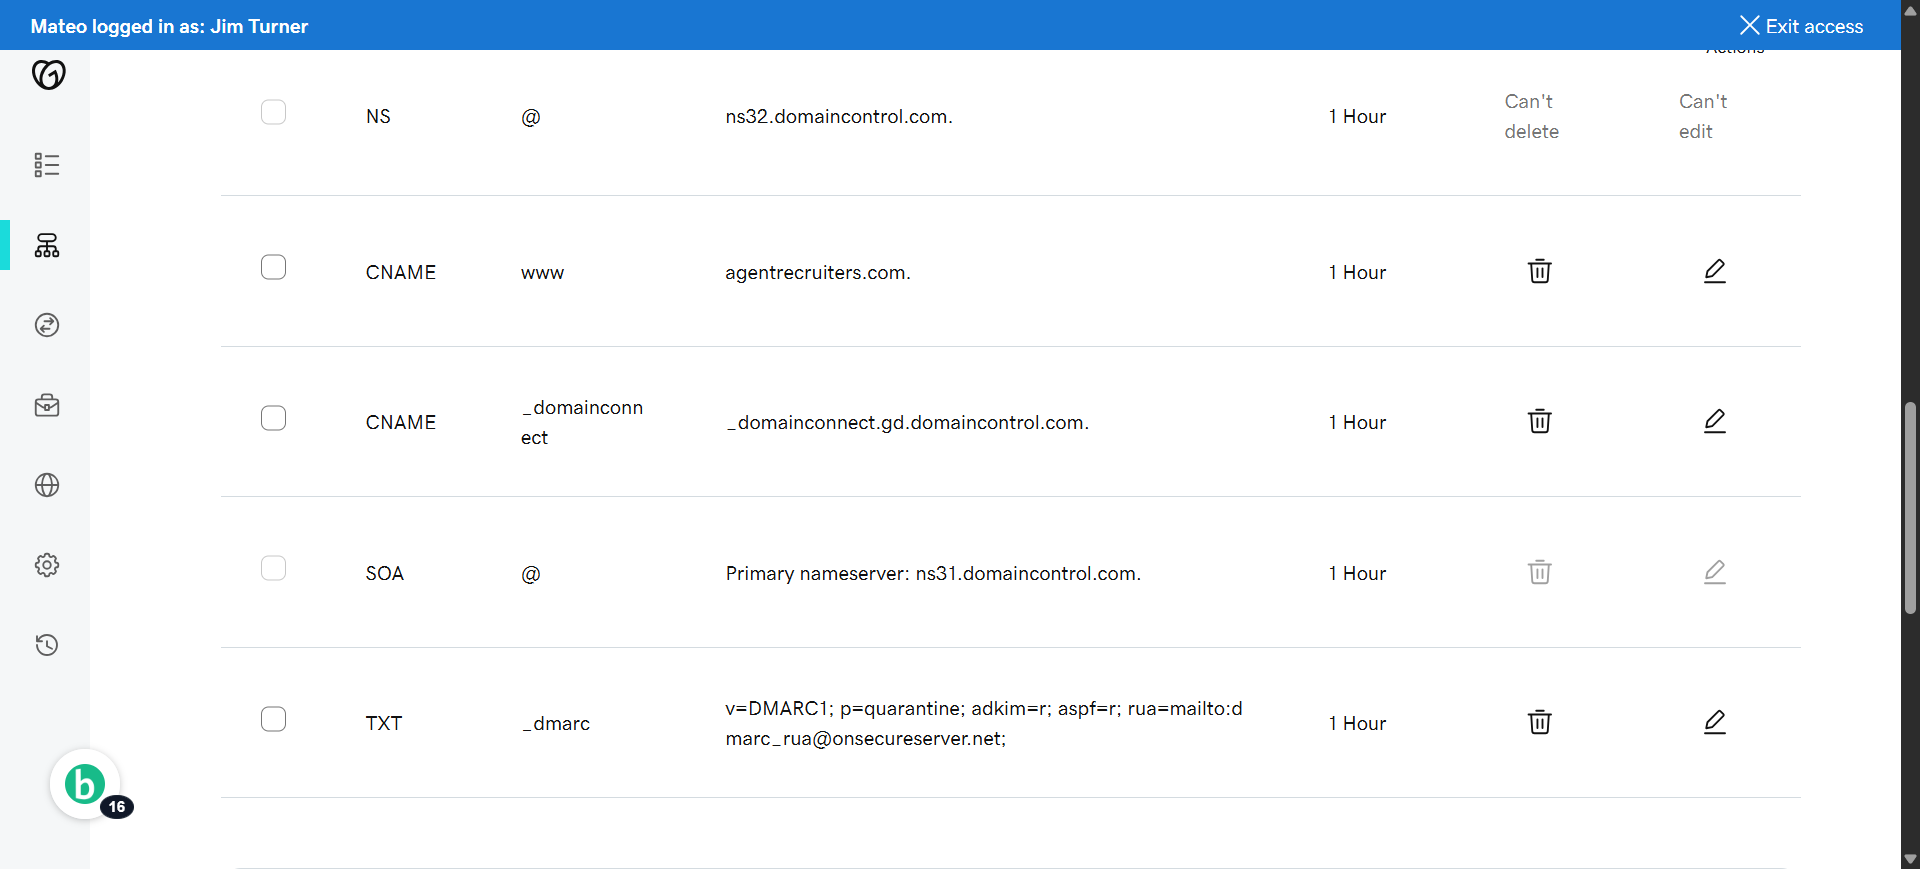
29. View "DNS Management"
Verify the spf records to ensure ther are not any duplicaTES.
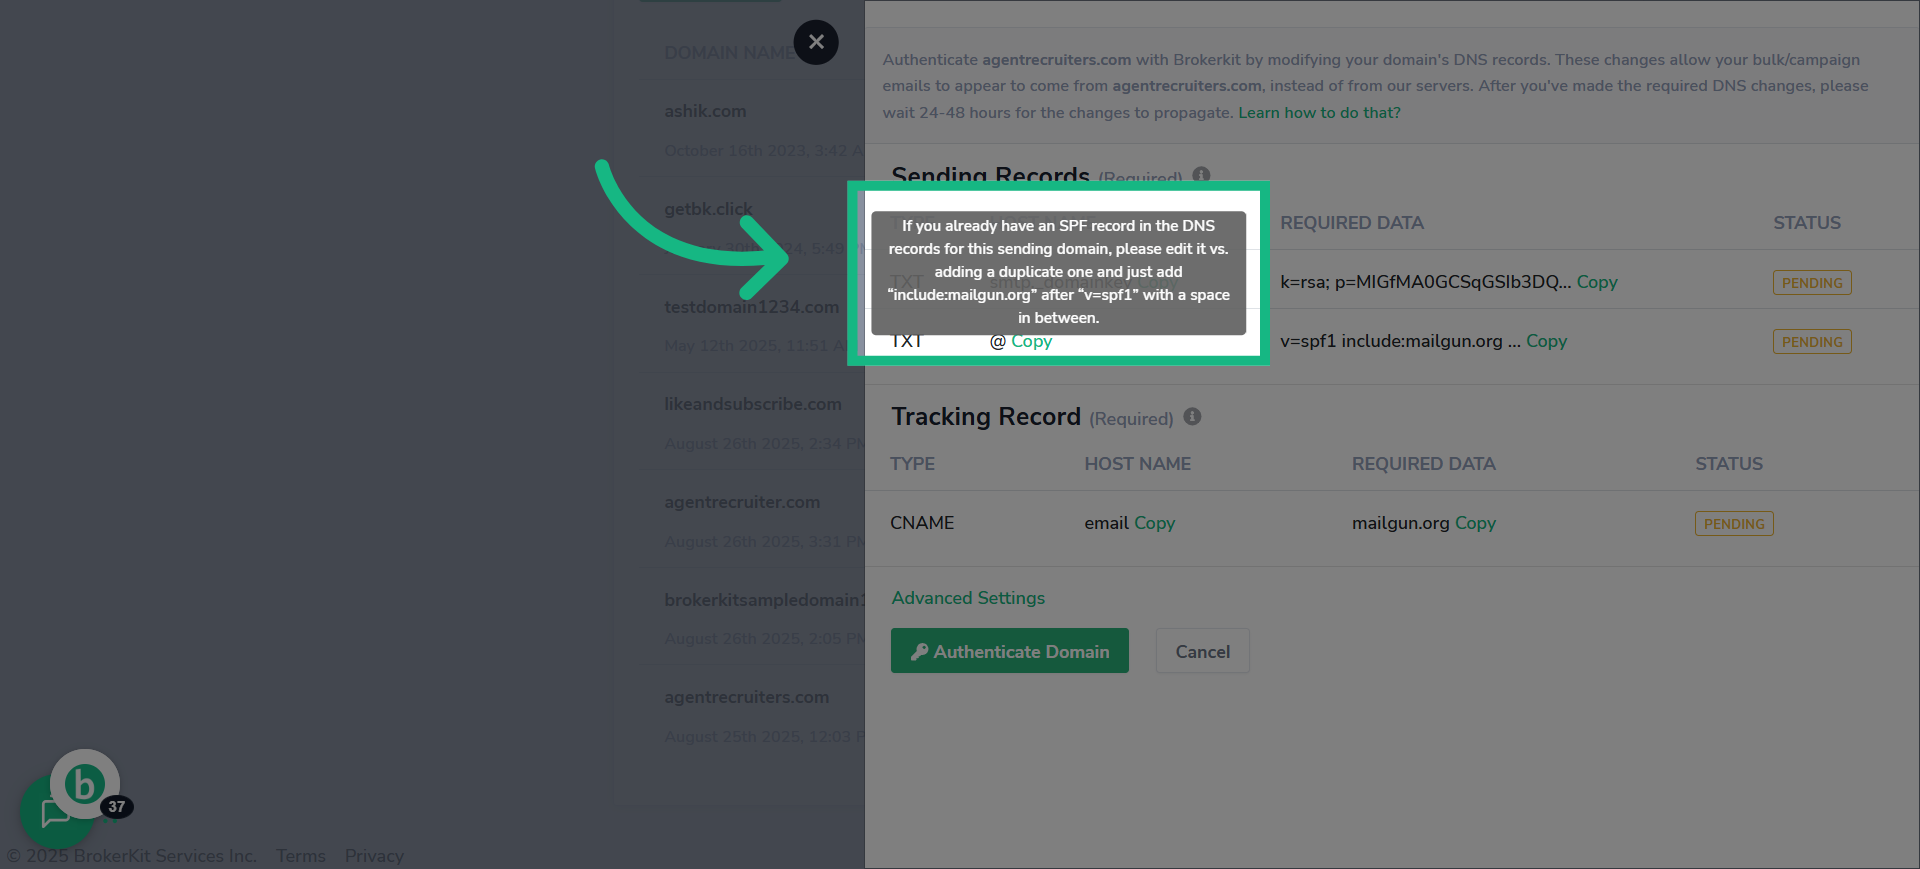
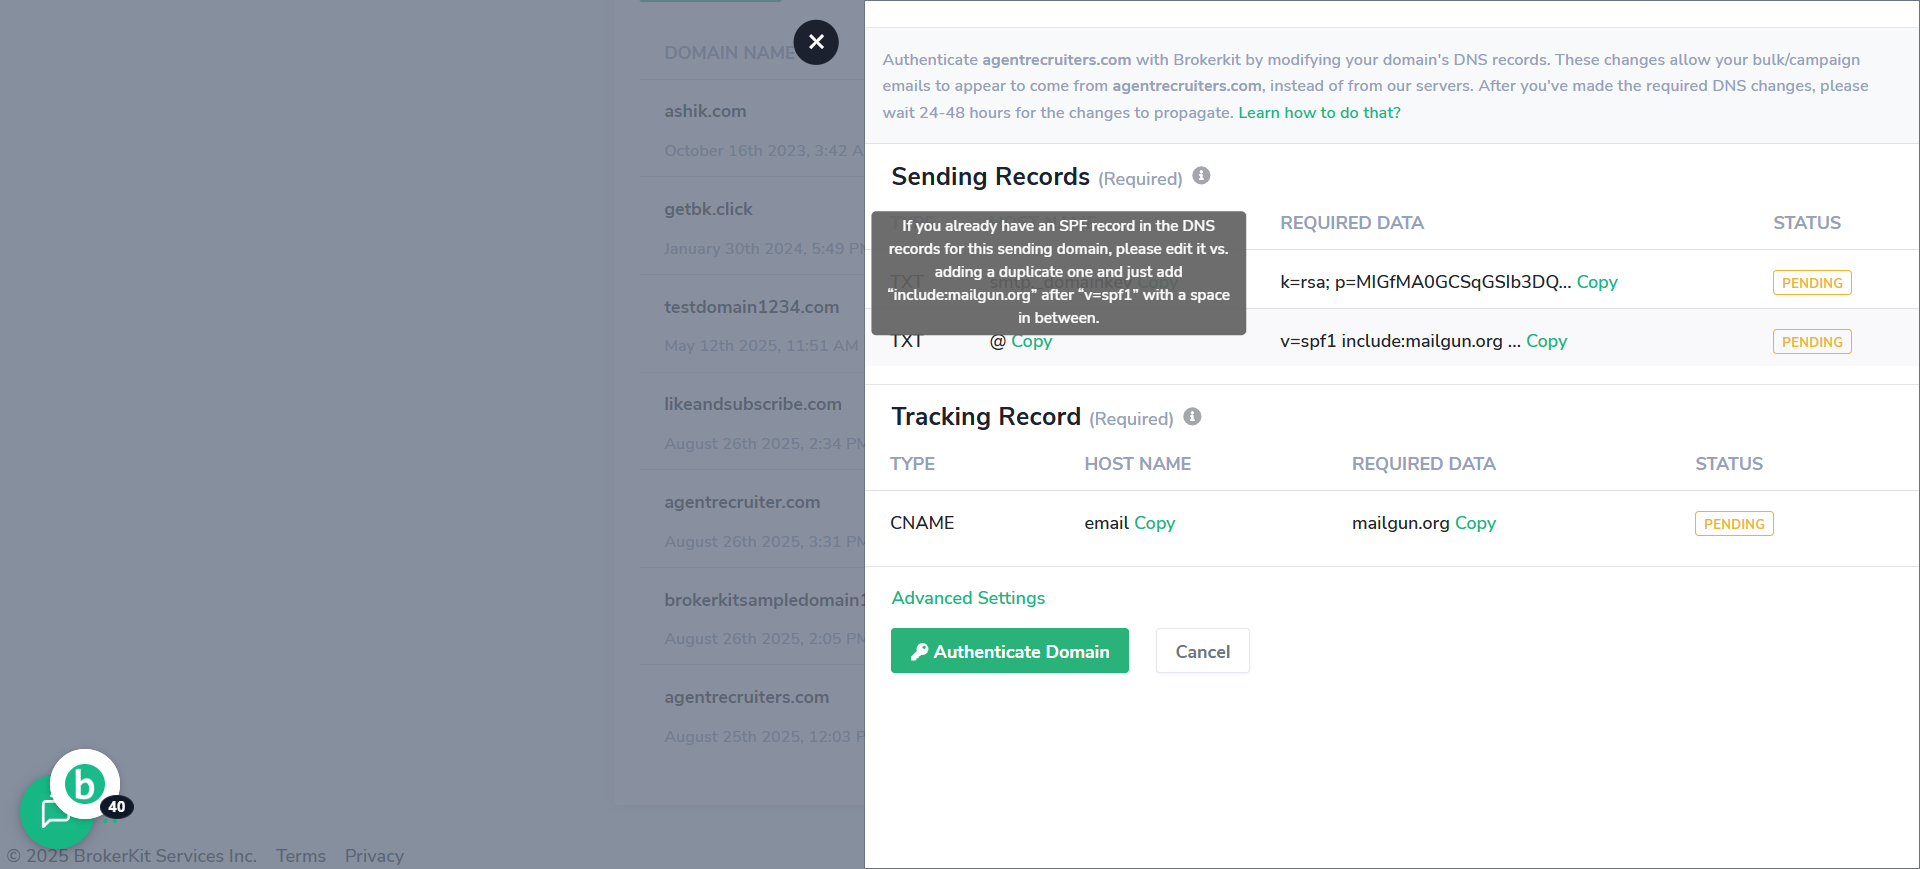
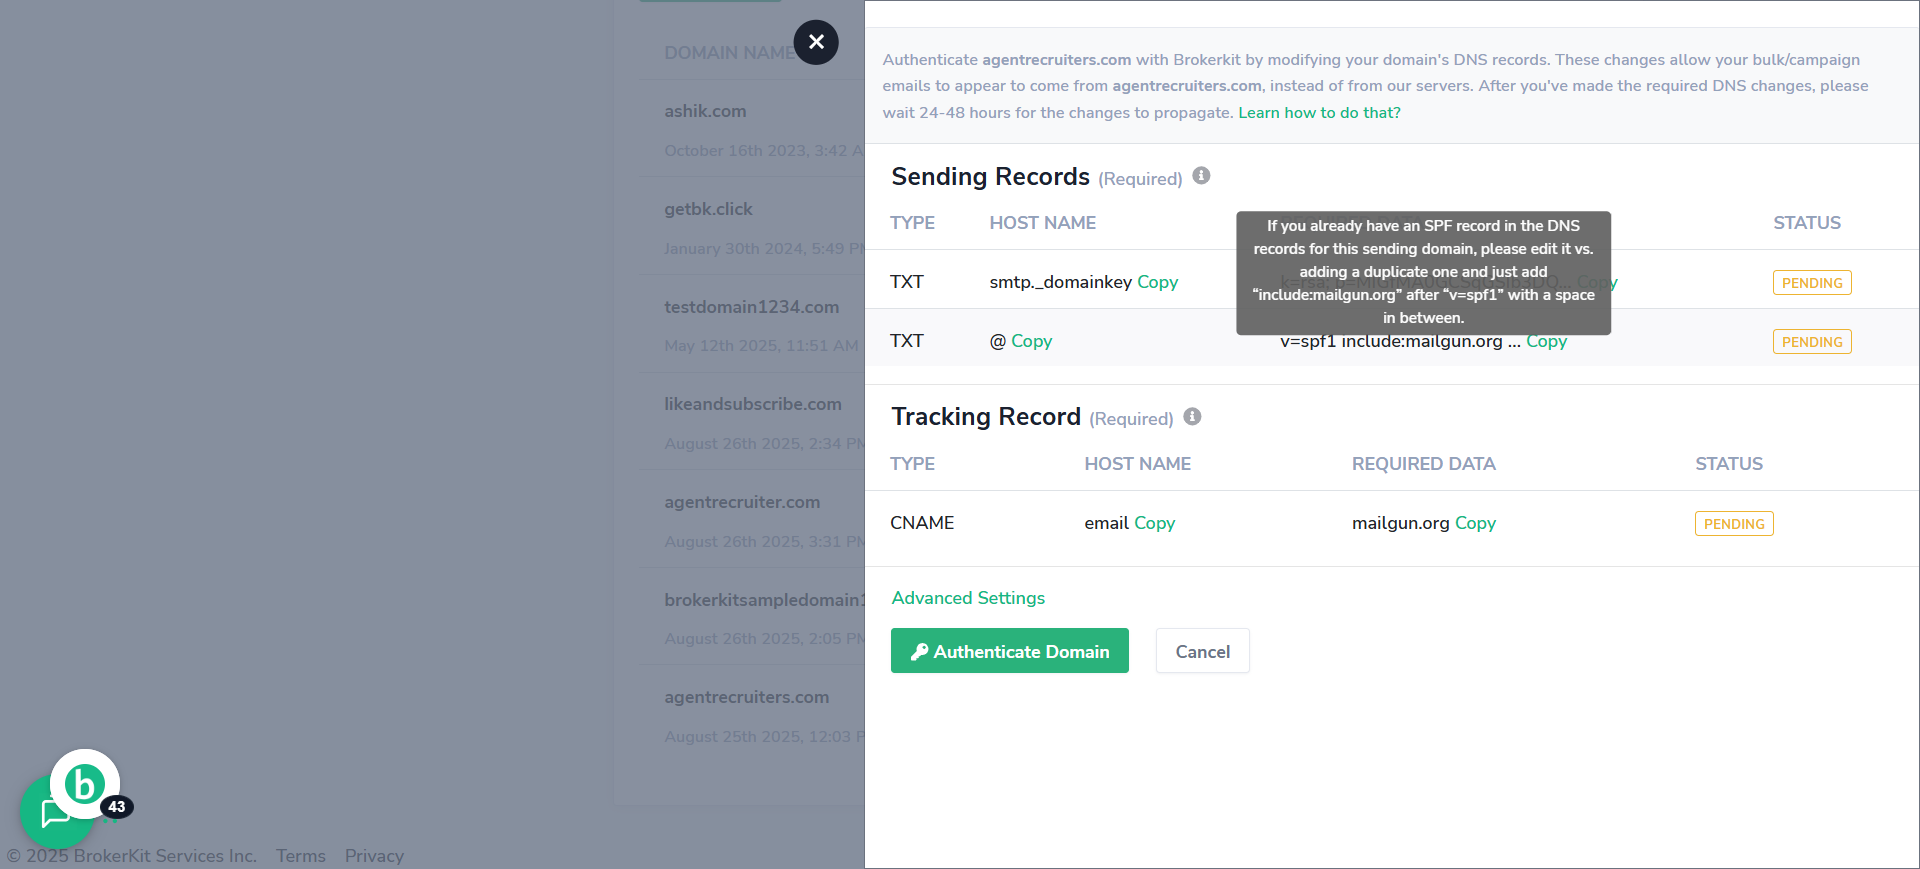
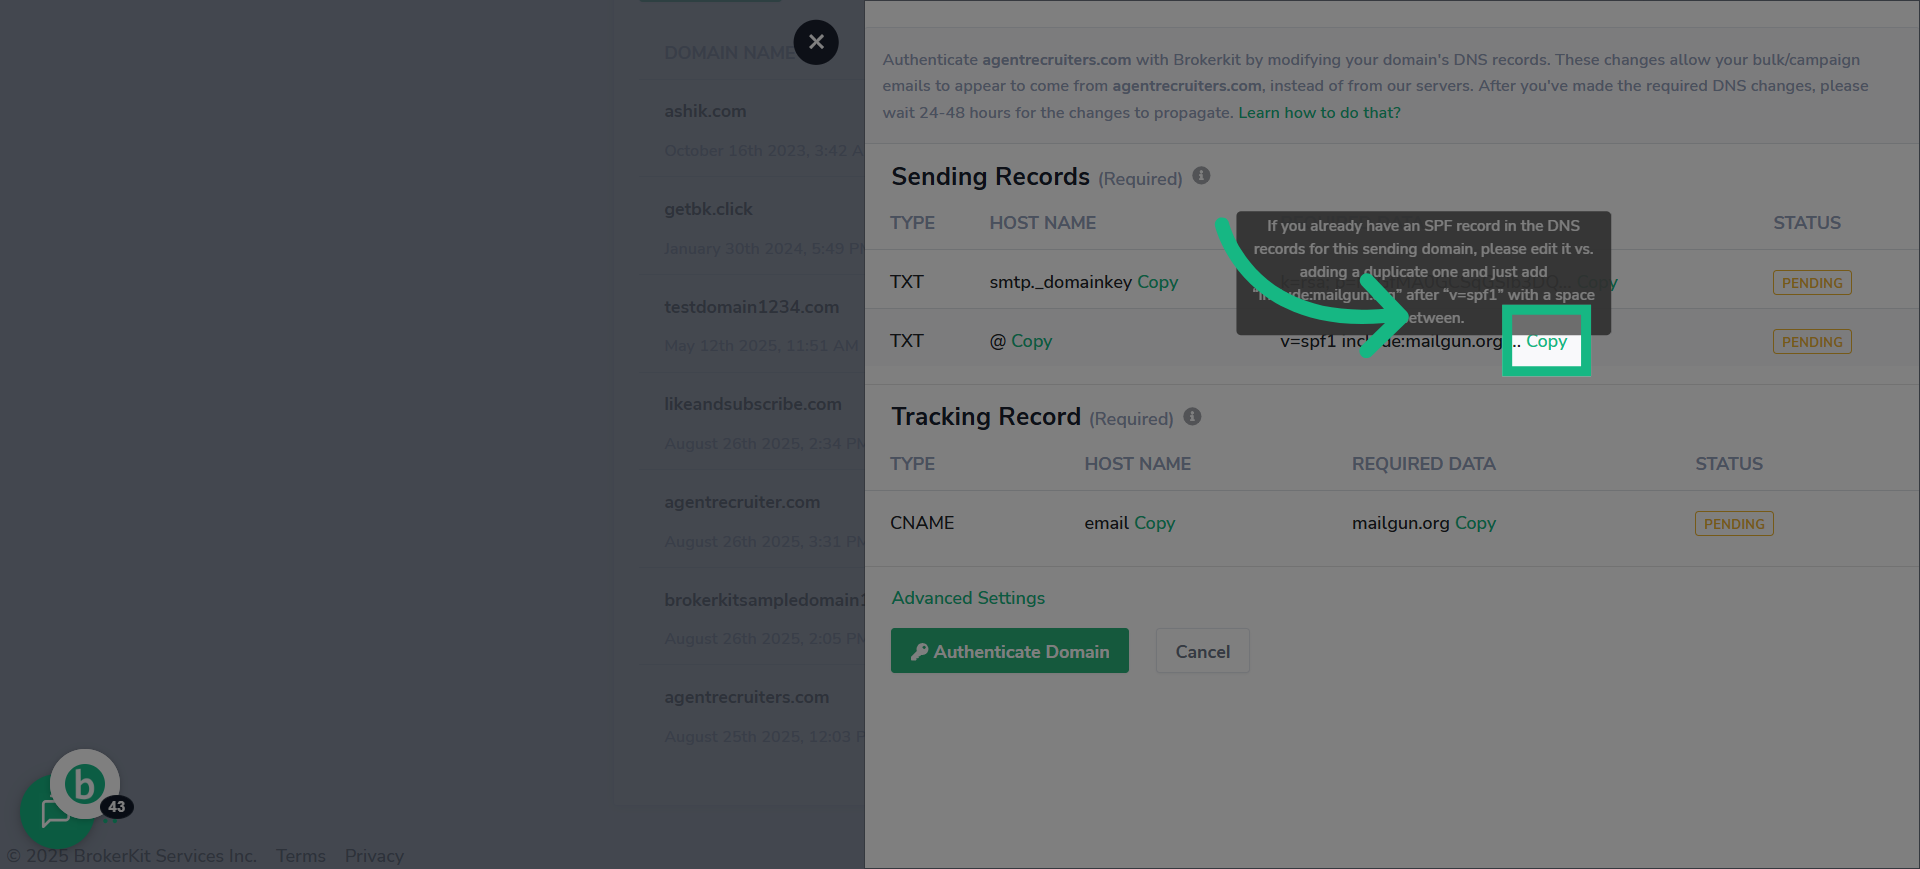
30. If you already have an SPF record
If you already have an SPF record in the DNS records for this sending domain, please edit it vs. adding a duplicate one and just add "include:mailgun.org" after "v=spf1" with a space in between.
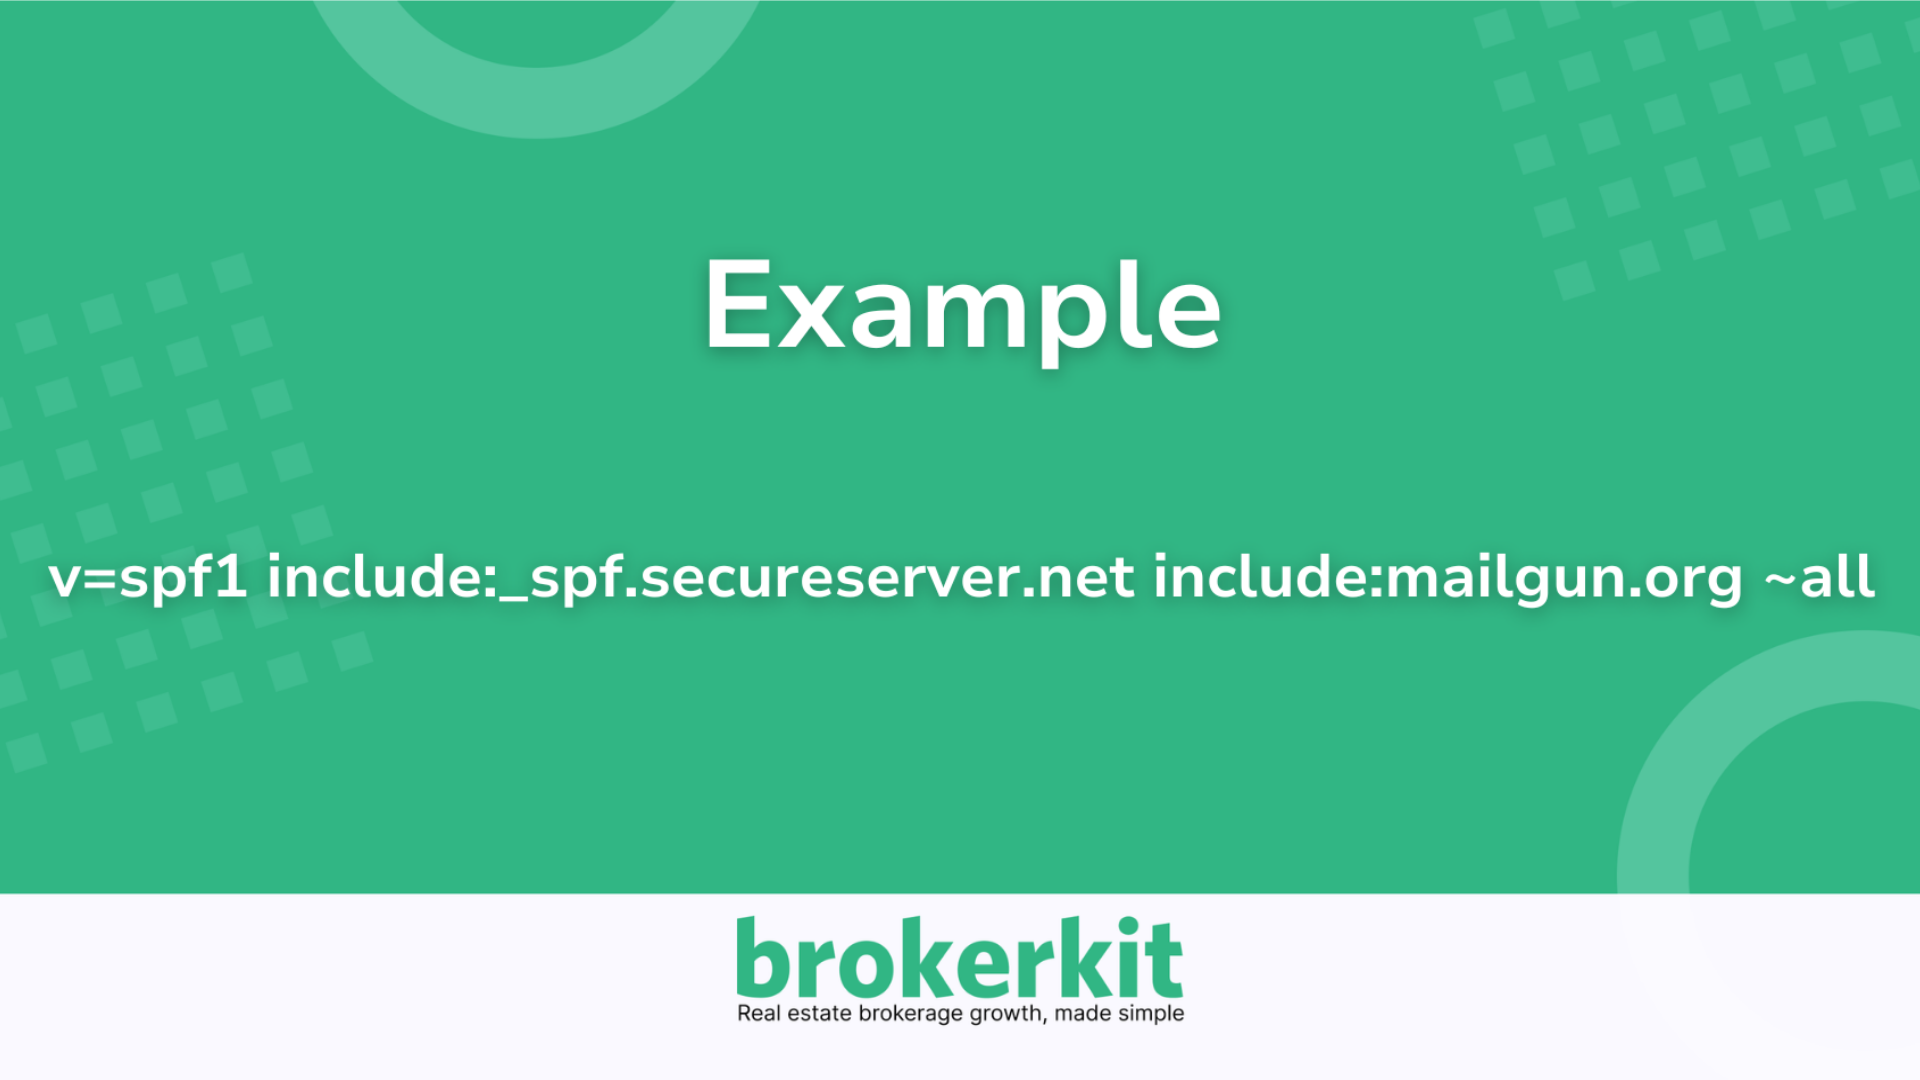
31. example
here is a sample of what it looks like when you have two "v=spf1"
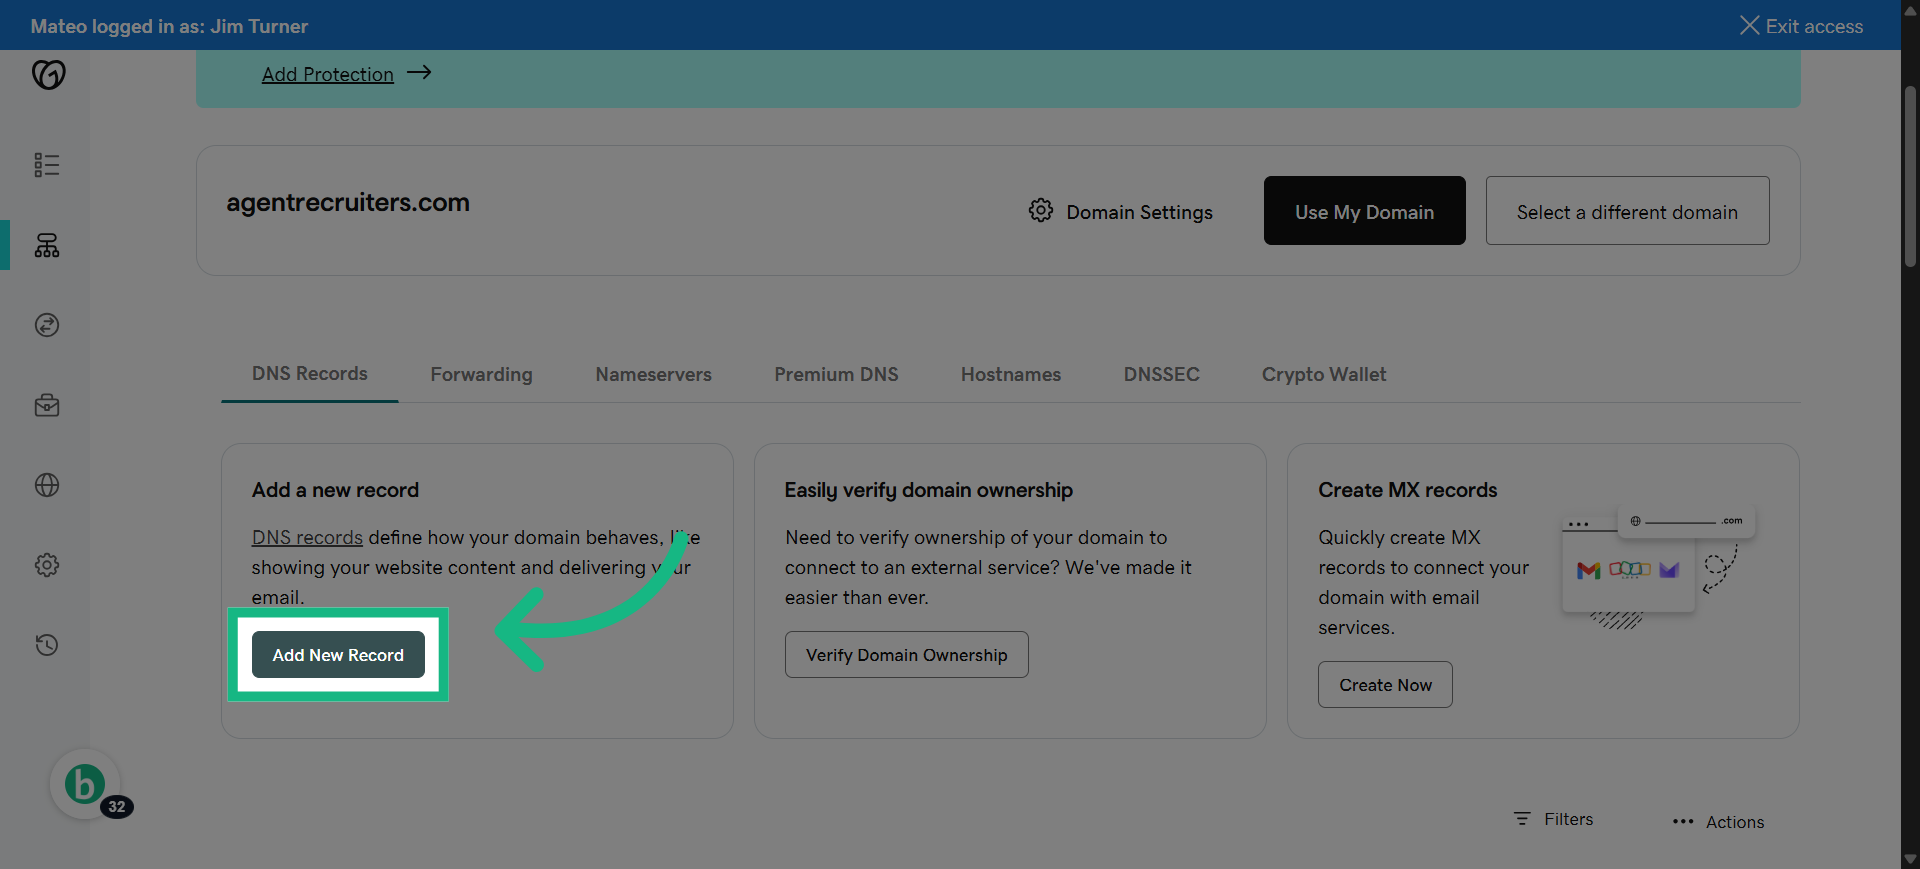
32. Click "Add New Record"
If you don't have an existing spf record add a new DNS record to continue domain verification.
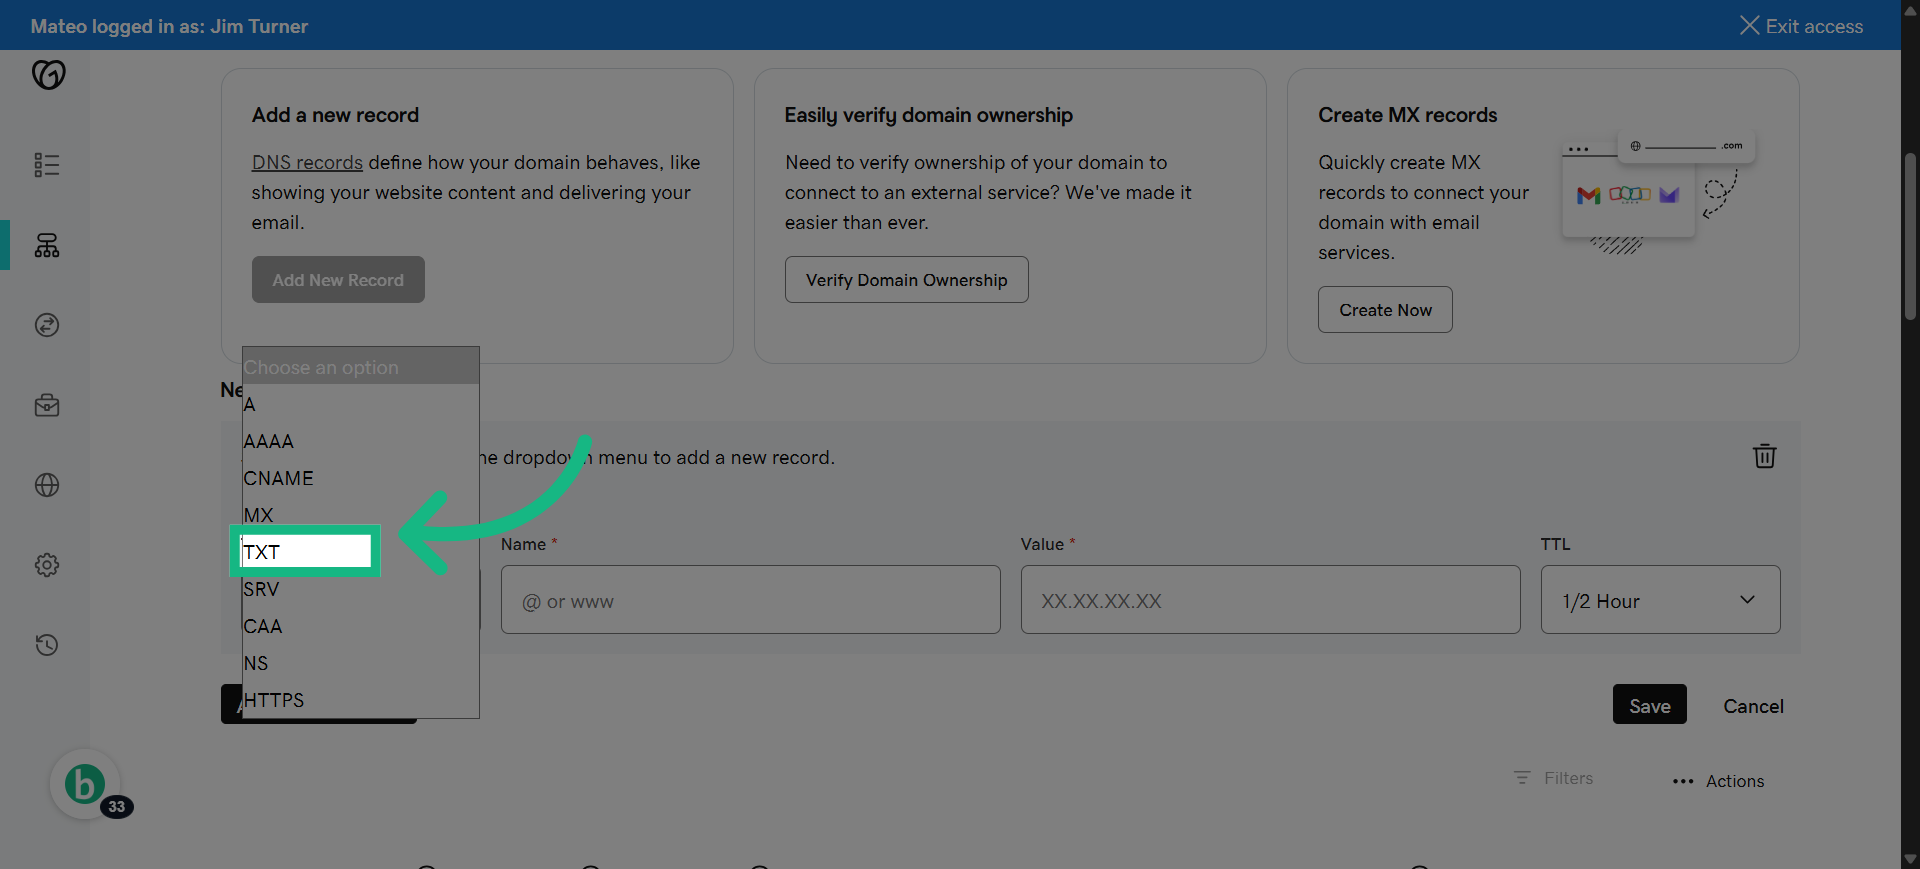
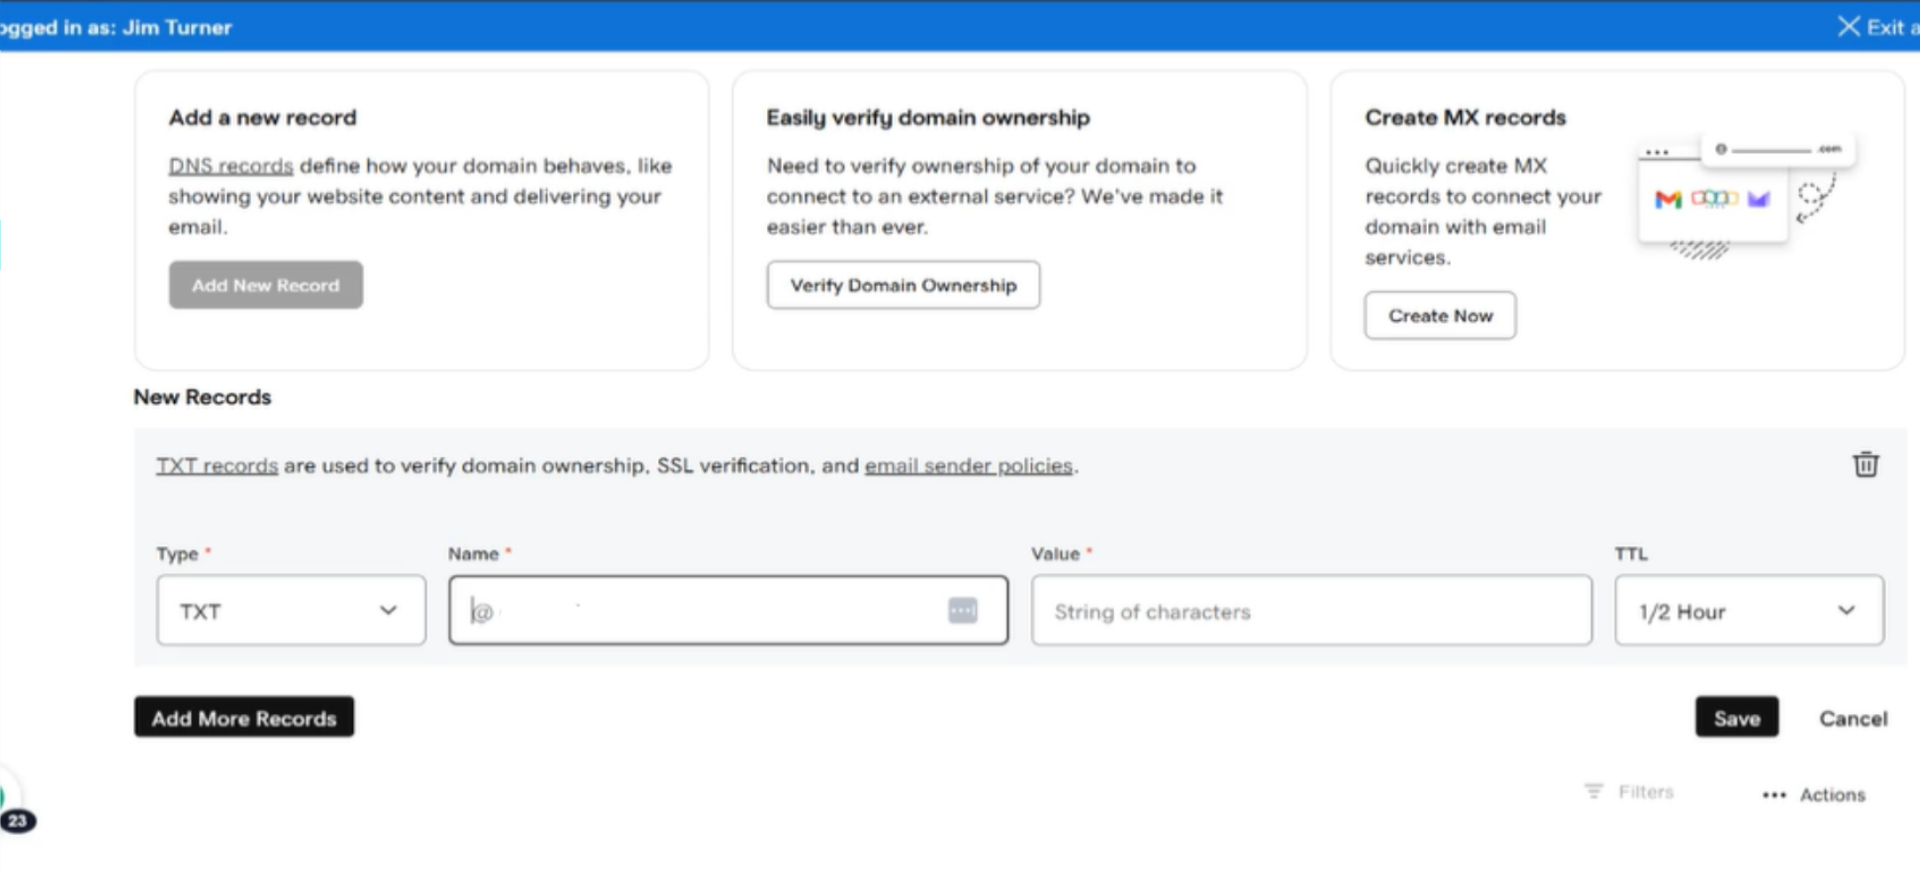
33. Select TXT
Select the next DNS record type required for authentication.
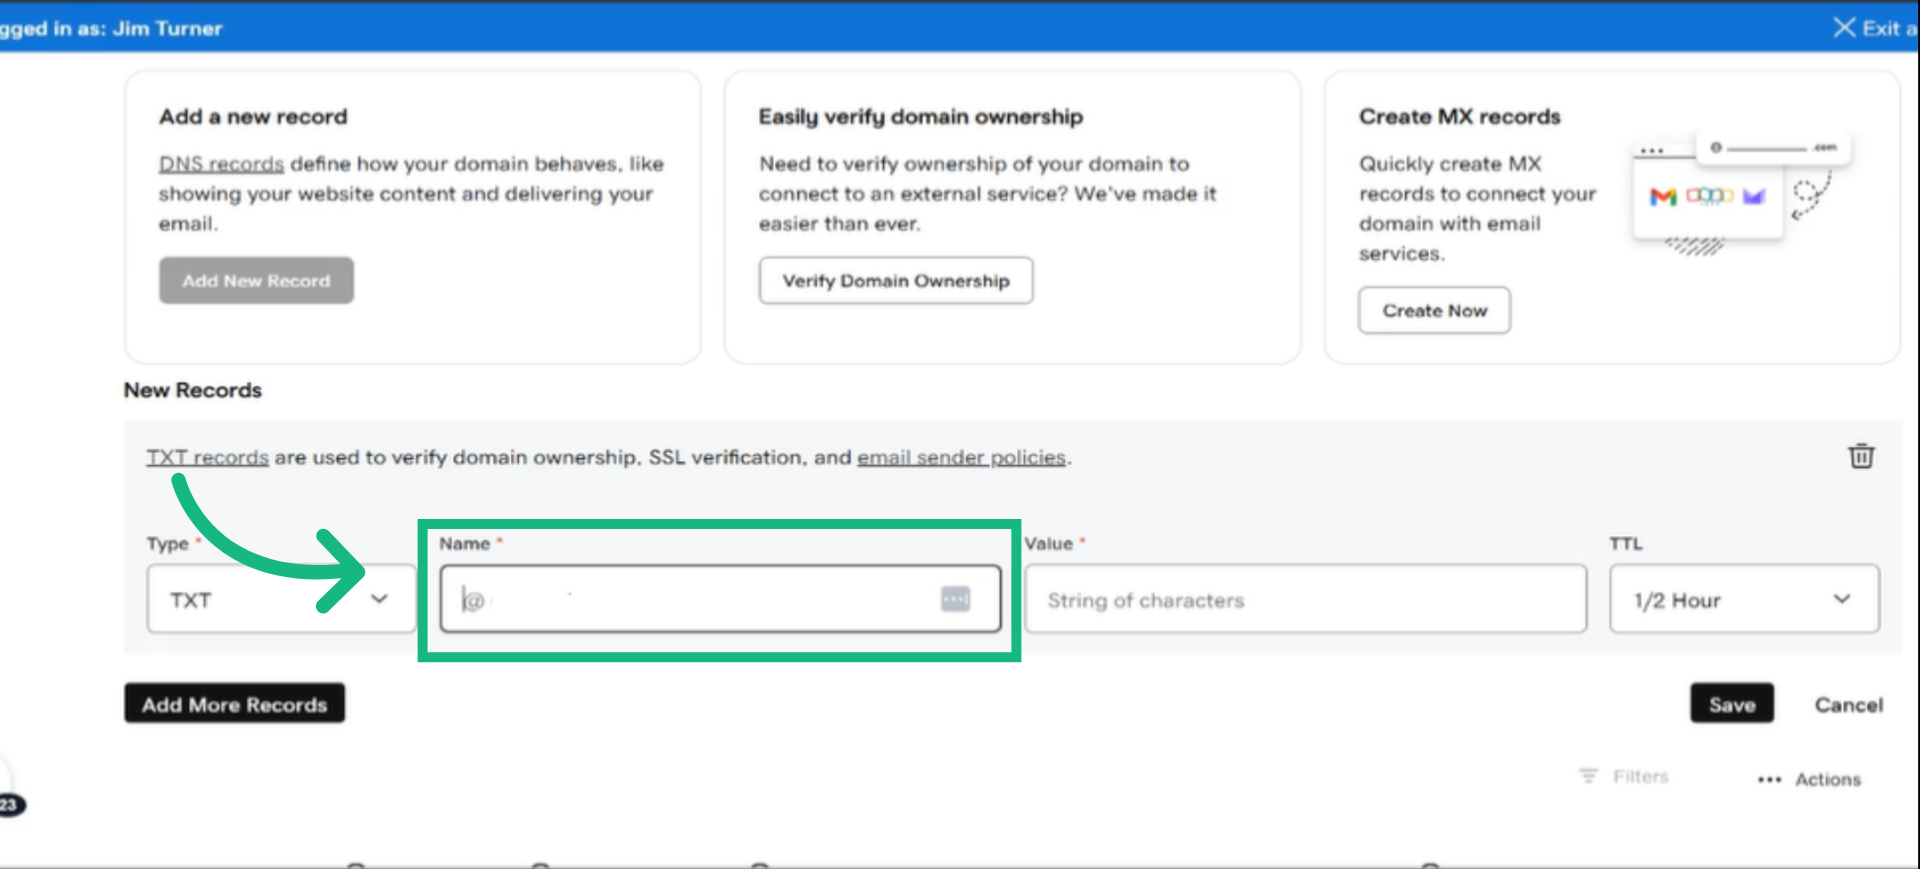
34. Click "Name"
click the name box

35. Switch to brokerkit
Return to Brokerkit to copy the SPF record value.
36. Click "Copy"
Copy the SPF record value provided for your domain.
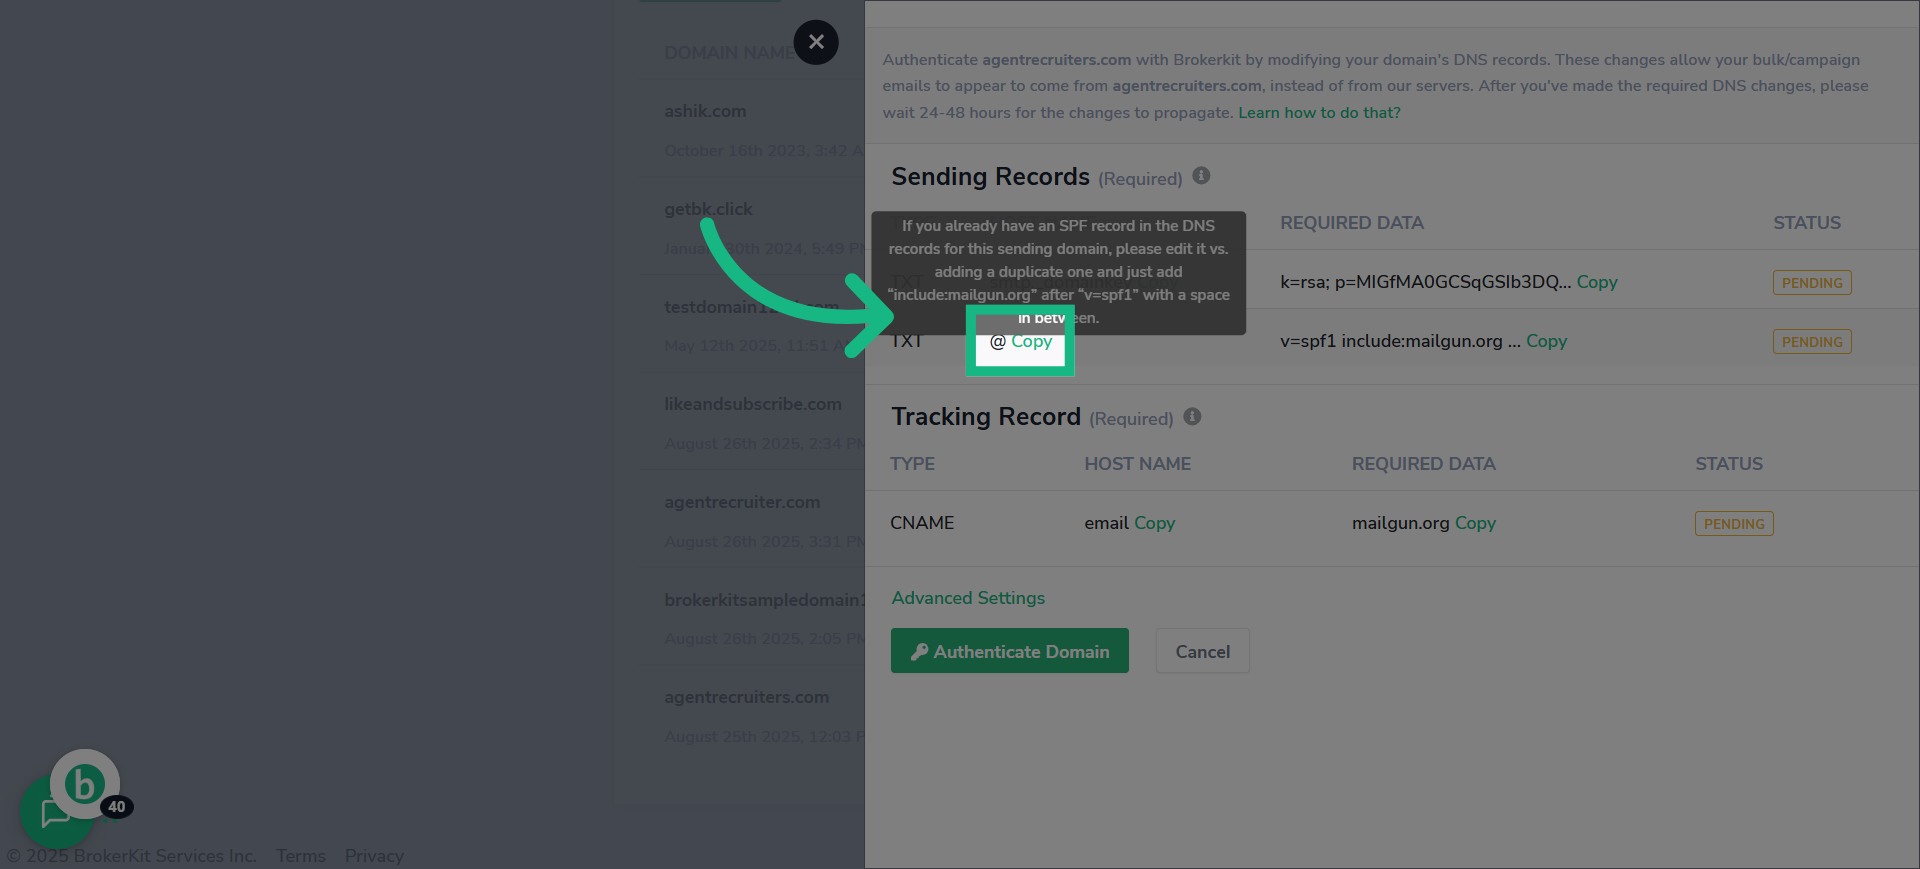
37. Fill "@"
Fill in the DNS record name field with '@' to represent your root domain.
38. Switch to brokerkit
Return to Brokerkit to copy the SPF record content.
39. Click "Copy"
Copy the SPF record content to be added to your DNS settings.
40. Switch to godaddy
Go back to godaddy.
41. Click "Value*"
Select the field to enter the DNS record value for SPF.

42. paste the SPF record content
Paste the SPF record content.

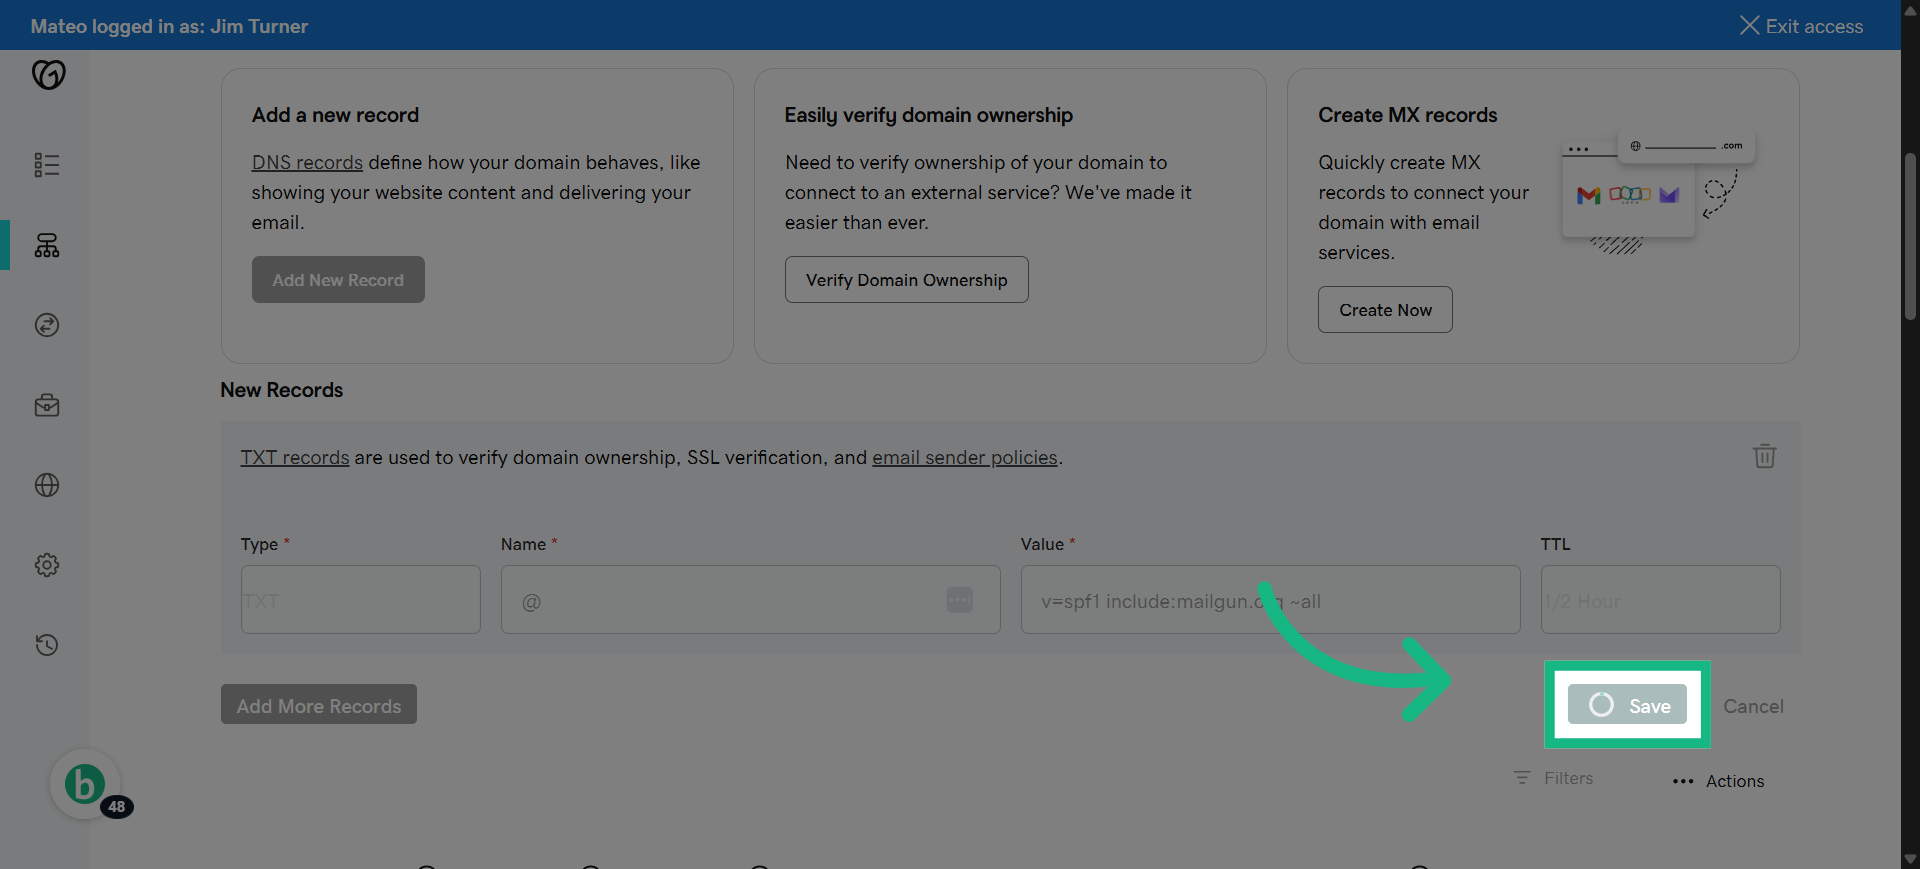
43. Click "Save"
Save the SPF DNS record to your domain settings.
44. Click "Add New Record"
Add a new DNS record to continue the verification process.
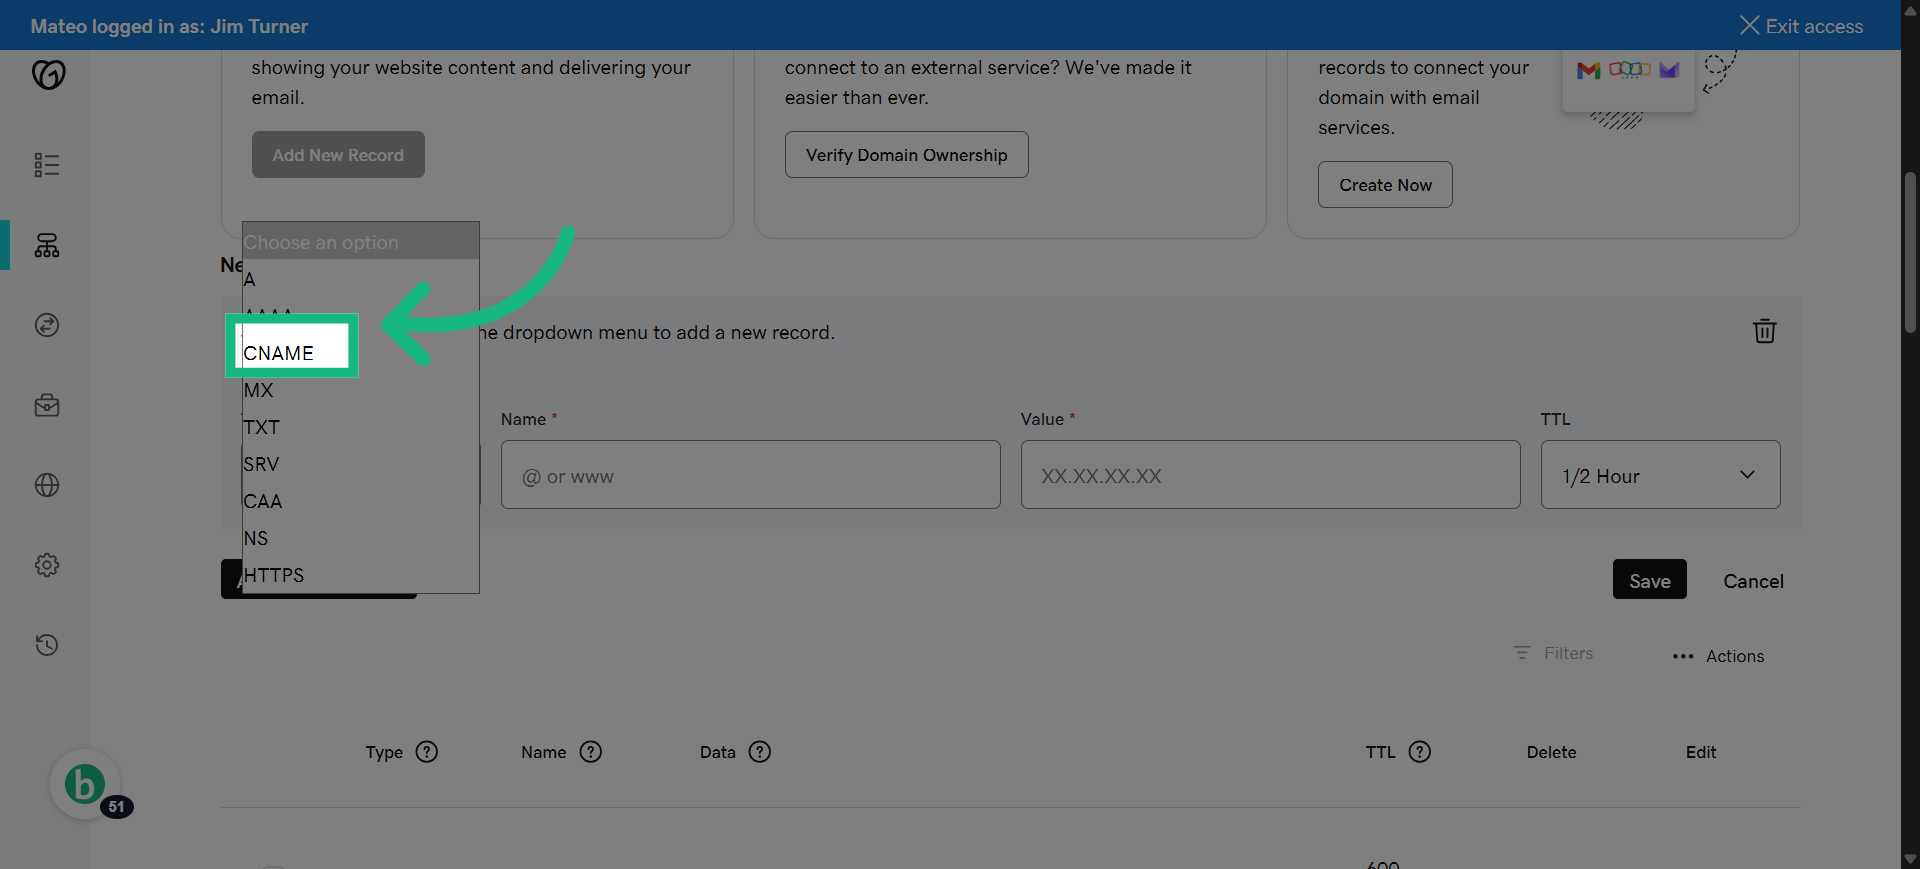
45. Select CNAME
Select the DNS record type needed for the next step.
46. Switch to brokerkit
Return to Brokerkit to copy the next DNS record value.
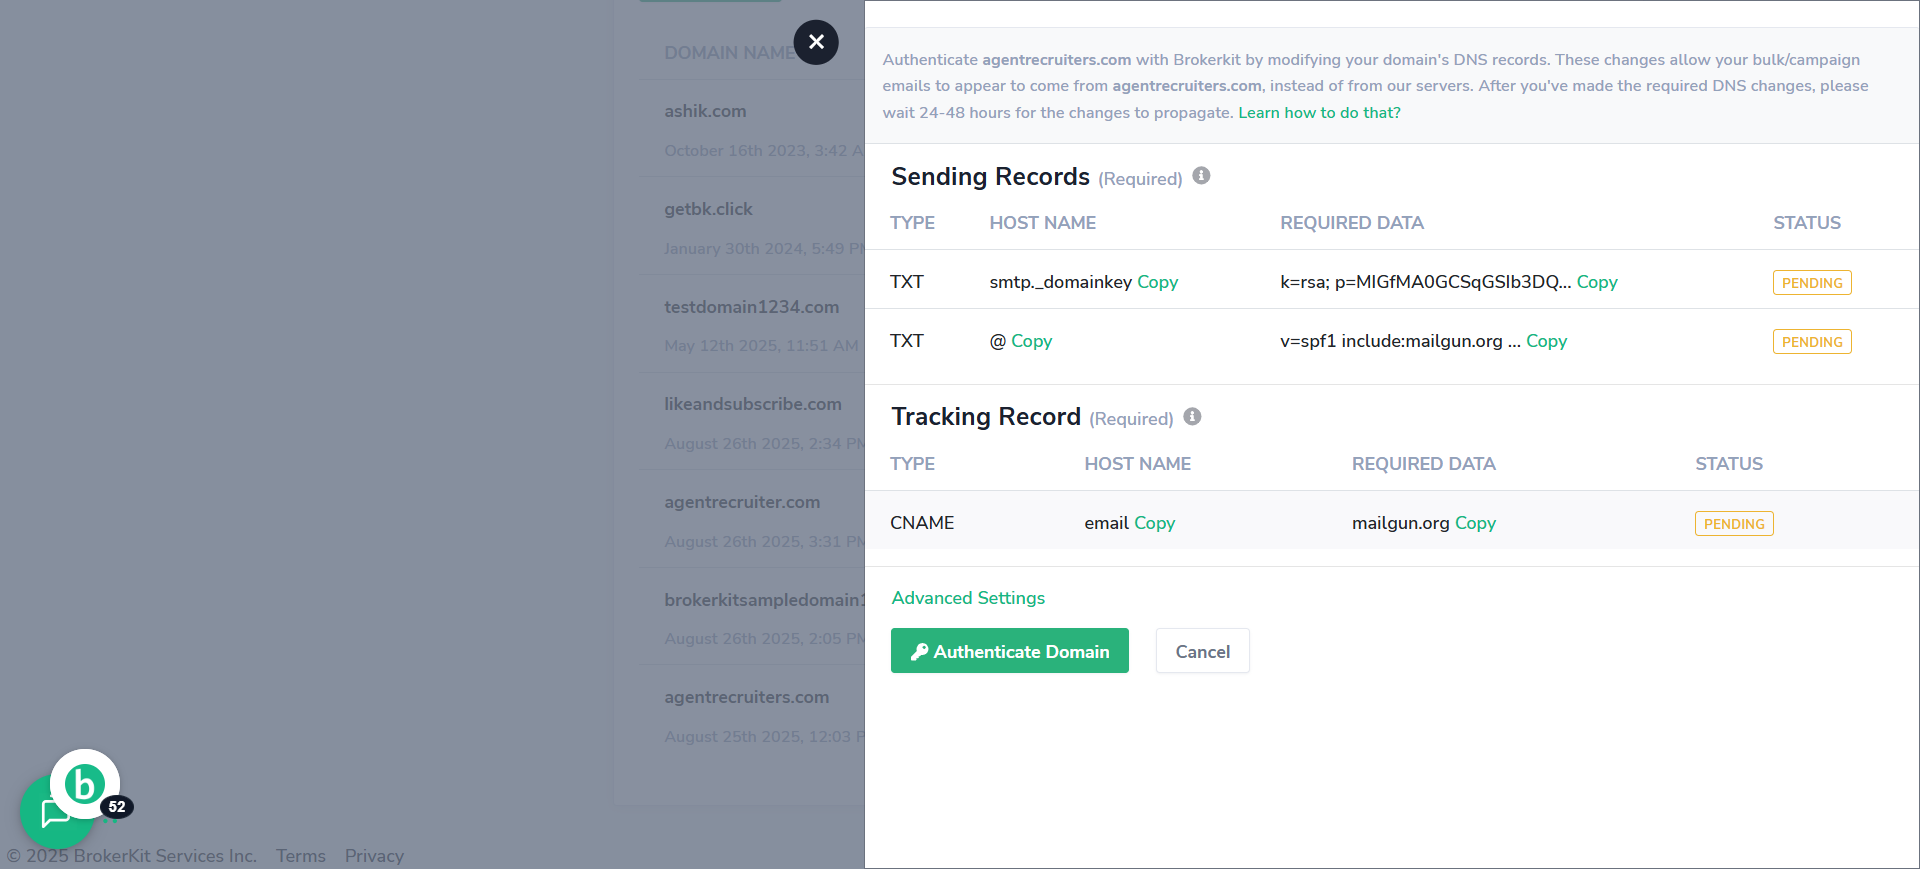
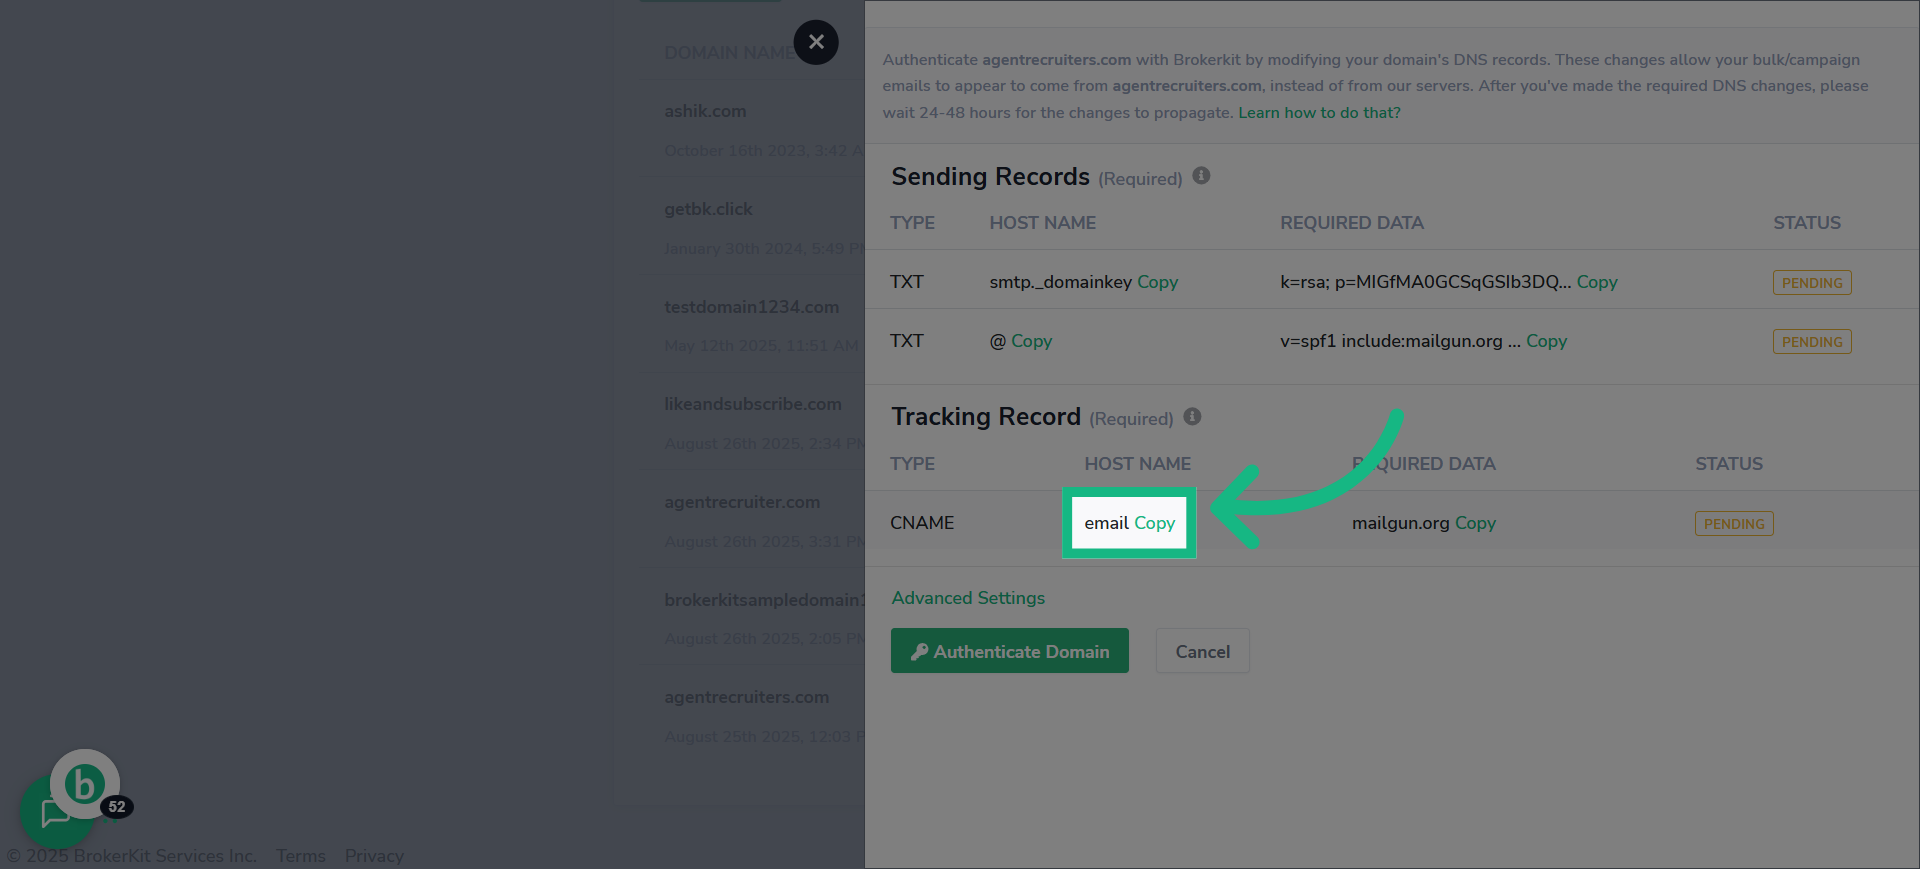
47. Click "Copy"
Copy the DNS record value for the email verification.
48. Switch to godaddy
Switch back to GoDaddy
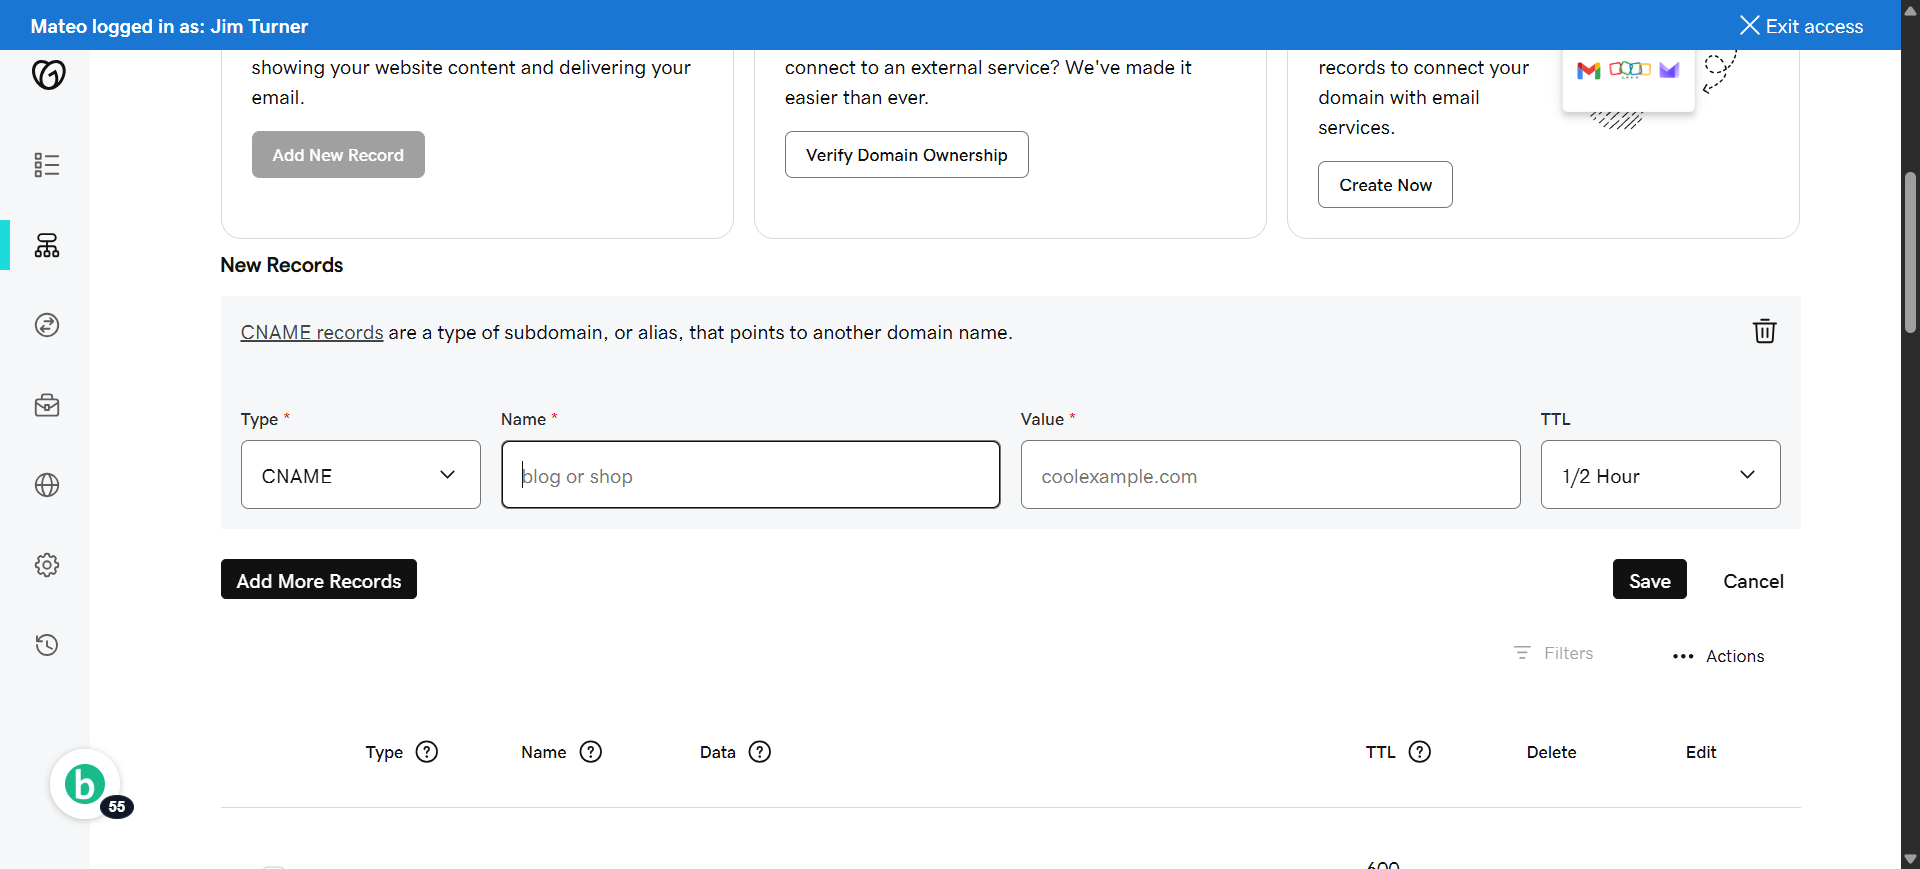
49. Click "Name"
click the name box
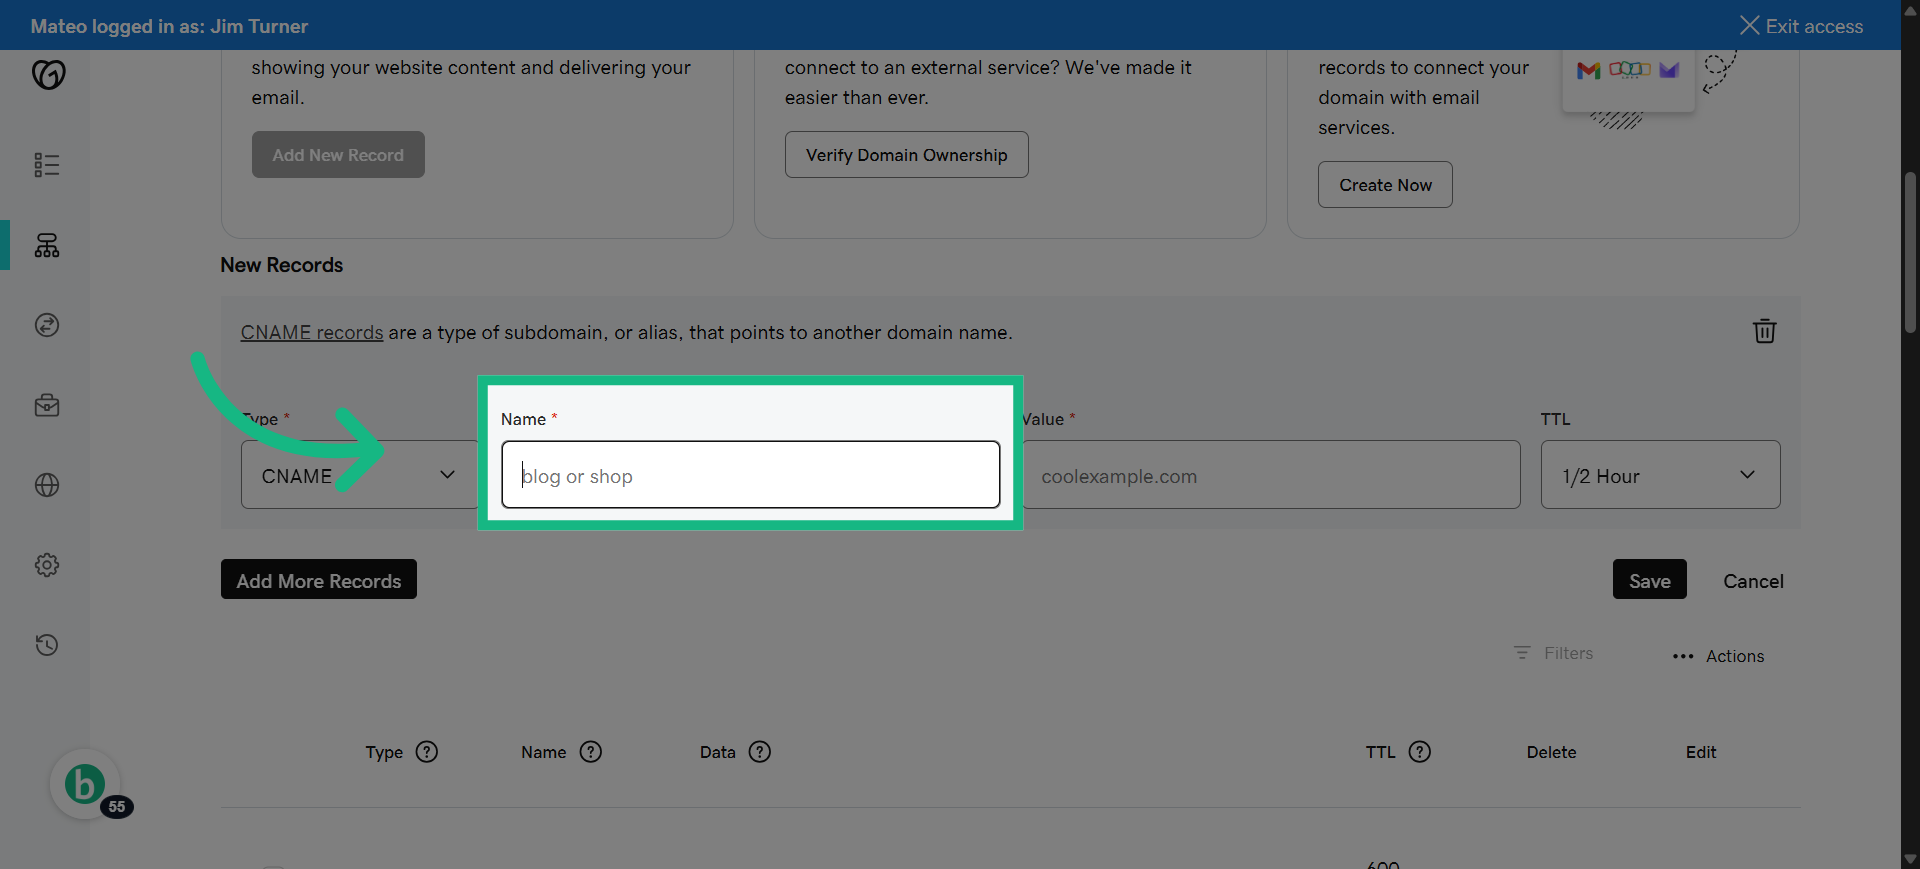
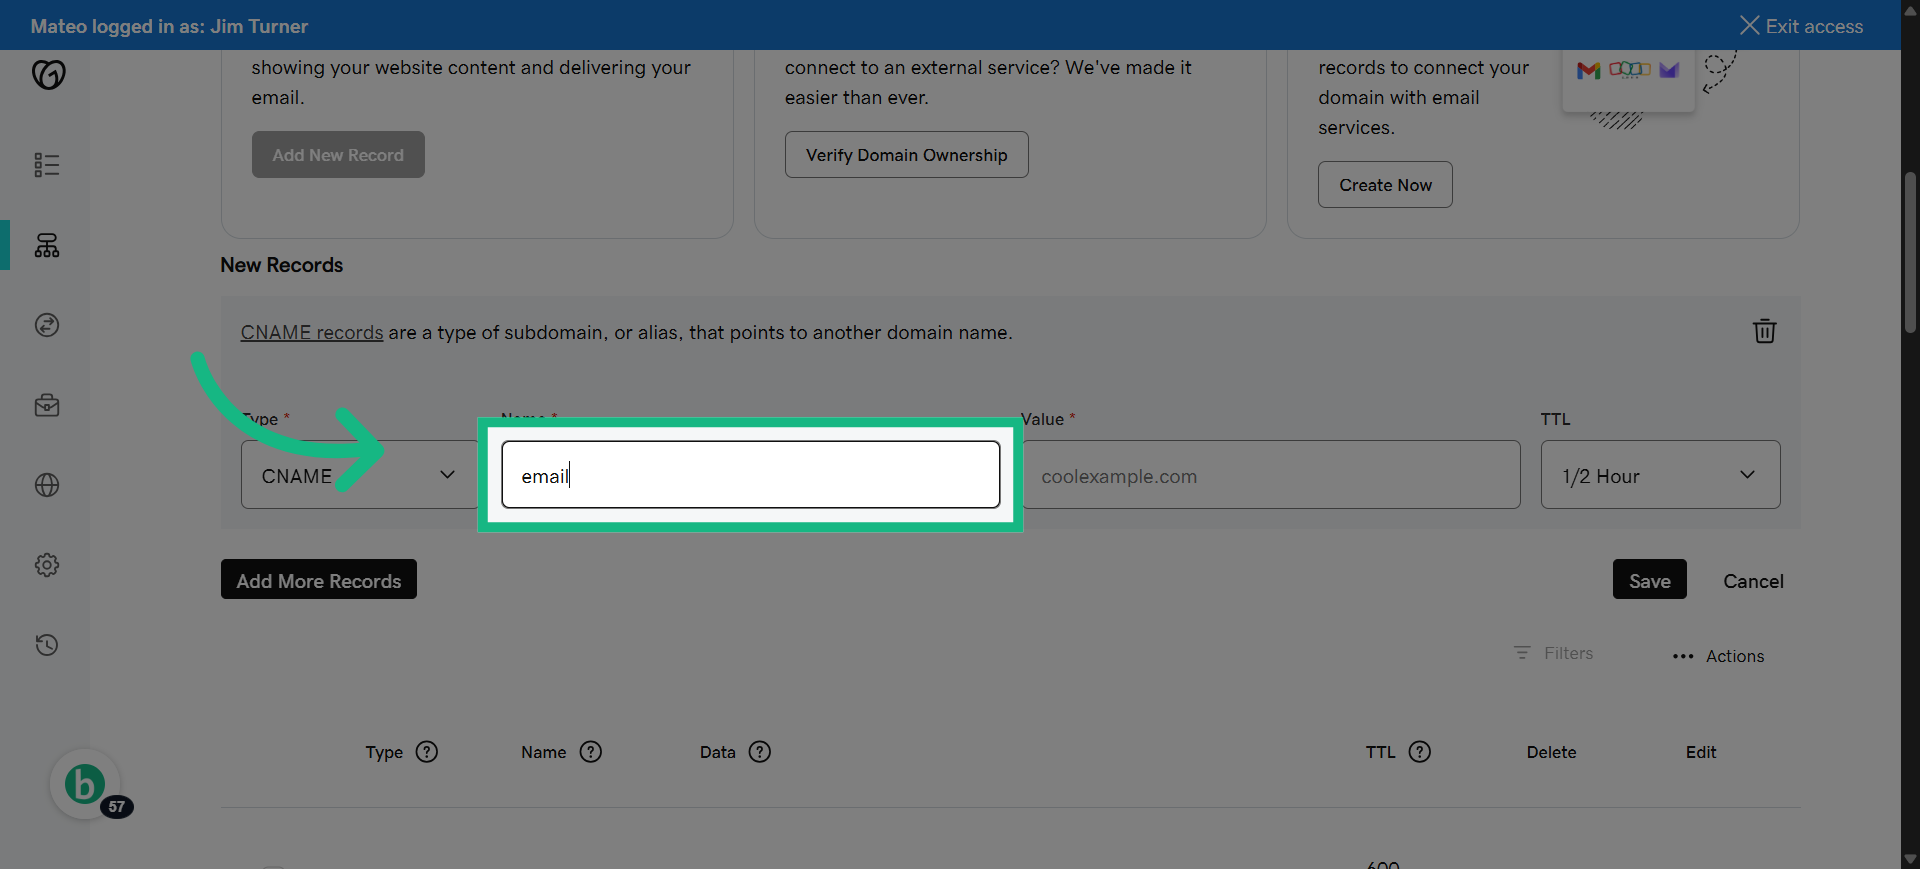
50. Fill "email"
Enter the DNS record name as instructed, such as 'email'.
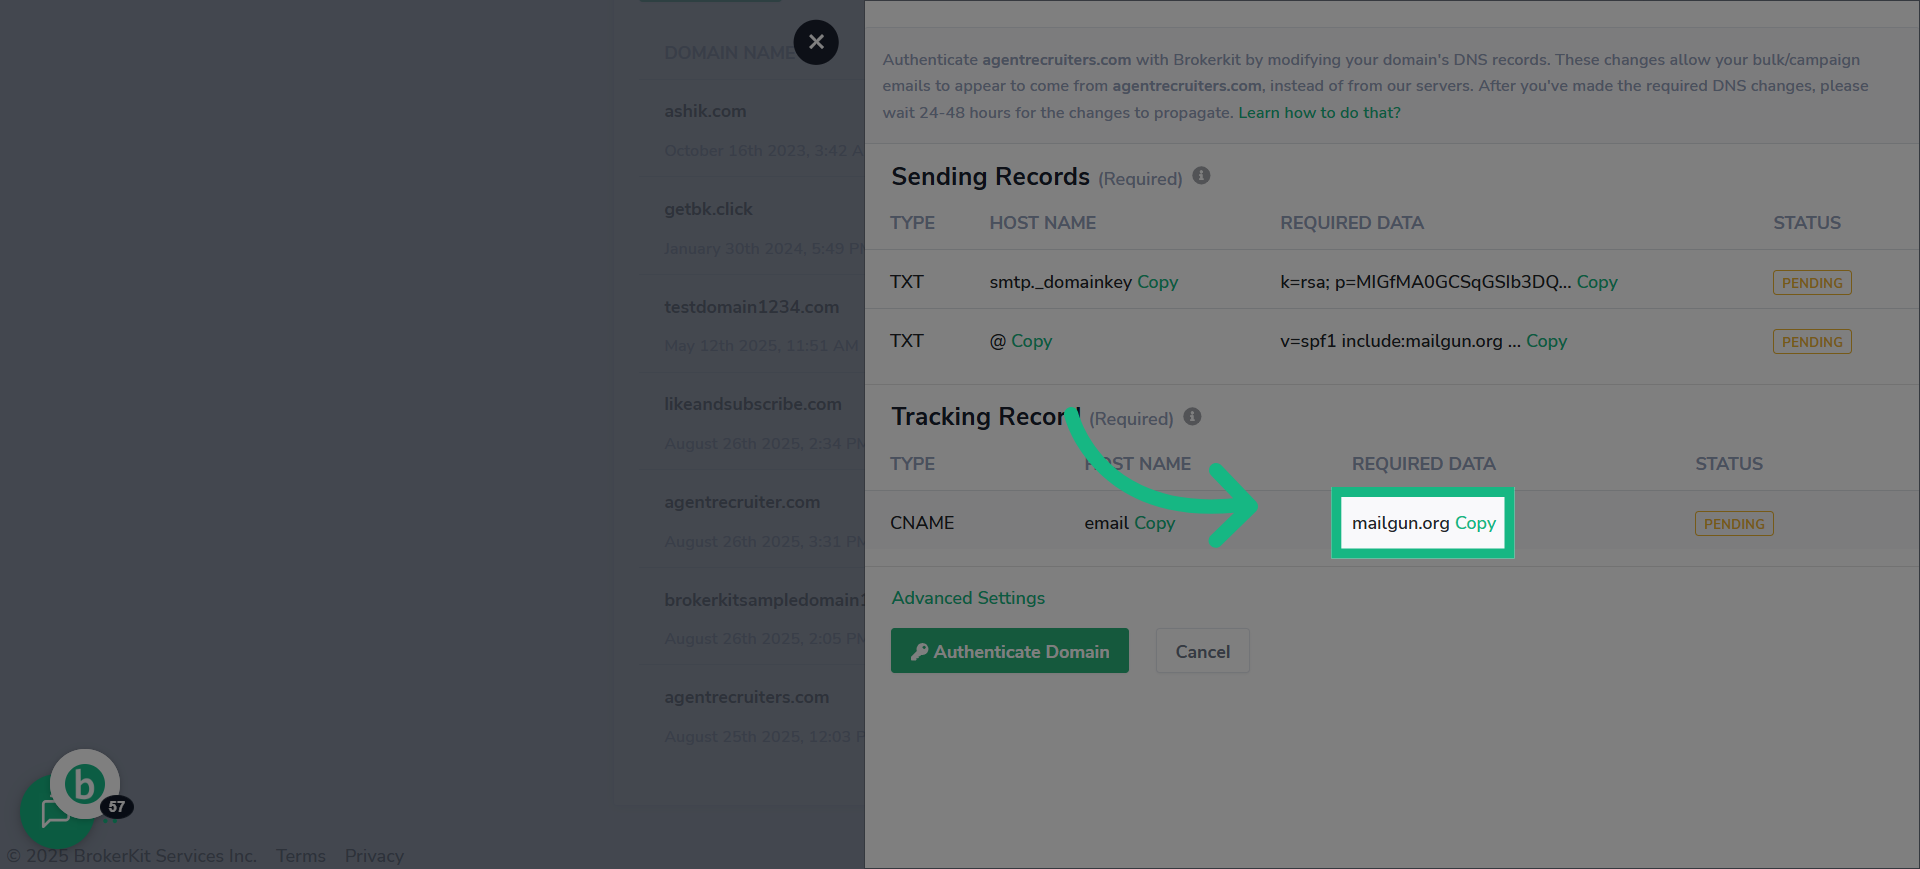
51. Switch to brokerkit
Return to Brokerkit to copy the email verification value.

52. Click "Copy"
Copy the DNS record content for email verification.
53. Switch to godaddy
Switch to Godaddy
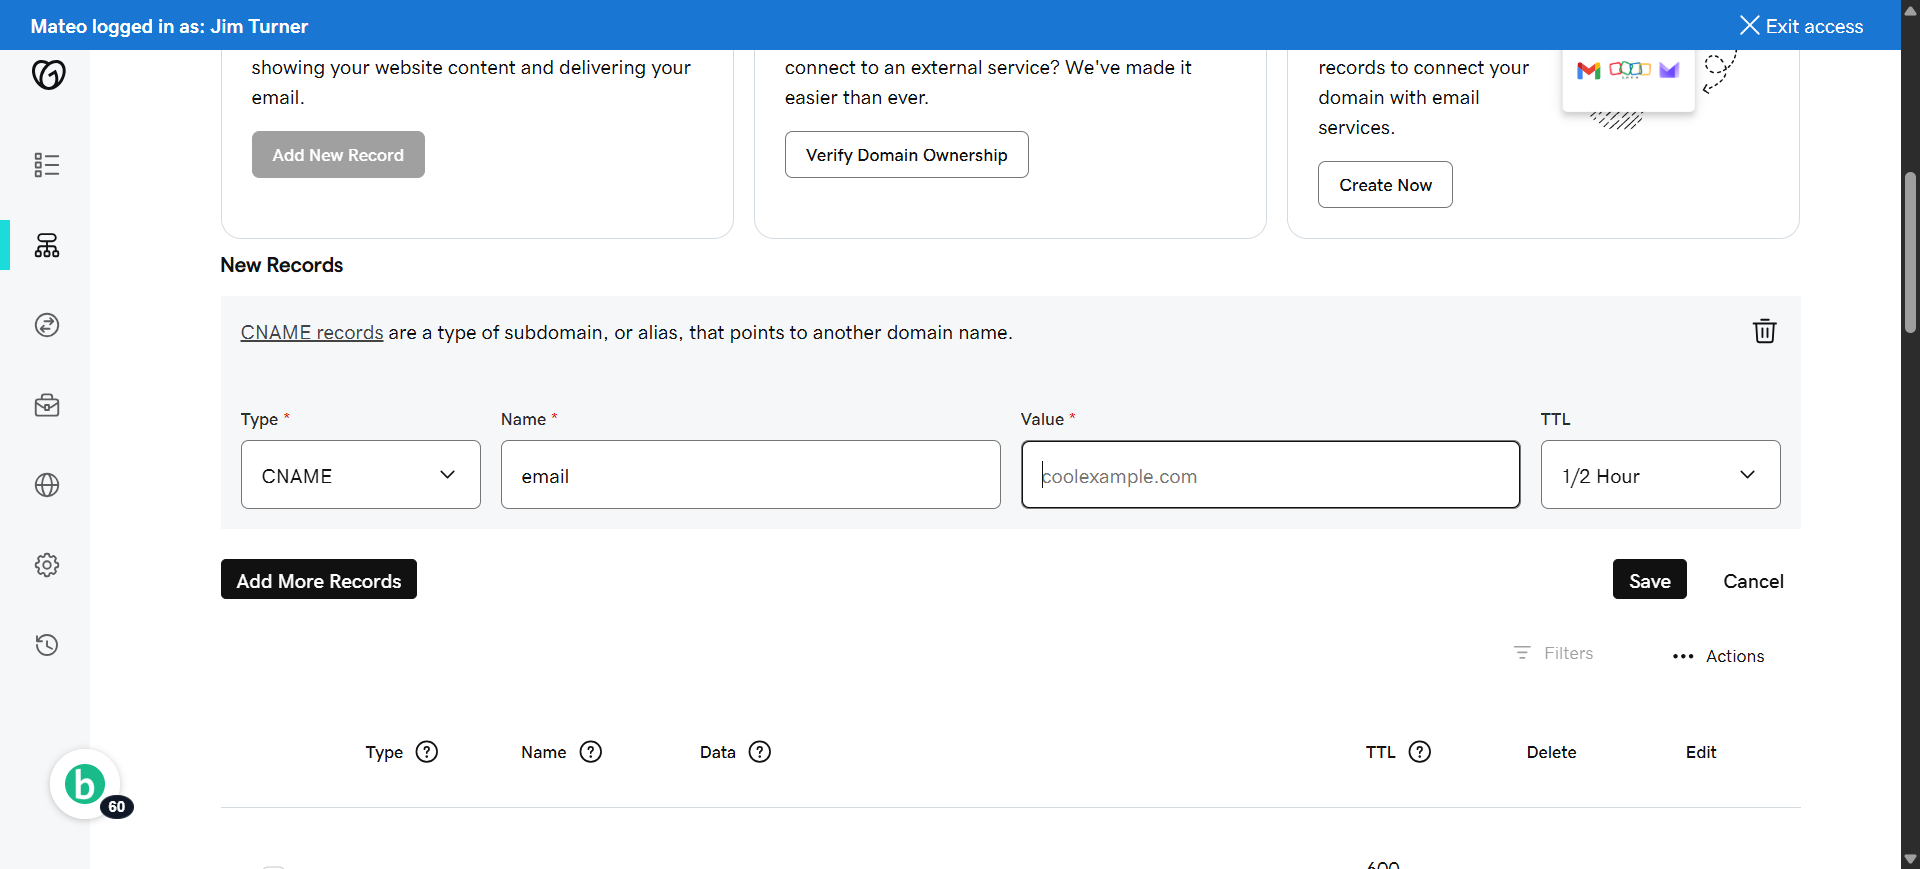
54. Click "Value"
Select the field to enter the DNS record value for email.
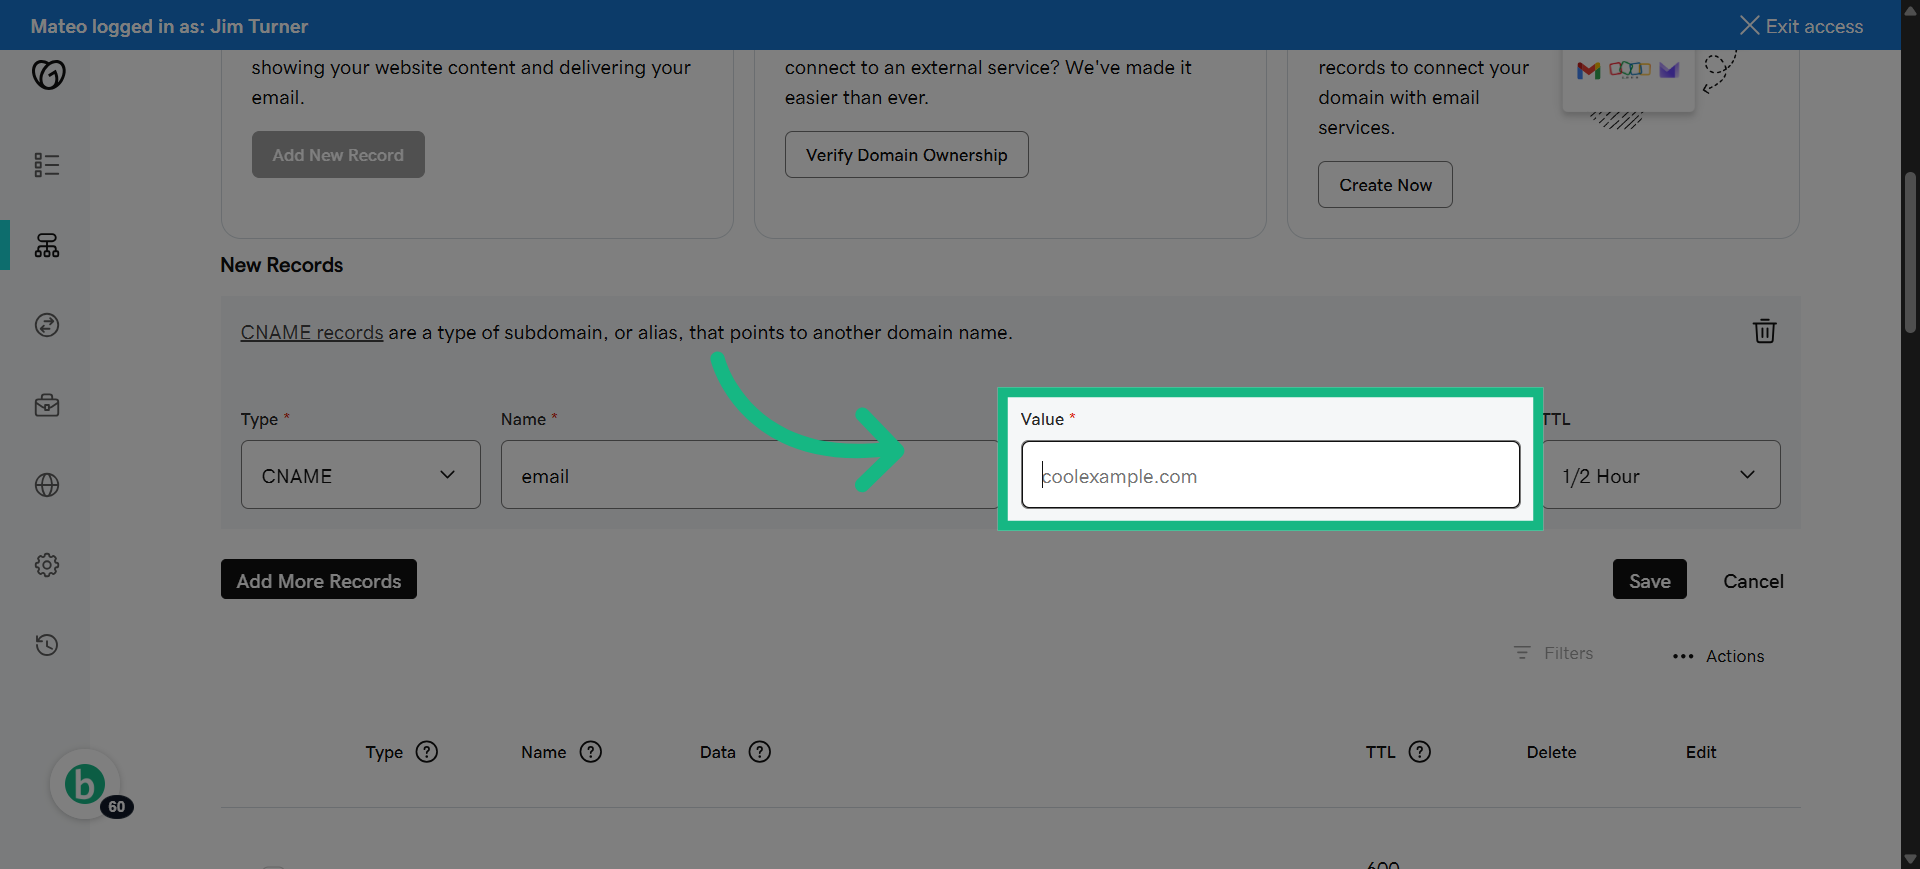
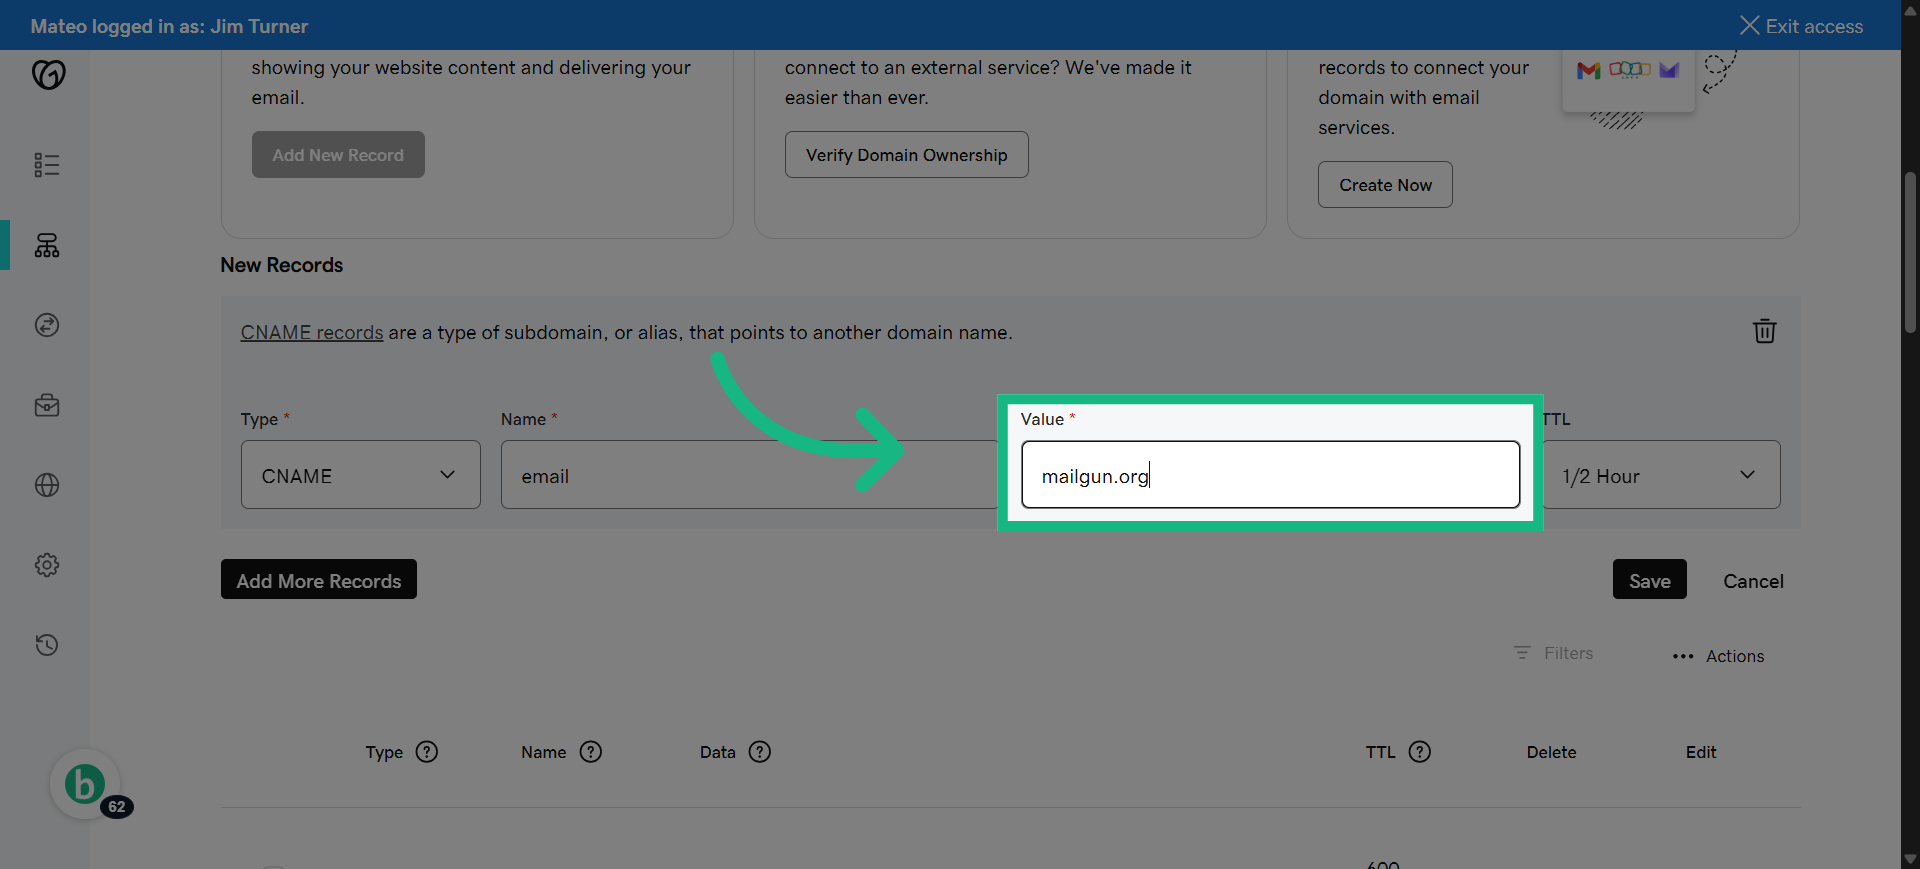
55. Fill "mailgun.org"
Paste the email verification content into the value field.
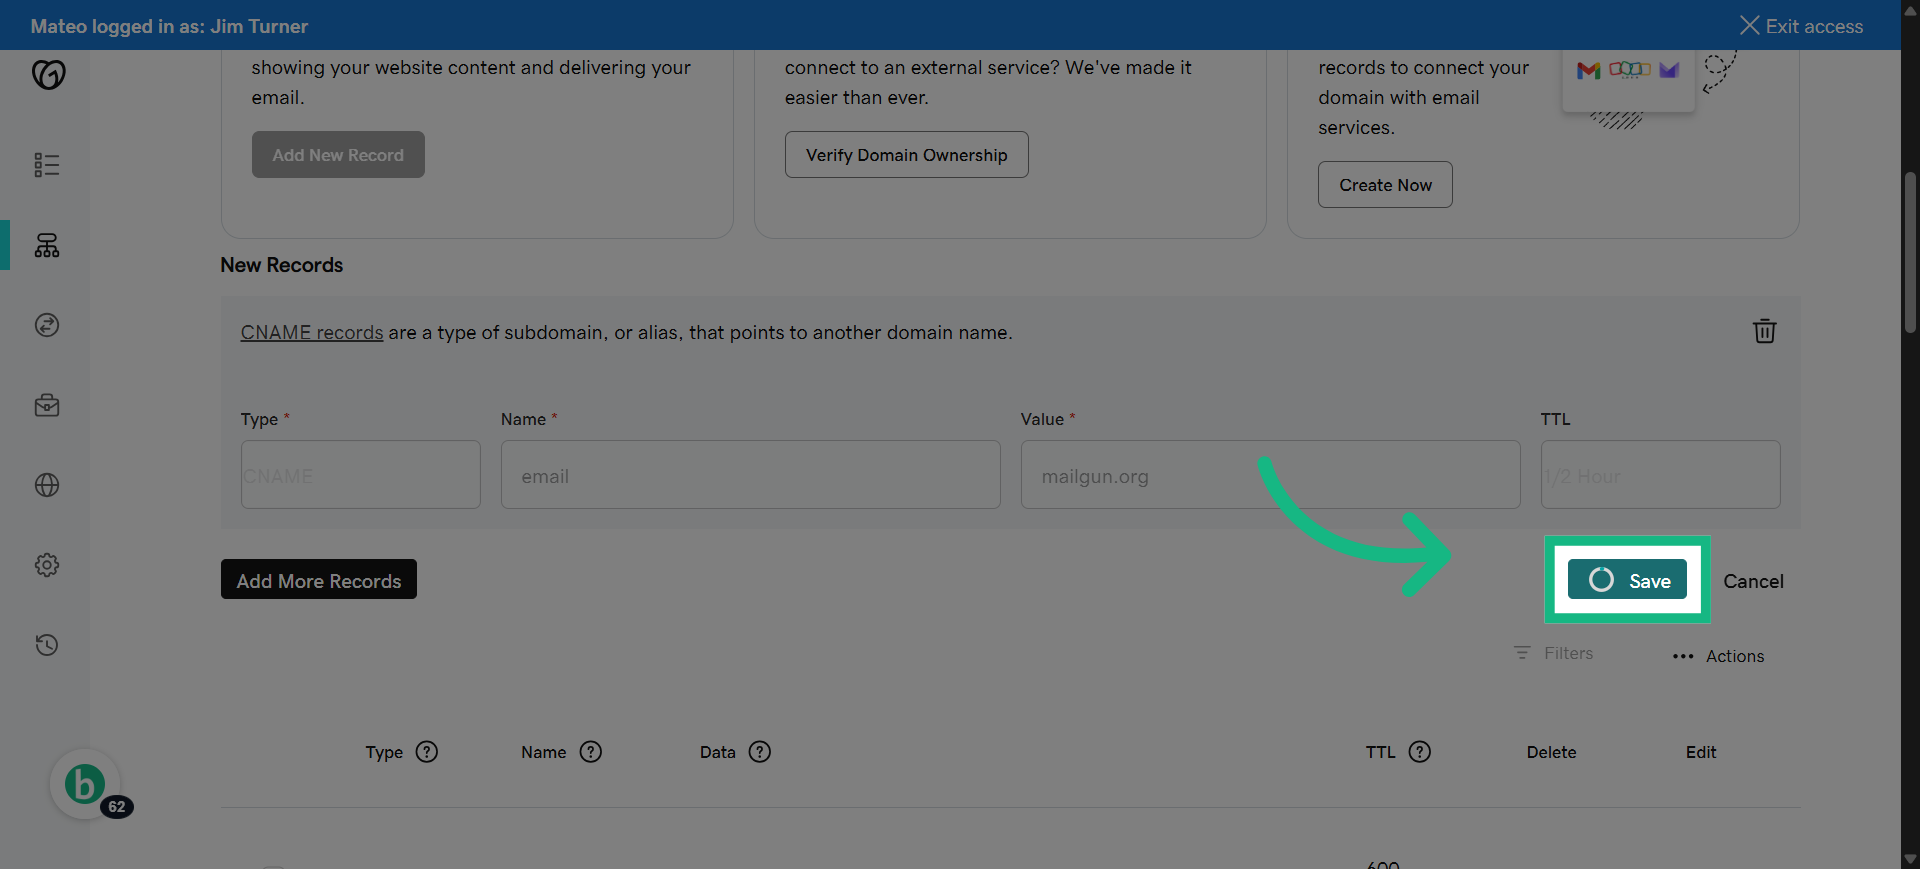
56. Click "Save"
Save the email DNS record to your domain settings.
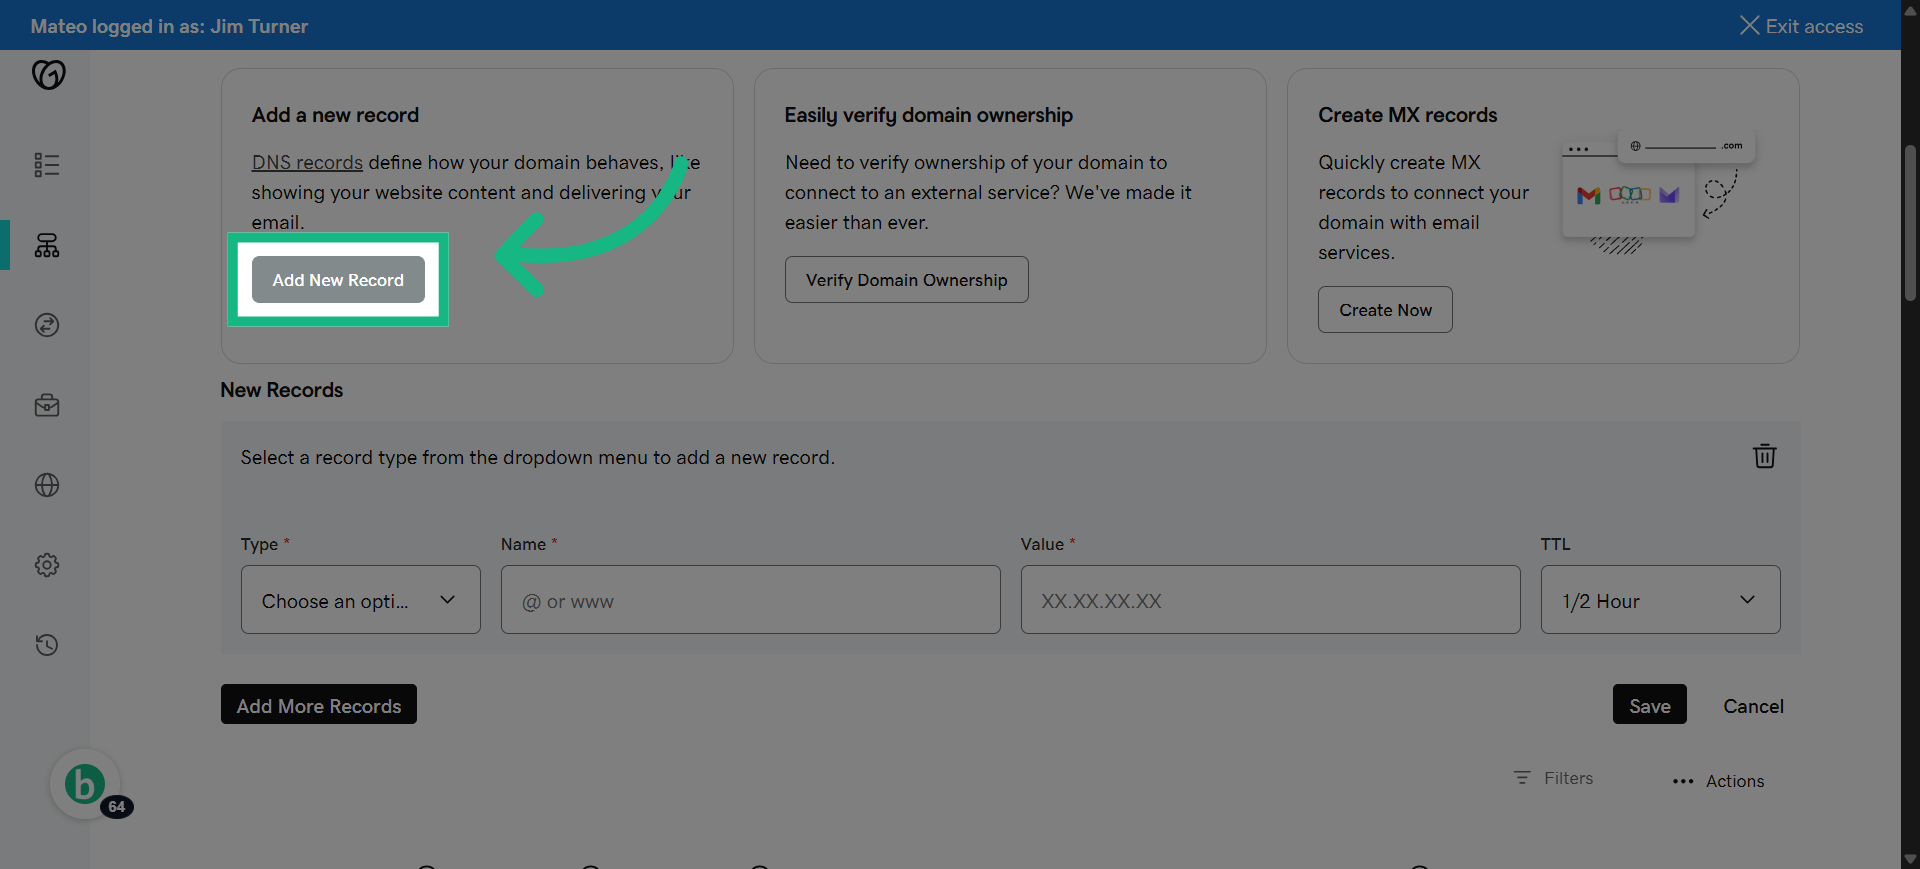
57. Click "Add New Record"
Add another new DNS record for DMARC configuration.
58. this is only needed if you plan to send more than 5000 emails per day through their domain via Brokerkit and any other system that sends from that domain,
this is only needed if youplan to send more than 5000 emails per day through their domain via Brokerkit and any other system that sends from that domain,
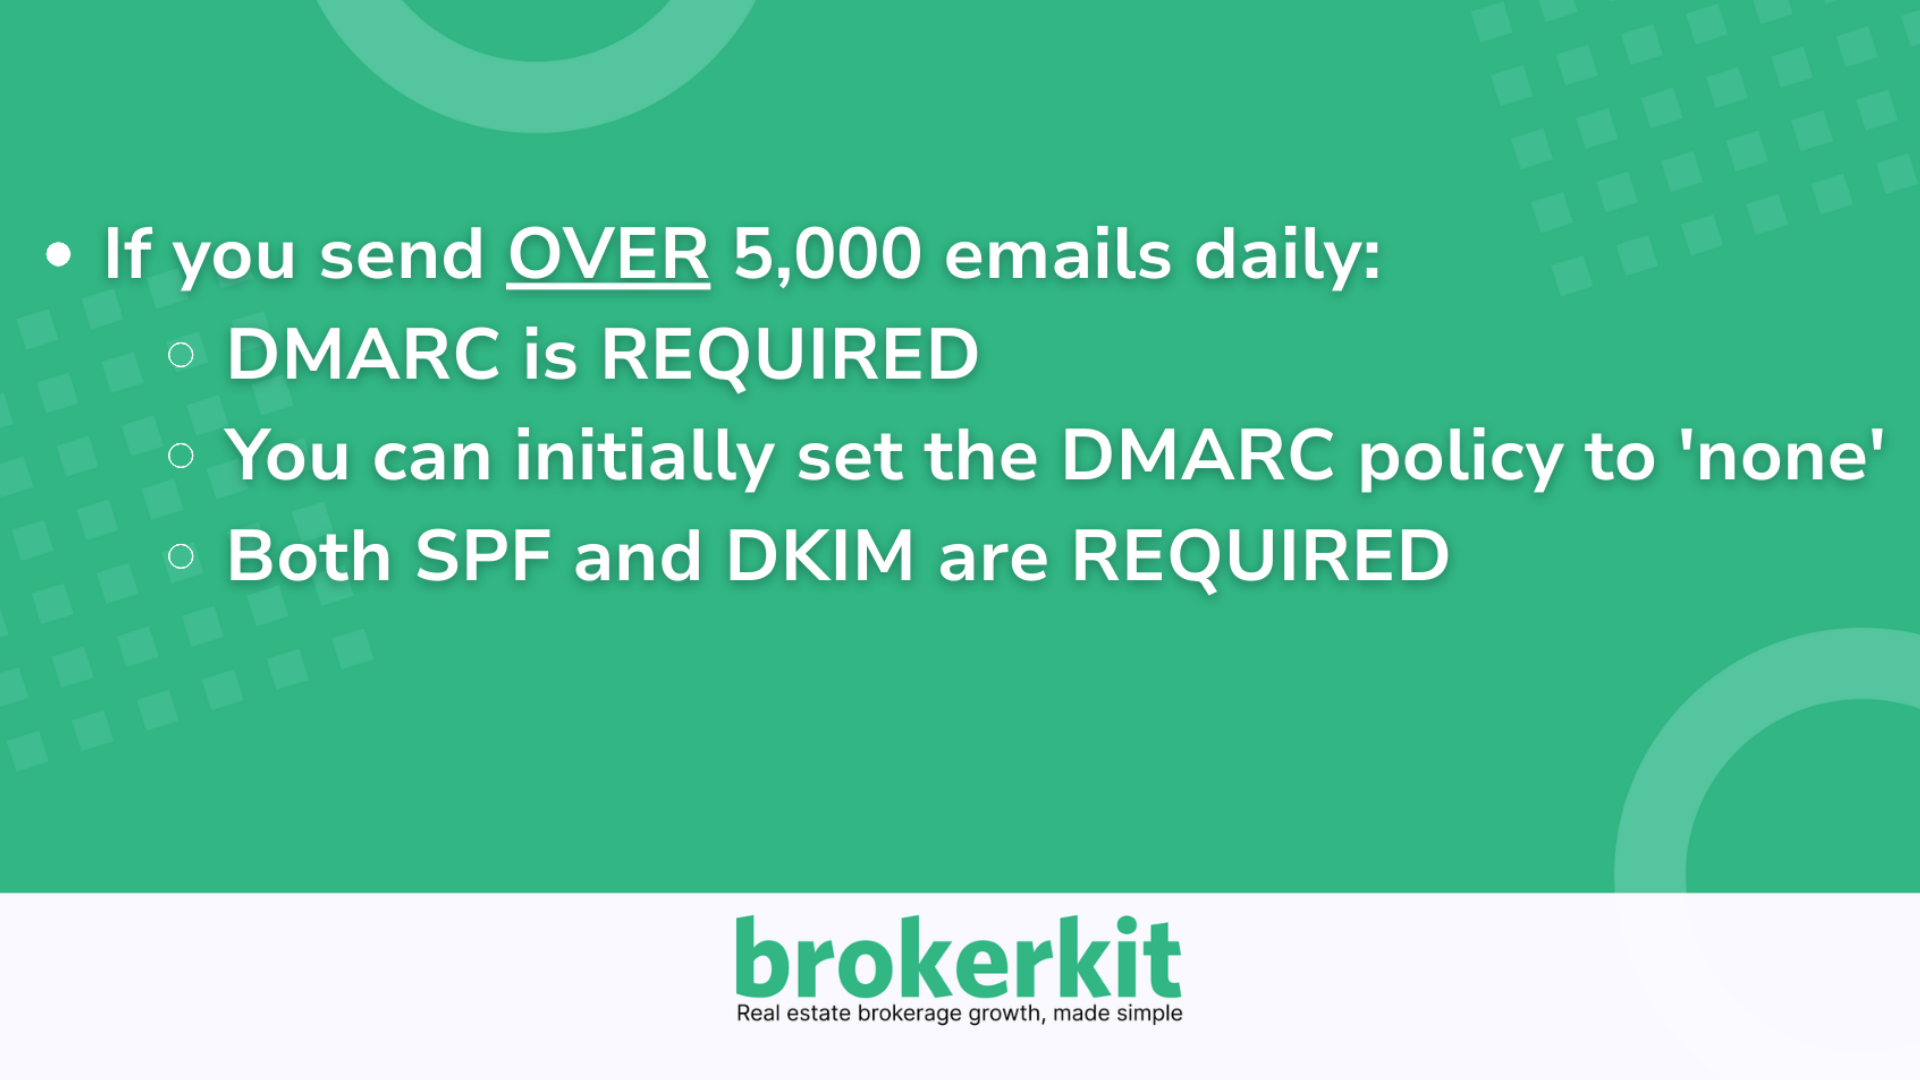
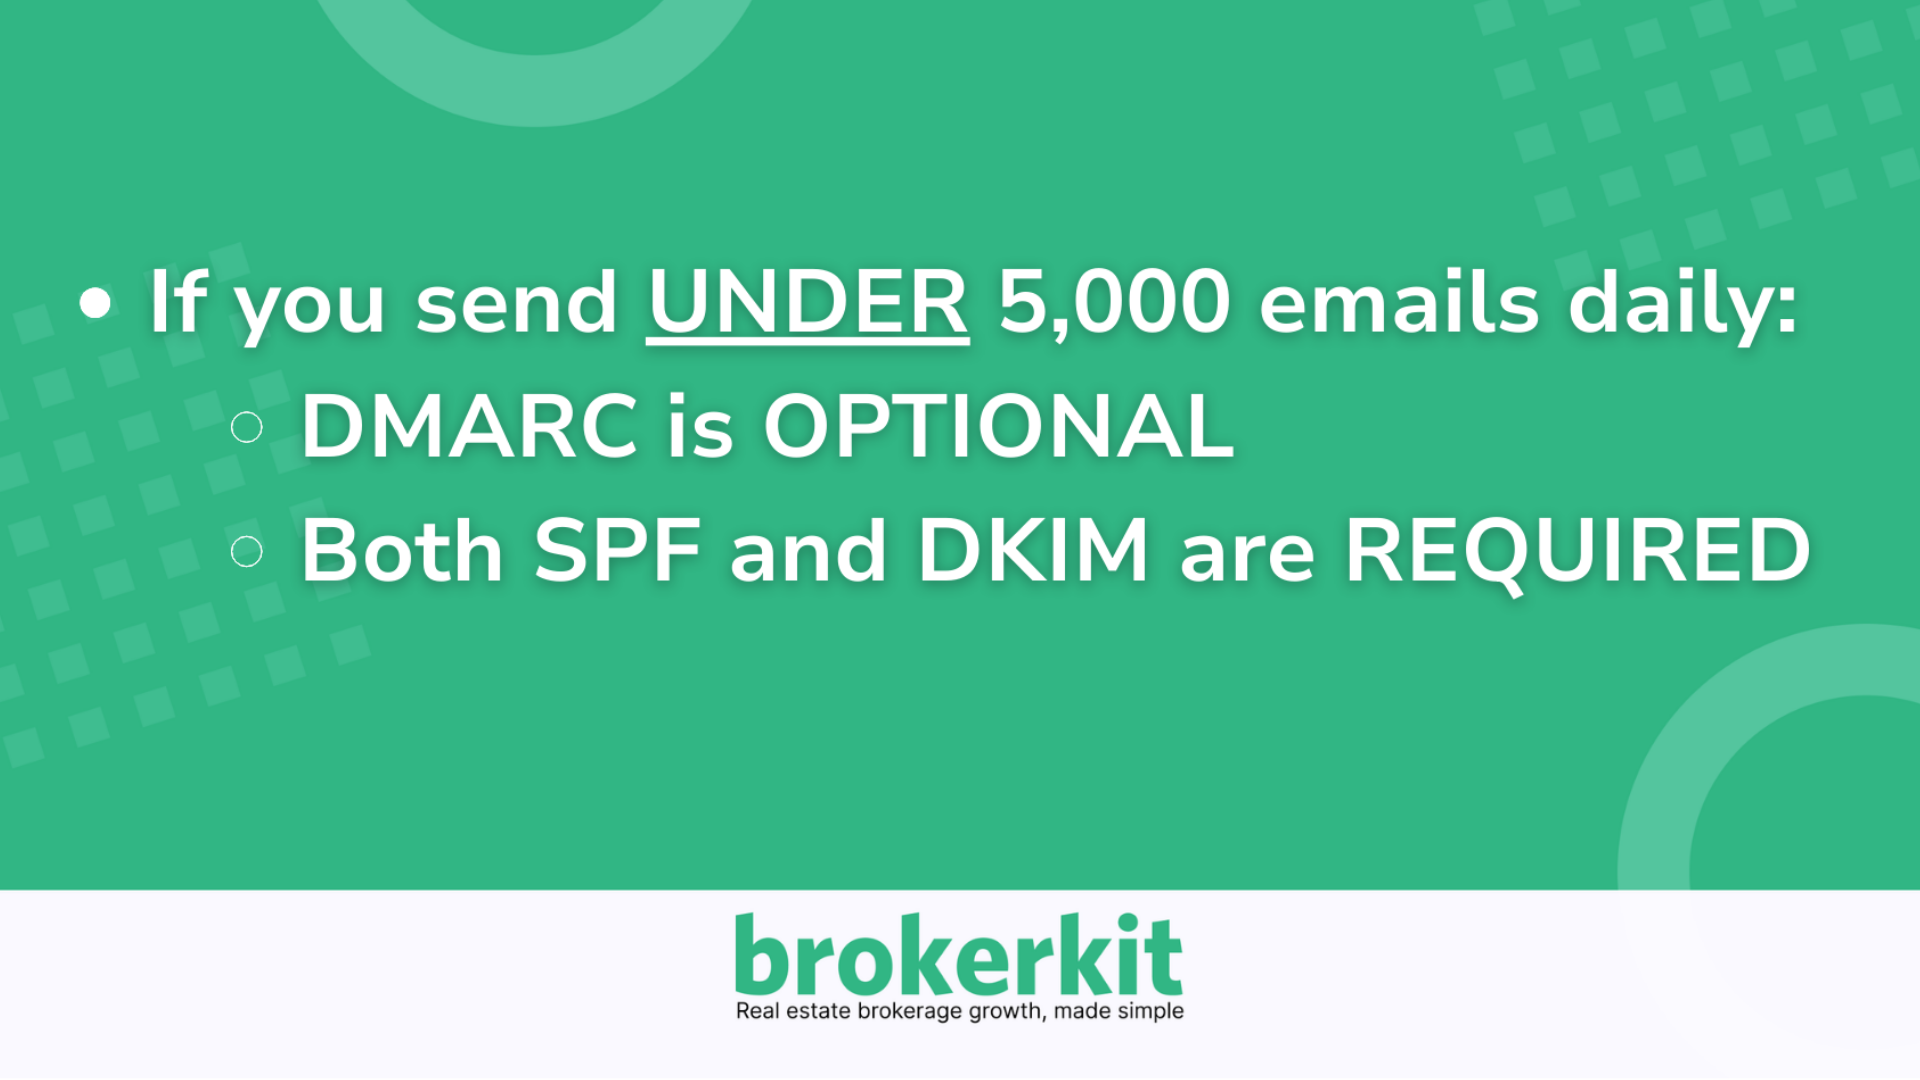
59. if you don't plan to send that many emails skip this section and go to the final section of the video to verify your email domain
if you don't plan to send that many emails skip this section and go to the final section of the video to verify your email domain.
60. Select TXT
Select TXT
61. Switch to brokerkit
Return to Brokerkit
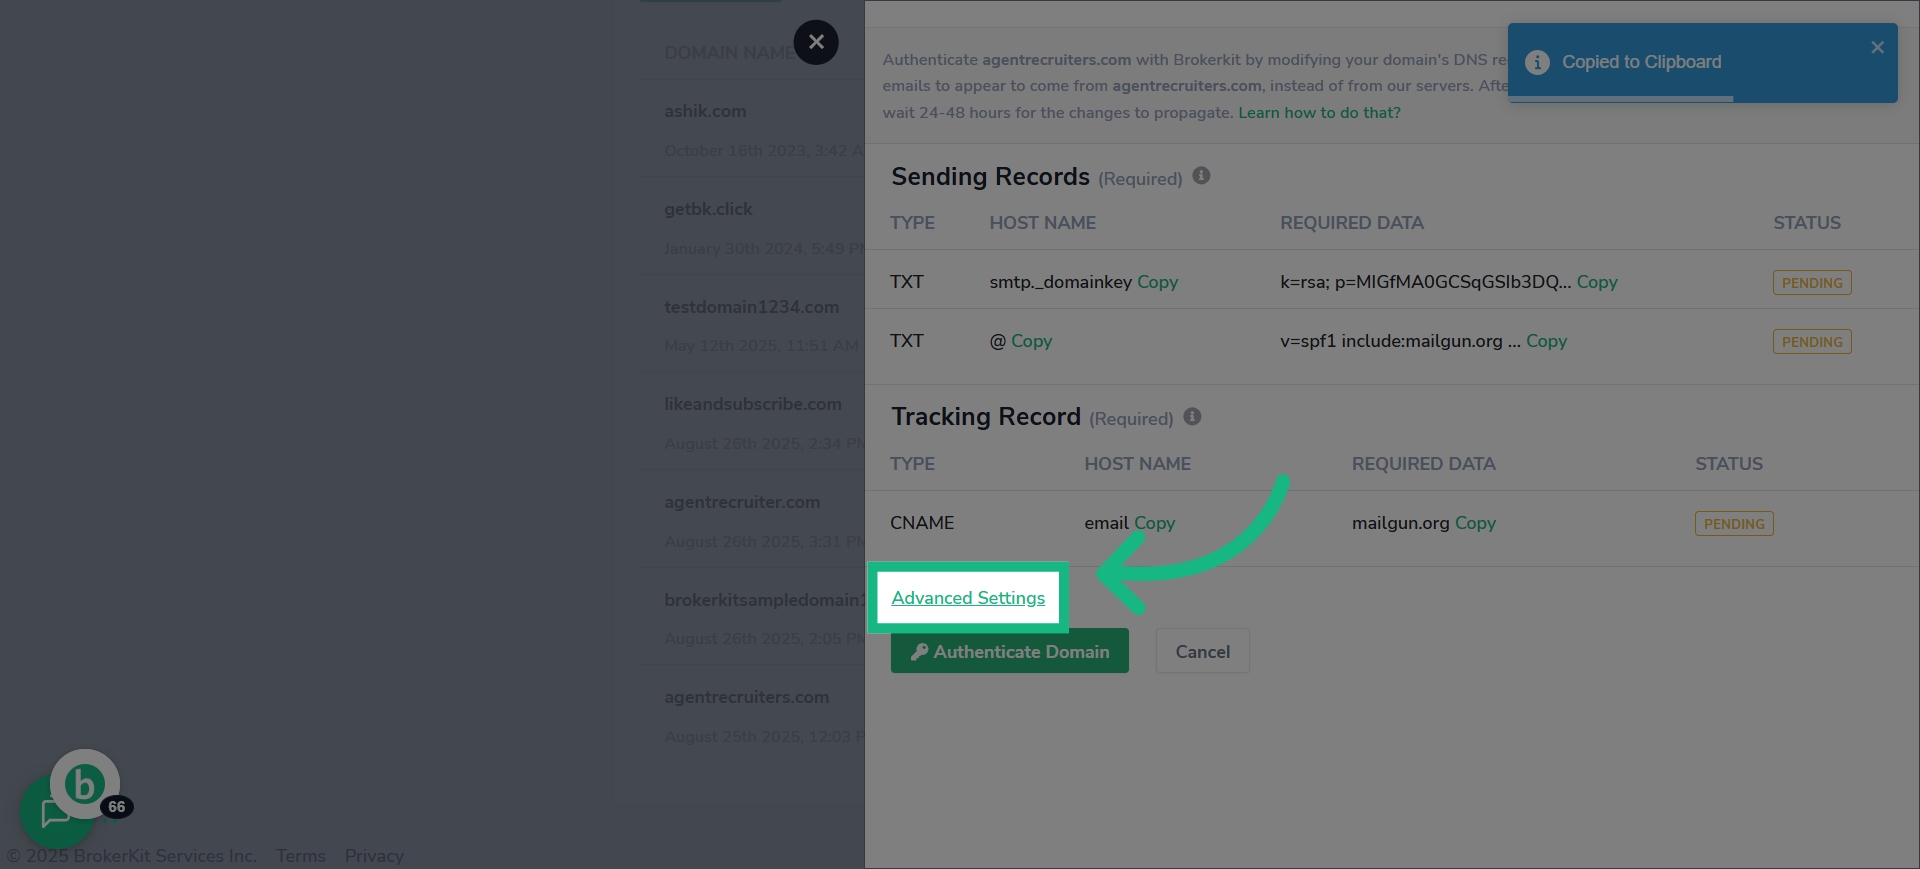
62. Click "Advanced Settings"
access Advanced Settings for DMARC.
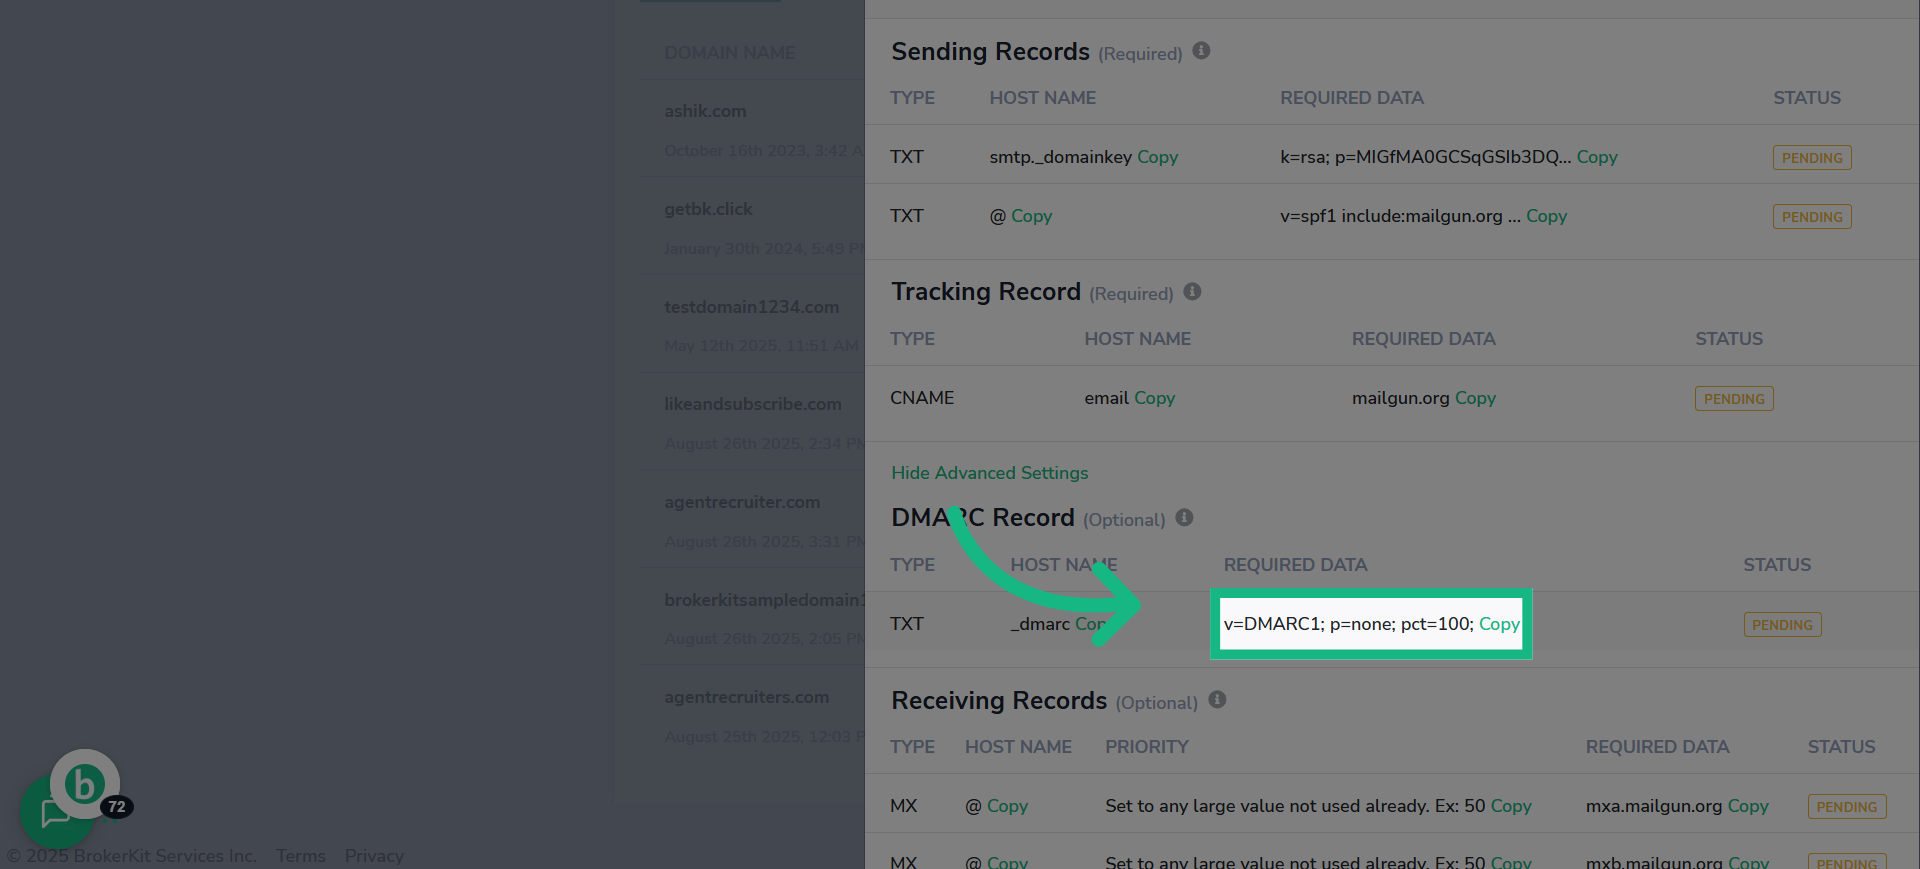
63. Click "Copy"
click the copy button
64. Switch to godaddy
Switch back to go daddy
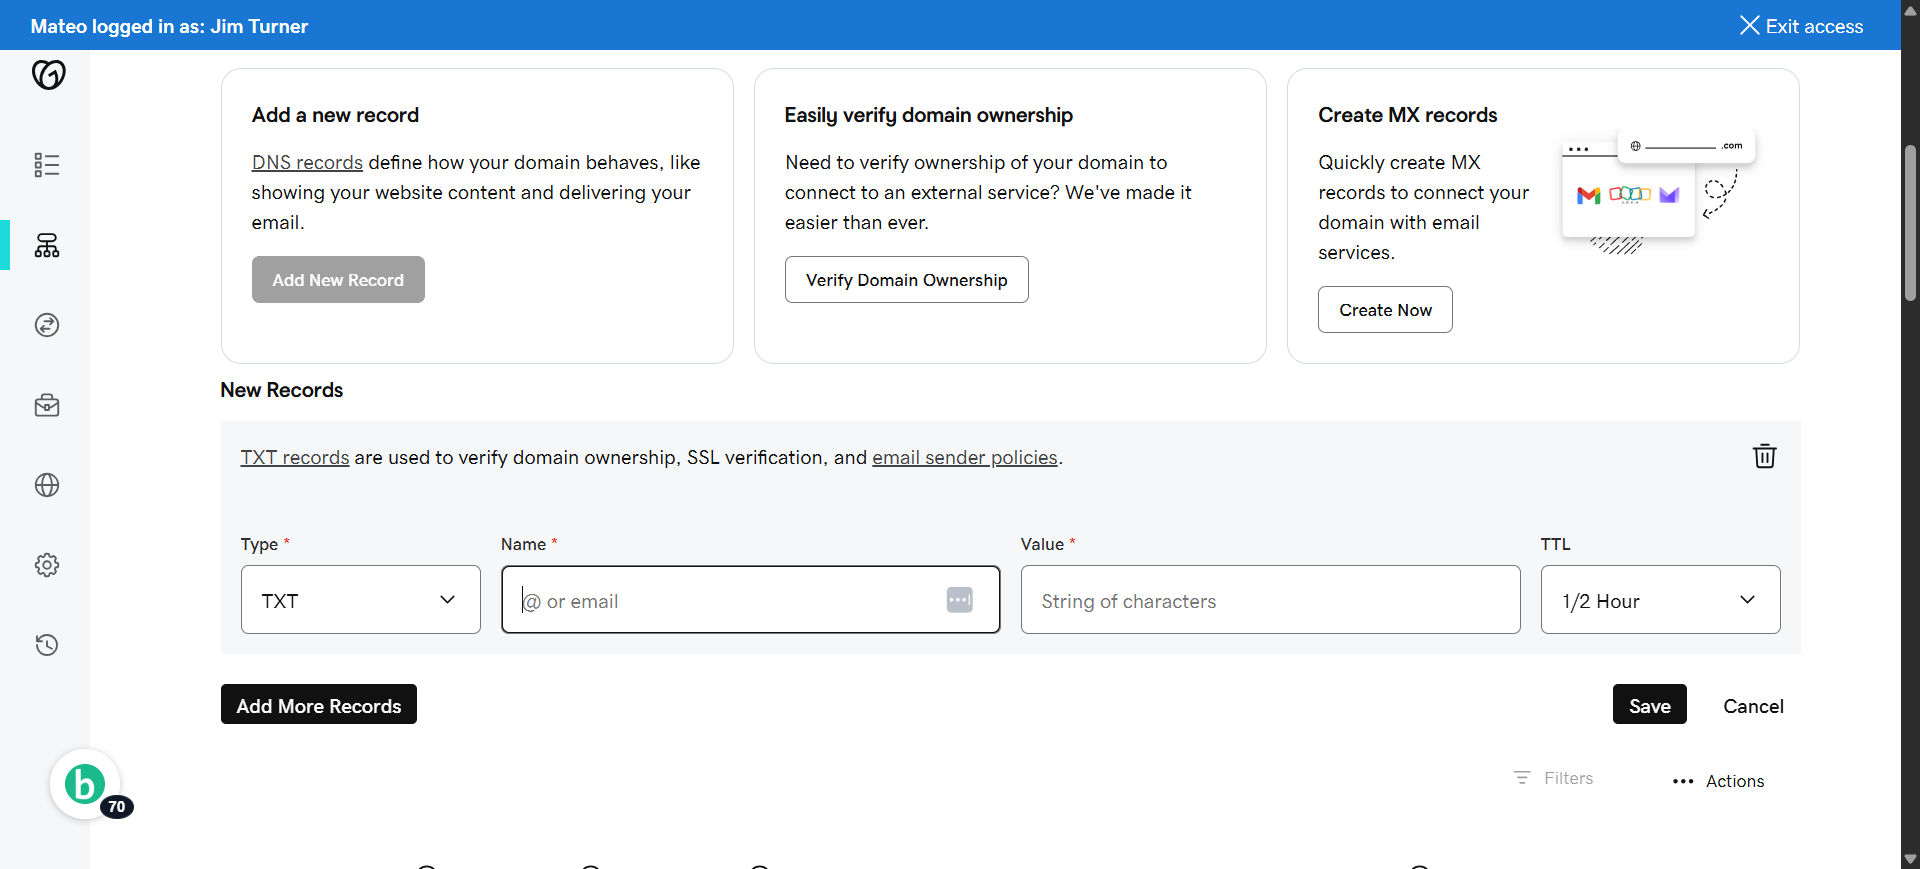
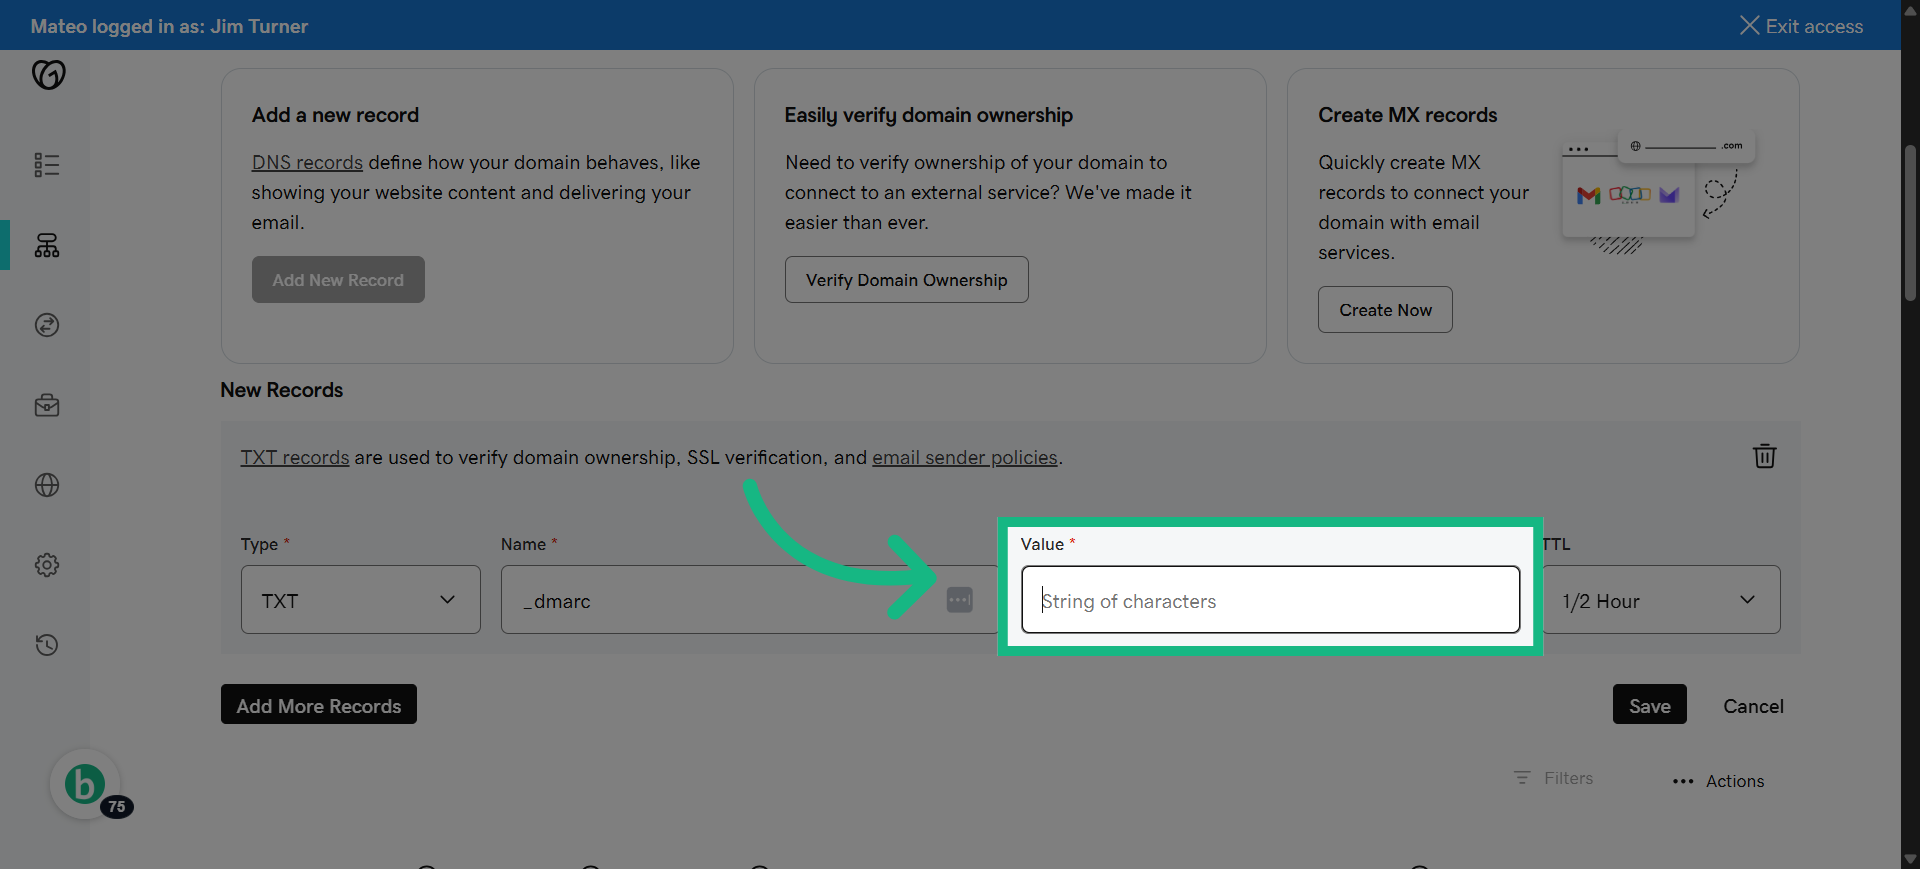
65. Click "Name"
click the name box

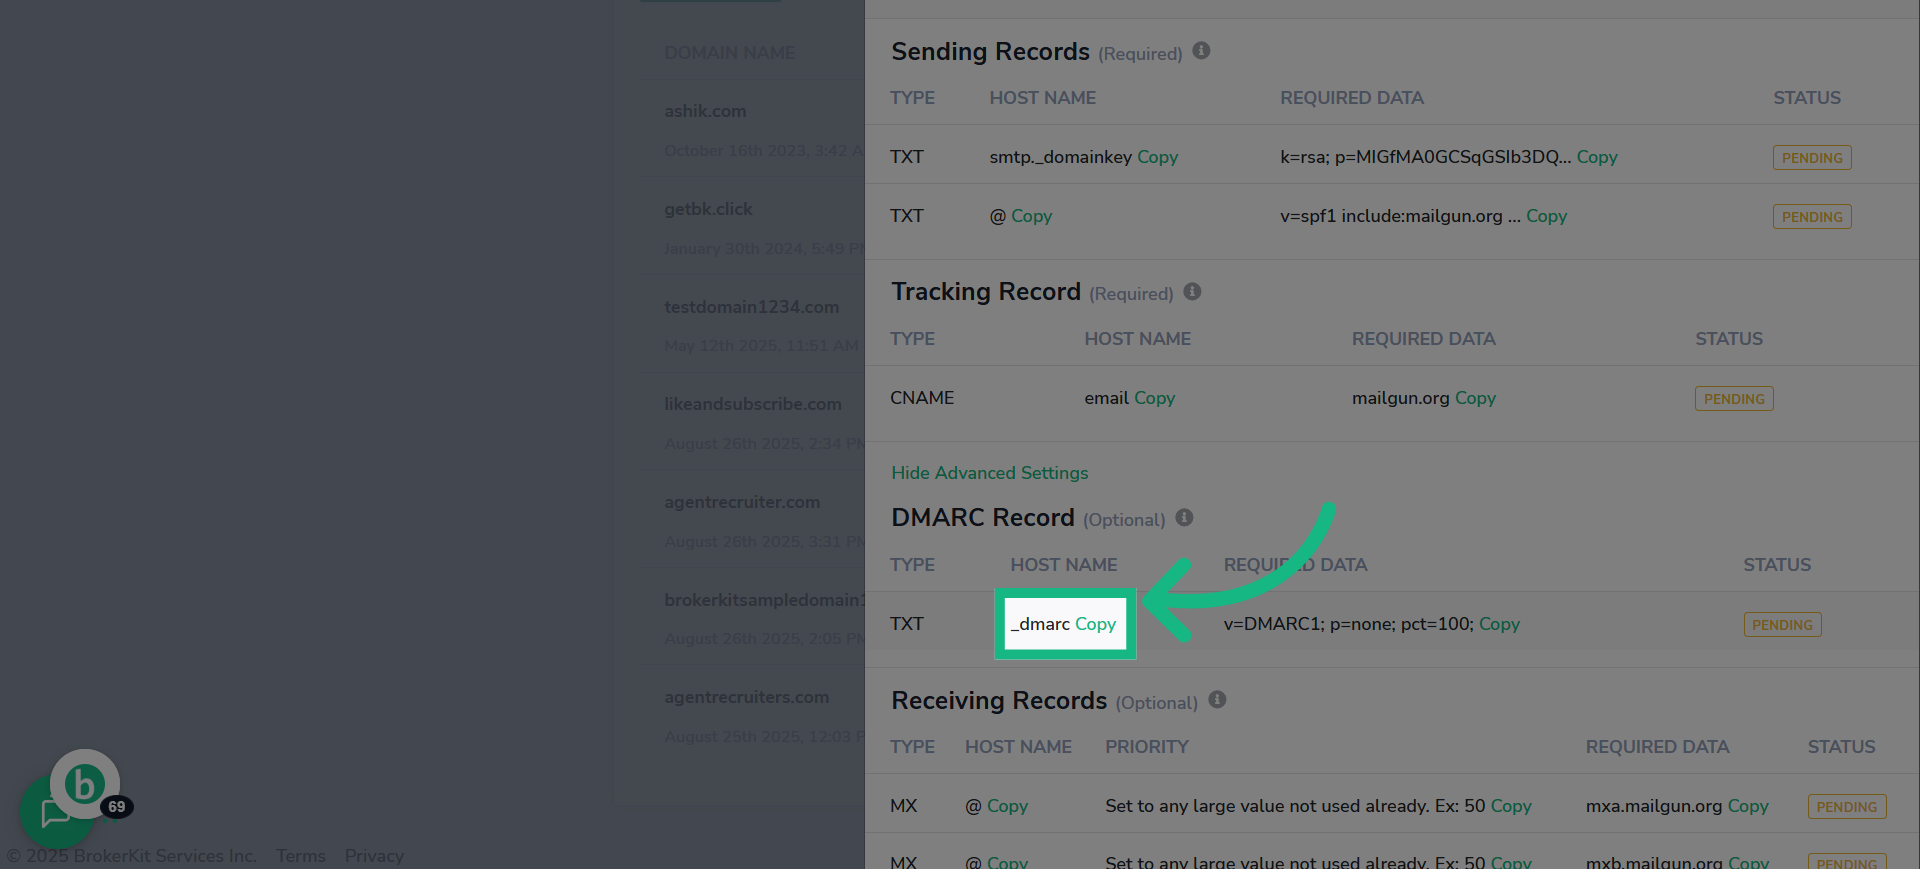
66. Fill "_dmarc"
paste the information you copied from brokerkit.

67. Switch to brokerkit
Copy the DMARC DNS record content for your domain.
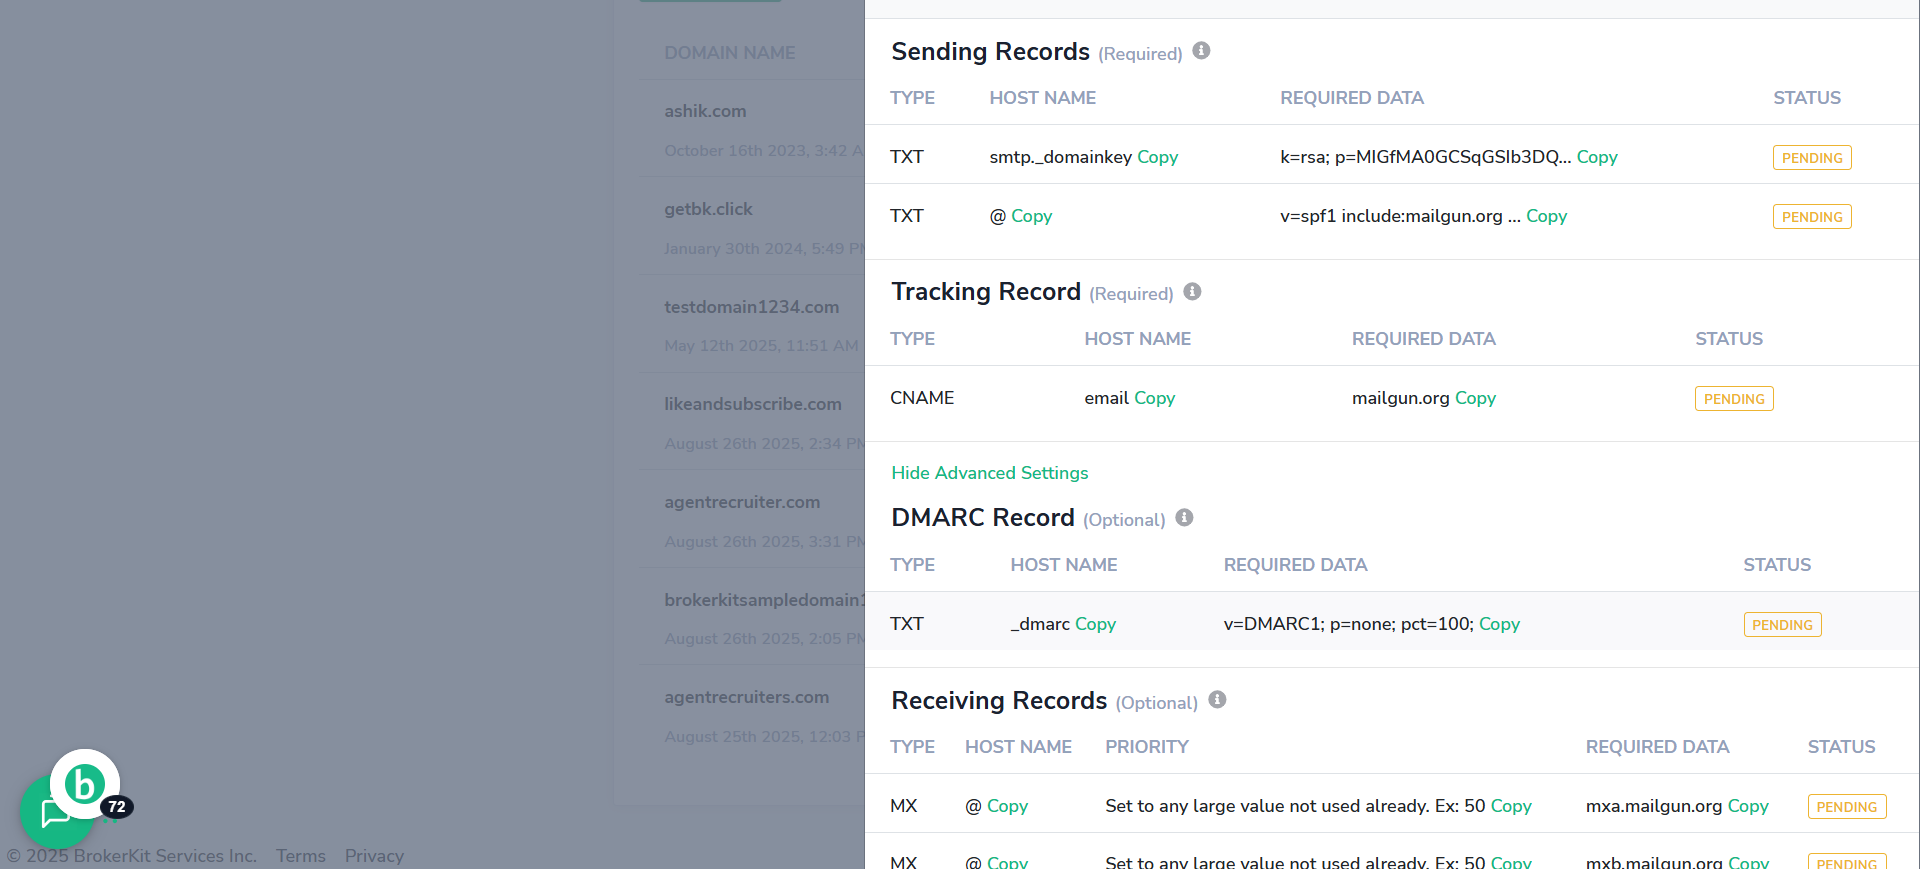
68. Click "Copy"
copy the required data.
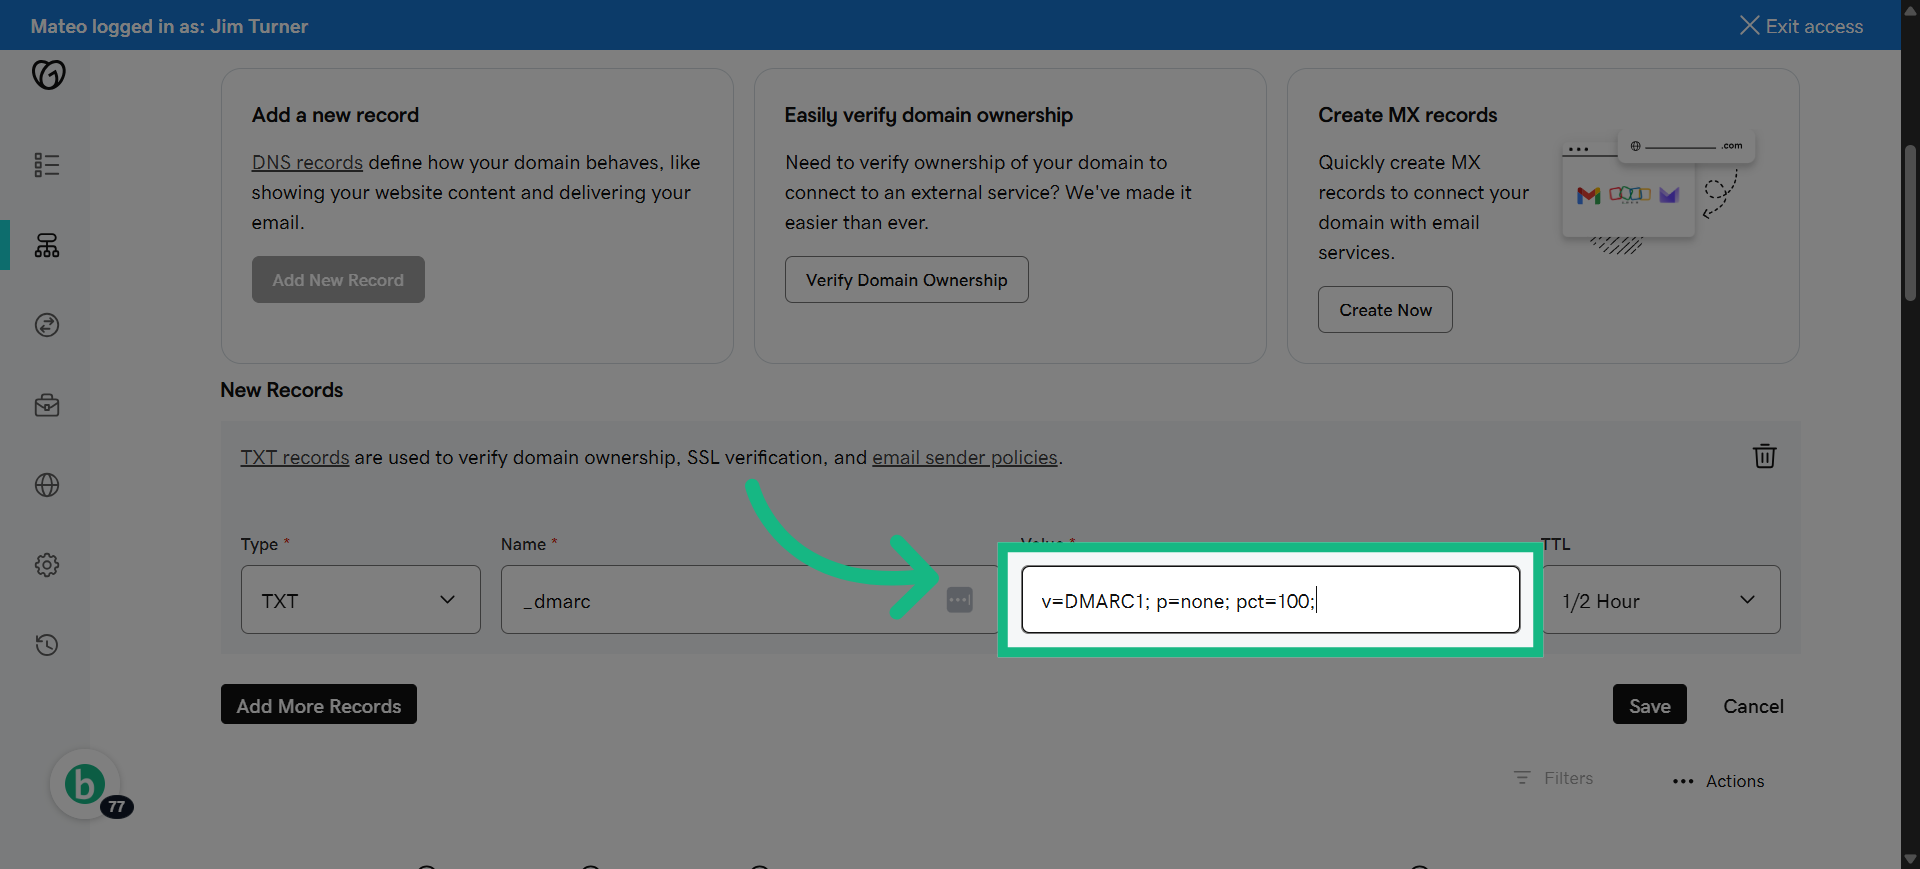
69. Click "Value"
Paste the DMARC record content exactly as copied.
70. paste the information you copied from brokerkit.
paste the information you copied from brokerkit.
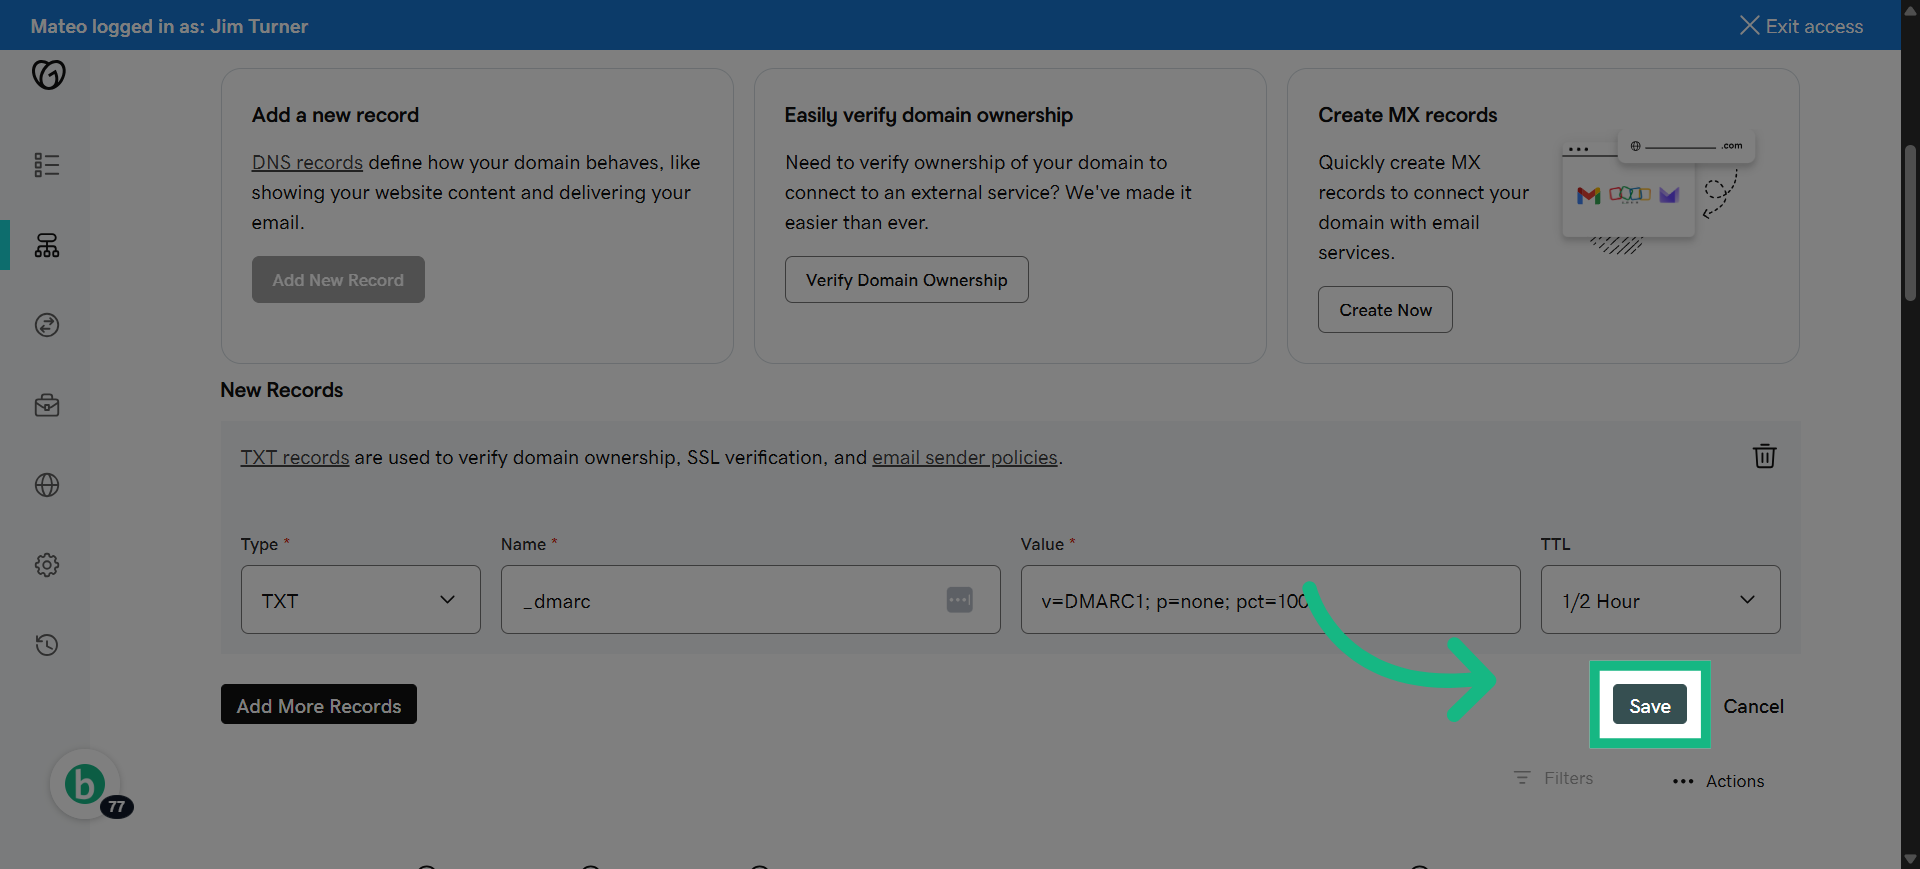
71. Click "Save"
Save and Return to Brokerkit to finalize domain authentication.
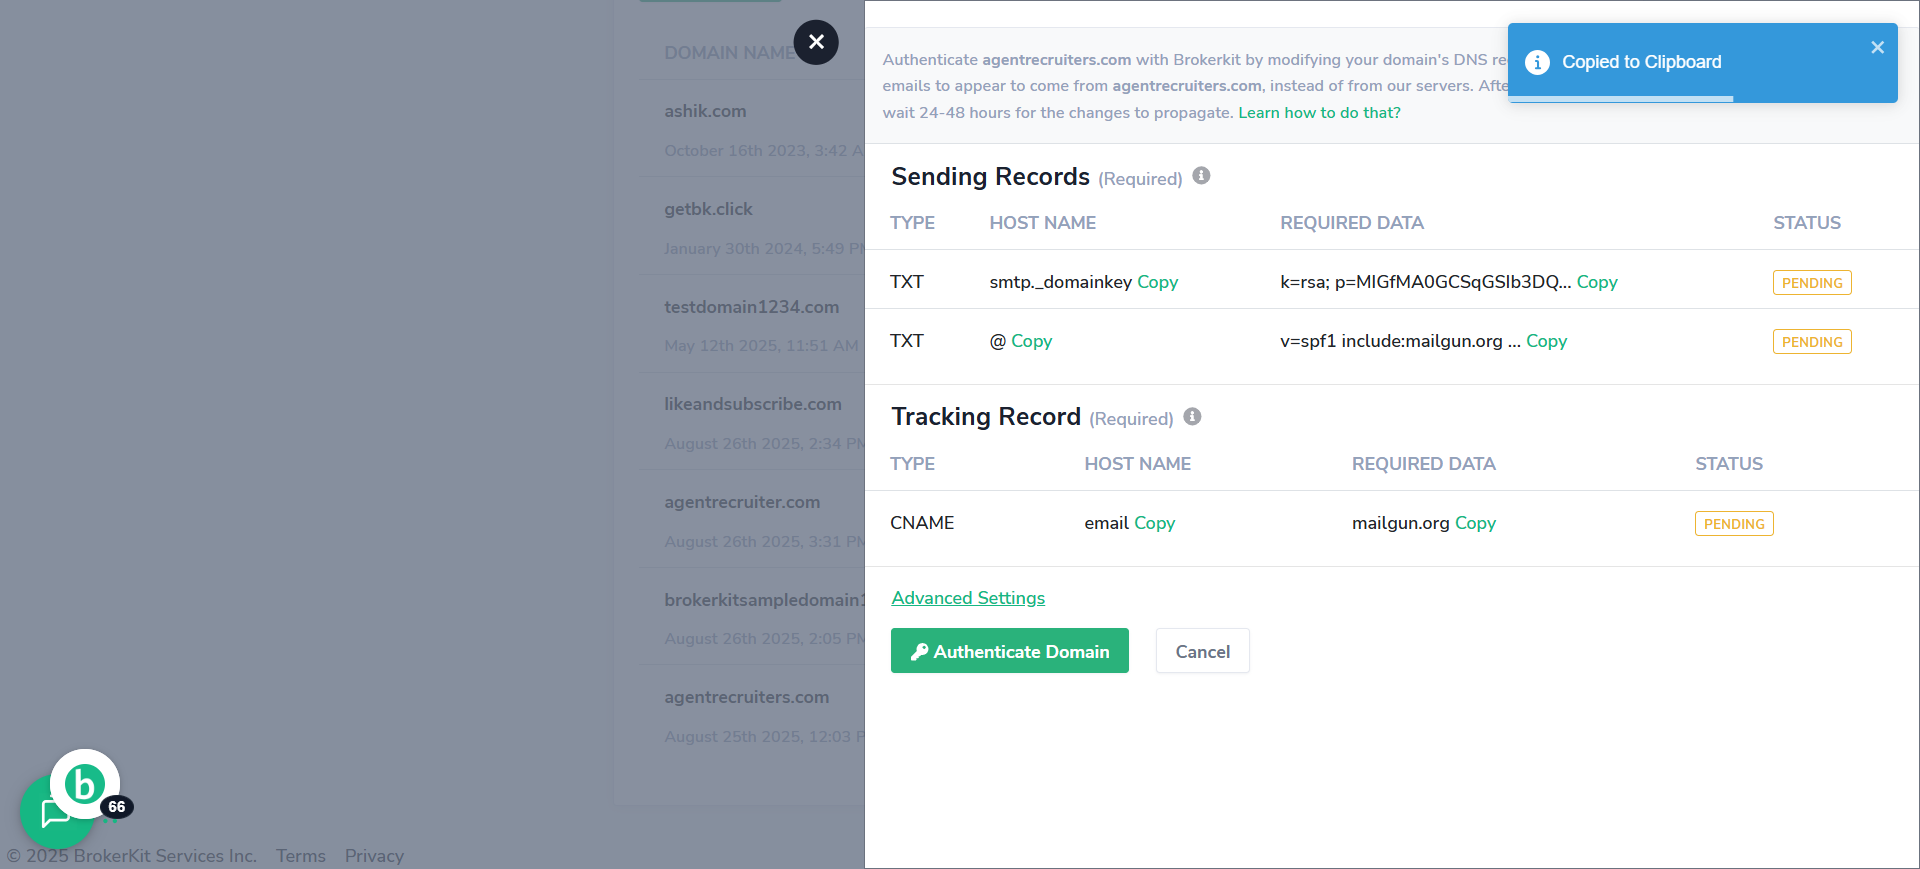
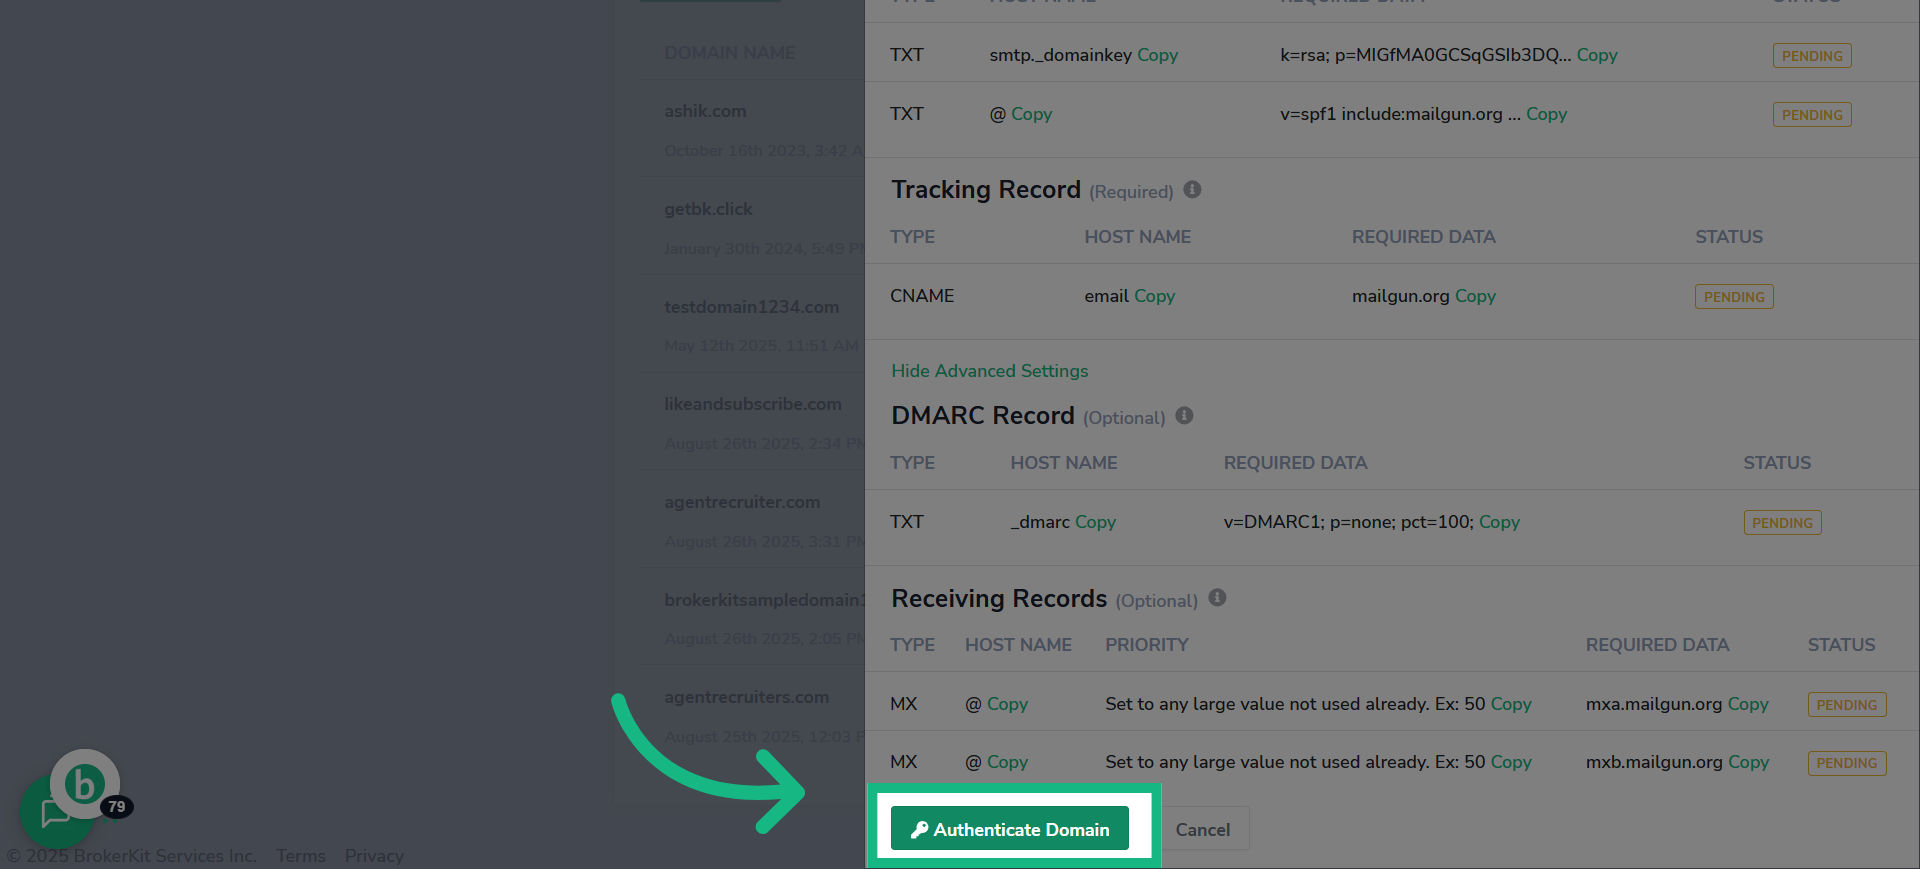
72. Click "Authenticate Domain"
click Autenticate Domain
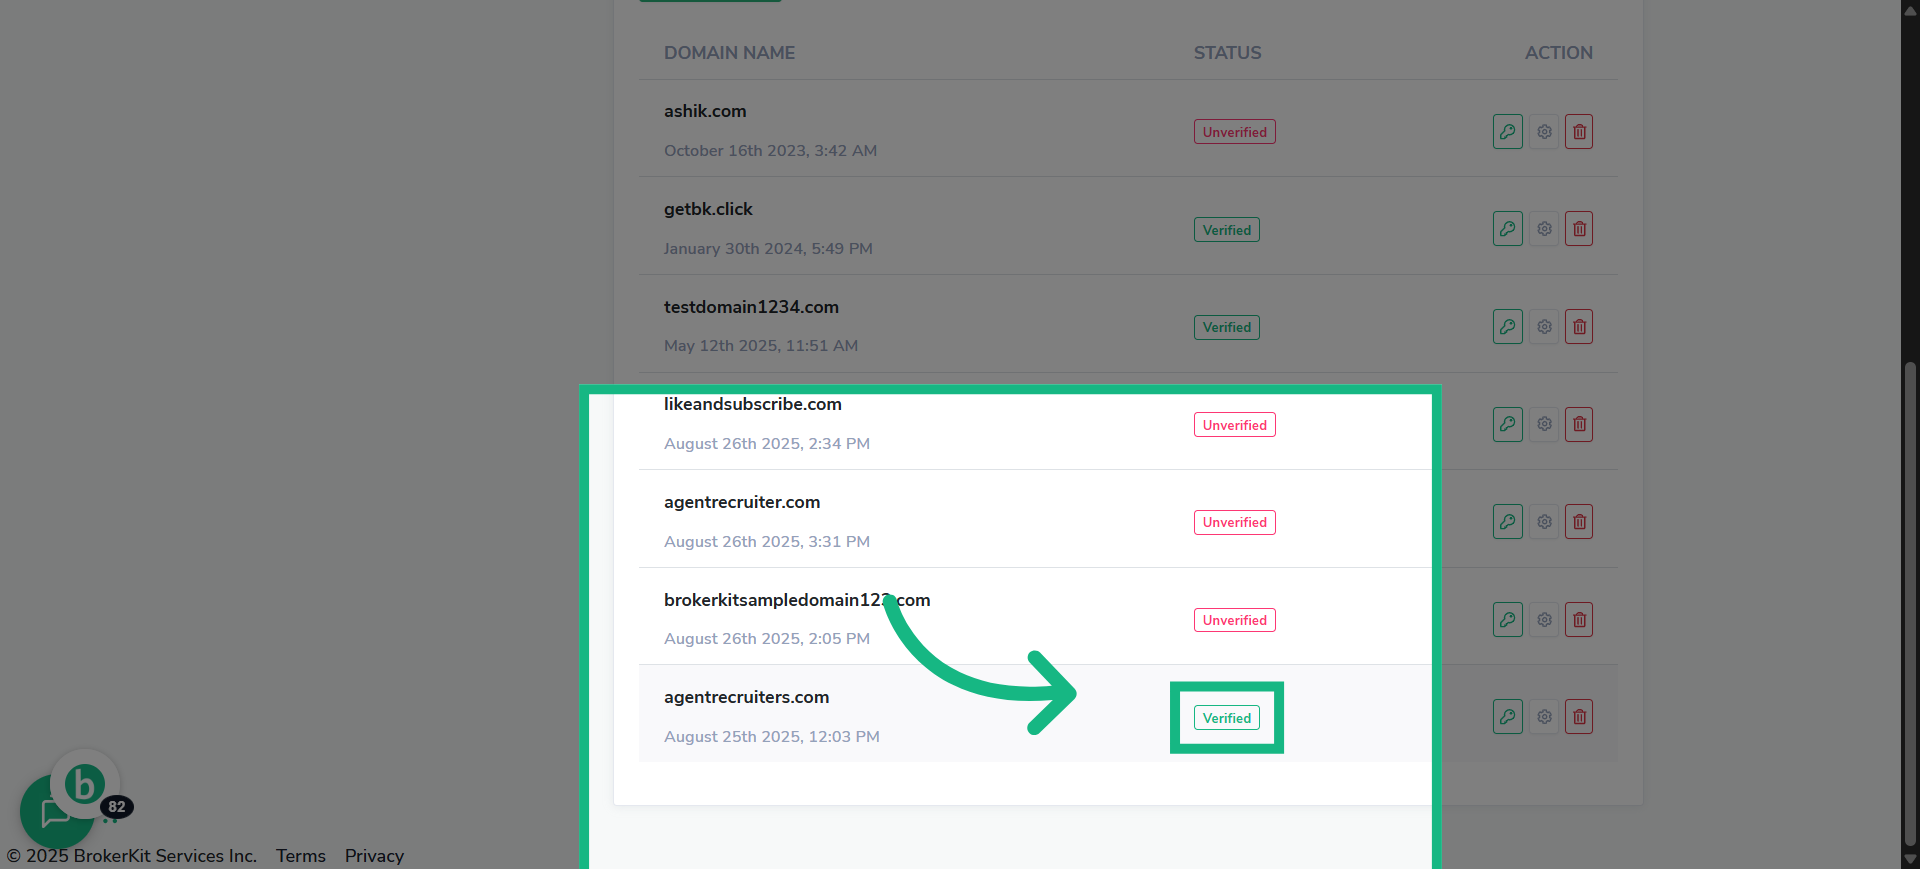
73. Click "Verified"
and now your email domain is finally verified
74. Ending
That concludes this tutorial.
To know more about videos, please click the youtube icon in the the bottom-right corner.
If you have any questions, please reach out to our support team at support@brokerkit.com.
Learn How To Send Email/Texts with your Videos