The most effective recruiters know your primary goal is getting the candidate in front of you. Emails, texts, and phone calls lay the groundwork, but face-to-face is where all the rapport you've built pays off.
From the Recruiting screen, select an agent to open their profile. Along the top action bar, click Appt.
Set your appointment's Date, Time, and Duration at the top. The meeting Location will default to the office address but can be changed as needed. We recommend adding lead and recruiter names to the Meeting Title so everyone is sure to recognize the appointment later.
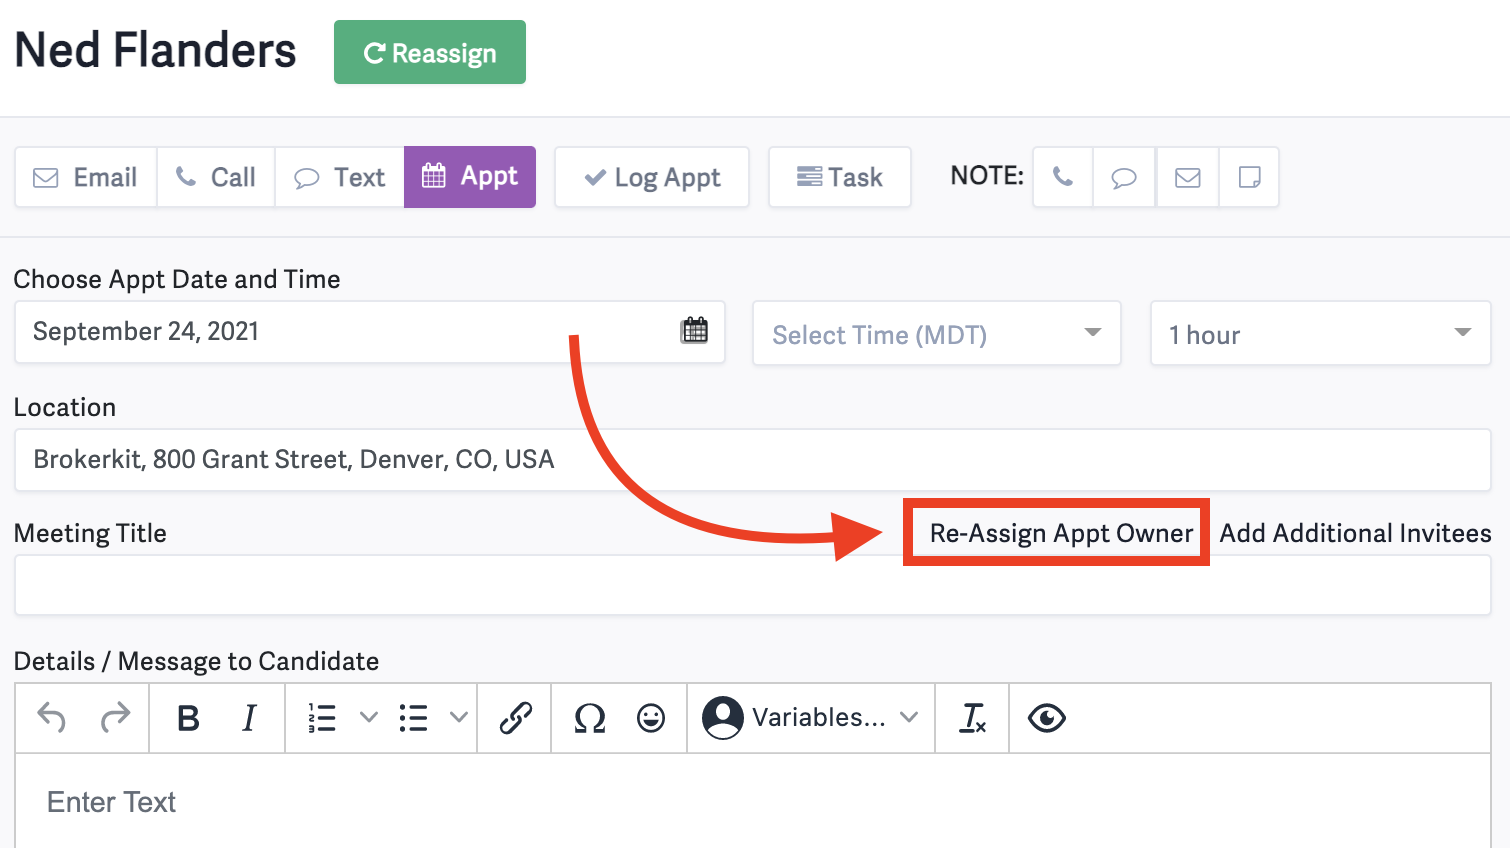
Setting an appointment owner
When setting an appointment, the person creating the appointment will be set as the owner by default.
If you are setting an appointment on behalf of another Admin/Staff user in your office, you can Re-assign the Appointment Owner and select the appropriate owner for the appointment.
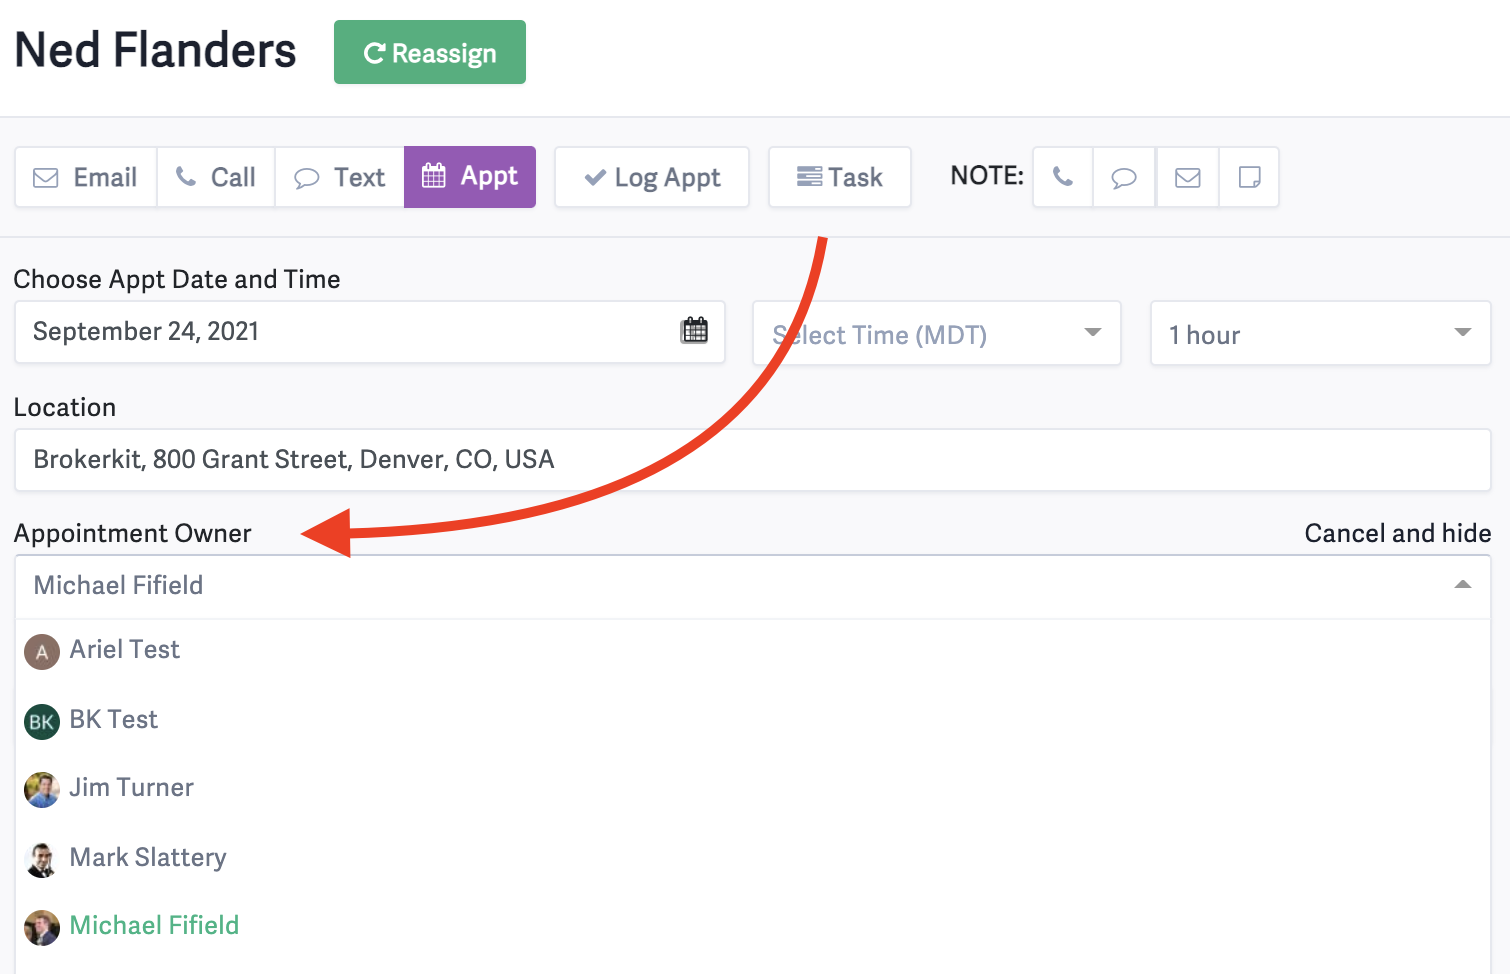
📝 Note: The appointment owner will be able to see the appointment in their today view, as well as in their Daily Recruiting Agenda Email.
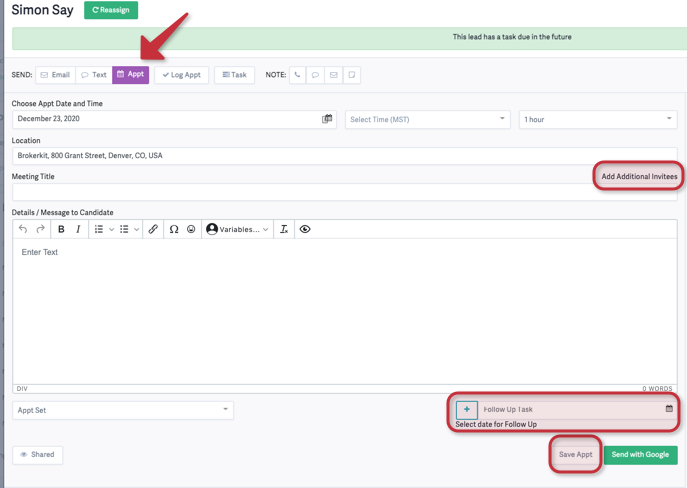
Adding Additional Invitees
Click Add Additional Invitees to add additional stakeholders - the recruit's partner, team members, or another recruiter from your office.
Note: Appointments set will only appear in the dashboard of the person who created them. If you are an assistant setting appointments for another broker or recruiter, we recommend using their account to access Brokerkit.
Click here for more information on assistants setting appointments for multiple recruiters.
Add any information you'd like to the Details/Message to Candidate, but be careful not to include any sensitive information as it will be sent to the lead. As with every action, update the lead's Status as needed, and set your next Follow-up.
By default, appointments are Shared with the referrer. Click the Eye Icon toggle this to Staff Only if you need to send sensitive information.
Finally, select Send with Google or Send with Microsoft (when using a Microsoft account) to push the invite to your calendar, and send an invite to the lead and any additional invitees. Or, to save the appointment in your calendar without sending the invite to the lead, click Save Appt.